
Tom Clancy's Ghost Recon: Wildlands Guide Welcome to Bolivia Espiritu Santo: La Santera
Soldiers Of Santa Muerte

Objectives
- Kill La Santera’s sicarios. Let no one escape.
- Kill the sicarios at the second camp.
LOCATIONS
- Pilgrim House (Center)
- Pilgrim House (Southeast)
REWARDS
- + 1,000 XP
Brief
La Santera maintains her authority through a group of elite sicarios loyal only to her. These killers are fanatics, more ruthless and violent than the worst of the cartel sicarios. Killing these adepts will weaken La Santera’s hold on the cult. Some might try to escape. Don’t let that happen.
Wipe them out. All of them.
Just southwest of the Espiritu Santo Base in the central part of the province, and 1.4 kilometers to the northeast of Espiritu Santo Bravo, the mission area is a cluster of buildings used to house Santa Muerte pilgrims. There are innocents to concern yourself with, as well as ten hardened cartel members, already tagged, who need to be neutralized.
Pilgrim House (Center): Recon
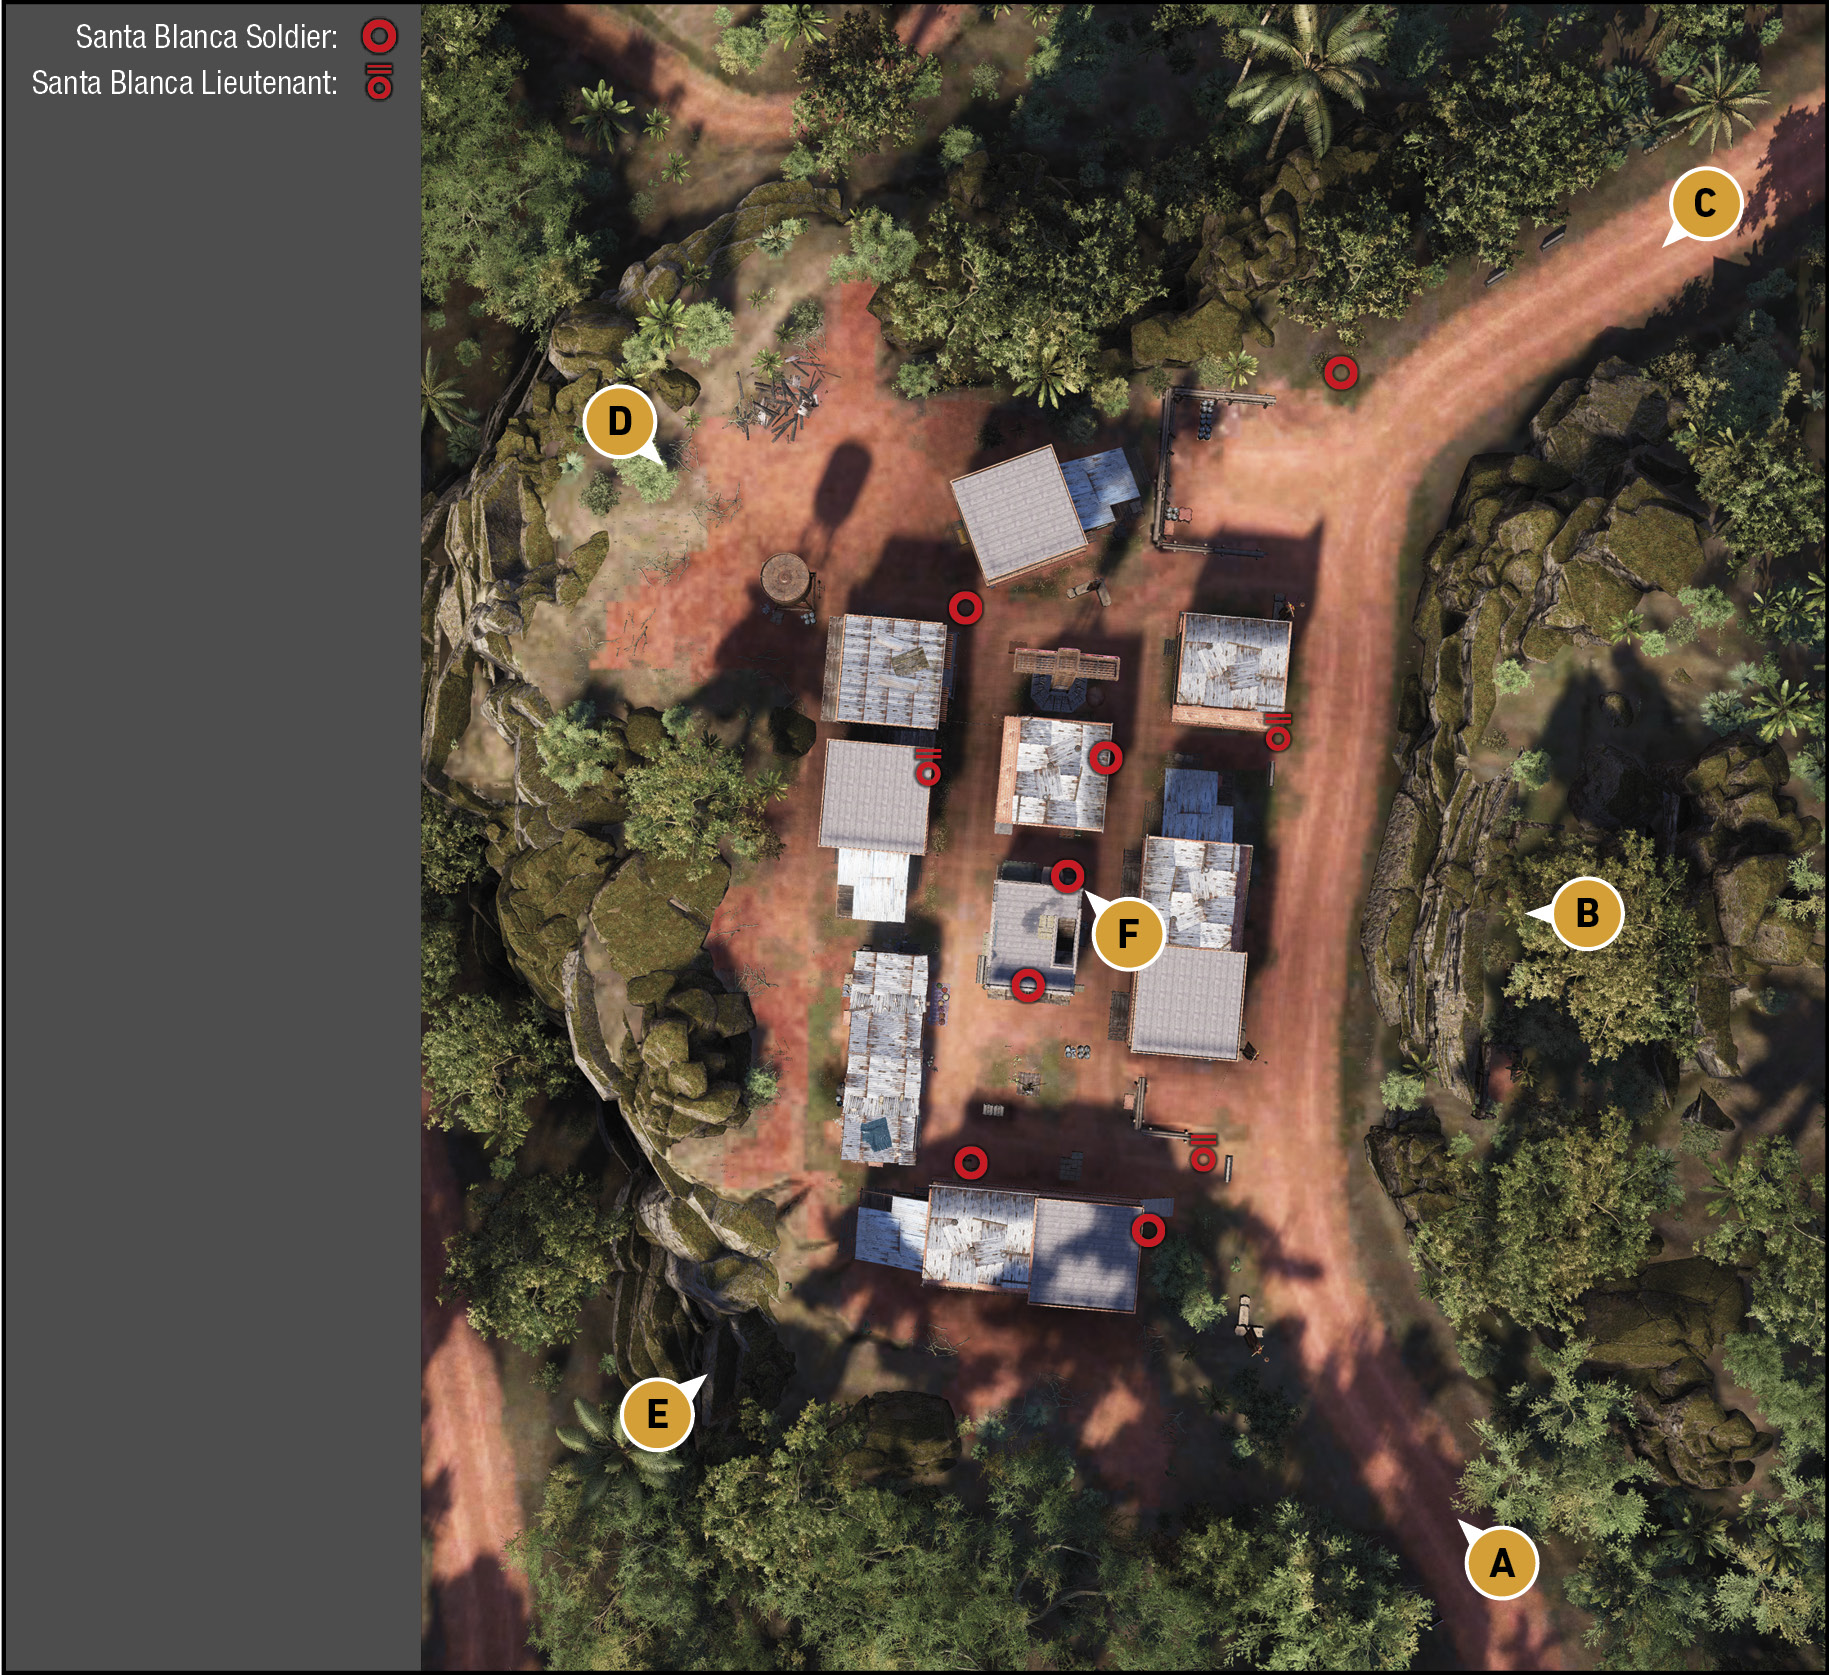
TACMAP
This is a cluster of buildings on the west side of a main north-south arterial road, just southwest of the Espiritu Santo Base (so don’t encroach too far to the north, to avoid fighting a number of additional foes there). The settlement is comprised of a number of shack shrines, green-colored barrack buildings (almost always two-floors in size), and two north-south alleys leading to a small square in the south where the reaper statue is. Be aware of innocents among the enemies, so think twice before using explosives anywhere except the two parking lots (north and south by the road) to stop enemies escaping.
South: Main Road
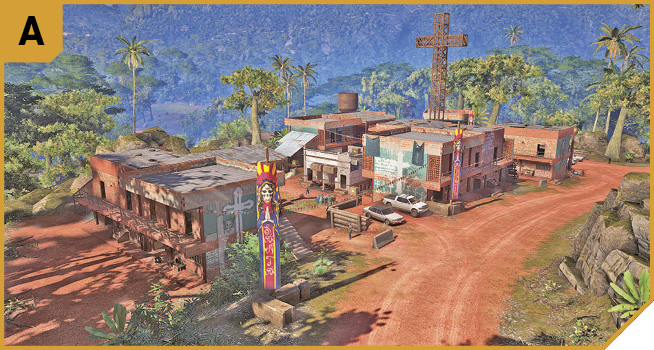
You can conduct a “drive-by” easily heading south to north, lobbing a grenade at the parked cars to stop foes escaping, and strafing the area with gunfire. As long as your driving is nimble (and vehicle narrow) enough, you can drive into the alleys too to continue the massacre, though it’s nowhere near as precise and safe as moving from building to building on foot.
Another option is to park up near the banner pole, creep to the log fence at the parking area, up the concrete steps to the balcony of the south barracks building and use this structure to fire from, wiping out the majority of the enemies in the south area. Or enter via the ground floor of the barracks, giving you great views up either alley. Just watch for enemies escaping at the north parking area—the only part of the settlement you don’t have a good view of.
East: Rock Outcrop And Ruins
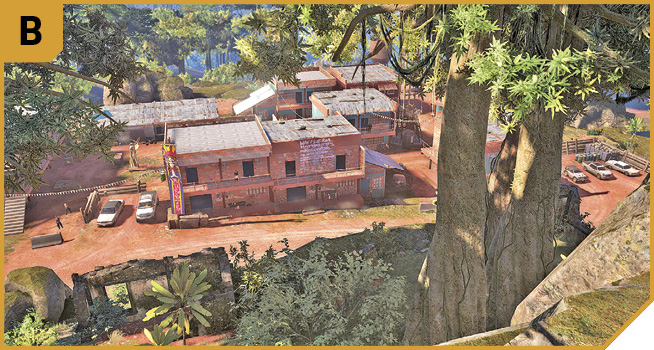
The small ruins and cliff-like boulders at the edge of the jungle are tough to climb, but there’s a good view and you can scan the entire enemy settlement from here. Lob grenades at either parking area to ensure foes can’t escape, then snipe enemies while others clear the area at ground level. You can even drop down and rush into the settlement to finish off foes if you need to.
Northeast: Main Road
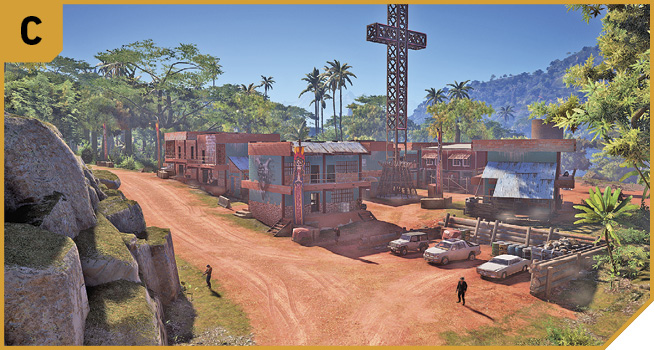
This isn’t quite as worthwhile a spot to infiltrate from, compared to A (you’re on lower ground, near to an enemy base to the northeast, and there are fewer hiding spots). Aside from using a vehicle to lay waste to the area, you can head in from the jungle to the north, using the log fence around the vehicle parking area as cover, then prep the vehicles to explode with mines or C4 (or grenades). Leave vehicles until you know you want to destroy them, in case you need one to follow an escaping foe!
You also have the option to head into the north building and attack foes along the alleys, or from the building’s upper balcony, but the views aren’t as comprehensive as from A.
Northwest: Water Tower
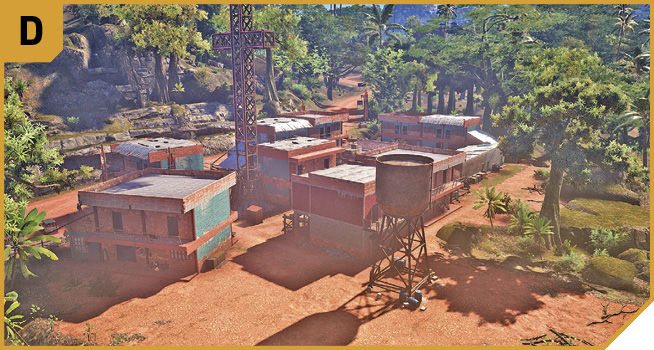
Use this landmark if you’re intending on heading in from the jungle to the northwest. This allows your team to split up, heading to outflank in two directions, or mingle into the alleys and start to take down foes. Note the buildings near the water tower that are open, allowing you to use them as cover, or the upstairs balconies (where available) to defensively fire from.
Southwest: Rocks and Jungle
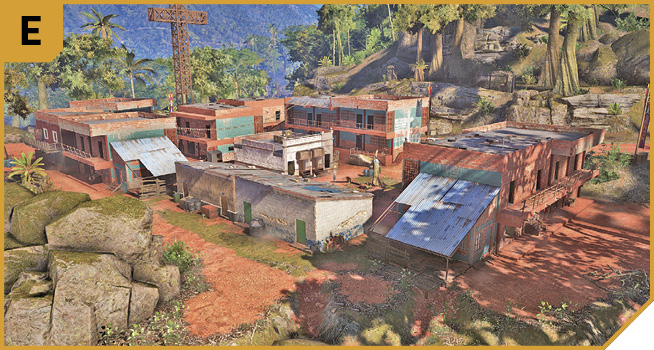
If you’re planning a flanking maneuver, with some Ghosts attacking from A, use the west side of the settlement to sneak along, so you can get the drop on the enemy by storming in from the west, or continuing around to D or C.
You can also use the large boulders here for height and ranged sniping, with good views of the south parking area, though you don’t have the flexibility of maneuvering through buildings to quickly drop enemies, or stop them escaping to the north.
|
 Target: Ten Foes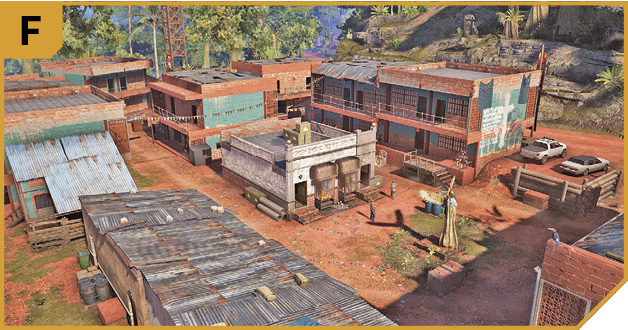
Pilgrim House (Center): Other Tactical Advice
 Either make the captains a priority (learn their location and begin combat by dropping one or two of them first), or keep a careful look at both the roadside parking areas (north and south), optionally destroying the vehicles or trapping them so your foes don’t get far.
Then it’s just a matter of mopping up the enemy by entering the settlement (ideally from the south) and shooting anyone marked. Storm buildings, use the central shrine building roof if you need to (it’s the only rooftop you can reach), and take no prisoners.
Not letting anyone escape is the other part of your mission, and although you can mine the main road, this isn’t wise as innocent (or enemy) vehicles can drive over your trap. Instead, mine or use C4 (or grenades) to destroy the parked vehicles, so the enemy has no mode of transportation to escape in. Priming this area, or at the very least having a Ghost in the vicinity to stop a foe from getting into a vehicle, is almost as important as removing all other threats.
If you’re wanting to try something a little more daring (or foolish), parachute and land atop the flat roof of the roadside building just north of the south parking area, and lay waste from there. You have good views, and can easily stop enemies escaping, and this is a novel approach to foe disposal.
 Use Solo tactics, and for a professional plan, split your forces and outflank in a quick and impressive maneuver. Split your team with one Ghost at B providing fire support, one heading along the west perimeter (E to D), one along the road (A to C), and a fourth heading up the middle of the settlement (east alley). You can cut down the ten foes in seconds with competent sync shots and captain-targeting as a priority.
Or, you can approach in two vehicles, and mow everyone down with a mounted minigun, parking on the road, ensuring parked cars are destroyed, and only getting out to kill the remaining stragglers who go into hiding.
Pilgrim’s Progress
Once the removal of the sicarios at the first Pilgrim House is complete, there’s a second camp to the southeast, where ten more marked men are to be neutralized. This area is slightly easier than the first, and not really that close to other enemy strongholds.
Pilgrim House (Southeast): Recon
TACMAP
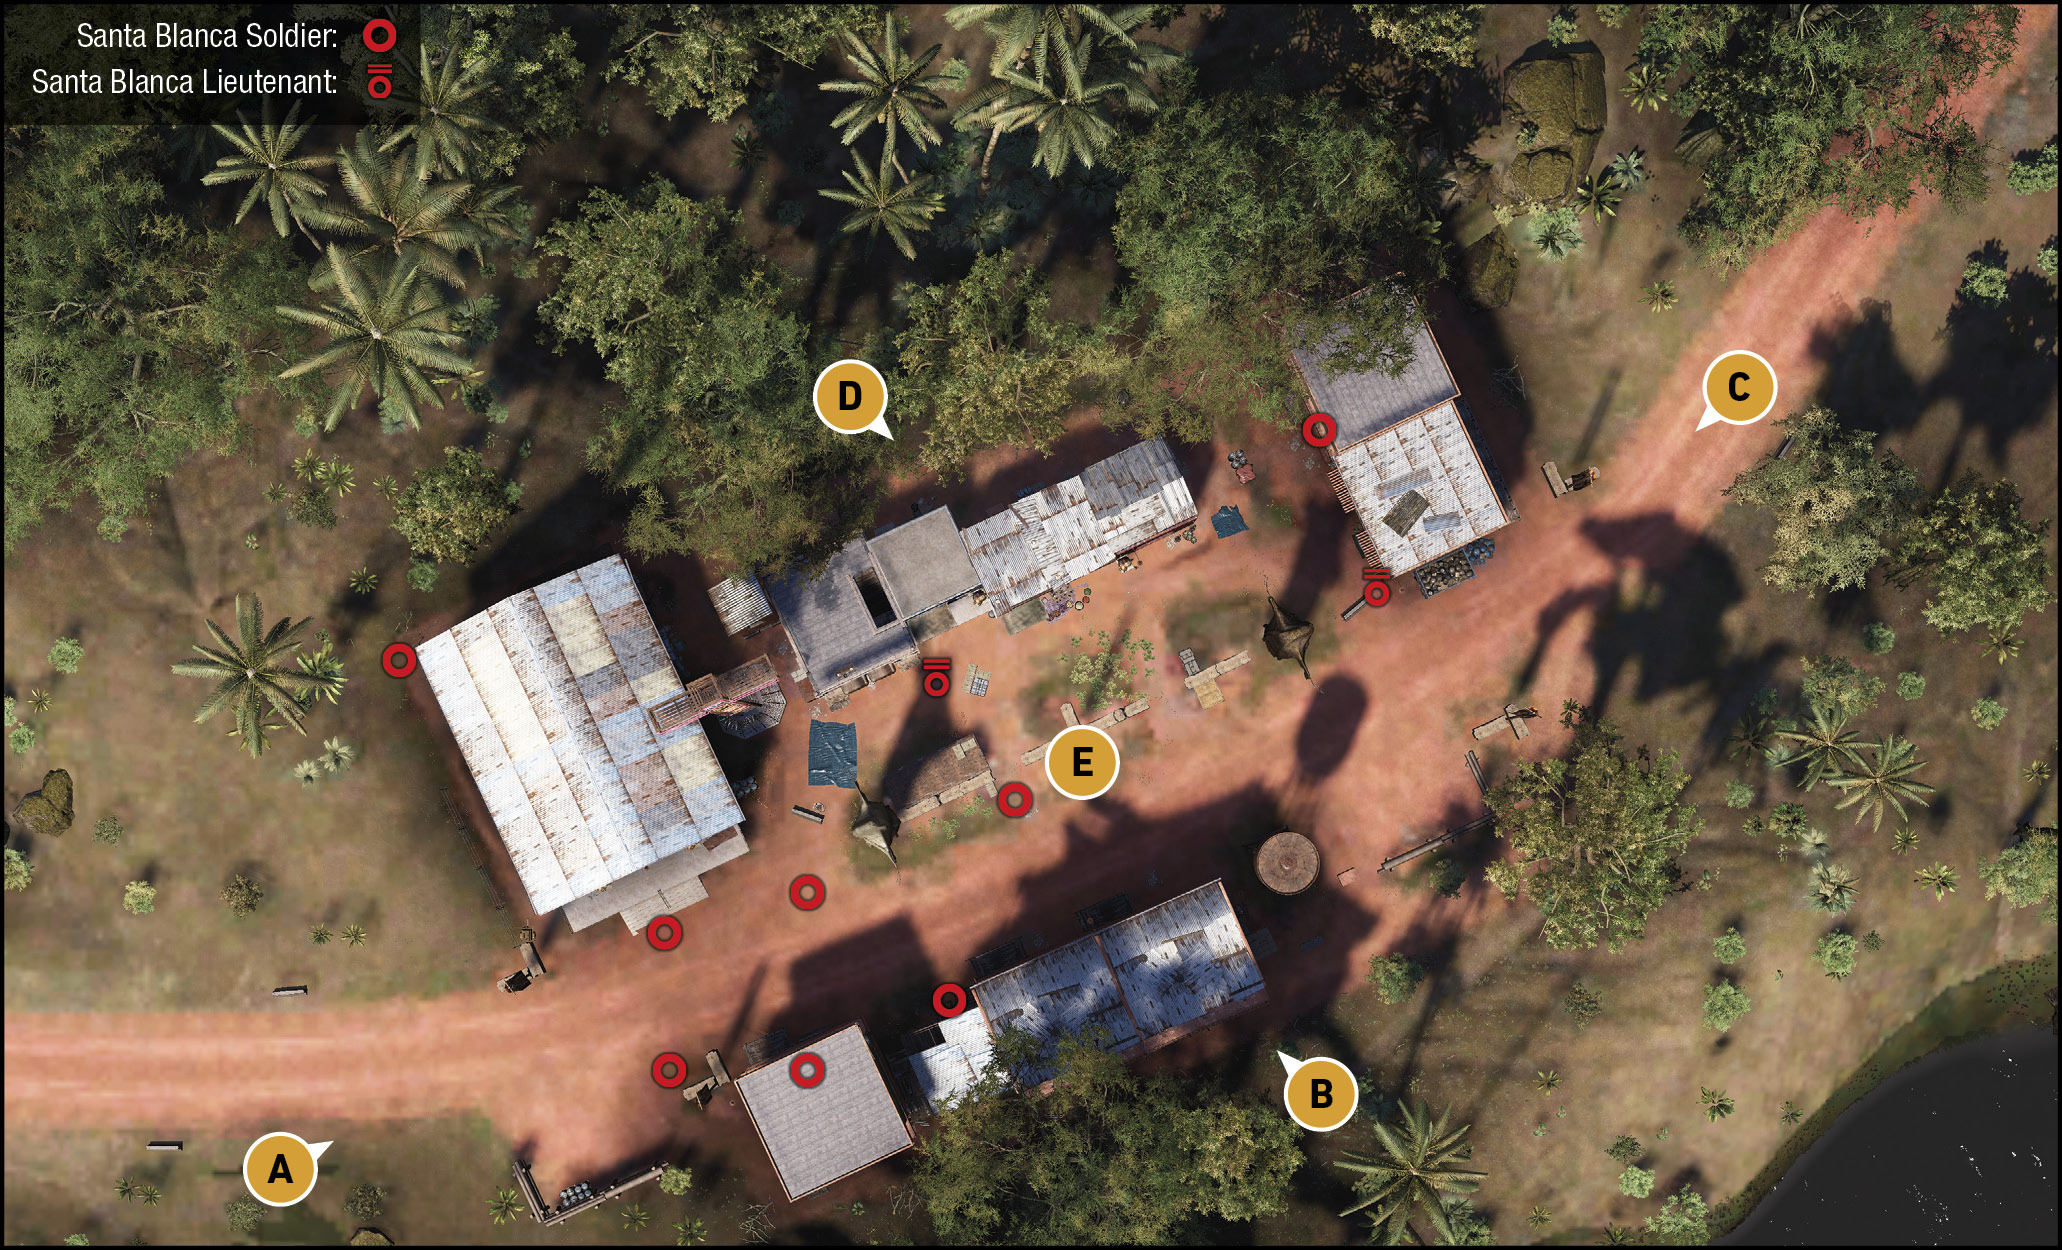
A line of buildings, mostly religious in nature, line either side of the dirt road, splitting up four of the ten enemies along the south side, with six on the slightly larger north side where the main chapel and statuary are located. Note the two captains, either of which may make a run for a vehicle; these are parked by the road to the west or east, by the entrance banners or water tower respectively. Note foes may be inside buildings, or upstairs on balconies.w
West: Main Road
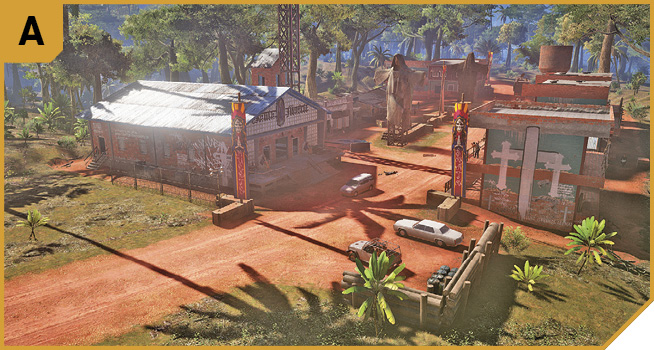
Head in here to clear the area using a vehicle with a mounted weapon on it. This isn’t subtle, but it gets the job done, and allows flexibility if a captain decides to run.
A better, more stealthy, option is to creep in from the jungle to the southwest, hiding behind the log wall where the vehicles are parked, and prime them with mines (or C4, or lob grenades depending on the clandestine nature of your plans), so they aren’t used as getaway vehicles. You can snipe foes from here, and see enemies at the east side of the settlement run to a vehicle, and stop them early enough. Don’t blow up the vehicles near you too early; you may need to use them to chase down a foe that bolts farther along the road!
You can also sneak to the concrete barrier corner on the north side of the road by the fence and main chapel, but this gives you less protection and viewing options.
South: Buildings And Water Tower Parking
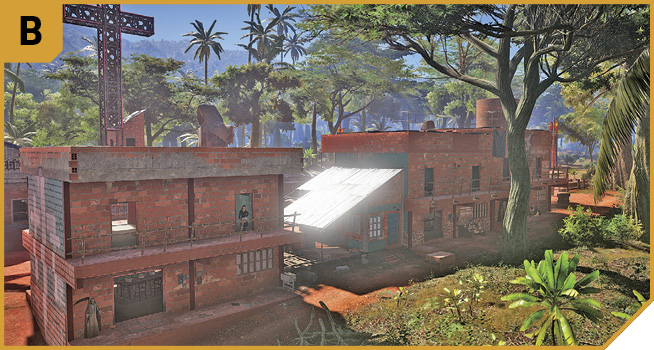
The southern side of the road features some green-colored brick barracks buildings with two floors (ground and upper) to explore. Four of the ten foes begin their patrols here. Approaching from the jungle to the south allows you to weave into the ground floor of the barracks, and use them as cover, while you drop foes. In the confusion, enemies across from you may bolt for vehicles.
Neutralize the vehicles by remaining on the south (jungle) side of the buildings, and destroy the vehicles parked to the west and east (or destroy one set of vehicles, and guard the others in case you need a vehicle later). Then use the hotels as cover and drop foes across from you. You can also approach these buildings from behind, after night fall, and strangle the foes mooching around here, if the mood takes you.
East: Main Road
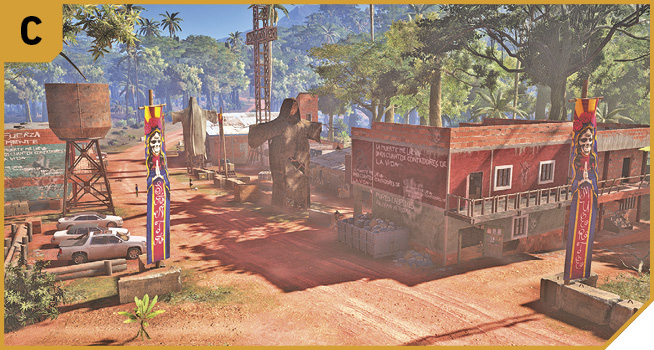
The view from the main road is slightly less comprehensive if you’re approaching from the east, as the slight curve in the road stops you from seeing enemies in the main yard where the statuary is. You can drive a vehicle through here and cause mayhem, or drop behind the large trash dumpster (north) or log fence (south) by the vehicles and pick off enemies.
The main benefit of being here is you can control the vehicles in the parking area by the water tower. Blow up vehicles you don’t need or want to see used by the enemy, or use them yourself depending on what the situation calls for.
There’s also excellent viewing opportunities from the upper floor balcony of the building in the northeast corner; you can see pretty much everywhere, and stop any foe from here.
North: Shrine Shacks And Main Yard
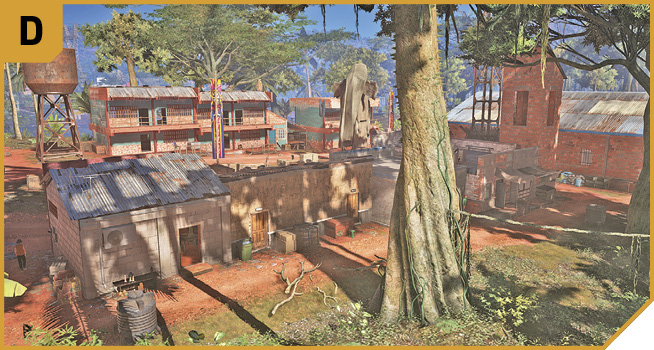
The northern part of the settlement has a row of shacks with Santa Muerte religious statuary of varying sizes scattered inside and out, and the main chapel to the west. Most of the shacks are open enough for you to sneak through the back entrance from the jungle (north), and use the area as cover before quickly dropping foes in the main yard. You have good cover choices here, though the ground is lower than elsewhere. You can also quickly cover ground to any escaping foe, training your weapon on either set of parked vehicles, or moving into the chapel or hotel building to the west or east if you need different cover or you’re outflanking or sweeping the enemy.
|
 Target: Ten Foes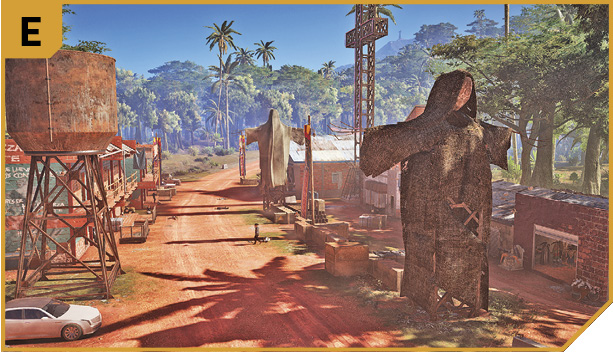
Pilgrim House (Southeast): Other Tactical Advice
 You can drive into the settlement in an armored vehicle, with teammates hanging off the sides of the vehicle, and mow down anyone that moves. Then park up, and execute any stragglers. Straightforward, easy, and you can quickly ascertain if a foe is trying to escape and then chase him, leaving your teammates to mop up.
Or, move in from one of the infiltration points (such as the jungle east of B), and line up multiple foes to cut down with a single burst of fire. Quickly aim and drop two or three other enemies as they scatter, and take cover, then finish everyone else off. Predict whether a captain is attempting to flee, and cut them down, shooting the vehicle before it leaves the area, or use C4, mines, or grenades to destroy the vehicle. If the foe escapes, follow him immediately and run him off the road before killing him.
Or, you can sneak in and locate a lone enemy others aren’t watching (such as a foe inside the main chapel) and bring him down with suppressed fire or a melee strangle. Then step back, loop around the exterior of the area, and do this again.
 Use Solo options when dealing with these foes. As it’s pretty difficult to foul up here, you don’t need to be too careful with your planning; just make sure there’s a Ghost at each of the parking areas to stop any escaping enemies. Of course, you can attack and push in from multiple directions at once, to complete this mission in seconds.