
Tom Clancy's Ghost Recon: Wildlands Guide Welcome to Bolivia Caimanes: El Cerebro
El Cerebro

Objectives
- Reach El Cerebro’s assistant without being detected
- Tail El Cerebro’s assistant
- Capture El Cerebro
- Extract El Celebro to Caimanes Bravo
LOCATIONS
REWARDS
- + 500 XP
- +5 Skill Points
- Submachine Gun: Experiment #42
- Tattoo: Penance
Brief
The intel we’ve obtained in Caimanes has allowed us to ID El Cerebro. His current location is unknown, but we do have a solid fix on his assistant. We need to get eyes on this assistant and tail him until he leads us to El Celebro, then extract him.
Some Assistance Required
Locating El Cerebro begins with pinpointing the whereabouts of his assistant. His last known whereabouts is in the town of Puerto Chico, which has a scattering of enemies loyal to this underboss. The first part of this mission involves the precise location of the assistant.
Puerto Chico: Recon
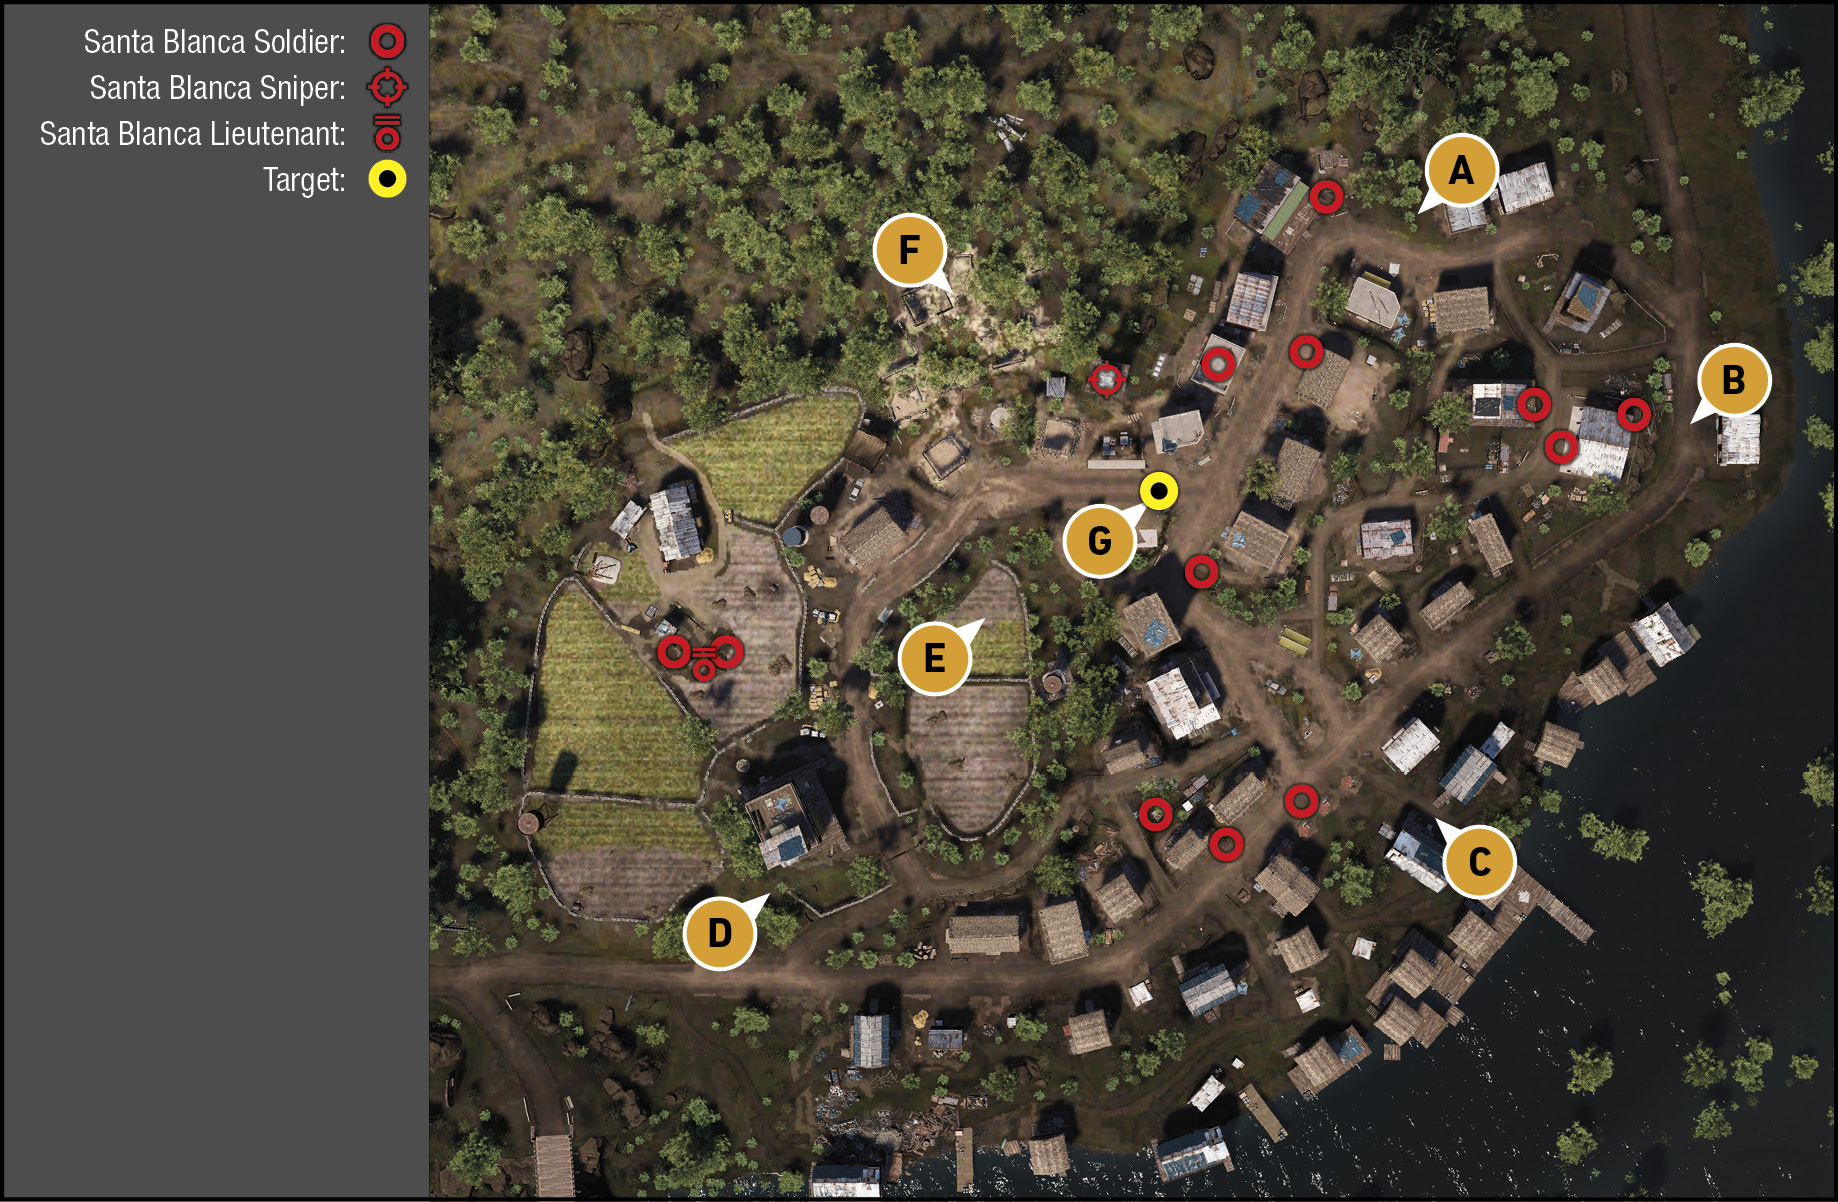
TACMAP
This small village on the edge of a river junction is small enough to be problematic to navigate through due to the clusters of enemies who can spot you, failing this mission. It’s worth locating any nearby vehicles, so you have something to drive in order to tail the assistant, who leaves via the road heading southwest. You’re here to prowl around the town square until the assistant makes his move; removing foes just adds to your chances of being discovered.
Main Road (Northeast)
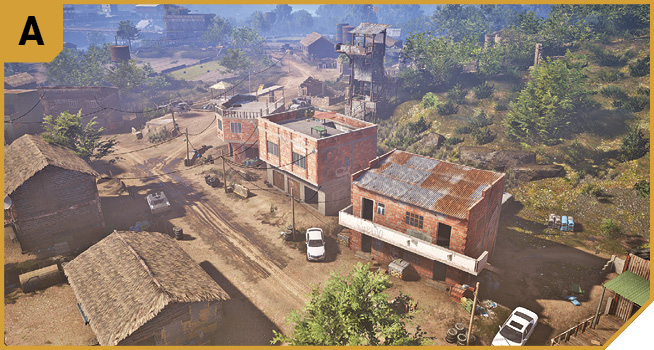
This main road to the town square has enemies on both sides of it, as well as a number of parked vehicles, including a Landrock SUV that’s an excellent choice to steal, once the assistant is mobile. Otherwise, avoid the buildings by moving along the grassy sloped perimeter to the sniper tower, dropping the foe up here only if necessary, and gazing down at the target from this point.
Eastern Perimeter
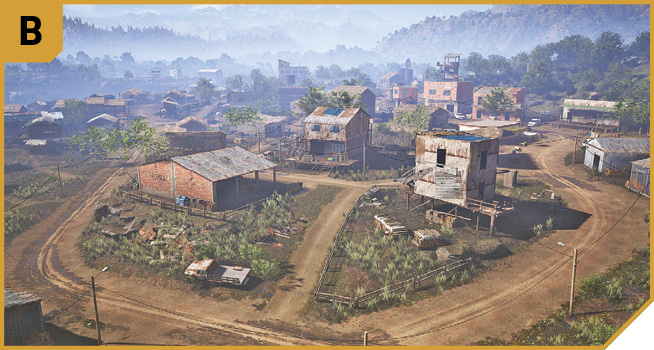
There’s no need to mop up the foes in this area, but this is a good spot to park up, so you don’t drive too far into the town and raise suspicion. From here, skirt the perimeter to A, and around to the target.
Shrine and Main Road
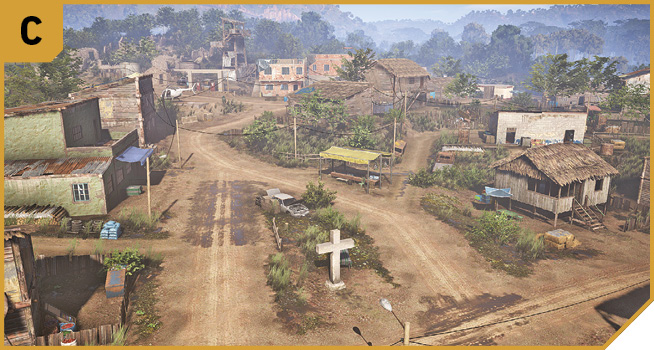
This route is perhaps a little too direct, as the large cross and main road offers little cover, and there are foes in a number of directions. If you must enter from here, move during the cover of dark from house to house.
Southwest Road and Ranch Entrance
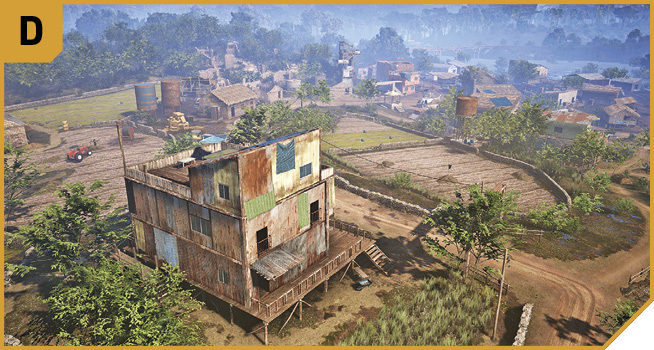
The ranch entrance with the cow skull sign is a good landmark to refer to, and this road is the one the assistant heads down in order to reach Buchon House. Have one of your team stationed here in a vehicle, so you can easily follow the assistant if others can’t reach a car in time. Note the three-story structure which is technically out of the combat zone, but a sniper can act from here (very rarely, and only to save a fellow Ghost from being spotted by shooting the foe in question).
Ranch Field
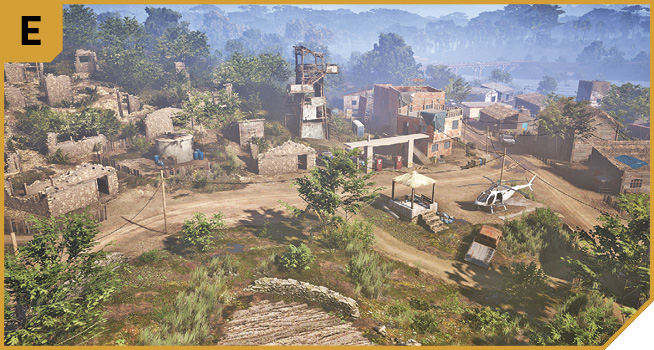
Infiltrating from here is advisable, as you can head across the field past E, and observe near the helipad, by the low drystone wall. Make sure you have a vehicle to use during the ensuing getaway though.
Upper Hillside (Northwest)
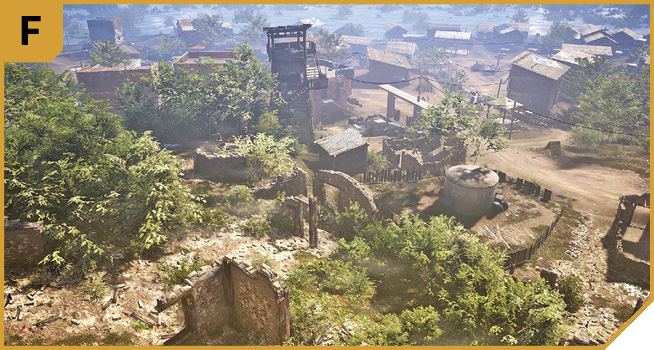
Approaching from this direction is a safe option, as you can maneuver through ruins where no enemies are residing, and tag the sniper in the tower if he’s endangering your mission. Then you can study the town square where the assistant finally makes his presence known. Just be sure you have a vehicle parked close by, or know where one is.
|
 Target: Town Square And Gas Station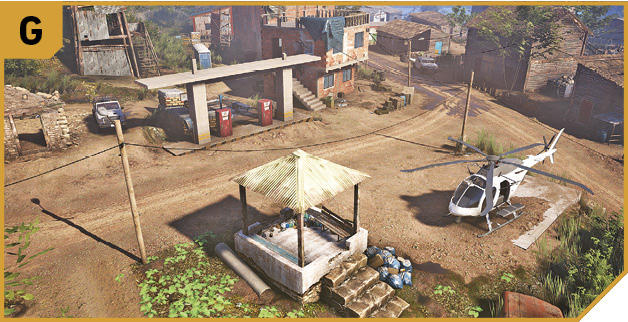
Puerto Chico: Other Tactical Advice
 You’re here to watch the movements of the assistant, so make sure you have either a helicopter or ground vehicle parked close by (ideally on the road near E), and then enter from F, moving through the ruins. When the assistant is seen getting into his vehicle, back up, move quickly to your own vehicle, and give chase. Do not engage the enemy.
 A similar tactic to Solo options is optimal here, though you could approach from E, or split your team and drop four targets in unison in each cluster of enemies, so there’s no one left but the assistant. That’s impressive, but entirely unnecessary.
Heighten your chances of keeping up with the target by having at least two of your team in different vehicles (one of which could be a helicopter), ready to head south as soon as a teammate gives word that the target is leaving town.
Usando Tu Cerebro
The assistant is now irrelevant to your ongoing mission; let him drive into the large Caimanes base known as Buchon House, and resist the temptation to follow him in. When the mission updates, it is revealed that the combat zone, and area to infiltrate where El Cerebro is hiding, is farther to the northwest. Take this knowledge on board, and try for a clandestine push via the narrow river inlets, instead of a full-on assault.
Buchon House: Recon
TACMAP
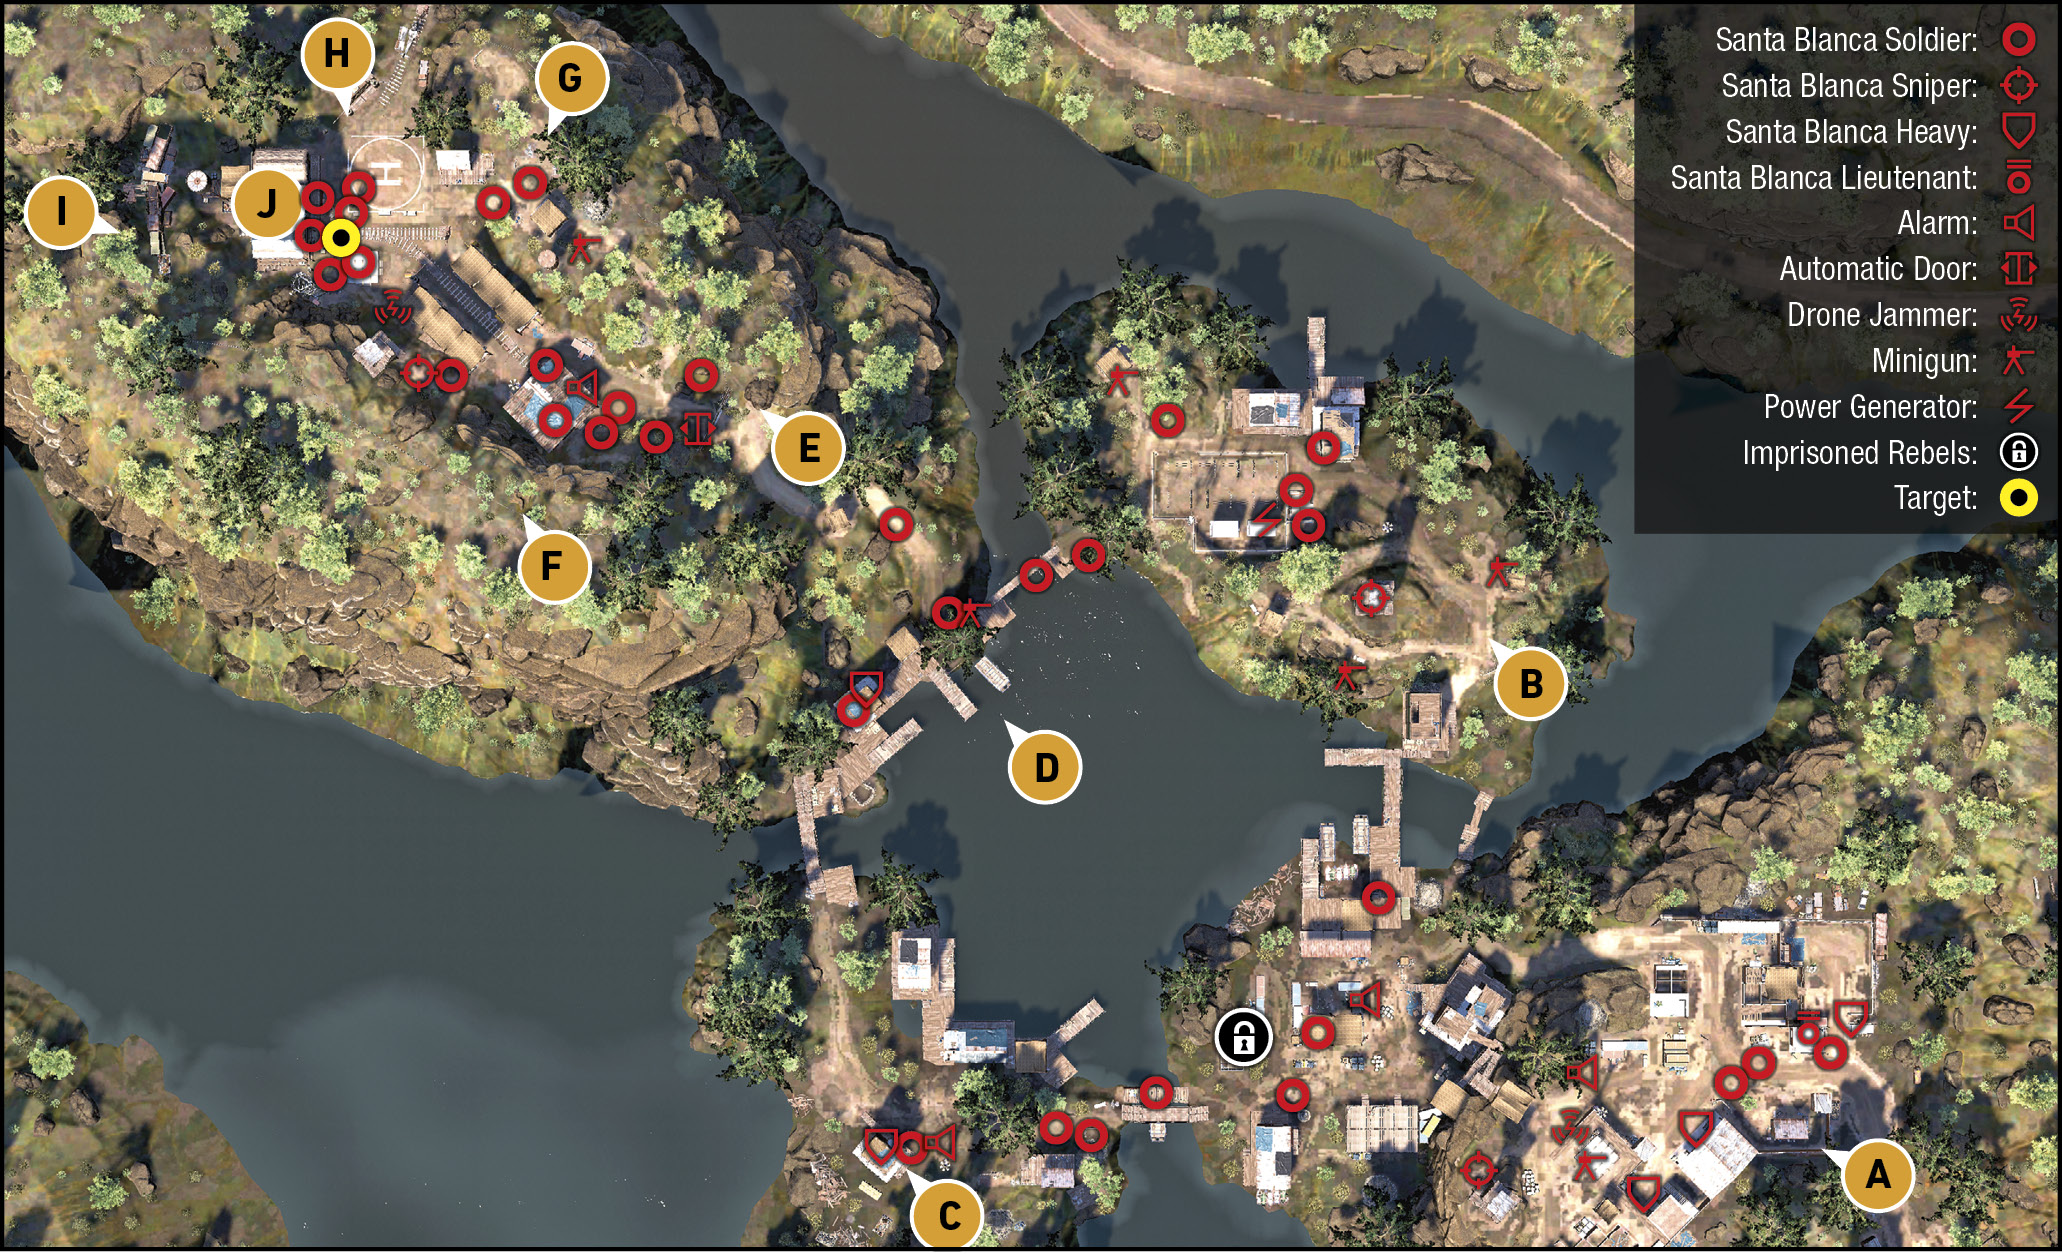
This is a set of four islands extremely close to one another (and technically, the small south island is attached to the main land mass). The cartel have built a main supply and defense depot on the southeast island (where the assistant drove into), there are two smaller islands to the west and north, and finally the northwest (and steeper) island with a small base nestled in the rugged, but lush, landscape. The fiercest fighting should take place here.
Southeast Island Base
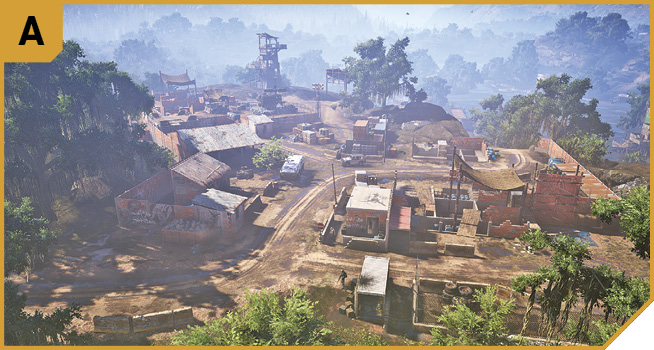
This collection of buildings with a main checkpoint entrance (where the assistant drove into), drone jammer, alarms, scattered vehicles, construction equipment everywhere, and a line of foes guarding the main muddy thoroughfare to an armory (southwest) leads to a sniper tower (west), which overlooks the lower part of the island.
This lower section is comprised of a two-story shack, a large wooden deck platform, another alarm, and numerous outbuildings, including a wooden bridge to both B and C.
There are plenty of hiding places, vehicles to commandeer, and the sniper tower is a good place to pick off foes in the vicinity. But check your combat zone, and you’ll find this area is irrelevant and does not need to be cleared at all. Simply skirt the perimeter fencing around to the north, or the west. Or approach from a completely different direction.
North Island: Substation (Small)
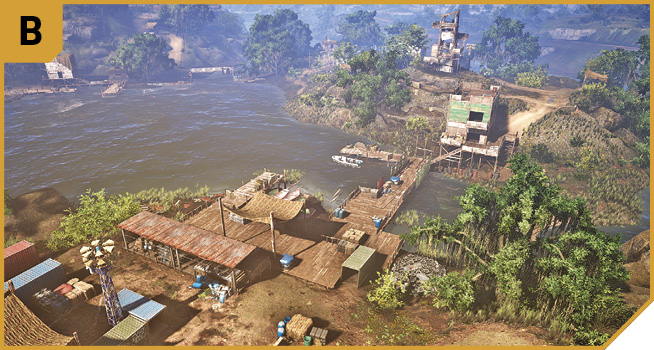
If you’d like to remove power to this location, the generator and a couple of shack-like structures (a warehouse and two-story wooden low-rise with a roof), as well as an easily-spotted sniper tower, are the main defenses on this spit of rock. Note the two minigun nests pointing out toward the river, and another alarm. Feel free to completely circumvent this location, move around the water’s edge, or assault it.
West Island: Sniper Tower (Small)
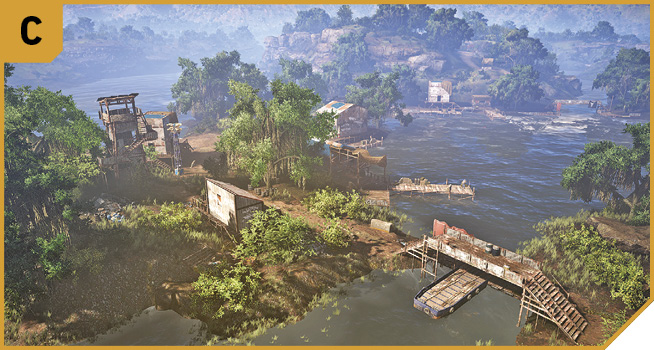
A number of rotting jetties are attached to the inner (northeast) part of this small island, which also connects you from the Southeast Island to the main one where the target resides. A slow and steady infiltration with special attention to the alarm and sniper atop the tower are necessary. Also watch for a couple of foes on the two-story corrugated shack, though once again, completely ignoring this area and moving around the river is a better plan.
Main Island: South Jetty
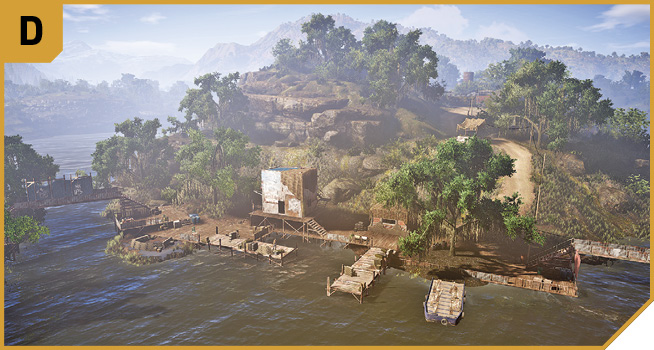
If you’re battling your way through here, and have swum across from A, maneuvered through B, or headed in from C, there’s a cluster of foes on these dilapidated docks. Of particular concern is the minigun inside the brick and tarp-covered pill box, close to a two-story corrugated metal structure. The majority of the half-dozen or so enemies are here, so you may wish to move in and up the slope to the north, and attack them using the height advantage. Or, just ignore them.
Main Island: Main Gates
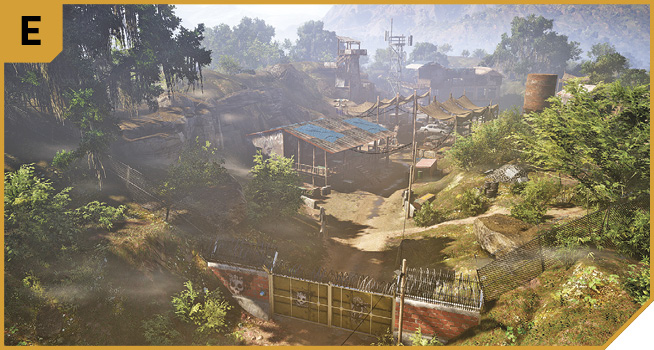
Head up the hill from D, passing a minigun nest on the dirt road, to reach an automatic gate. As you’re not likely to have managed to get a vehicle here (aside from asking for one courtesy of a Rebel Support Vehicle Drop-Off, it’s worth moving around the mesh perimeter fence for a better and more clandestine opening.
On the inside of the gate is a large warehouse, an alarm and two bays full of junk. At least eight enemies should be expected here, and there’s a sniper tower along the western side that can give you trouble. Across the large helipad (one of two on this island) is a drone jamming your target’s building.
You’re more likely to be attacking from the north, if you’re using a more cunning infiltration method, or strafing the area with helicopter gunfire. Though closer fighting is possible, it isn’t necessary or encouraged.
Main Island: Western Perimeter
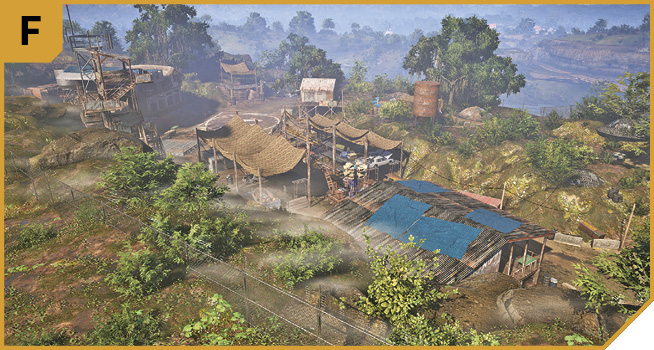
From the main gates at E, all the way clockwise around the perimeter of the island base to I, is an impenetrable fence. This is actually helpful, as you can simply maneuver around it to either of the H and I infiltration points. Deal with the troublesome sniper by shooting him from this side of the fence too, if you need to.
Main Island: Debris Access Point
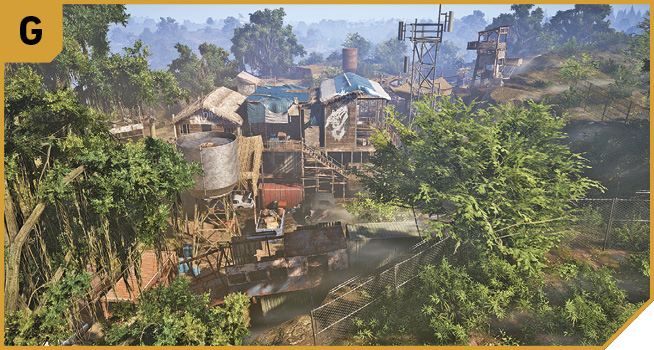
Approach by moving around the perimeter fence, or via the river to the west or north, and look for the gap in the fence leading to a large pile of debris, including some train carriages, containers, barrels, and other detritus. This is actually a great (and preferred) method of entering the base as you’re very close to the target, you can remove the drone jammer with relative ease, and your team can quickly fan out around the inside of the perimeter fence to start raining death on the foes down below (including an assault on the sniper tower, and then dealing with the enemies at E).
Or, you can head through the gap and move to the left (clockwise roughly northeast), around to H. With four teammates all assaulting from the rear, the enemy won’t know what’s hit them. Attempt to take the Target building as the firefight continues.
Main Island: Rusting Plane Access Point
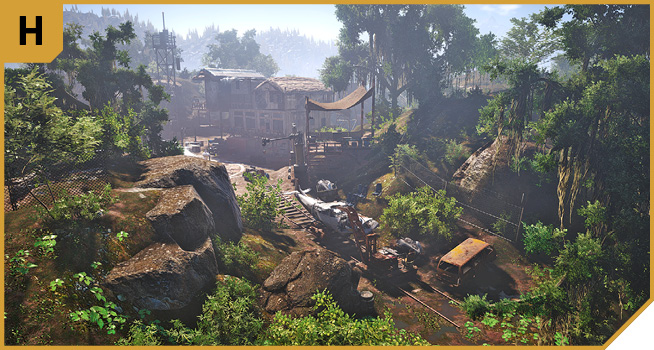
On the north side of the island, up from the river via a series of climbable rocks, or if you move around the perimeter fence, there’s an entrance into the helipad area, past the remains of a small crashed plane. This offers great and quick access to the defensive nest just north of the target’s building, as well as the stilt shack to the east, close to Helipad 2. Both these structures are great positions to fire down on the foes below, so the remaining enemies inside the building have no reinforcements to rely upon.
Main Island: Helipad 2
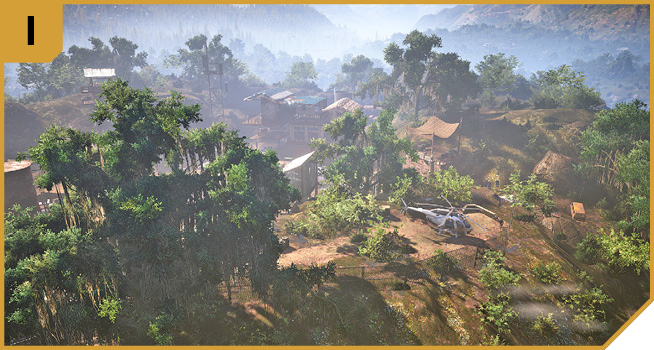
If your combat gets a tad too overzealous, and the main chopper in the helipad is destroyed (and a teammate isn’t retreating to find another chopper), use the small helicopter at this position, after entering the base. South and inside the perimeter fence is upper ground above the main structures, with a minigun pillbox and large bushes. With thermal vision, you can neutralize many foes within these bushes, and remain on the higher ground to complement your teammates.
Main Island: Target Building And Helipad
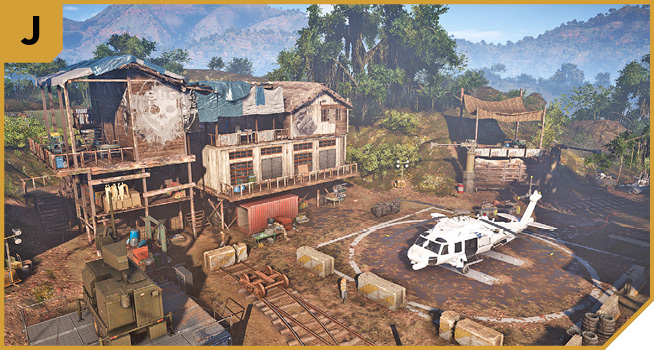
The main building where El Cerebro is hiding is a sprawling, four-floor structure overlooking the main helipad. With around six foes, you need to assault this from one of the wooden sets of stairs, and use the second floor interior workshop to fire out from, on any foes coming up from the main area to the south. This is, of course, after you remove any foes in the vicinity. Climb to the top floors and secure El Cerebro; he is docile, but the mission fails if you shoot him. So don’t.
Buchon House: Other Tactical Advice
 Abandon the chase of the assistant as soon as you see him enter the base, before backing off completely and moving to the main island to the northwest. Enter via H or I, and remain on the higher ground, and order your team to strike the foes in the area while you back them up. Call on any Rebel Support strikes or help you wish during this time, as well as removing the drone jammer. Or, creep to the jammer, destroy it, and use the drone to pinpoint El Cerebro.
Scale back your offensive capabilities the higher up the structure you go; no grenades near El Cerebro, please! Once you have El Cerebro, drag him down to the main helipad chopper, stow him inside, and fly to the rally point. Either helicopter should be available, but a third option is to leave via H, head down to the river, and leave by a boat you’ll need to acquire, or cross to a road and summon a vehicle via Rebel Support.
 Disengage from the assistant, and move around the islands until you’re at H or I. Then head into the main island base. Have two teammates head along to the higher helipad, and work down along the bushes, or remain at the minigun pillbox or stilt shack and fire on the foes below. The other two teammates should assault the sniper tower, one of them using it to fire on foes in the main area as well as the Target building.
Have one or two Ghosts storm the building itself, clearing it with close assault weaponry, such as shotguns. Keep that trigger finger off the weapon when you see El Cerebro, though it’s wise to have fewer than a couple of foes left before you drag him down to one of the choppers. Have the aircraft already warmed up and ready to fly.
Or, you could parachute onto the target building roof, or drop from a low-flying helicopter, but staying alive becomes trickier in this narrow space, with multiple foes, one of which can’t be accidentally killed.
Up, Up And Away: To Caimanes Bravo
Once you’ve captured El Cerebro, he’s a docile hostage. The only competent extrication plan out of the base is via helicopter (ground vehicles can’t access this part of the base, and you can’t drag him across a river though you are able to stow him aboard a boat). As Caimanes Bravo is land-bound, an exit via boat needs to be followed by a ground vehicle or helicopter. And as there are two choppers parked at the northwest island, use one of them, or have a teammate drop in. The ride to the Rally Point should be uneventful, and once you bang on the safe house door, the mission, and your time completing Story Missions in Caimanes, concludes.