
Tom Clancy's Ghost Recon: Wildlands Guide Welcome to Bolivia Caimanes: El Cerebro
Submarine Fleet 3

Objectives
- Destroy the drug sub
LOCATIONS
- San Miguel Ruins
REWARDS
- + 500 XP
Brief
El Cerebro has built a flotilla of three submarines that are capable of making the run from Caimanes all the way to Florida. This represents a major increase in the cartel’s smuggling capability, and it must be stopped. Locate and destroy these submarines.
Rumble In The Ruins
Just north of Caimanes Alpha are the soggy ruins of San Miguel mission, which is now one of three mooring docks for a clandestine smuggling operation using a submarine. Like the other two missions, this one requires a simple destruction of the craft. This can be done from any distance, using C4, a grenade or two, or a launcher. There’s just the small matter of the four cartel snipers, two heavily-armored foes (close to 20 enemies total), and extreme sogginess under foot.
San Miguel Ruins: Recon
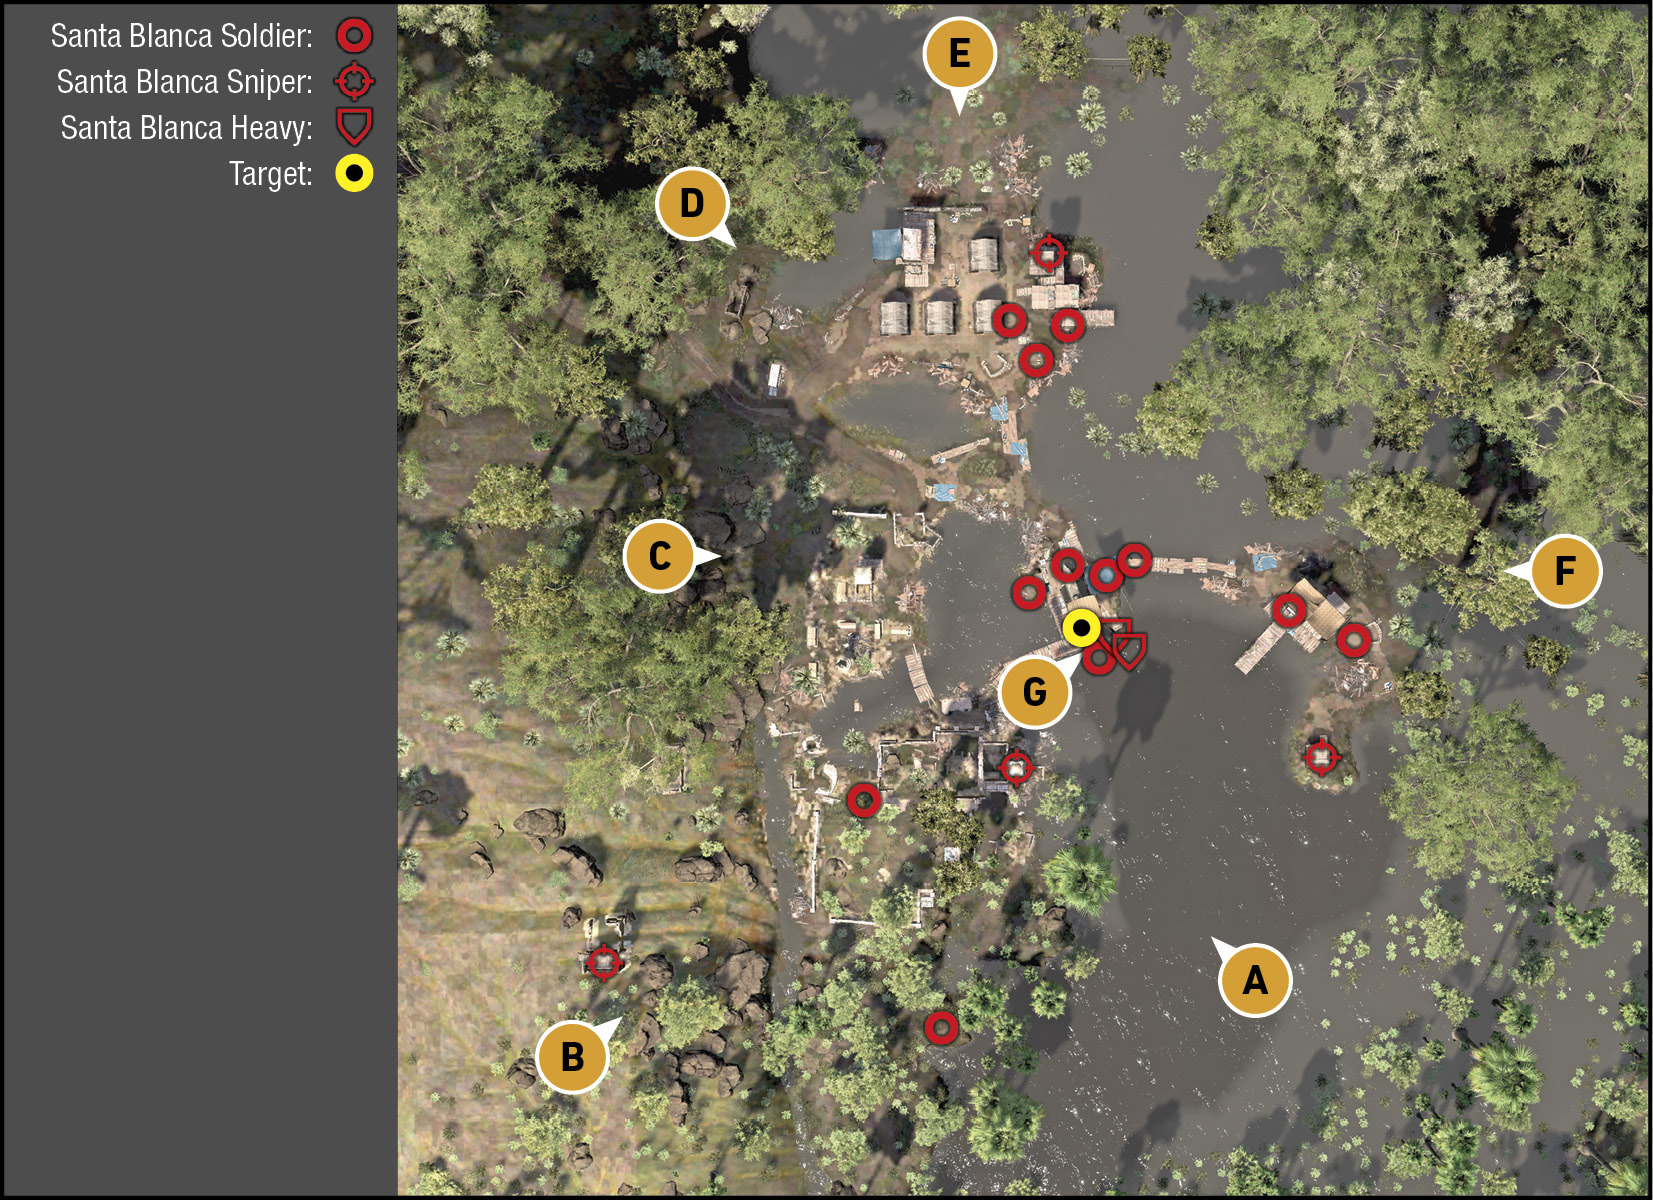
TACMAP
Consider this combat zone to be four separate areas, with the main cluster of foes around the submarine itself. The relatively open area means despite the number of enemies, you’re able to take them down with relative ease. This is optimally attempted once the other areas with foes have been neutralized; the barracks to the north with a sniper tower, a small island to the east with a sniper, and the southwest jungle with four separated foes, two of them atop sniper nests. There’s excellent cover on the western jungle slopes, and almost none anywhere else.
South Swamp (Water)
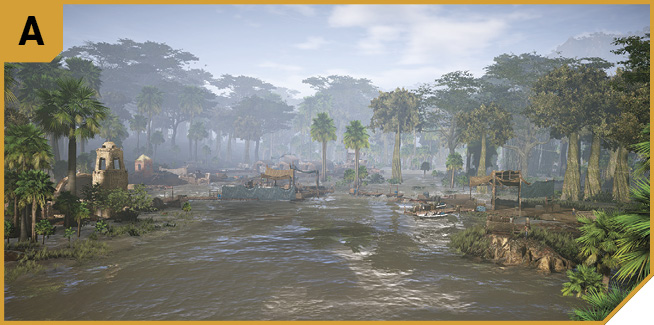
Not shallow enough to wade through, and open enough to be spotted by enemies unless you’re infiltrating at night, there are better places to attack from than here, though a mass assault toward the east island, or running and gunning (using grenades with a fast-moving boat, lobbing projectiles at the target) are reasonable plans.
Southwest Jungle and Mission Ruins
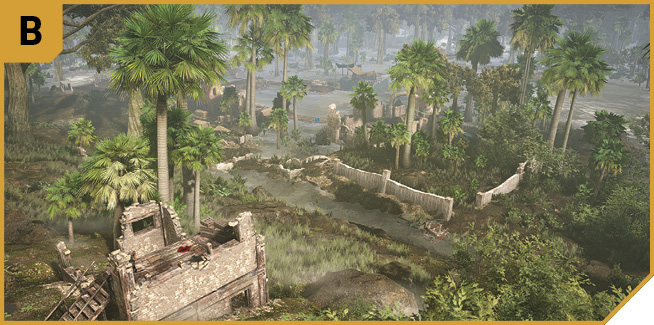
Thermal vision is a great idea when hunting cartel members on the southwest slope and main mission ruins. Note the two snipers here: one atop a ruin up on the slope that’s easily missed, a location which then offers excellent elevation and a clear sniping shot at the target. The other foe is atop the mission belltower, which can’t be climbed; you must shoot this foe from the ground or air around the belltower. Then use the ruins to fire out from. You should be able to tag the enemies and sniper across the water to the east on the small island, as well.
You’re also very close to the target (close enough to lob grenades and complete the mission without having to wade into the target area at all) while still maintaining cover behind the old stone walls.
West Jungle and Steeple
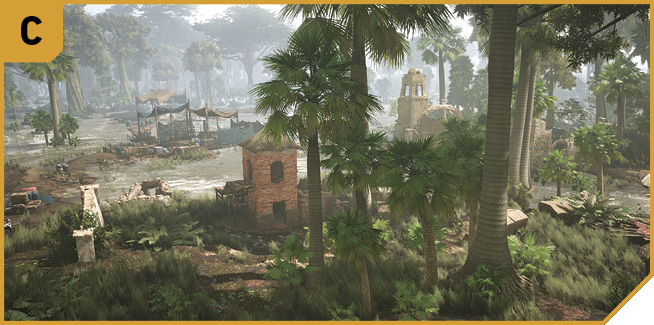
The area of open marsh and jungle slope to the west of the target is more open than B, has fewer areas to hide, and you can easily be spotted by foes at both E and G. However, the small brick steeple is a good place to hold up and snipe from; there are views of E and G, though you aren’t quite close enough to lob a grenade at the sub. Use this for crossfire opportunities, and to drop the sniper at E.
Northwest Jungle
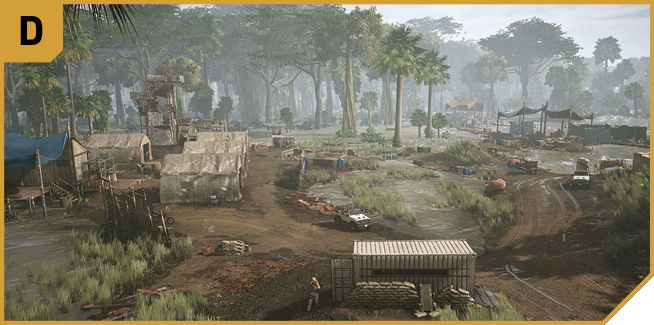
Don’t veer too far to the west, or you risk infiltrating and alerting the Caimanes Base instead. Approach from here, using the large trees and undergrowth as cover, and you can easily tag the sniper at the barracks, most of the foes at E, and offer long-range fire at the target area. Note the muddy tire tracks; there’s a vehicle near here and a rough track out if you need a quick extraction route.
North Swamp and Barracks
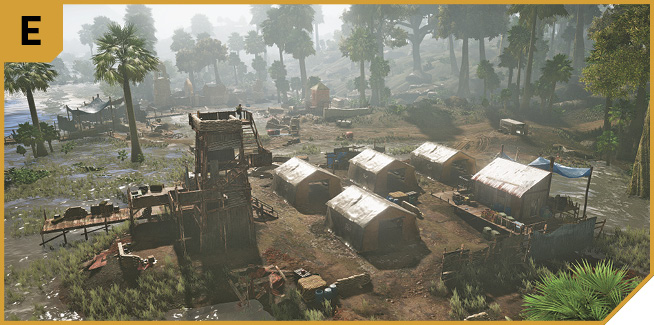
This barracks has only around four foes during daylight hours, but more at nighttime; the four tents can be easily accessed from the north, using the metal fencing as cover, and the sleeping foes either slain or ignored. Climb the sniper tower and use it to rain death down on the target foes. This is a good area to defend, as it has sand bags and few foes to give you any trouble.
East Island
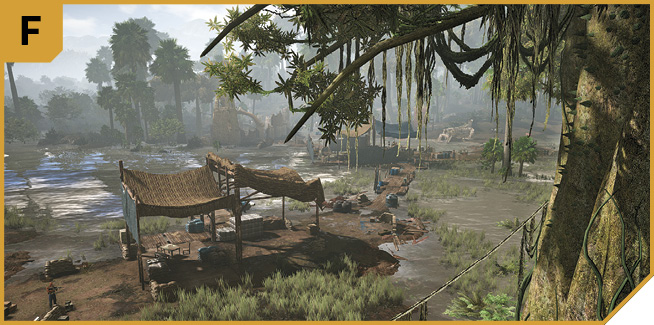
Approaching from the swamp to the east is a better idea than you’d think, as the tall grass and massive buttress-root trees offer excellent cover. The trio of enemies can be quickly slain without drawing attention to your team, and the defenses here (especially the platform where the sniper is) offer great protection against the foes in the target docks. Plus, there are boats moored here for a quick getaway.
|
 Target: Submarine Dock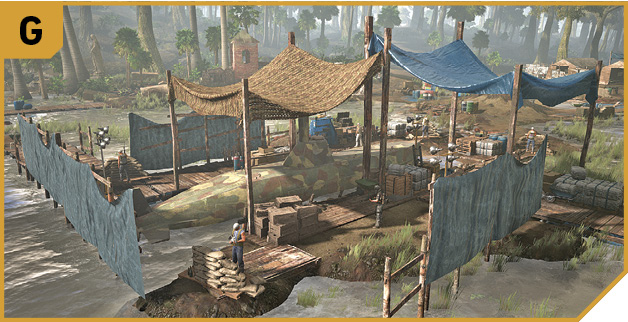
San Miguel Ruins: Other Tactical Advice
 Approaching from B, removing the four foes in the southwest jungle area, before lobbing in a grenade from the gap in the wall of the ruins next to the bell tower, and destroying the submarine from this covered spot, before retreating the way you came, is perhaps the most proficient method of completing this mission.
Other options include sending your team in to battle the foes directly, while you take up refuge at the sniper tower (E), or at another defensive position.
 If the Solo plans aren’t to your taste, you can clear the entire combat zone by placing a Ghost at B (the sniper ruins) to provide cover and shoot at the target area. A second Ghost can remain in the ruins after defeating the sniper in the bell tower. A third Ghost can tackle the barracks and stay atop the sniper tower with a fourth Ghost defending the stairs from foes. Then, simply tag all foes you see until the base is cleared. An alternate camping location is from the defenses at F.
Using a chopper to strafe the target area is of limited use, unless you have a steady pilot and better sharpshooters, as the foes around the target are usually protected by the roof covering. Dropping explosives from overhead is a great idea, though, assuming your pilot doesn’t fly into any of the tall trees in the immediate area.