
Tom Clancy's Ghost Recon: Wildlands Guide Welcome to Bolivia San Mateo: El Pozolero
El Pozolero

Objectives
- Locate El Pozolero
- Extract El Pozolero to San Mateo Alpha
LOCATIONS
REWARDS
- + 500 XP
- + 3 Skill Points
- Submachine Gun: Residuos
- Facewear: Gas Mask
Brief
We now have a confirmed location on El Pozolero, the man behind the gruesome disappearances in San Mateo. It is vital we extract El Pozolero and learn the identities of his many victims.
The Stench of Death
It’s just under two clicks south from San Mateo Alpha (but closer if you head north from Barvechos Alpha instead) to San Mateo Base, where El Pozolero is hiding. The settlement is crowded with foes, but has few installations and good infrastructure routes in and out, making extraction relatively straightforward. Find this butcher, grab him, and extricate him to the rally point.
San MAteo: Recon
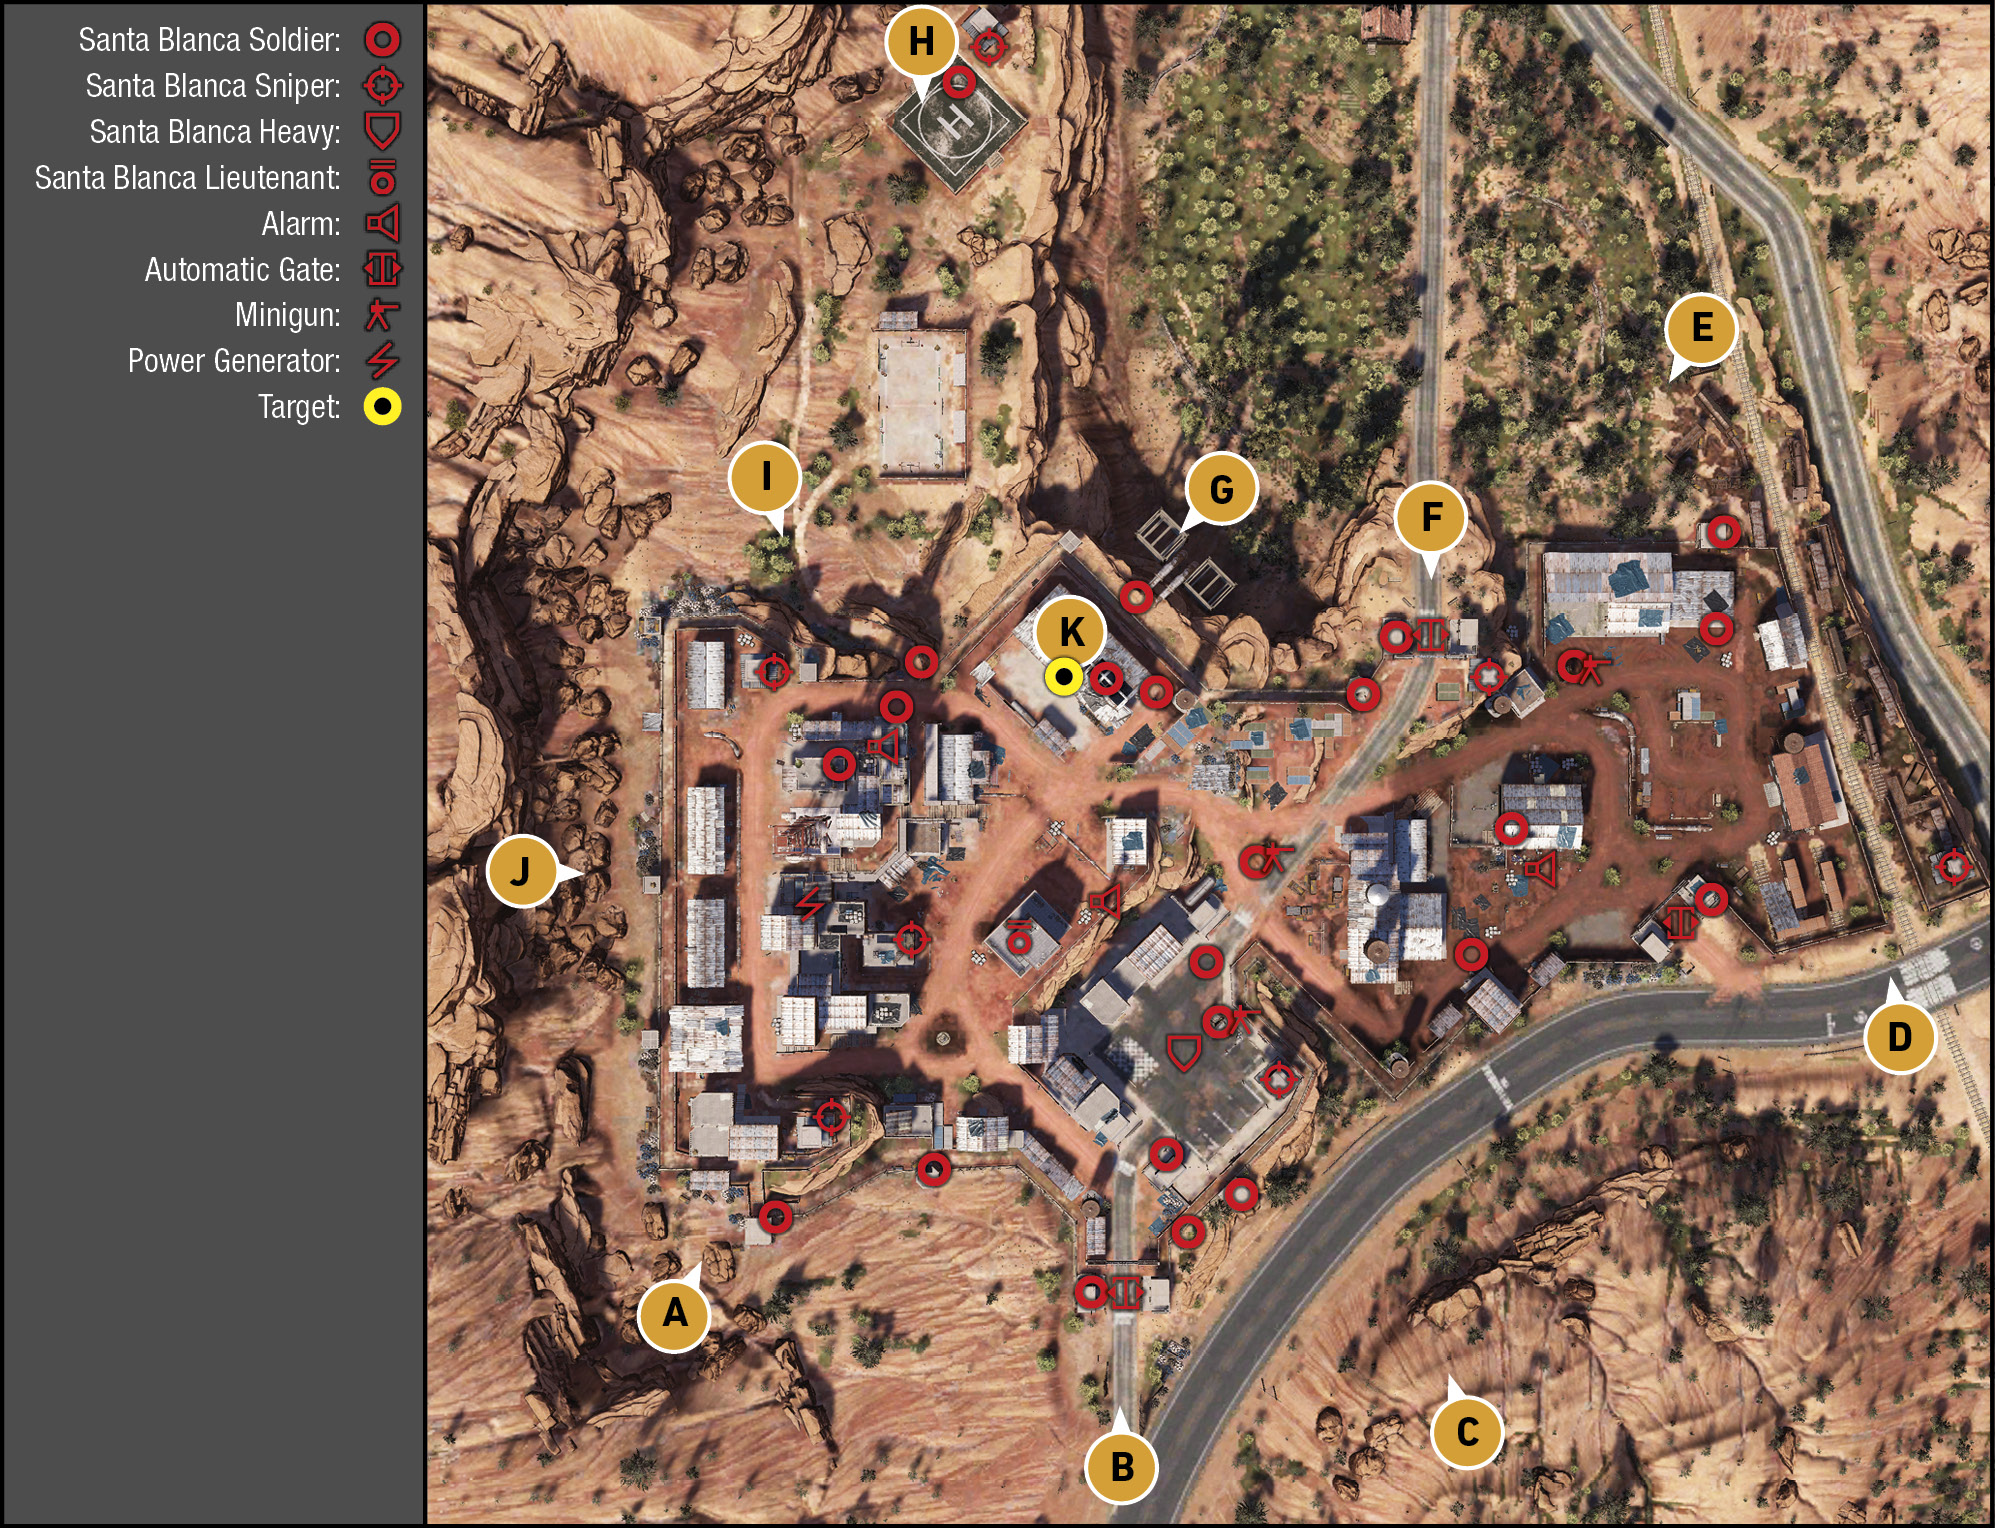
TACMAP
This base is on three distinct hillside tiers, descending from west to east.
Southwest: Security Hut and Pill Box
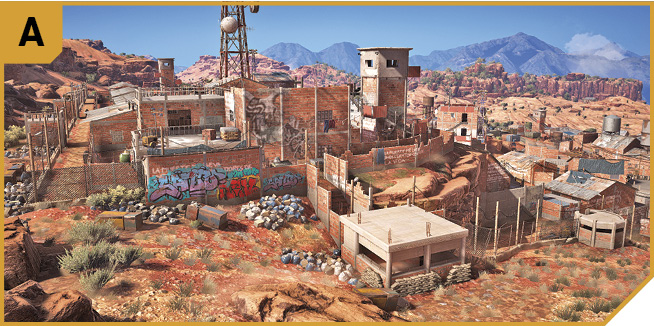
The rocks above this area make a good stealth recon point, and there are relatively few foes to worry about. Snipe the sniper from afar, and then the enemy inside the security hut on the corner. You can actually infiltrate in from this point by climbing onto the security hut (on the west wall by the trash bags), drop down behind the foe inside the base, and strangle the foe. Then you can navigate across the upper tier of the base, to the sniper tower to provide cover, or north weaving between buildings, watching for patrolling foes, and moving along the inner perimeter. Check the mess halls for foes, neutralizing the generator and/or the alarm pole by the radio mast. The target warehouse (K) is an easy downhill creep or run from the upper part of the base, too.
Southwest: Automatic Gate and Perimeter
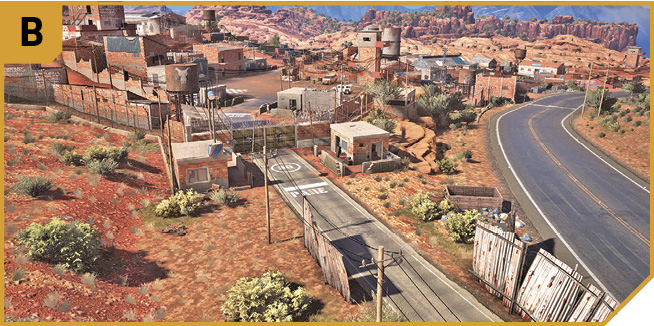
Think of this as the southwest corner of the base, as these outer checkpoints (outside the main gate) not only allow cartel-approved vehicles to pass in and out of the mission area, but you’re able to maneuver on foot (or at a pitch, on a bike) around the huts, to the inner perimeter, inside the fence, but outside the brick wall. There are numerous openings in the brick wall, allowing you to slip in unnoticed, or assault the base and create havoc (and ideally, distractions so your other teammates can get to the warehouse, as it’s on the other side of the settlement).
Take the inner perimeter path behind the left (west) security hut, and you can enter the base at the water tower, or continue and climb the wall onto metal containers just behind the pill box. Then step onto the metal roof to your right (east); this is helpful as it offers sniping opportunities to take out all three alarm pole panels from a single location. Or, continue on up the hill (west) to A.
Take the inner perimeter path behind the right (east) security hut, and you can maneuver along the southern inner perimeter, all the way to the barracks (the brick structure north of C and west of D with exterior concrete steps). Along the way, you have two opportunities to enter the parking lot (mid-tier), a chance at hopping the fence near the minigun nest at the road junction (middle of the camp), and access to the southeast yard.
Drive a cartel vehicle through this gate and you have two main routes to the warehouse (or you can ditch the vehicle at any time, seek cover, and start a firefight). Make an immediate left up the dirt track, then across to the target warehouse and you avoid the two minigun nests on the tarmac road, which is also accessible. Don’t forget this gate is a possible escape route, too (assuming you’re taking El Pozolero out in a cartel-approved vehicle).
South Rocks
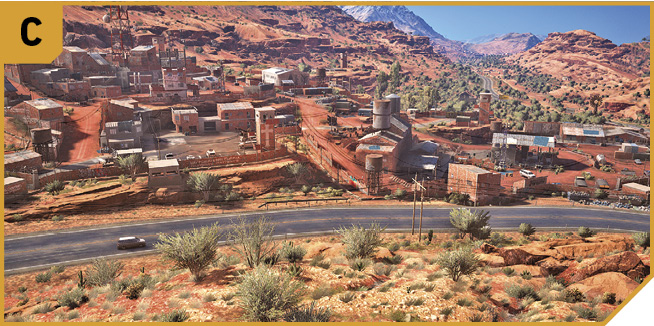
Though seldom used, a good sniper worth her salt can utilize the rocks on the south side of the main road to remove the panels from all three alarm poles, as well as the snipers from the towers between A and D (along the south perimeter). You have marginal views of the minigun nests, and can drop foes milling about, but after your alarm panel destruction, you may want to head elsewhere.
Southeast: Gates and Railroad Track
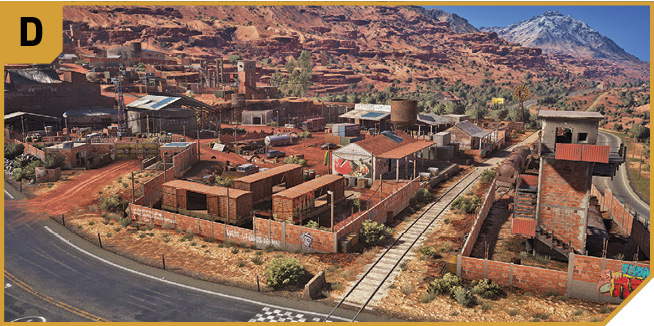
There are two ways into the southeast yard, which offers a tough slog uphill to the target warehouse, and numerous foes (including one behind a minigun) along the way. You can hop the wall behind the left security hut by the tires, or smash the inside window at the back of the right security hut. Or, of course, you can barrel through here in a cartel-approved vehicle. If you’re after a fast but chaotic infiltration with no subtlety, this is the entrance to drive in at!
The railroad tracks just west of the gate are a better proposition (assuming the sniper in the nearby tower is removed) as the unloading platform between D and E is completely open, allowing excellent access and stealth opportunities as you creep westward. Non-cartel vehicles (such as bikes) can be driven up here easily, and if you’re attempting to flee the base in a vehicle, but don’t want to use the automatic gate, set yourself up to drive over the corrugated metal ramp at the perimeter wall between the gate and railroad tracks.
Northeast: Train Junkyard
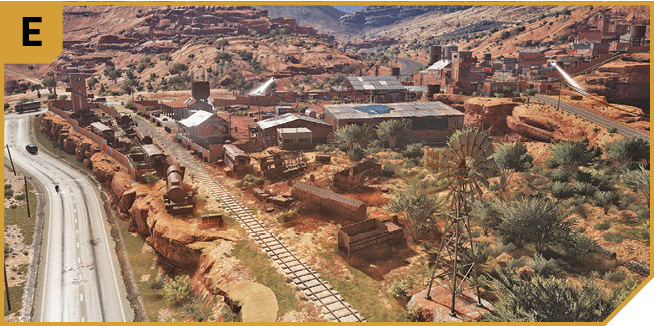
The security hut here is dangerous, as there’s no way to climb over and the wall is secure all the way west to F. Either snipe the foe from a distance, or head along the railroad tracks to the first graffiti-strewn platform building, infiltrate in, and sneak along the inner perimeter wall and tackle the guard from behind. Once inside, you can run along the inner perimeter wall, entering the large mechanic’s garage, and continue to the propane tank and armory. Better yet, the minigun operator in the south yard can be tackled silent, from behind. From there, you can enter the yard, or remain on the perimeter and head up the road to double-back and kill foes at F.
North: Automatic Gate
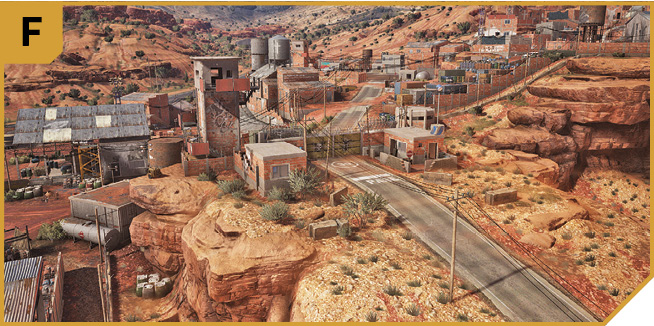
Just like the others, this gate allows cartel-approved vehicles in and out of the base. If you’re heading here by vehicle, this is the closest to the target warehouse, so it’s preferable to use when heading in and out.
Just like the gate at D, the two security huts (each with a foe) allow infiltration access via an opening behind the left (east) hut and an interior window to break inside the right (west) hut. The left hut is a good choice as you can then climb the adjacent sniper tower, rid your team of this sharpshooter, and take up some long-range targeting yourself. Bag all three alarm panels and two of the minigun operators if you can, along with any other foes.
Choose the right (west) security hut, or just cross from the left if you’re worried about the sound the breaking of the window makes, and you can pass a pill box (watch for the foe), and creep along the inner perimeter all the way to G, just outside the “container hill” area of trash, barrels, and metal containers.
North: Giant Pipes Infiltration Point
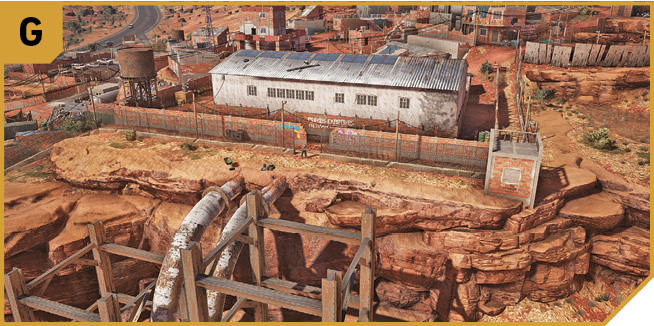
A good landmark to tag, and featuring only a couple of enemies, this is the only break in the perimeter wire fencing, with a second break in the inner brick perimeter. It just so happens this is adjacent to the target warehouse, so if you’re after a quick infiltration plan, and don’t care about clearing the settlement of foes, this is a great option.
Either approach from F, sniping the foes at the security hut or pillbox, or sneak below the pillbox foe. Or, approach from H or I, carefully negotiating the cube-shaped brick post to the northwest. Now you can easily get into the warehouse, and out again if you’re not the one extracting the target.
Northwest: Sniper Tower and Helipad
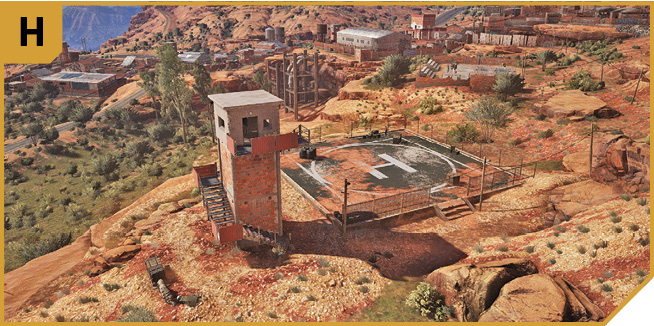
The base stretches north with a basketball court and helipad, as well as a sniper tower to watch for. Two foes are usually here. Land a chopper here if you work well with others, and you’re part of a Co-op plan to get El Pozolero out at infiltration point I. You can also reach the target warehouse via a careful maneuver around the brick cube post to G.
Northwest: Corrugated Fence Infiltration Point
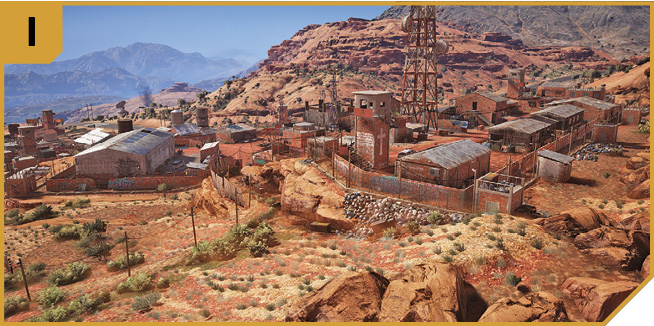
The only part of the perimeter that isn’t wire fencing and brick walls is a small section of curved metal, offering excellent infiltration planning just below the upper tier area of the base. Beware of the sniper above and west of this point, then sneak around the fence, make a sharp left (east) turn, and you have almost immediate access down the inner perimeter wall to the target warehouse. This makes a good possible dragging route out to a waiting helicopter at H, too.
West: Rocky Vantage Point
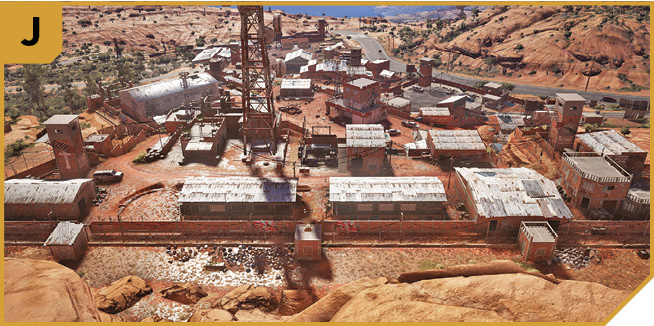
If you like sniping generators (or lobbing grenades over perimeter walls at generators), shooting alarm panels, and clearing snipers from towers on the upper tier of this base, this is the recon hillside to sit at. Offering excellent views of the western side of the base, you can then head down to help your teammates by entering at A, or moving northeast to the corner brick cube-shaped post, using the roof of a rusty vat to climb onto the roof of it, and over into the base. This is the only infiltration area on this side of the base.
|
 Target: El Pozolero and Lyme Warehouse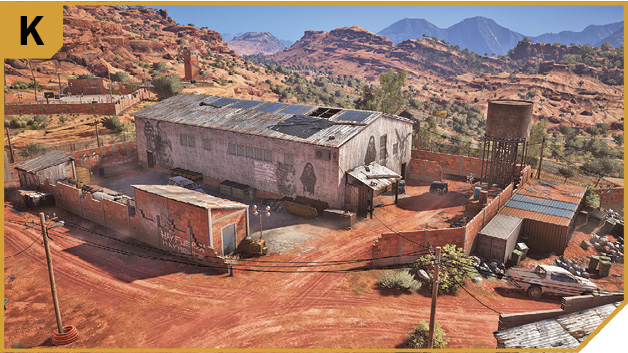
San Mateo Base: Other Tactical Advice
 You need a vehicle close to the warehouse, the ability to stow El Pozolero into that vehicle without being shot, and knowledge of how to get out of the base, and that’s pretty much it.
A basic stealth plan would be to drive any vehicle you wish south from H (removing all foes at the sniper towers and nearby from range before maneuvering here), parking near the corrugated metal fence at I, sneaking in, and dragging the target back to the vehicle. That vehicle could also be a helicopter, making extraction a little easier.
Or, you can employ stealth takedowns at G, enter via the pipe ledge through the open fence and wall, grab the target, and bundle him into one of the two cartel vehicles usually parked at the warehouse. Then simply choose any gate and drive out (or the ramp between the gate and railroad track at D).
Another option is to sneak in at the north gate (F), up the inner perimeter fence by the container hill, and into the target warehouse, using a cartel vehicle to escape in. Or, cause a commotion elsewhere in the base by ordering your team to attack from B, D, or E, while you head in from I.
You could also head in from A, take out the generator so no reinforcements are called, and fight your way down the tiered base levels from west to east, clearing the entire settlement of foes, and using your height advantage to tackle any particularly troublesome enemies.
Or, drive at speed through the gates at B, D, or F (B offers the easiest route with fewest short turns, though F is closest to the warehouse), park at the warehouse, sprint to the target, and bundle him in the nearest truck and extract him while your teammates defend the warehouse area. Do this quickly before the enemy knows what’s going on.
Yet another choice is to drop from a helicopter, or skydive into the target warehouse roof, drop through the hole in any skylight, and grab El Pozolero, moving him to a cartel vehicle outside.
 With real friends by your side, you have the obvious advantage of attacking from multiple directions, which can aid in removing the three alarms, the generator, the snipers, and the minigun foes, leaving only the foot soldiers milling about to massacre.
You can also have some redundancy, with multiple Ghosts each driving in a vehicle from a different direction, and the one getting to the target first having the prize of dragging El Pozolero to the safest and closest vehicle. Other teammates should create a barrier at the warehouse and defend it while El Pozolero is stowed.
A great plan is to land the chopper on the basketball court after a sniper has cleared the area, and another Ghost has already snuck in at I, grabbed the target, and is waiting at the basketball court itself.
Extraction to San Mateo Alpha
As long as you’ve stowed El Pozolero into a vehicle and you’re heading to the rally point, even if you come under fire you should be easily able to reach San Mateo Alpha; just make sure the sharp turns are taken slowly to avoid tumbling down the hill close to the extraction point. With the Stewmaker in custody, the mission concludes.