
Tom Clancy's Ghost Recon: Wildlands Guide Welcome to Bolivia Tabacal: Madre Coca
Inside Job (Optional)

Objectives
- Kill Madre Coca’s supporters (3)
LOCATIONS
- Pilpintu Farm
REWARDS
- + 500 XP
Brief
Salazar has provided information on a number of Madre Coca’s supporters who are hiding among the cocaleros. As long as these agents are alive, the cocaleros will fail in any attempt to fight the cartel. Madre Coca’s agents must be hunted down and eliminated.
Eroding Madre Coca’s Support
A small farm perched on a coca field cliff in the southeast part of the province is the location where three of Madre Coca’s supporters must be dissuaded of their alliances in the strongest possible terms. This means locating the trio among the cartel goons and innocent farm workers, and then taking them out. Any cartel members are fair game, too.
Pilpintu Farm: Recon
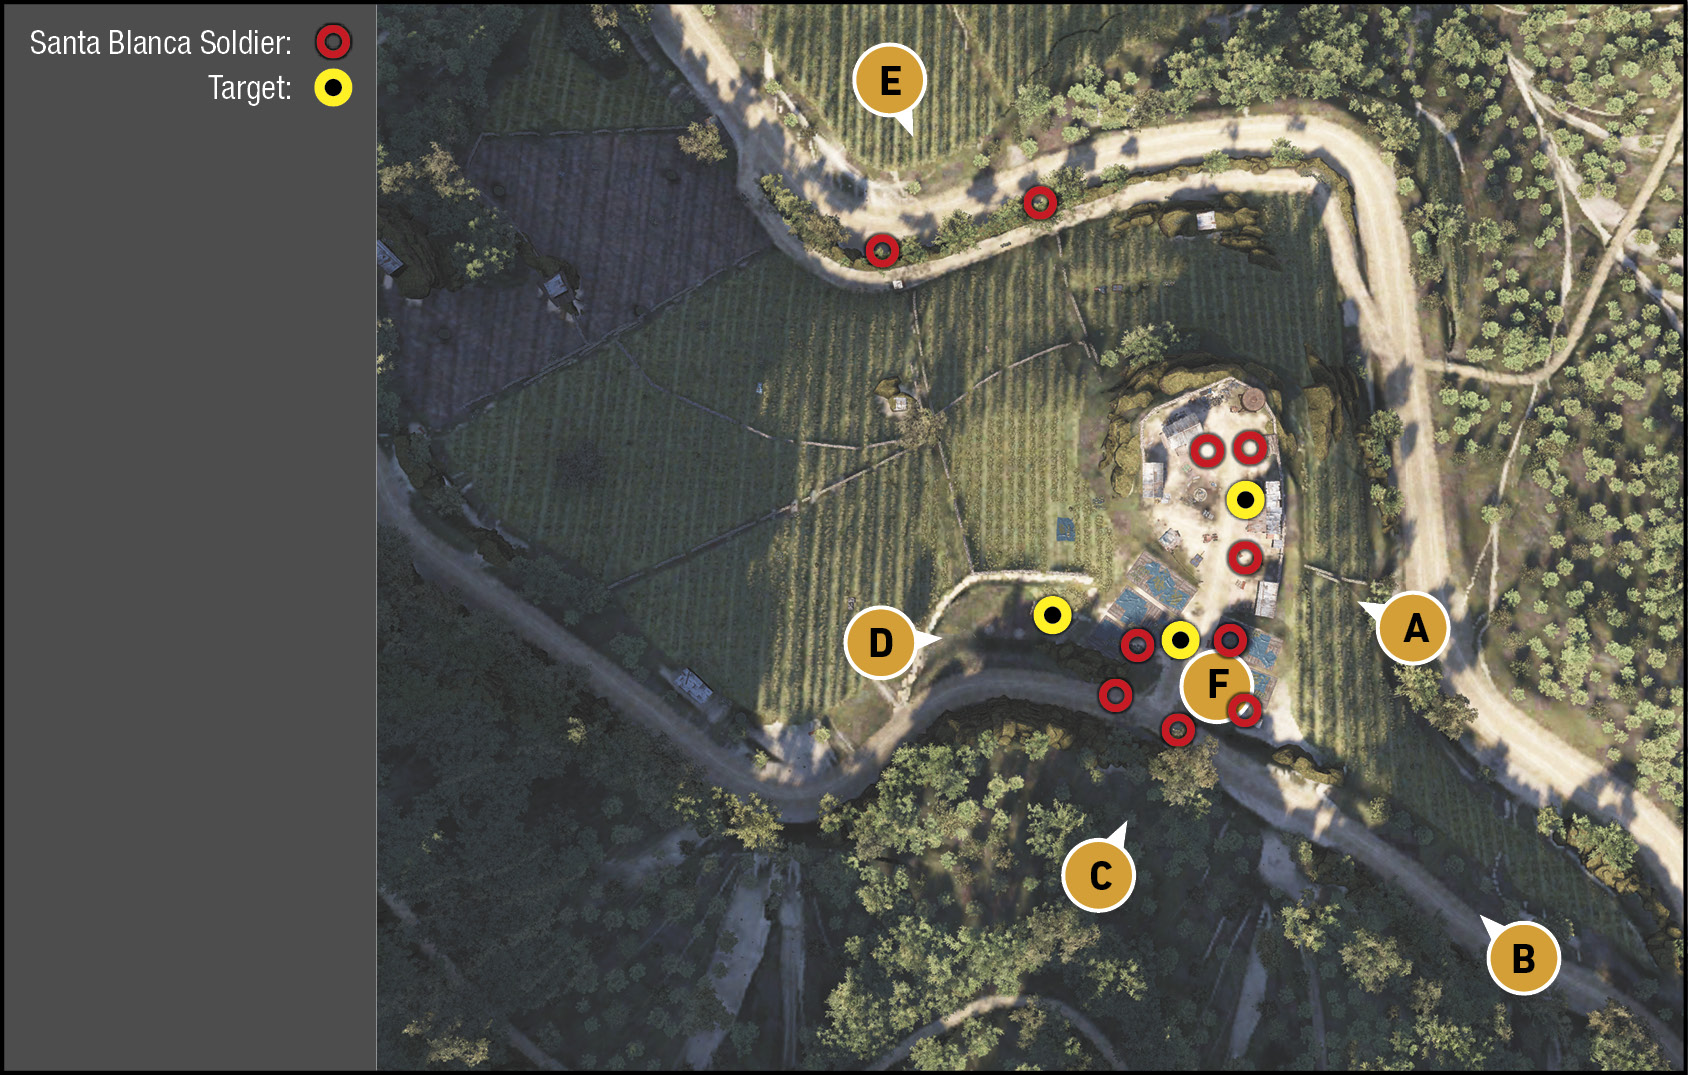
TACMAP
The cliff-top location of the farm, overlooking some very steep coca fields. The main infiltration points are mainly to the west, east, and south. It’s also critical you spot the three vehicles parked in the vicinity of the farm (an SUV at the north end, a pickup close to the washing pools, and a flatbed truck on the road to the southwest). Any of these can be used by your targets to escape in, if you spook them into fleeing. So make your shots count.
Eastern Fields and Outbuildings
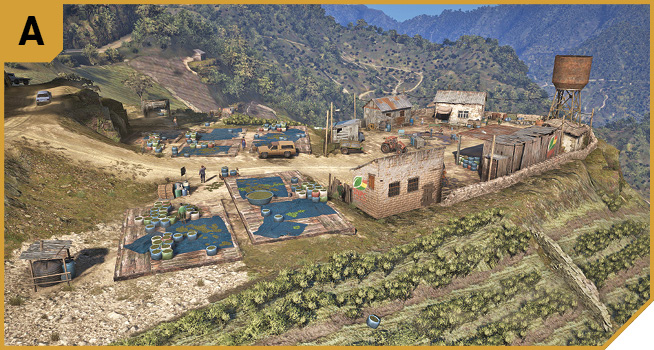
The fields just east of the stone boundary wall and washing pools is a little exposed, but you can park up on the road just east of here, enabling you to reach a battle-worthy vehicle if the mission goes sideways. You can also line up both the two front targets and drop them with a single burst if you’re quick enough.
South Road (East)
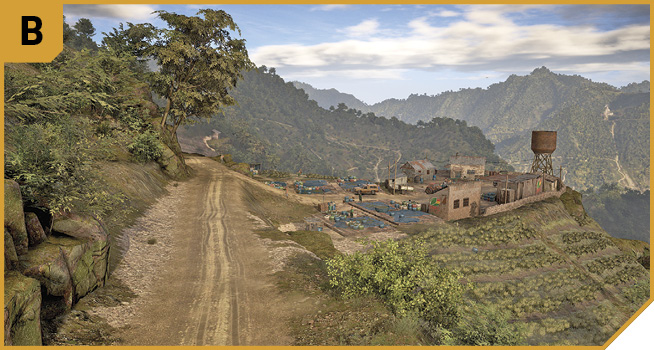
A roadblock of vehicles or teammates is a good idea here, as this is a possible escape route of one or more targets. Should you need to pursue the targets, they drive southeast into Monte Puncu Province, where they can be tackled by shunting them off a cliff road. Feel free to land a chopper near here if you want an airborne pursuit without the worry of Unidad or cartel reinforcements joining the chase and getting on your case.
Sniper’s Vantage Point
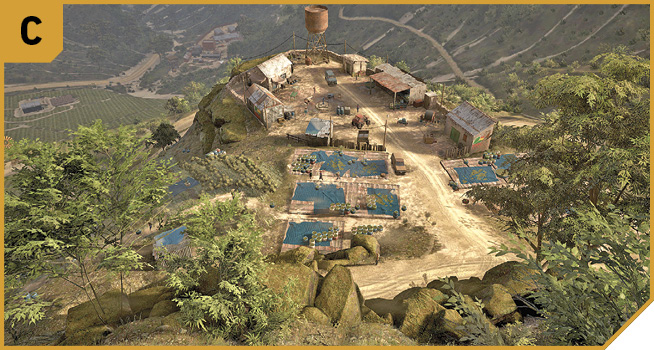
This relatively safe sniping abutment can be accessed by heading in from B, and up the slope without being seen. The drone can easily be sent from here, the three targets tagged, and (if you’re in Co-op) all three targets can be bagged by a different Ghost in unison, making this the quickest mission completion of all! For Solo Ghosts, tag the target nearest you, so the others have farther to run when escaping, then attempt to halt any vehicles as you descend to intercept.
South Road (West)
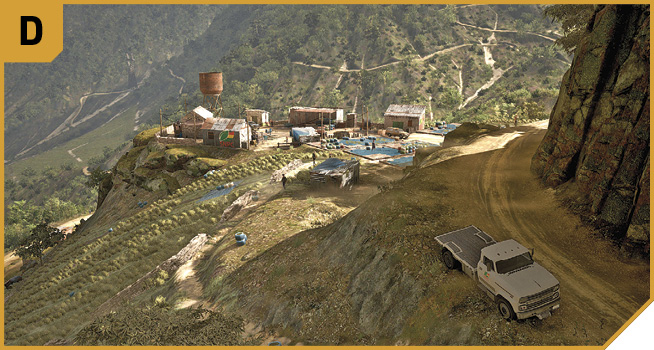
It’s worth hanging back to the east of D if you’re approaching from this direction, as the foes standing at the farm entrance can easily see you. The height of the road means you can move to the rocks just past the parked flatbed (one getaway vehicle option for the targets, so be ready to neutralize it or move it away from the area before beginning your assault), and aim at the two nearest targets from here, or behind the small metal shed.
Lower Fields (North)
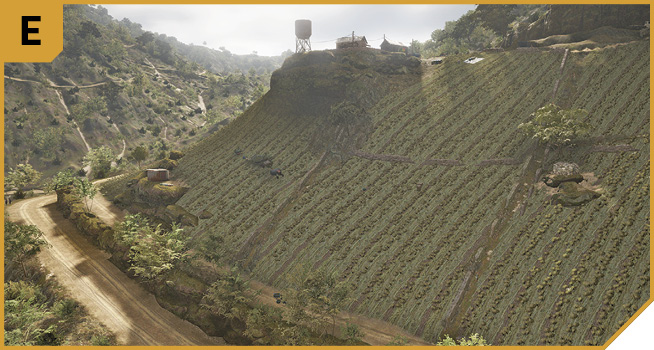
The steep coca fields to the north of the farm have a couple of cartel foes, who usually aren’t a threat unless you’re completely botched the target takedowns. Entering from this direction isn’t a particularly sound plan, though you can drop the two foes without being discovered, before creeping up and around to the low stone wall on the edge of the farm itself. Here you have an excellent takedown opportunity to hit one of the targets, as well as cripple one of the getaway vehicles. But doing this from far away is safer and is just as easy.
|
 Targets: Farm Courtyard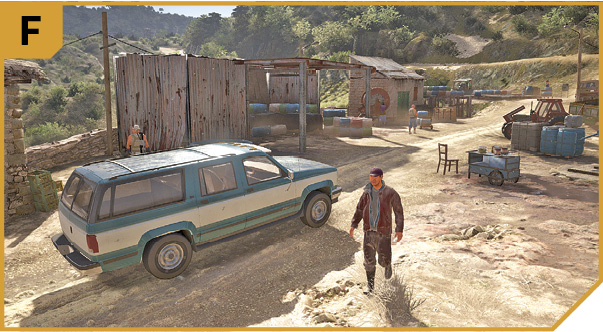
Pilpintu Farm: Other Tactical Advice
 It’s always a good idea to drive here in an armored vehicle, ideally with a minigun, and park it out of range of the enemies (but along the main road to the south, or park it on the dirt road below and east of the farm). Retreat to this vehicle if one of the targets makes a run for it.
Place your team close to the roads, so they can hopefully waylay any target attempting to flee. Then snipe the target closest to the road. Immediately send your team in to storm the farm, and drop down from your sniper’s vantage point and lob a grenade at any leaving vehicle (unless you want to use it!), lessening the chances of a car chase.
You may wish to prime a charge on the flatbed prior to the assault, so it can’t be used to escape, and block the main road to the south with vehicles to slow down fleeing foes.
 With the benefit of three additional humans on your team, this mission can last seconds rather than minutes. It’s simply a matter of each Ghost targeting a separate enemy, usually from a good sniping point, and tagging them in unison. With all three targets falling at the same time, the fourth Ghost can provide the getaway vehicle, or infiltrate the farm and prime the SUVs a foe might escape in with explosives (or use a grenade launcher on them) so they never make it out of the farm compound alive.