
Tom Clancy's Ghost Recon: Wildlands Guide Welcome to Bolivia Itacua: La Yuri Y El Polito
Armadillo’s Commander

Objectives
- Reach F.O.B. Armadillo
- Locate the Unidad captain with the drone
- Interrogate the Unidad captain
LOCATIONS
- Forward Operating Base Armadillo
REWARDS
- +350 XP
Brief
The Unidad captain of F.O.B. Armadillo frequently sends prisoners to La Yuri and El Polito for interrogation. Get to F.O.B. Armadillo, track down the base captain, and find out what he knows.
Forward Operation Basics
F.O.B. Armadillo is along the river on the eastern edge of the Province, just off the main north-south road. It’s wise to stop a little farther away than normal, just outside the circular Mission Area (yellow) on your Tacmap, before engaging in your Recon.
F.O.B. Armadillo: Recon
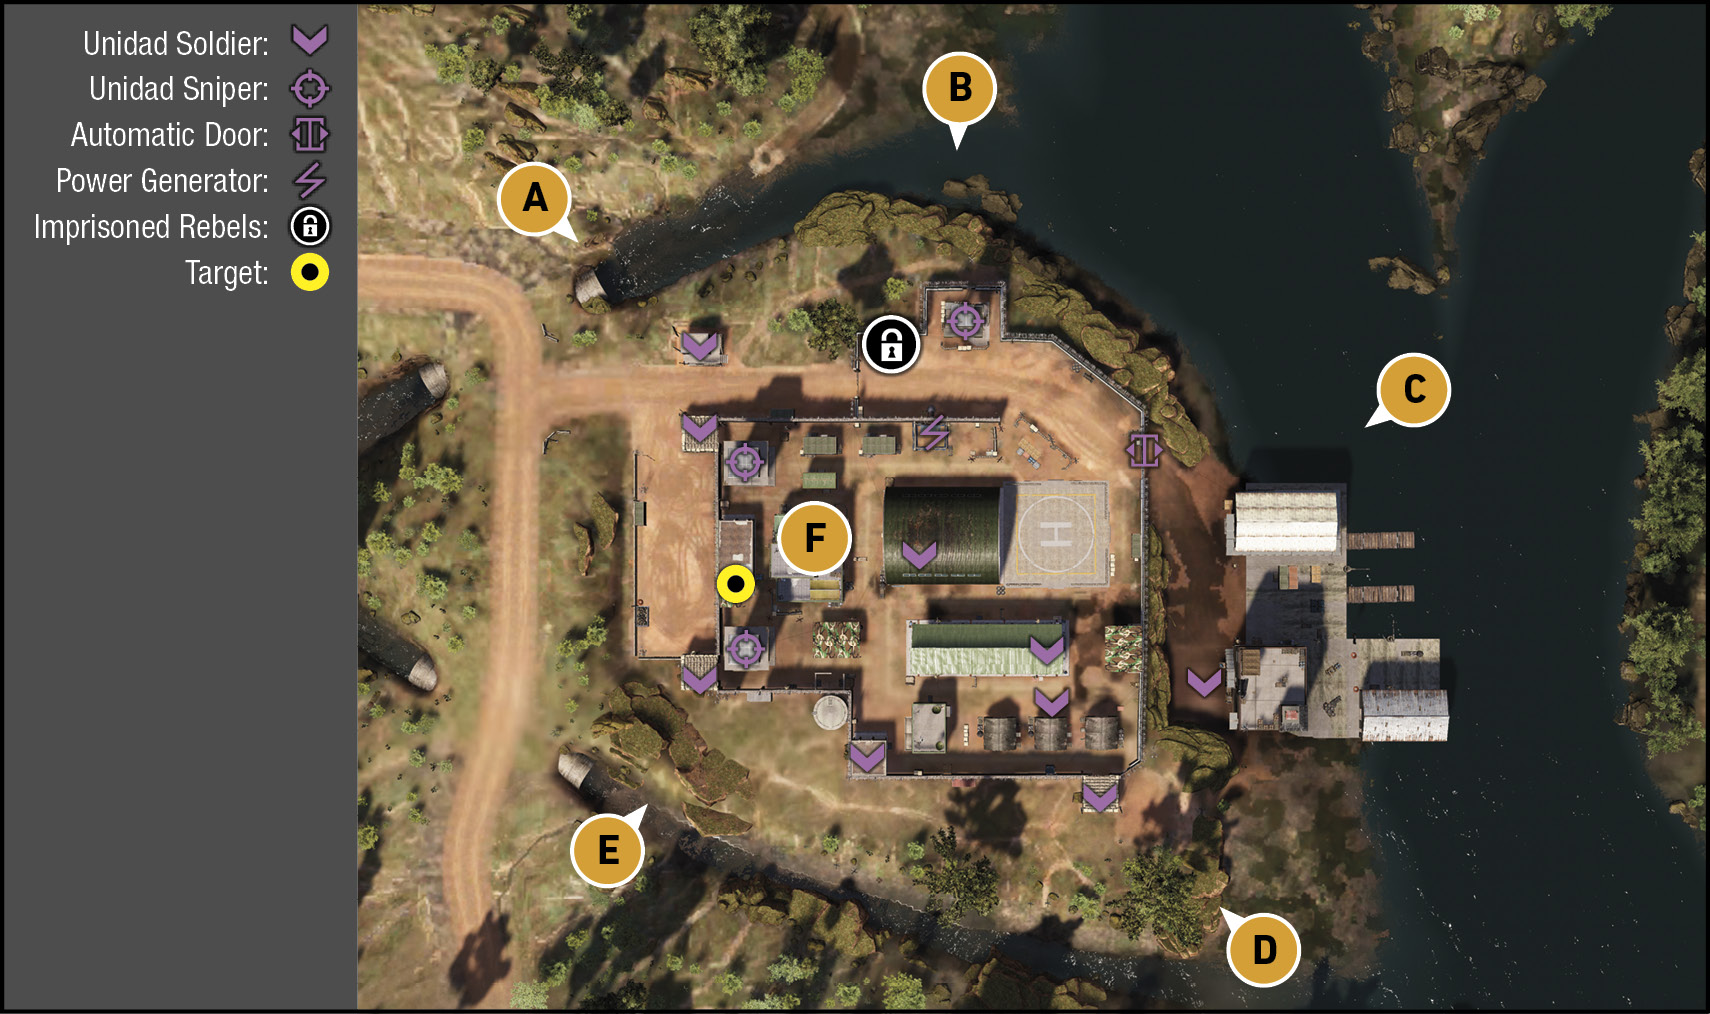
TACMAP
This is a well-defended base with very few infiltration locations (all are flagged on the map), and well-disciplined Unidad soldiers guarding, including three snipers on different towers. Inside is a large hangar, and open warehouse canteen with a number of innocents to avoid embroiling in your battle. The captain requires interrogation, not a bullet.
Checkpoint And Main Gate (Northeast Sniper Tower)
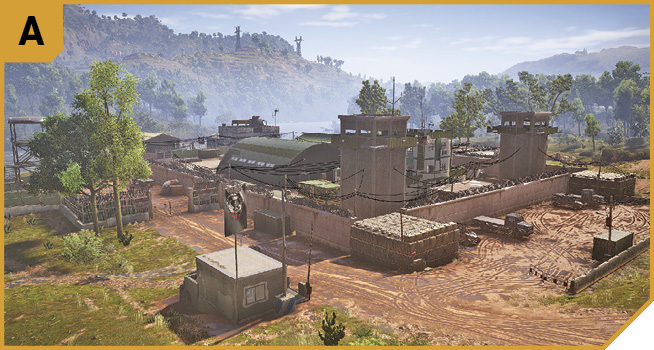
This is the main base entrance, and a guard can quickly ascertain your position from the checkpoint hut. Drop him from range, and watch for foes spotting you from inside the stacked barricade defenses with the tiny windows, by the “PARE” (Stop) sign. These are difficult to penetrate with stealth from the outside, so avoid this area.
The main gates can’t be climbed over (unless you’re standing on a vehicle), but can be destroyed by ramming or with explosives. However, announcing your presence isn’t wise.
Have your sharpshooter take out the sniper on the tower from extreme range, or avoid being spotted and once you’re inside the base, enter the base of the tower and climb to the top, and drop the sniper with suppressed fire.
North Perimeter (Sniper Tower)
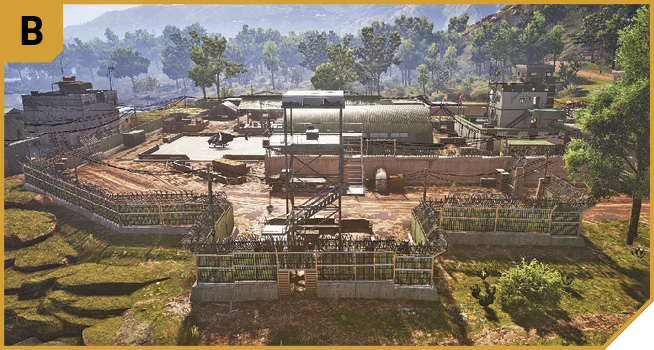
Remove the sniper atop this tower either from range (hiding in the low ground to the north, for example), or you can enter via the opening in the perimeter at the base of the tower. There’s rebels to release from prison to the west of the tower, and you can quickly enter the base from this direction. As the area to the southeast has little cover, conduct a stealth sweep to the west once you’re inside the base.
East Docks And Warehouses
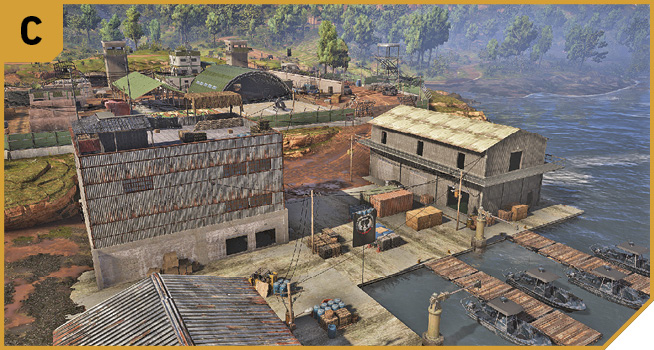
Though this requires some hiking, infiltrating from the river is another option. Beware of a foe around the southern warehouse outside the base perimeter; one of three buildings on the docks. As this area is on lower ground, and the gate into the base requires vehicular ramming, use this when maneuvering around the walled perimeter. Or snipe from the top of the four-story warehouse where the enemy begins his patrol.
Note the boats moored at these docks; they make excellent escape craft, especially at a pre-determined extraction point (such as the water’s edge near B or D).
South Wall And Southeast Perimeter Entrance
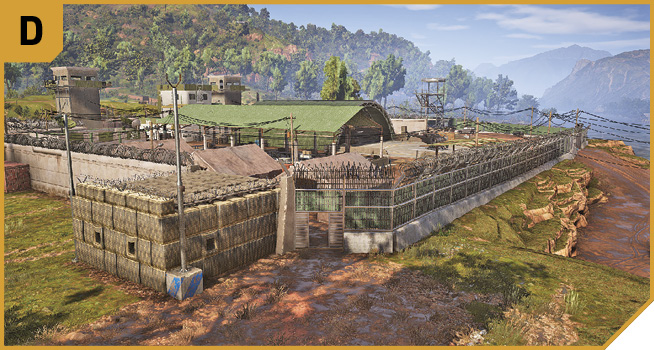
Between E and D is the south wall, which is impenetrable, with barricade defenses, each with an enemy that can easily spot you. The tiny windows can have grenades thrown through, or a well-aimed shot can take down these defenders, but not without likely compromising stealth. Instead, crouch below and hug the walls below these defenses. Point D is an excellent infiltration location, as long as you’re aware of the Unidad foes within the base and can circumvent them.
Southwest Perimeter Gap And Sniper Tower
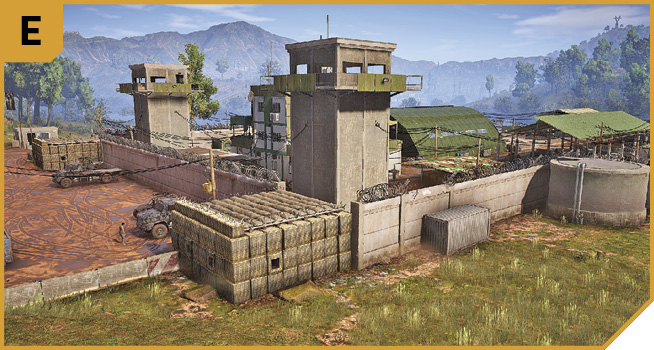
You’re spotted from a distance if the sniper on this tower isn’t removed. One Ghost can achieve this from range, but you can also climb the container crate and the gap in the barbed wire perimeter wall to drop into the base; then climb the sniper tower and remove the foe at closer range. This tower can then be used to help defend your teammates.
|
 Base Interior And Target Location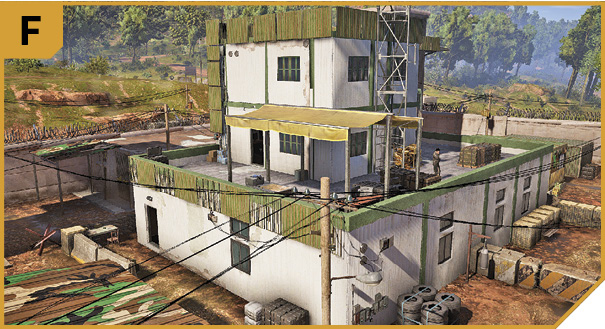
F.B.o. Armadillo: Other Tactical Advice
 Disembark at A or E, and have your team work their way around the perimeter to your favored gap in the defenses (D or E are excellent choices). Remove the three snipers from their towers before entering the base. The optimal access into the base is via the container crate and over the wall at E. Then quickly drop the three or four foes in the vicinity using suppressed fire; use the buildings as cover and don’t get spotted! Then, quickly grab and interrogate the captain while your teammates mop up (after you move them into the base).
 Giving each Ghost a specific role is the best use of your team and time. Instantaneous takedowns of the three snipers from range removes the Unidad’s long-range viewing. Don’t forget to tag the foe at the checkpoint (A) while a second Ghost clears foes at C, then enters at D. One Ghost entering the gap in the barbed wire wall at E, and using Solo tactics to reach the captain, is a great idea. Have at least two Ghosts quickly drop interior foes with suppressed fire so the alarm isn’t raised.