
Tom Clancy's Ghost Recon: Wildlands Guide Welcome to Bolivia Caimanes: El Cerebro
Submarine Fleet 1

Objectives
- Destroy the drug sub
LOCATIONS
- Outpost (West Outpost: Caimanes)
REWARDS
- + 500 XP
Brief
El Cerebro has built a flotilla of three submarines that are capable of making the run from Caimanes all the way to Florida. This represents a major increase in the cartel’s smuggling capability, and it must be stopped. Locate and destroy these submarines.
River Rampage
Taking out the first submersible involves entering a mooring warehouse that’s tightly controlled by close to 20 armed cartel thugs, who are guarding a rather makeshift jetty of observation towers. They’ve commandeered a huge suspension bridge well, and placed a mortar nest on top of each bridge tower. This means a quick and explosive completion isn’t really possible due to the tricky navigation needed to reach the warehouse. Unless you drop in from above, of course.
Outpost (West): Recon
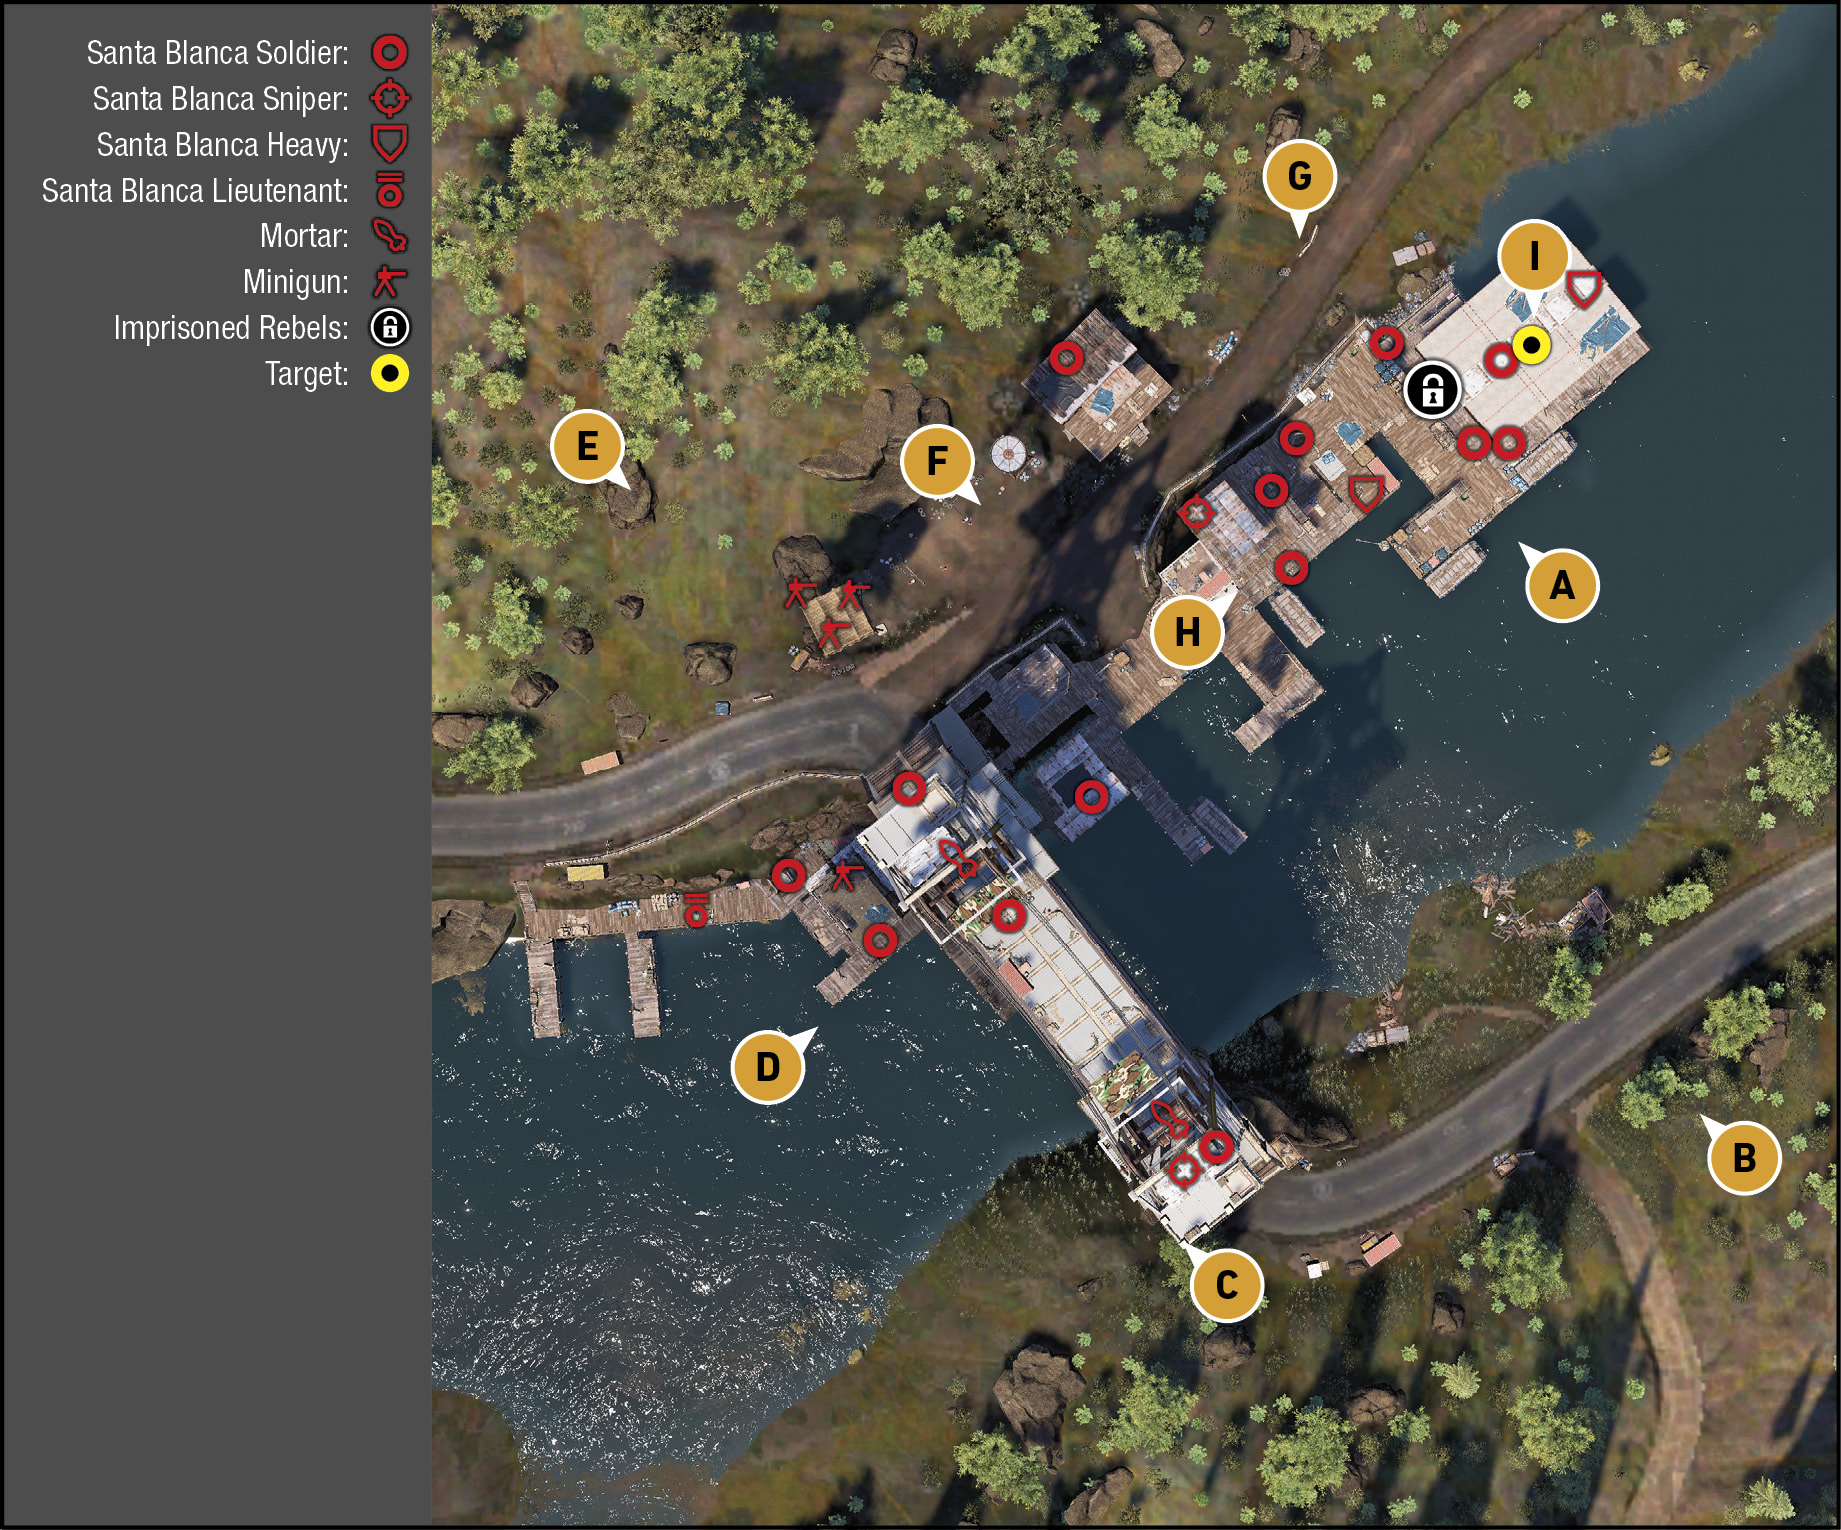
TACMAP
Separate this Outpost into three distinct areas, all south of the main road on the north bank of the river. There’s a western jetty area with a minigun nest and rickety tower, all under the massive suspension bridge tower. The second area is the bridge itself, with a roof span and two towers to assault, if you’re worried about mortar fire (and haven’t neutralized the mortars with your own Rebel Support mortar request). Finally, there’s the maze of wooden gantries and buildings northeast of the bridge, where the majority of the foes, and the submarine, lies.
River Barge
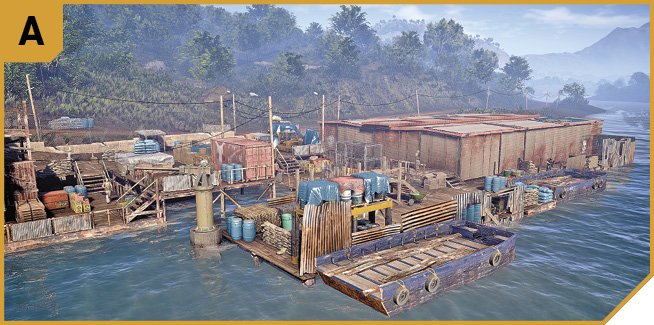
If you’re not approaching the target by land or air, this river barge is the nearest location to deploy onto if you’re after a quick dash up and over the corrugated metal fence onto the floating deck, and into the submarine warehouse (I). You only have around three or four foes to face if you know the exact route, and the rest (who are likely to be alarmed if you aren’t swimming up to this infiltration point) should already be feeling the heat courtesy of your teammates.
Sniper’s Hill (Southeast)
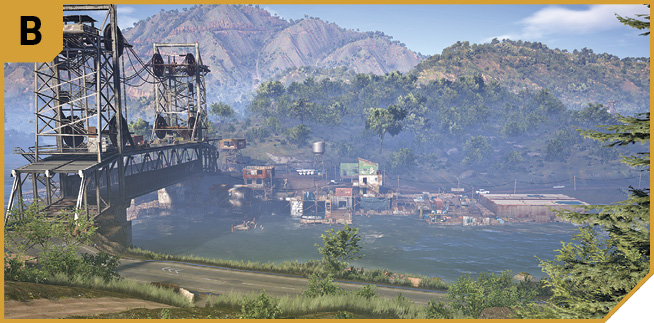
A reasonably high spot to recon the area, aim up at the snipers on both bridge mortars, and most importantly, snipe across the river at the outpost itself. You’re not likely to face enemy retaliation, and can keep a fellow teammate who’s going for the target. Train your rifle on the floating deck structures and cover your fellow Ghost.
Mortar Nests and Suspension Bridge
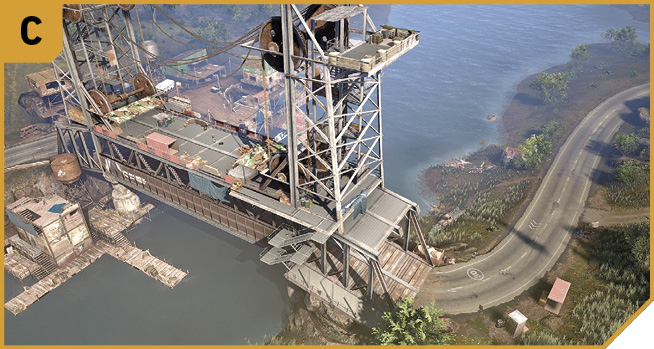
The north and south towers of this rusting suspension bridge each have a platform around five floors up from the road, which is the least dangerous part of this structure. Directly above the road is the top of the bridge where a cartel thug is located. Expect one or two more thugs atop each tower, where a mortar is also stationed.
Use the metal stairs near C to climb (south tower), as this tower also has a sniper to neutralize, and ascending using the steps on the north side of the river makes you more easily spotted by foes inside the Outpost. Or, you could try parachuting down to either mortar nest.
Defeating the light defenses up here allows you to put the enemy mortar out of action, letting you use a chopper. Plus, the vantage point enables exceptional sniping opportunities.
West Jetties
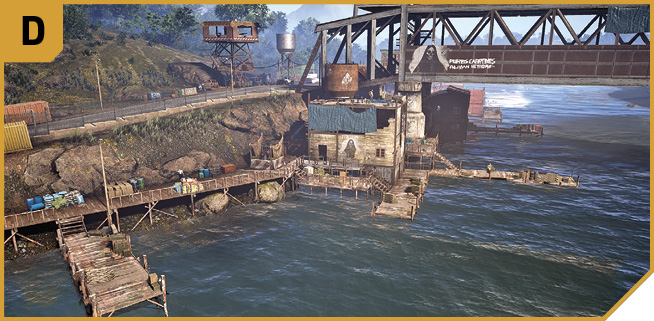
This isn’t a particularly wise infiltration point if you’re heading in from the river, as there’s a minigun nest on the rickety wooden platform and small tower at the foot of the bridge on the west side. Deal with this gunner by shooting him from the bridge road junction so you don’t have to shoot through any defenses. Otherwise, this area can be maneuvered through, as there’s a narrow deck bridge under the main suspension bridge linking to the east side of this Outpost.
Northwest Hill and Minigun Tower
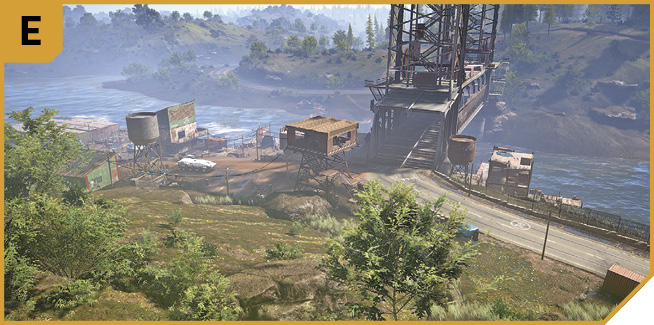
A wooden tower at the north end of the bridge road has three miniguns, but the place is usually unmanned, making it a key area to infiltrate and snipe from. Rifle fire toward H is better than using the minigun, unless you’ve roadside vehicles to mow down (from any direction!).
The sloping grassy hillside has enough height for you to use the area to recon the bridge, shoot the foes up on the mortars (with careful aiming), and provide covering fire to Ghosts inside the Outpost itself.
Roadside Café and Main Entrance
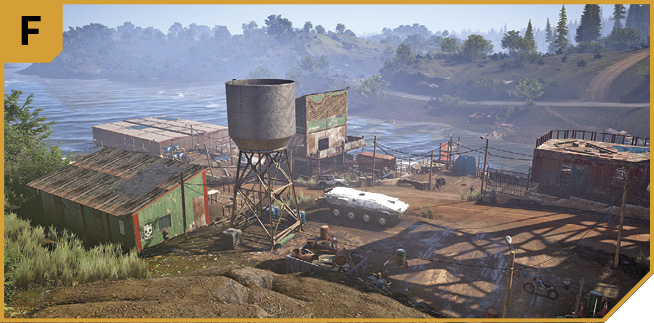
Don’t overlook the foe in the green roadside café, before studying the main entrance into the Outpost itself. Though there might be some decent vehicles (such as an APC) to commandeer, the concrete barrier and mesh fencing along the side of the road can’t be driven through, so the main gap in the fence between the observation posts on the rickety river platforms is the only way in from the road.
North Hills
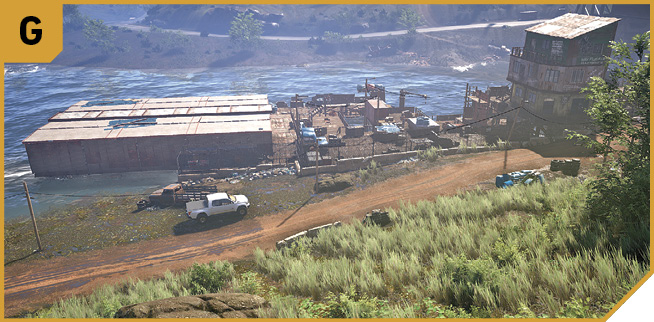
If your sniping capabilities are good enough, you can tag foes on the bridge, and throughout the yard from here, though many of the enemies at H and I aren’t easily lined up due to the undergrowth and buildings blocking your view.
Central Yard and Observation Post
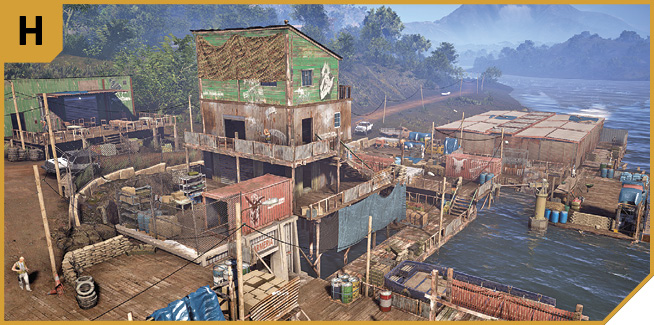
The rough maze of wooden shacks, walkways, equipment, and well-armed foes makes this a tricky place to maneuver through. It’s worth heading from southwest to northeast, removing foes from the west docks and bridge first, before heading into the Observation Post (you can’t reach the upper balcony) and pushing forward toward the submarine warehouse.
You may find sneaking along the inside (south side) of the road fence lets you ignore the drop down to the lower decks and walkways, and offers an easier time to reach your objective. Prepare for fierce fighting as you go.
|
 Target: Submarine Warehouse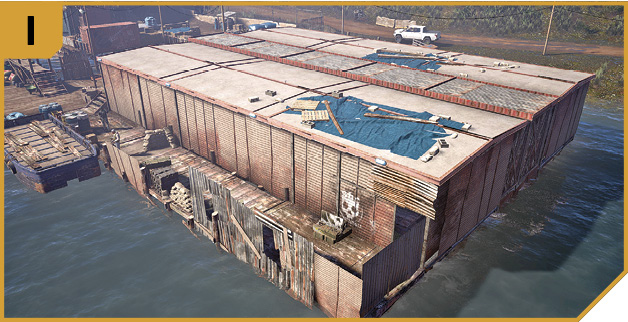
Outpost (West): Other Tactical Advice
 Depending on how you want to play this, the biggest concern is likely to be neutralizing the mortar nests atop each bridge tower. Start from C and ascend to defeat the foes on the south tower, then move to the north, and you can order your teammates into the Outpost (H) and provide covering fire, or follow them in after removing any adversaries to the west (D).
Or, you might wish to minimize carnage, maximize stealth, and swim from the south bank to A, hop over the low wall or climb straight onto the floating dock. Work your way with suppressed fire northeast to the submarine warehouse entrance, and clamp C4 to the submarine hull before leaving the way you came. Detonate when safe.
Or you could just land a chopper on the submarine warehouse roof, drop down to the entrance, destroy the sub, and then flee, but getting away is far more difficult than dropping in.
 The major mortar nests are the biggest initial concern if you want to overwhelm this area instead of infiltrate it. Strafe the two towers with helicopter gunfire, then target the enemies on the jetties too, raking the Outpost until there’s a safe route to the submarine.
Or, try a variation on the Solo plan; either head in from A, or push northeast from D. With Ghosts backing you up at B, C, E, or F, perhaps creating disturbances, lobbing in area-of-effect explosives, and generally causing havoc, you can destroy the first submarine relatively easily, providing you know how tight the entrance into the mooring warehouse is.