
Tom Clancy's Ghost Recon: Wildlands Guide Welcome to Bolivia Pucara: DJ Perico
Radio Santa Blanca
Objectives
- Reach DJ Perico’s radio station
- Enter the radio station without being detected
- Neutralize the drone jammer
- Scan the rooftop antenna with the drone
LOCATIONS
- Charamokho Village
REWARDS
- + 500 XP
Brief
DJ Perico’s radio station is located in the village of Charamokho. Search the station; if Perico is there, take him into custody.
Two Turntables and a Submachine Gun
Just over a click northwest of Pucara Delta, in the far northern reaches of this province, is the mountain village of Charamokho. The cartel has a relatively small presence in the northern part of the settlement. You are to enter and check the radio broadcast building for signs of Perico, then scan a radio antenna. There’s a drone jammer active in this area, so removing that before or after checking Perico’s building is imperative to complete the mission.
Charamokho Village: Recon
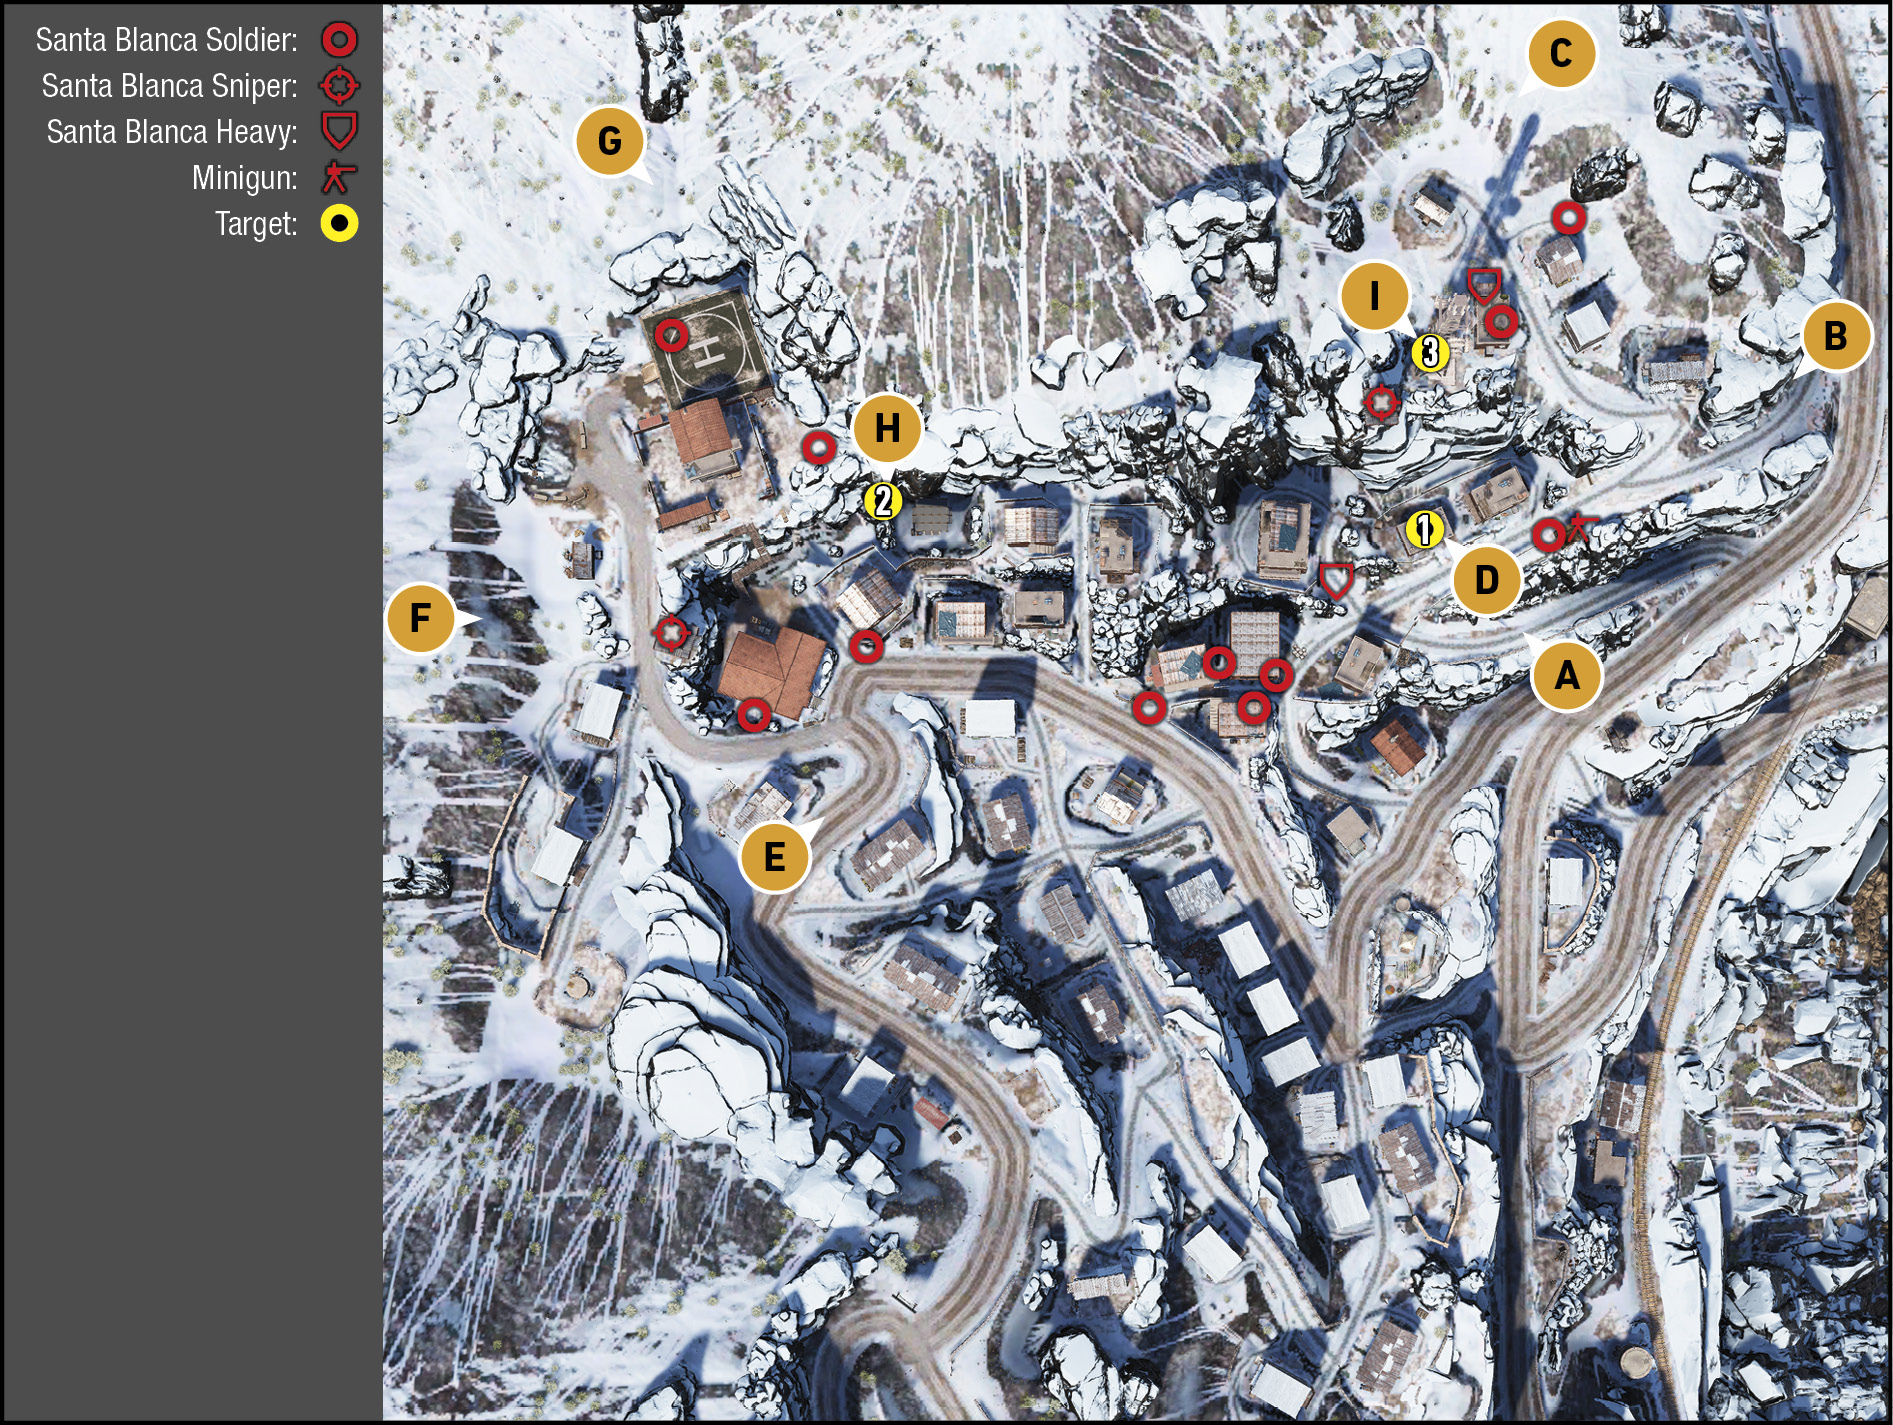
TACMAP
With around 15 men to worry about (these can be attacked only after the first objective is met, or not attacked at all if you wish), only the rough terrain makes this infiltration a little more difficult than normal. The enemy are positioned in a thin line from east to west, bookended by a sniper tower at each end. If you’re interested in removing all foes quietly, start on the outer edges, and don’t approach from the main roads to the south.
South: Main Road and Gates
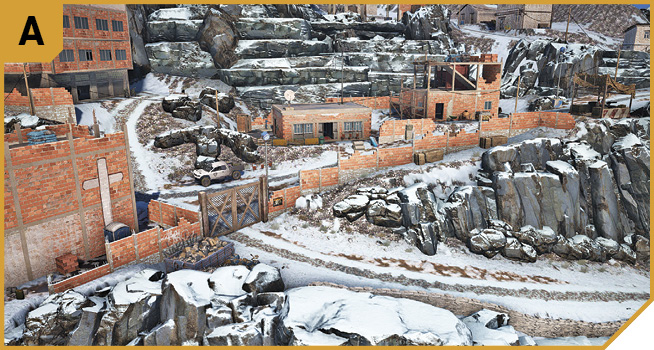
Though downhill from the radio station, and blocked by a gate, you can quickly (and quietly) climb over the brick wall between the gate and the minigun nest (and sneak up to bring down the gunner from behind), before slipping into the building without being seen; which is an imperative part of the first objective.
East: Rock Outcrop and Hill Road
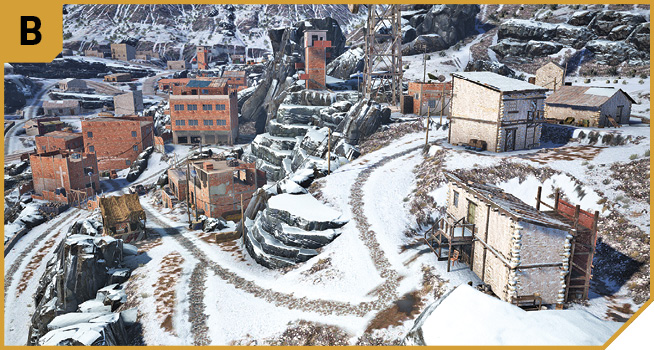
You can head up from the main road, to the narrow stone building with the wood scaffold on it, near a rocky outcrop offering views from east to west across the area. Watch for foes ahead and right (northwest) of you, as well as that minigun operator. Try sneaking to the right of the minigun, behind the buildings north of it, and access the radio station from the rear (north), entering via the west doorway near the outhouse.
The area by the antenna features a sniper tower, so remove this foe with silenced ranged weapons as early as possible. This is a good vantage to try from; just watch for three foes in and around the comms center when sneaking in.
Northeast: Alpaca Field
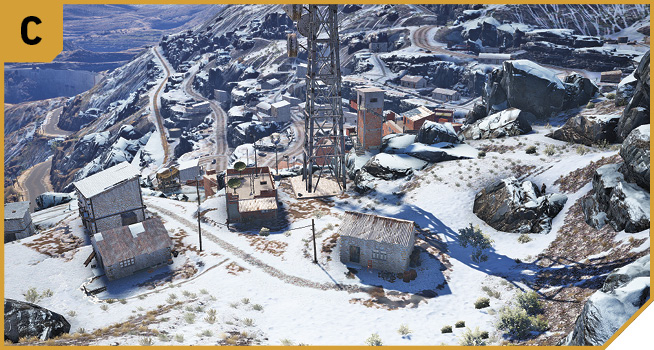
The field of alpaca is another good infiltration point, as you can split your team, with some heading across the upper ridge to the rock edge overlooking H to remove the drone jammer, while you head down to the radio station. Make sure you remove the sniper from the tower. This is also the best location to track and take down the three foes near the comms center.
When you’re descending into the radio station, drop down to the west of the sniper tower, via the steep rocks, over the wall by the outhouse, and in via the west doorway. This assumes the sniper has been neutralized first.
|
 Target #1: Radio Station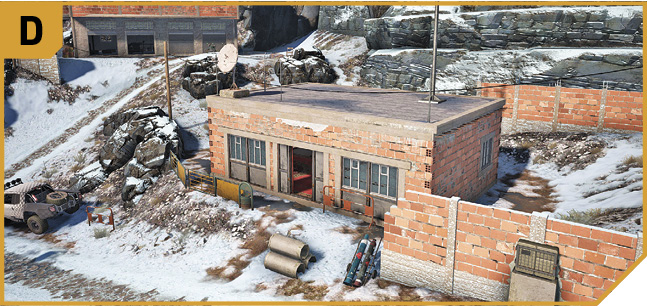
Southwest: Main Road to Hospital
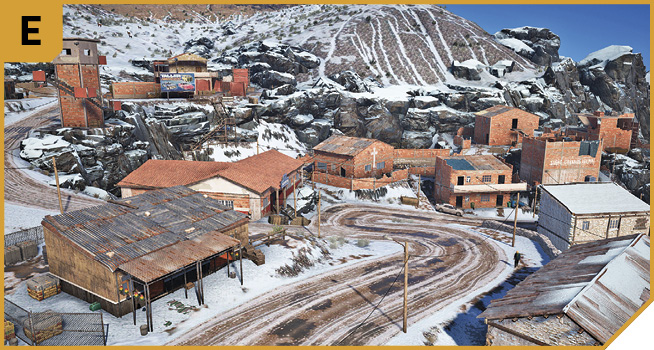
Stop your vehicle before you reach the twisty bend by the hospital building, as the sniper can easily see you. Instead, take a ranged position and remove the sniper in the tower from just south of E, or from F or G. You can do this as part of a secondary team in Co-op play, while the other duo finish the first objective. Or, in Solo mode, you can park up and start to sweep from west to east, though this is dangerous and pointless until you’ve found the radio station (as you need to enter without being seen).
West: Tundra Slope
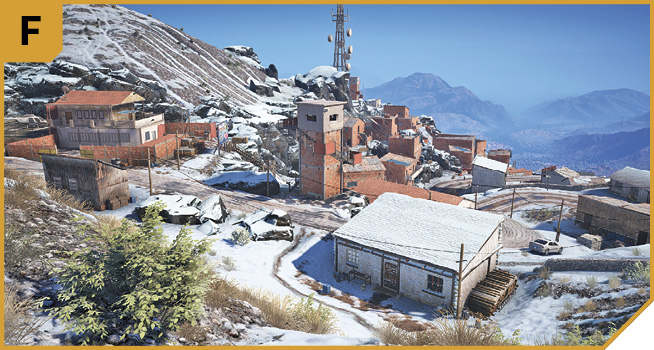
A good, if exposed area to snipe and take out the sniper from, before checking the mansion by the helipad, and working west to east to neutralize foes. Head around to the north, to G to get to the drone jammer; it’s easier than the narrow paths the enemy is guarding.
Northwest: Helipad
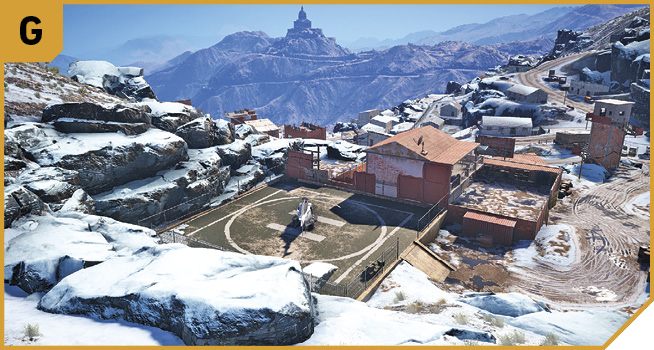
With large flat rocks to hide behind, and easy access to the short cliffs above the drone jammer (or even access to C), this is a great infiltration point. You can drop down and deactivate the jammer using the lever, allowing you to skip the first objective completely, then climb up the rocks to the east, to the area north and above the village, where you can release the drone.
|
 Target: Drone Jammer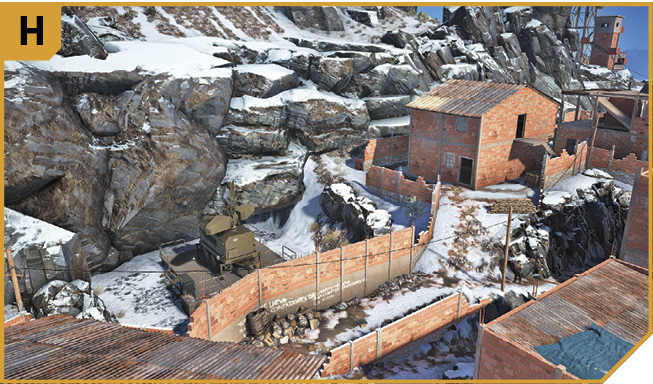
|
 Target: Antenna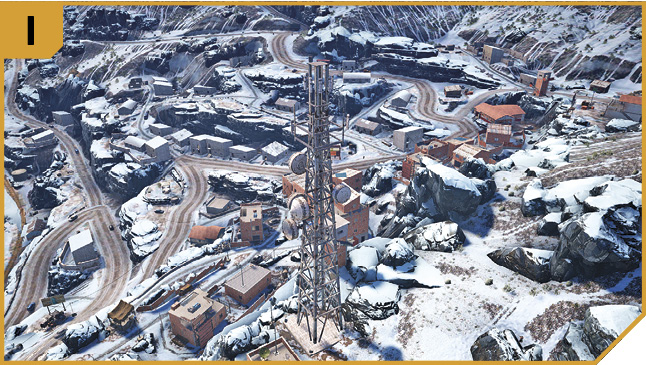
Charamokho Village: Other Tactical Advice
 Enter from A, hopping over the brick wall by the gate, and into the radio station. If you have an explosive drone, you can then send it to the jammer, destroy it, wait for the cooldown, then use it again (all from inside the station) to reach the antenna.
Or, after finding the radio station, fight your way westward through the streets, staying to the north and engaging the enemy if you need to before hopping the brick wall to the jammer and destroying or deactivating it. Retreat to a safe distance or clear the entire area of foes before flying the drone to the antenna.
Or, after finding the radio station, head northeast, killing the minigun enemy, and starting a thorough sweep of the comms center and sniper tower. Then cross via the rocks to the north, to the helipad, and remove the other sniper and foes in and around the mansion. Work back to the jammer, heading east and clearing the cluster of enemies in the middle of the map.
Or, you could check the radio station building using a drone, destroy the drone jammer using an explosive drone, and then use a drone to scan the antenna, all without entering the main area!
 Your Co-op chums simply make the subsequent objectives quicker and easier to complete. Have one Ghost hop the brick wall at A and enter the radio station, while a second stands atop the drone jammer and destroys or deactivates it, while a third waits at I with a drone already hovering near the antenna.