
Tom Clancy's Ghost Recon: Wildlands Guide Welcome to Bolivia Special Missions
Ramon Feliz

Objectives
- Locate Ramon Feliz
- Confirm Feliz’s identity
- Check Ramon’s computer
- Interrogate the thief
- Recover the data
REWARDS
- + 350 XP
- + 7 Skill Points
- +10,000 Comms Tools
LOCATIONS (La Cruz)
- Santa Elena
- Suspect Pickup Truck (Flor De Oro)
- Outpost (South)
Difficulty

Brief
Ramon Feliz is a popular blogger who’s spent months making Santa Blanca look like heroes. Now he’s turned on them, breaking a story about a cartel child trafficking ring. We need to get to Feliz and find out what he knows before Sueño has him killed.
Social Murder at Santa Elena
Ramon Feliz needs to be checked on; it seems going against the cartel on social media isn’t a wise move. It proves to be a real problem for Ramon once you discover him at his home. Then it’s a swift chase to track down the thug responsible for taking a selfie (and a hard drive) from the scene of the crime. Fortunately, Bowman already has the idiot’s geotagging data. Finally, the location of the hard drive (a cartel outpost) is located, and the data must now be retrieved.
Santa Elena: Recon
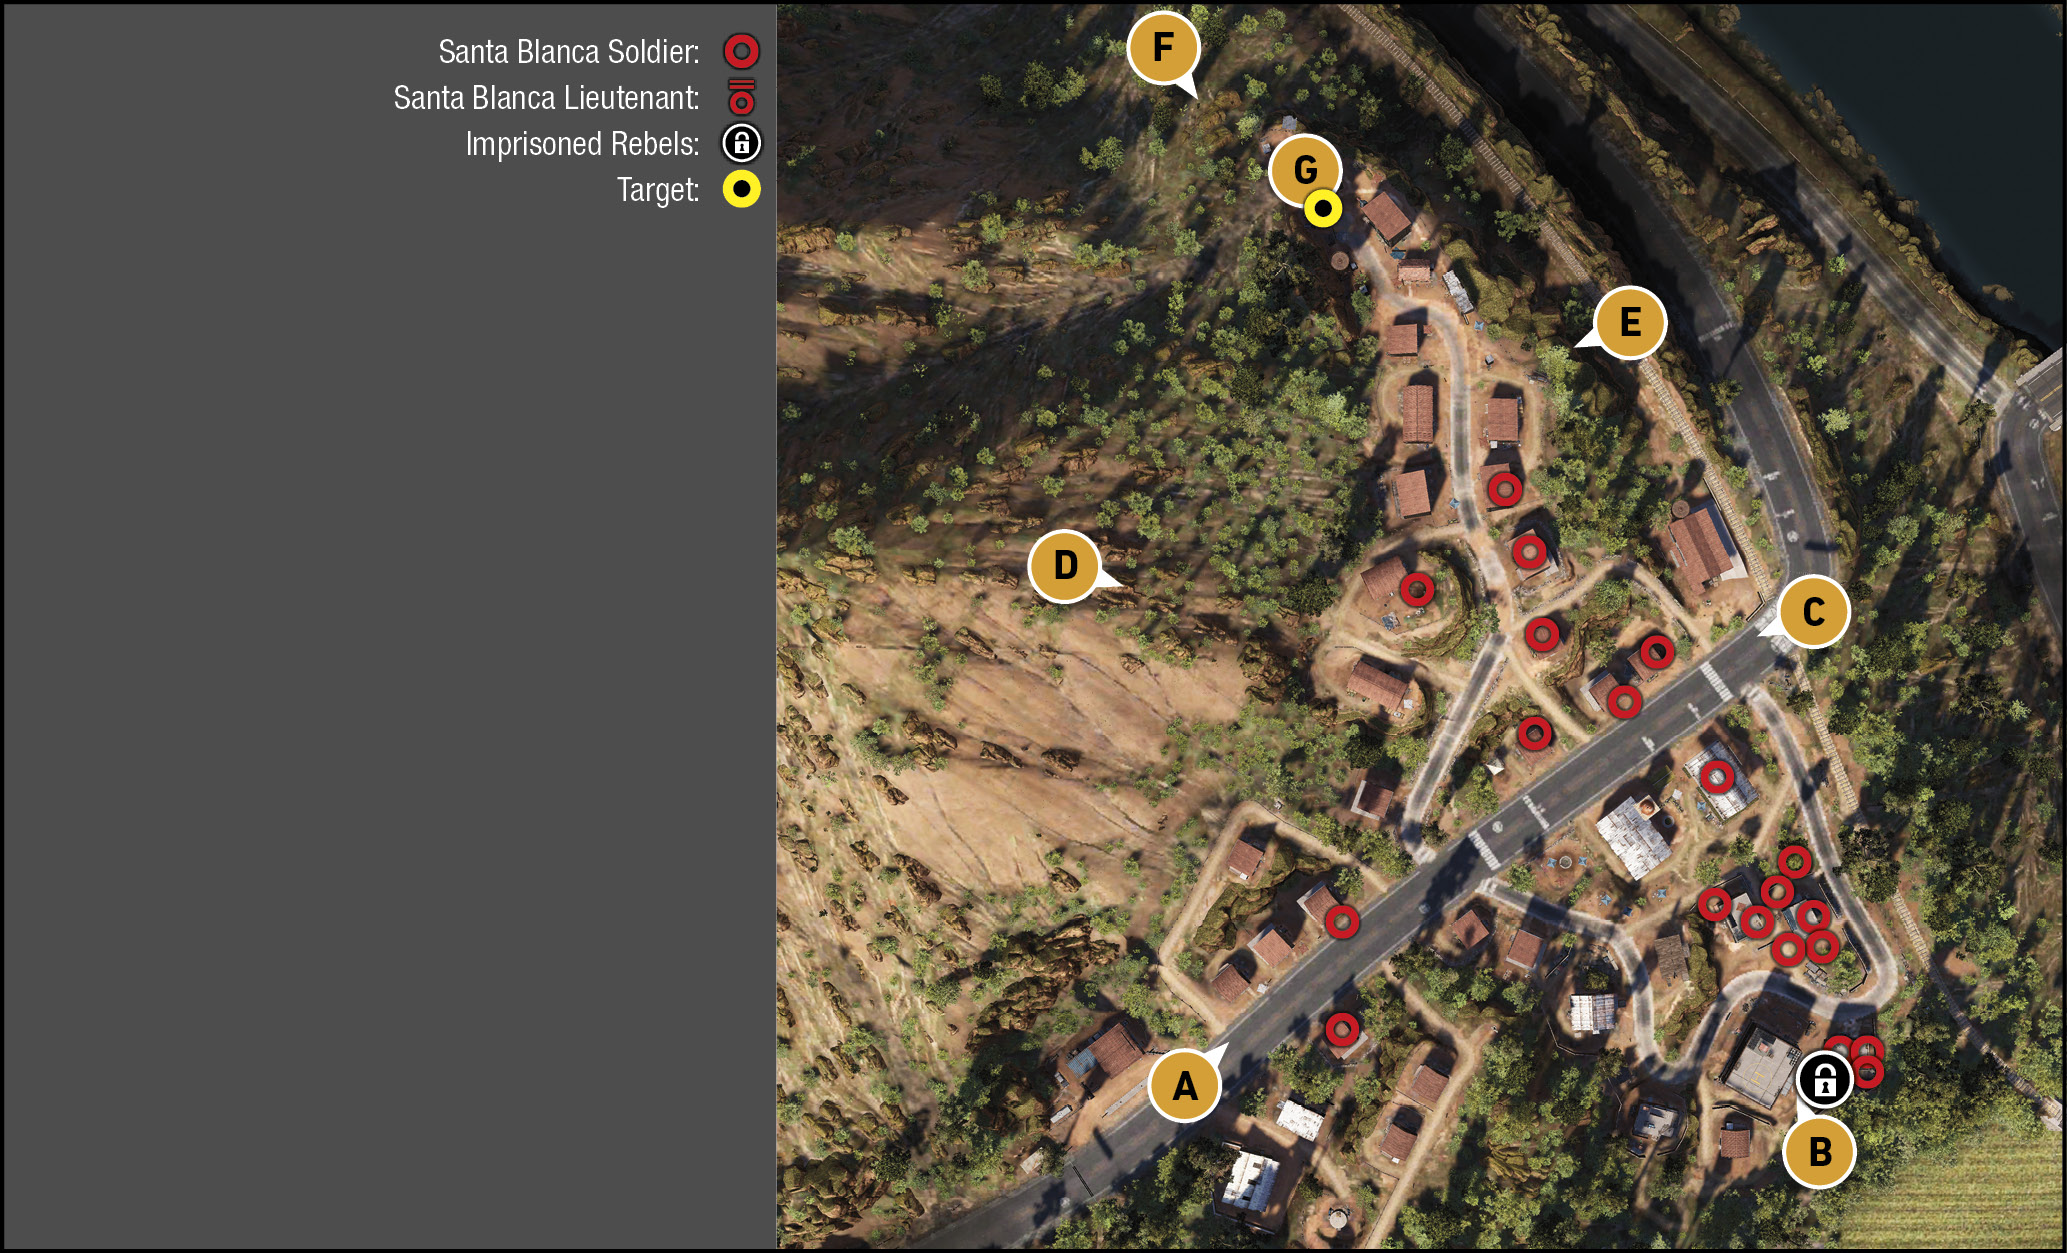
TACMAP
Ramon Feliz’s house is at the north end of this settlement, on higher ground. This allows you to investigate his residence without having to engage the few cartel foes in the area, mainly across the main east-west road to the south. As you’re here to check on Ramon’s safety, and then give chase, getting embroiled in a fight at this location is not only unnecessary, but it can fail the mission if you take too long, and the thief with Ramon’s hard drive gets away.
Southwest: Main Road
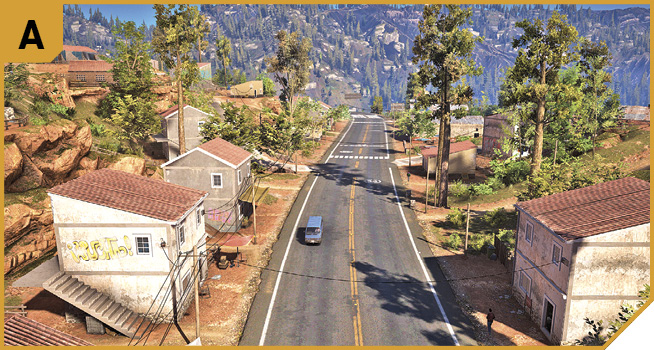
It’s relatively easy to enter the town via here, as there are minimal enemies, usually mooching around the small buildings at the side of the road. Drive past, or quickly remove them as threats.
Southeast: Warehouse Helipad and Hangman’s Stage
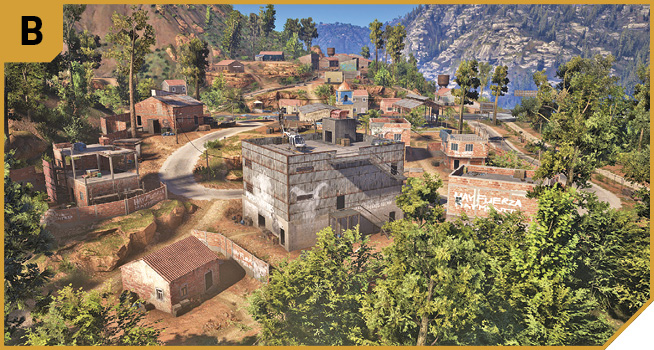
The cartel has a presence in this village, as the stage with the corpses attests to, and a cluster of them may be in the vicinity of the hanging stage, or around a large multi-floor warehouse with a helipad at the top. Though you can approach from the gaps in the perimeter wall to the south, freeing rebels in cages as you go, this is superfluous to your mission parameters. However, if you must engage the enemy, do this before investigating Ramon, so you’re not fighting while the thief with the hard drive is getting away.
East: Main Road
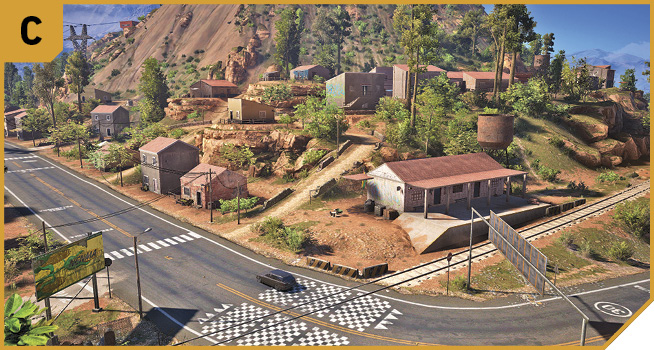
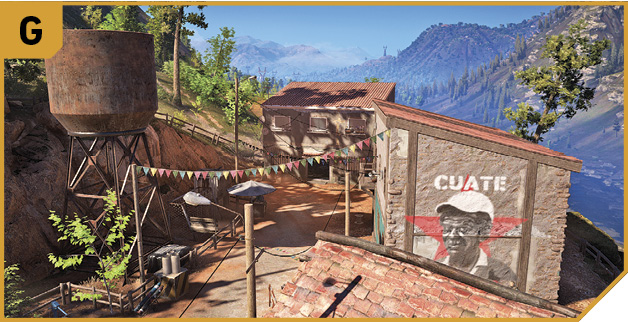
Taking a local or cartel vehicle, and driving it along this road, then up the street to Ramon’s house (G) is advisable, and usually doesn’t get you noticed by cartel members. Otherwise, stop and work your way through the homes here, removing cartel thugs inside with silent melee strikes, if you’re intent on removing every foe from the area.
West: Hillside
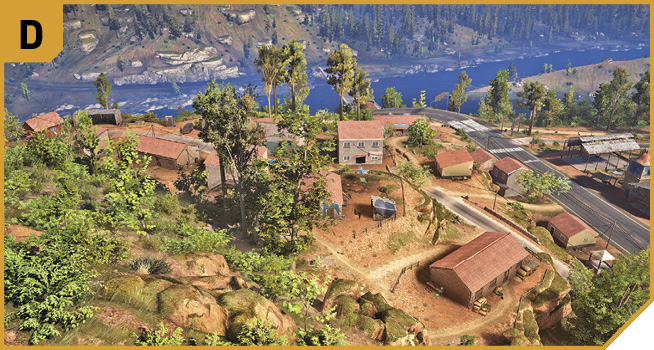
You can act as a look out or sniper if you position yourself here, shooting down at any foes scrambling out of the houses, or across the road at long distance, inside the cartel base itself where the helipad warehouse is. Conduct a sweep from north to south, with your team advancing downhill from D to B, to ensure enemies are dealt with before checking in on Ramon.
Northeast: Railroad
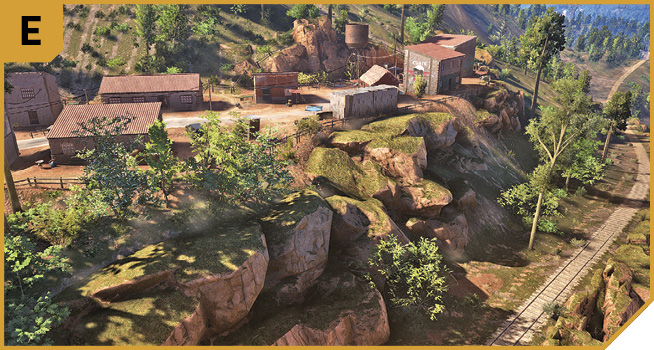
A quick scramble up here allows easy access to Ramon’s house, or an area just north of where enemies are likely to be, allowing you to advance south and flush foes out, without worrying about being outflanked.
East: Main Road
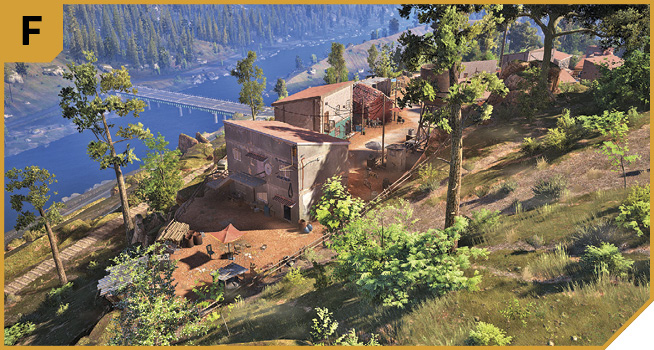
Simply hop over the fence, and head into Ramon’s house from this direction; completely circumventing the enemies present in the town, and allowing for quick completion of the first three objectives.
|

Santa Elena: Other Tactical Advice

 You’re not here to defeat foes; indeed, there are no enemies at the exact location of Ramon’s house, though you can quickly clear them walking south to north, up the street, to his location (G). When you head inside, move up the stairs, and it’s quite clear that the cartel has already caught up with Ramon.
Head to the wall and confirm that this is the blogger you’re seeking by identifying him. It is. Once this occurs, quickly check the hard drive on his tower PC. It’s been stolen. Bowman has already found out who the thief is. Time to grab him.
If you’re here to clear the town of enemies, and give it back to the Rebels, simply work from north to south, so you maintain the height advantage, and cordon the area south of the main road (where the hanging stage and helipad are) off, swarming the area from different directions.
In Co-op, feel free to have a fellow Ghost in Flor de Oro province, driving the north roads, or setting up an ambush prior to the thief appearing. The road just north of Flor de Oro Alpha is a good place to try this.
A Hard Drive
The idiot who stole Ramon’s hard-drive is currently driving along the main road east of Nupucu in nearby Flor De Oro province. There’s a single vehicle you need to bring to a halt. It isn’t chaperoned by cartel vehicles, meaning that you don’t need to fire a single shot if you don’t have to. The only slight worry? You need that driver alive!
Target Thief: Recon
TACMAP
The thief in the pickup truck can be found on the roads to the south, in northern Flor de Oro province; he heads downhill from Flor De Oro Alpha, and turns right (east) along the road, east of Nupucu. Catch him before or after he drives by the large Unidad base, or you’ll have additional foes to worry about, and the real possibility of a stray bullet killing your target. When you reach the truck, simply engage it until the driver leaves the vehicle, and interrogate him.
Target Thief: Other Tactical Advice

 This gets a whole lot more simple if you ensure your ambush location isn’t near an enemy stronghold. You don’t need the extra and unwanted hassle of engaging cartel or Unidad henchmen when all you need to do is drag a guy from his vehicle and slap him around a bit. You can wave down the truck with your guns pointed at the driver, but he usually takes off, running you over in the process. However, you can grab him from his vehicle (this is possible, but difficult).
Or, you can ram him off the road (in Co-op, each player can use a vehicle to pin him more quickly, and from multiple sides), or bash the truck until it catches fire. Or, you can all ride in an armored truck and ram the enemy vehicle while shooting at it (but not the driver).
When the driver exits the vehicle, bundle him into a second vehicle if you’re too close to an enemy installation, or simply interrogate him. The mission then continues.
Data Breach
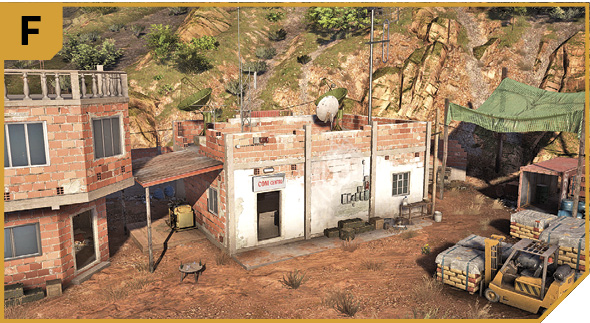
Almost directly south of La Cruz Bravo one kilometer away is a small roadside outpost that should be a cake-walk. It has light defenses, only a few buildings, and although built on a hill, the perimeter is easily navigated and the hard drive finally accessed. Simply head to the Comms center, either as a rapid assault mass, or stealthily with minimal carnage.
East: Main Road
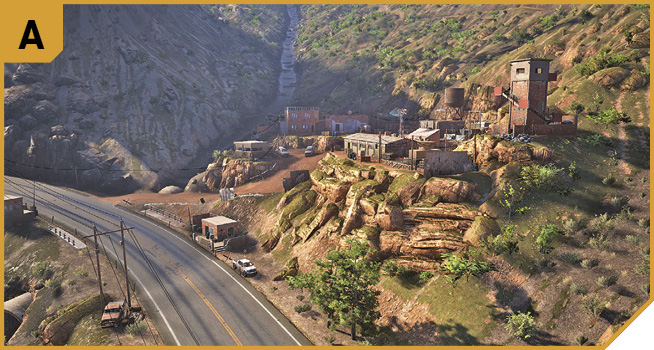
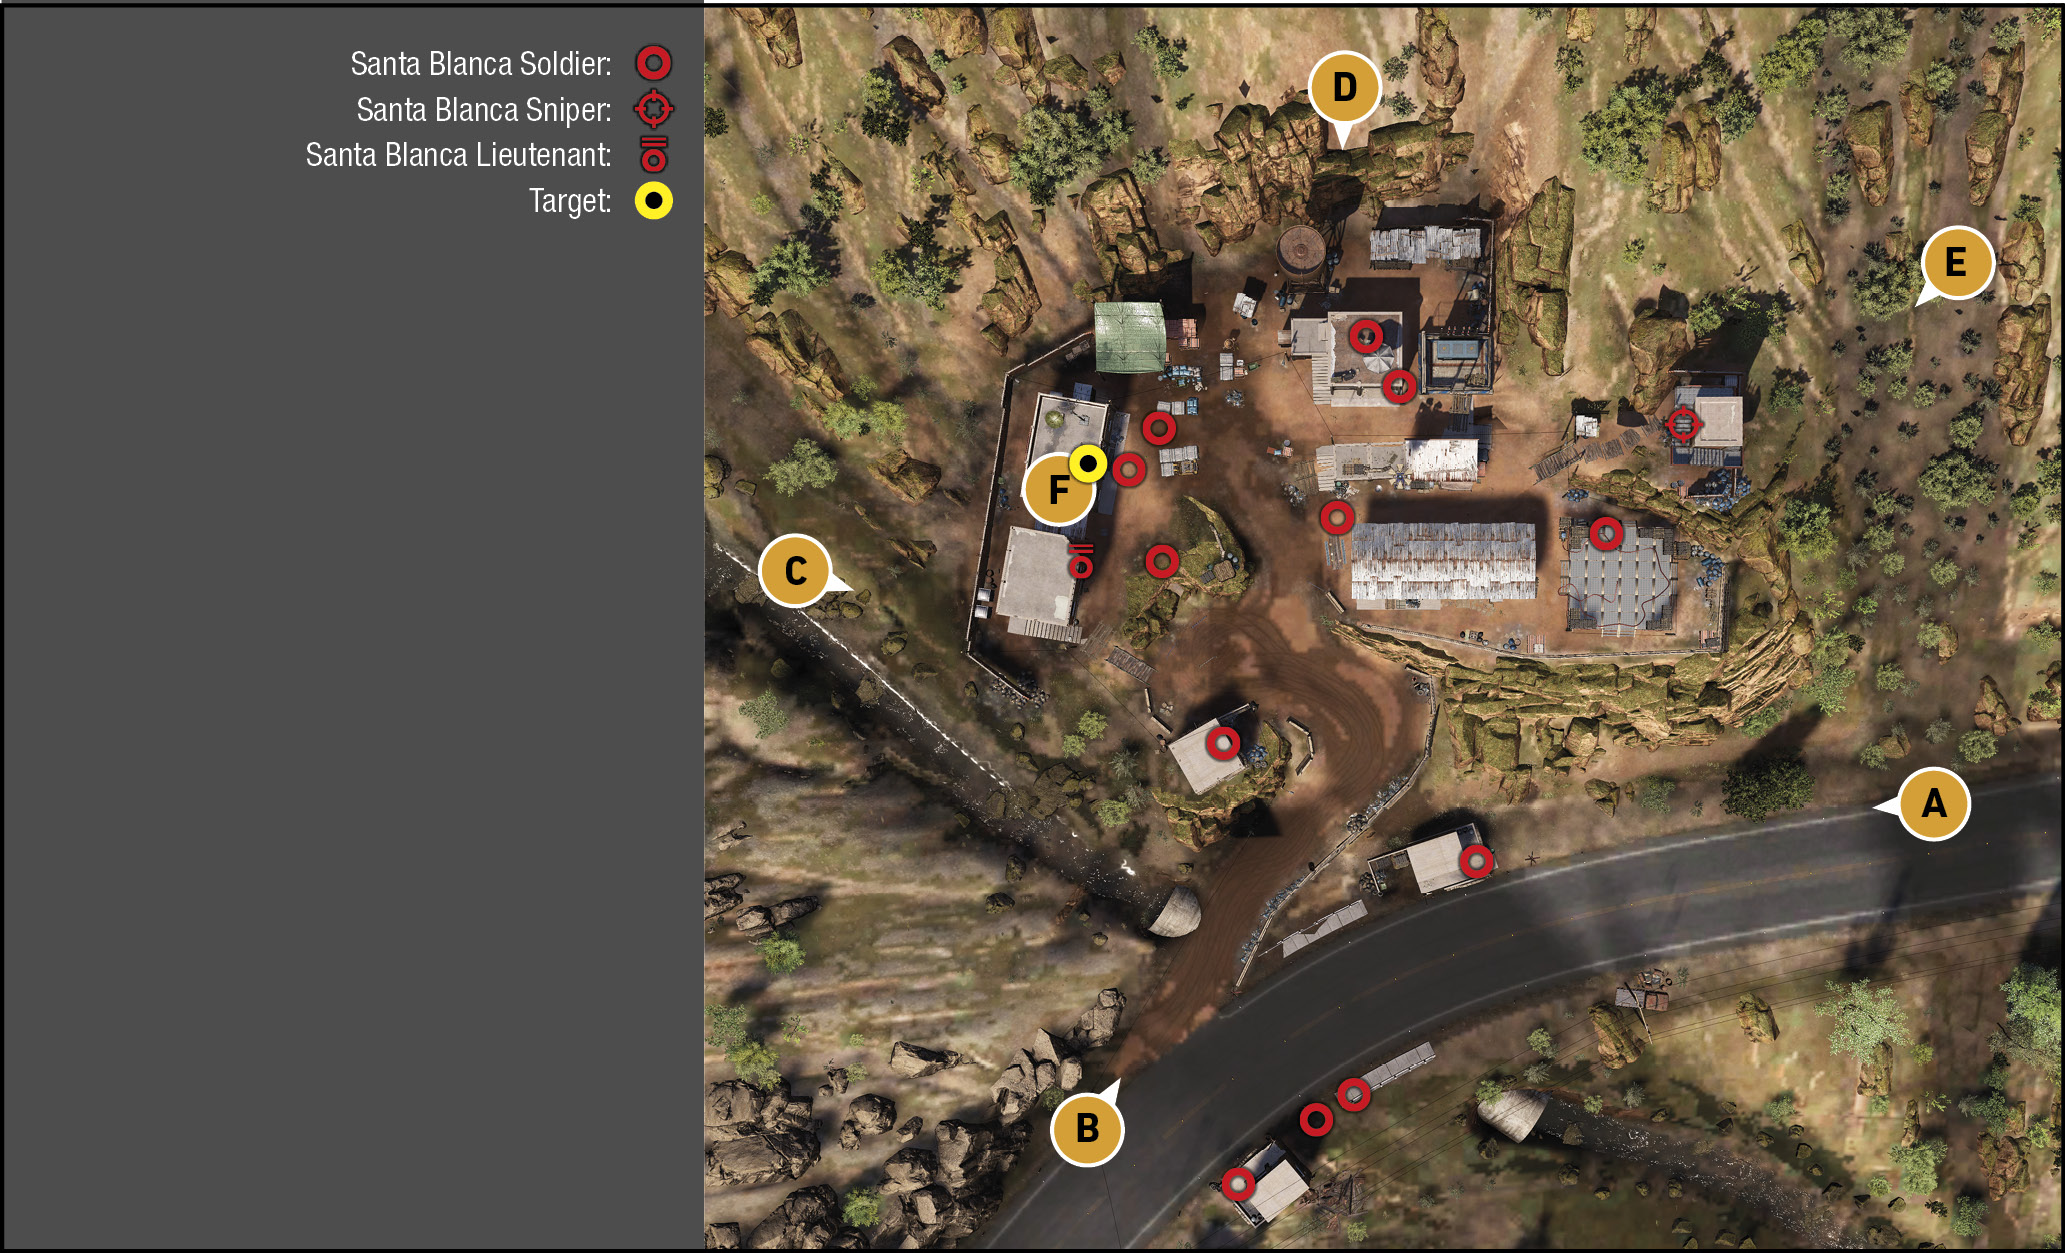
It’s worth parking a little way from the mission area and hiking up to E, so you have easy takedowns of the sniper in the tower, and foes aren’t alarmed and attack you from above. If it’s night time, enemies may be congregating in the barracks, meaning this is a little safer to approach. Or, try driving straight through, up into the base, and to F.
Southwest: Main Road
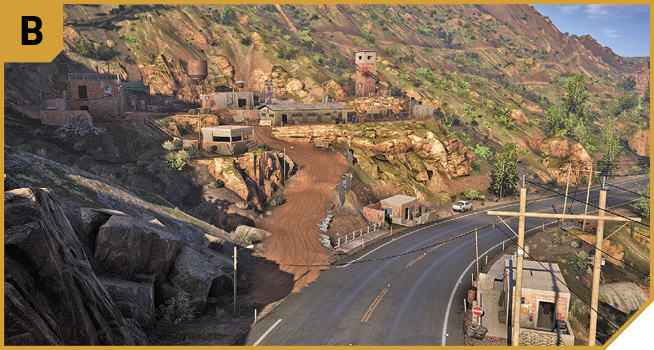
If you’re feeling stealthy, stop the vehicle and hike up to C instead. Or, park up and snipe both the alarm and sniper so you’re not disturbed as you clear the base. This route offers a more direct road up into the base, to the Comms center you can park outside of (and then storm, fighting foes from there).
West: Mountain Stream
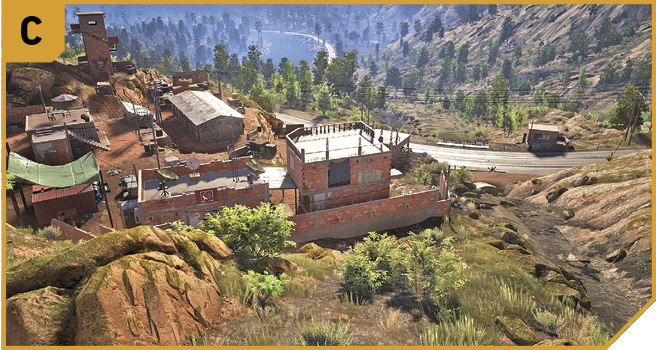
The higher ground here is perfect for removing the sniper and alarm panel, before advancing on the comms center itself. The wall can’t be climbed, so simply head around to the south or north of it, and in through the back entrance of the Comms center.
North: Mountain Slope
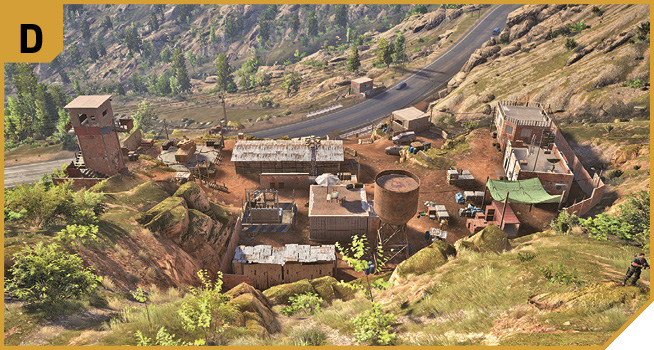
This has perhaps the best overvall view of the entire base; you’re able to tag both the sniper and alarm, as well as destroy the generator and SAM launcher if you advance down to within grenade-throwing range. Even better, you can drop down by the water tower, as the entire north perimeter has no wall. Climbing back up here is more of a challenge, however, so use this only when moving north to south.
Northeast: Mountain Trail
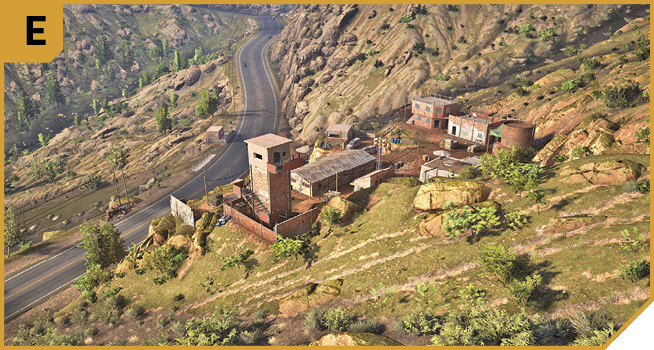
Head down from the trail and you have an immediate view of the sniper tower; deal with the foe there, then use the low rock outcrops to hide near, and then fire across the outpost to any foes before you’re discovered. As always, the alarm panel is a priority. You can also snipe the south security hut by the road from here, too.
Outpost (South): Recon
TACMAP
Working south to north, watch for a high concentration of cartel members at the two security huts on either side of the road. Farther up to the east is a sniper tower, and the base itself has a cluster of buildings around the armory, with barracks being the main low metal-roofed building in the center. Off to the west is an unloading yard and Comms center; the latter is the place to get to.
|

Outpost: Other Tactical Advice
 A stealthy approach involves approaching at night, removing the sniper and alarm, checking the barracks for groups of foes to easily take down (or ignore), and working your way through the outpost from east to west. Leave the foes by the security huts at the road until last, watching for them to run up the road. Retaliate with mine traps, grenades, or small-arms fire.
 A more daring plan involves zooming up into the base in an armored vehicle (how about an APC if we’re pulling out all the stops?), parking it by the Comms center so it acts as cover, and having your team cover you while you do the hacking. It’s worth removing the alarm panel before rolling in, so you only have the outpost foes to worry about.
Your team can easily complete this mission by advancing from C, D, E, and one of the roadside directions, catching foes in the crossfire, and taking this base.