
Tom Clancy's Ghost Recon: Wildlands Guide Welcome to Bolivia Remanzo: El Gato
The Quinoa Factory

Objectives
- Reach the factory
- Destroy the base’s conveyor belts (2)
LOCATIONS
- Remanzo Base
REWARDS
- + 1,000 XP
Brief
The cartel is using a quinoa factory to hide bags of cocaine in sealed bags of cereal. Destroying the factory’s conveyor belts will bring the packaging operation to a halt.
Going Against the Grain
After confirming this factory is a legitimate threat, you must make a careful study of the base’s impressive defenses before trying out any infiltration plans. Two quinoa conveyor belt warehouses must be destroyed before the mission is deemed successful. The only real problem is getting to them.
Remanzo Base (Quinoa Factory): Recon
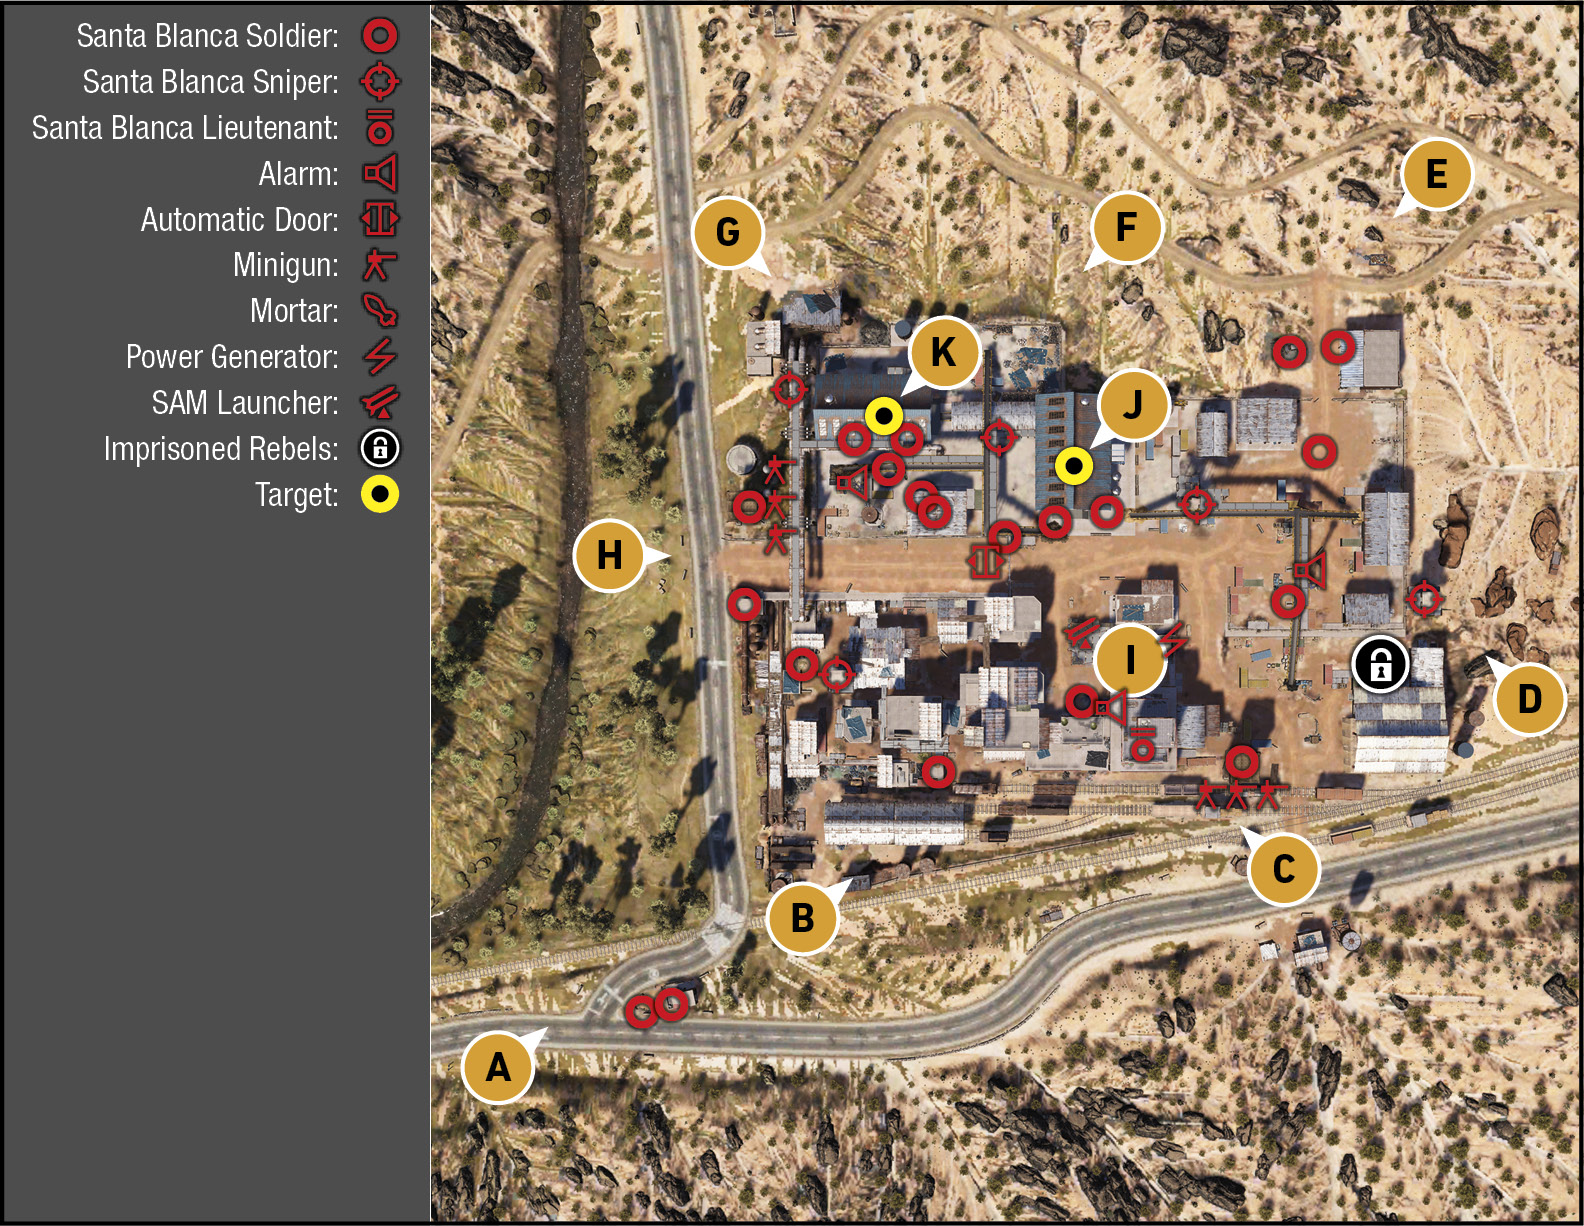
TACMAP
Think about separating this base into four adjacent areas, each with its own set of problems to overcome. In the southwest is a cluster of buildings connected by low ground and ramps from balconies to rooftops; there’s a mess hall here, and the area can be used to hide in. In the central and south part of the map is a cluster of important buildings: a comms building, armory, HQ building, and a SAM launcher and alarm pole, as well as a generator. Focus on that to offer cover to Ghosts entering the target warehouses, and to shut down the base’s capabilities. Along the east side are two large warehouses, a yard (at two heights), and a small mechanic’s garage at a poorly guarded northeast entrance. This area is good for sneaking into. Finally, the north and northwest area features the two target warehouses with conveyor belts to destroy. Though the perimeter along the north side is mostly impenetrable, an area of rusting pipework allows access. Don’t forget to use the gantries above the ground to aid you in your movements.
Southwest: Checkpoint
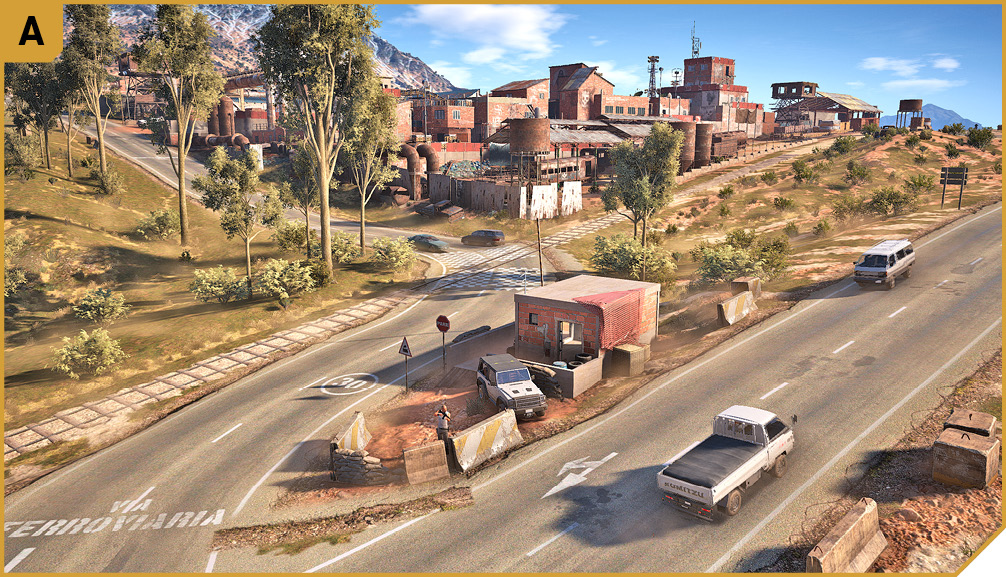
Though you aren’t likely to be targeted by the main base enemies, make sure the two foes at this checkpoint are neutralized, as they can head in and back up other foes if they aren’t dealt with early on. You’re on low ground here, so find a better infiltration spot than this.
Southwest: Rail Yard and Mess Hall
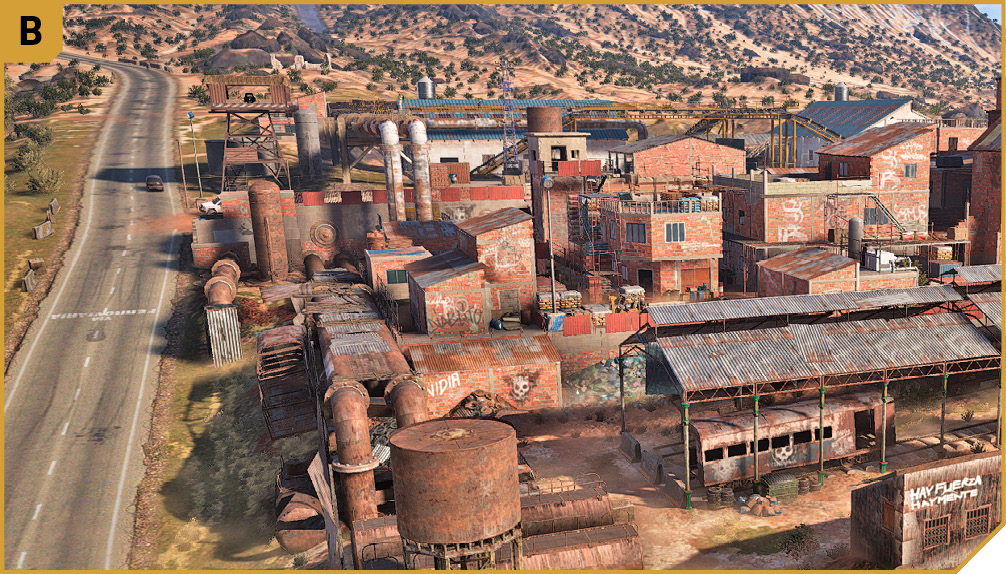
This yard is lightly patrolled (usually by only one enemy) and provides stealth infiltration opportunities. Check the brick shed attached to the main base under the two large pipes; climb the tire pile and slip into the cluster of buildings and a sniper tower in the southwest corner of the base. Farther along the rail yard on the north side is a doorway allowing access to the same area.
The southwest base interior is a series of buildings clustered together under the watchful eye of a sniper. Remove him immediately so you’re not compromised. Then clear the two or three other foes. You can also climb up the brick structures, slip inside, and snipe foes to the north (mainly snipers on gantries). Use the connecting wood ramps to move along the upper levels, balconies, and low rooftops of these structures to gain extra sniping capabilities. Plus, you can maneuver east and reach the upper floor of the HQ building where the captain is, or drop down to I, or use the sloped ground to head up to I. The upper floors of the buildings on the east side provide views of I, as well as J.
Note there’s a mess hall here, so check this location to see if the enemy is eating, and kill a large number of them in a single massacre, which eases the clearing of this base considerably.
South: Minigun Tower and Entrance
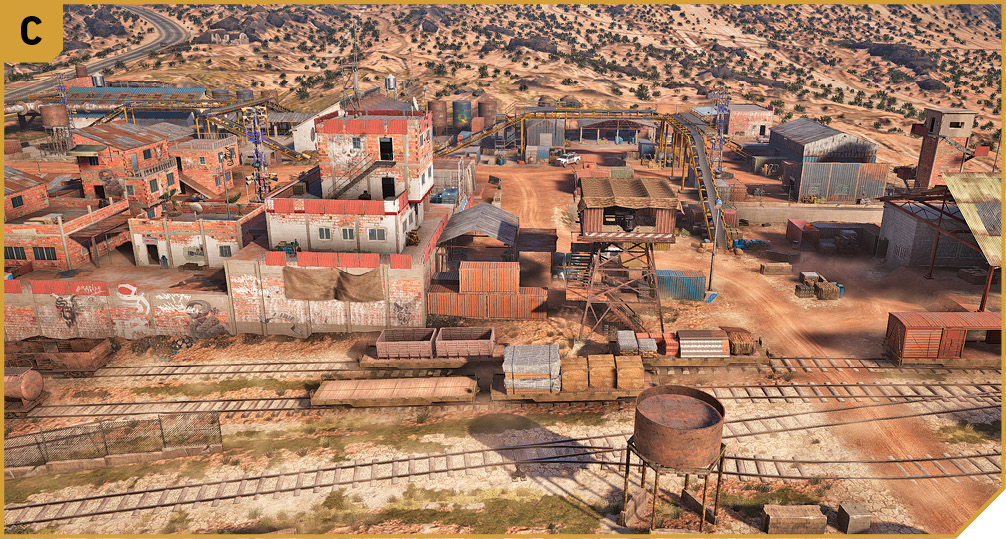
The metal tower by the entrance contains three miniguns (facing west, south, and east) and a single operator. Remove him by sneaking up the tower steps, or by sniping him from a distance (south of C, or from B or D).
You can climb into the base via the metal cargo containers just west of the minigun tower, which is the best way to reach the generator and to slip into I undetected.
The main road into the base at this point leads to an open area where you’re easily spotted, so use the open containers for cover and advance on J, up the conveyor belt, and quickly snipe the sharpshooter and alarm panel northeast and north of you, respectively. From here you can advance into the northeast yard, or across to J, assuming you’re being covered or you’re very careful with your foe disposal.
You could drive a vehicle (including a bike) through here, if you’re not interested in the subtleties of war. Park at J to lob a grenade through the front doorway, or cause a distraction by driving from C to E and back again.
Southeast: Rail Warehouse and Sniper Tower
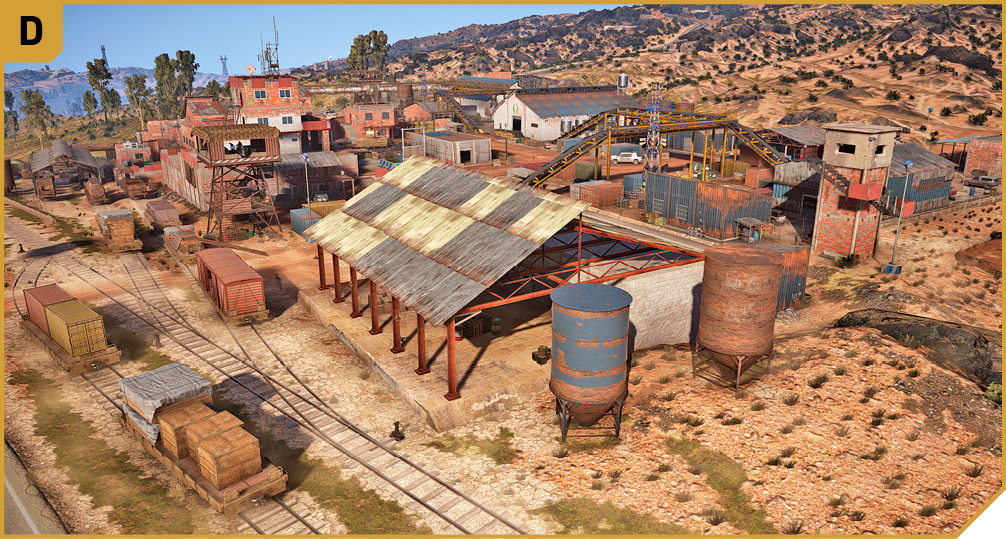
The eastern part of the base features few foes and some good infiltration opportunities. You can move through the open warehouse to the yard at C, or head north to the sniper tower steps, overwhelming the sniper at the top and using the height to remove all foes on the eastern side of the base, as well as the two closest alarm pole boxes. As the action usually heats up elsewhere, don’t spend too long here.
Northeast: Entrance
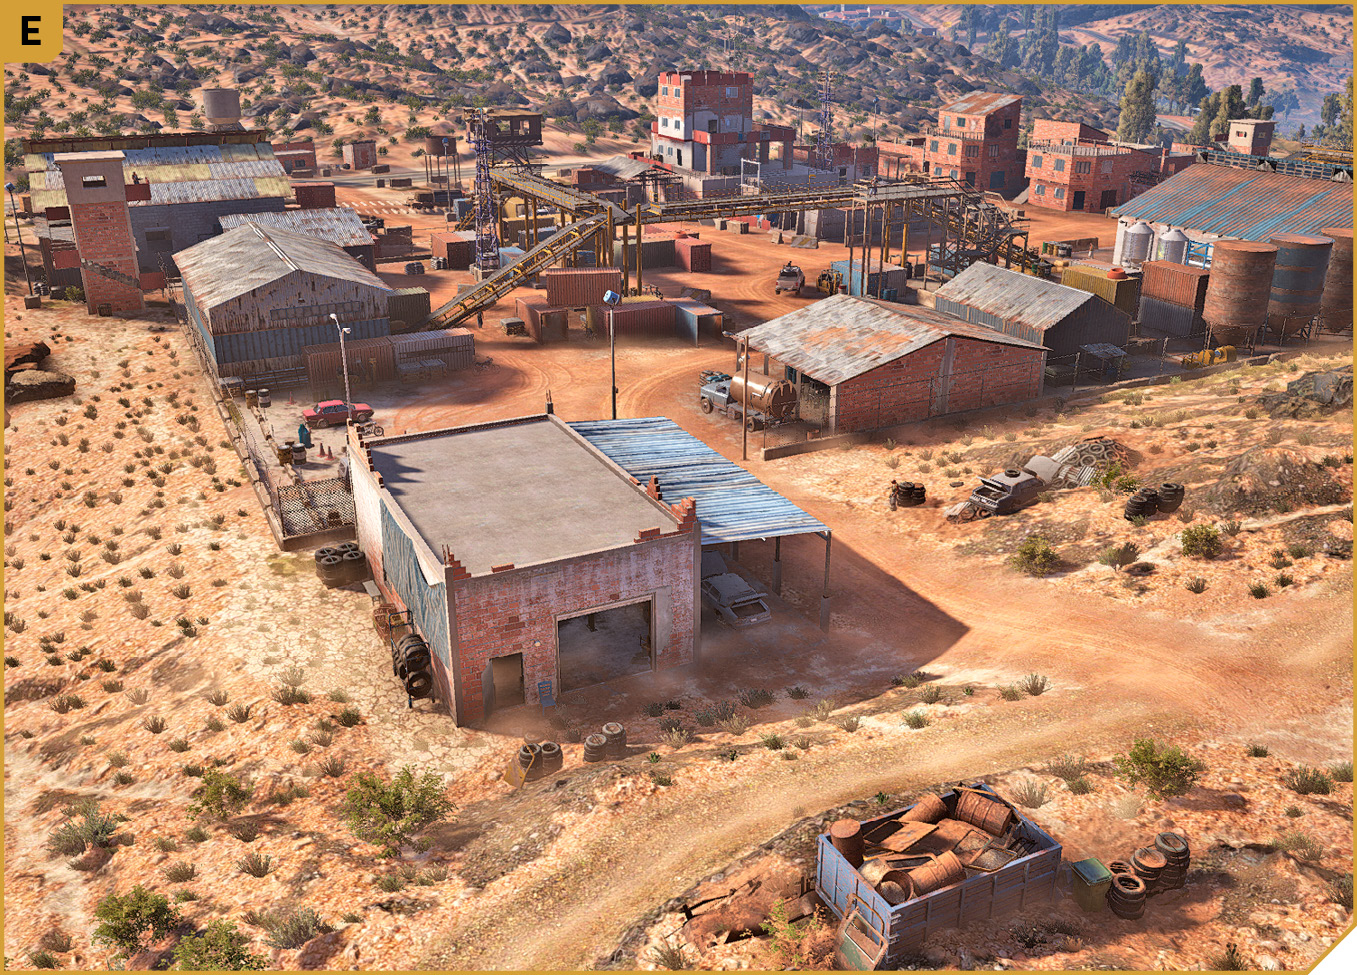
This is another spot to drive a vehicle in through, as the three closest guards are easily circumvented, though the base is on full alert if you haven’t neutralized the non-human defenses.
Once inside the base, if you’re using stealth, you can run west along the inside of the northern perimeter wall to the target warehouse (J), smash a window and vault inside, and storm the target area (or lob a grenade in from outside).
Or you can locate the large warehouse on the eastern edge of the compound (just north of the sniper tower), creep out of the ground doorway onto a conveyor belt, and onto the gantry above the action. From here, you can almost reach the target warehouse (J), and you have good views of I, the SAM launcher, and the two alarm poles. With a sniper rifle, you can just about take out the third alarm pole by K, too. From here, head down and assault the target warehouse by stairs or belt.
North: Hills
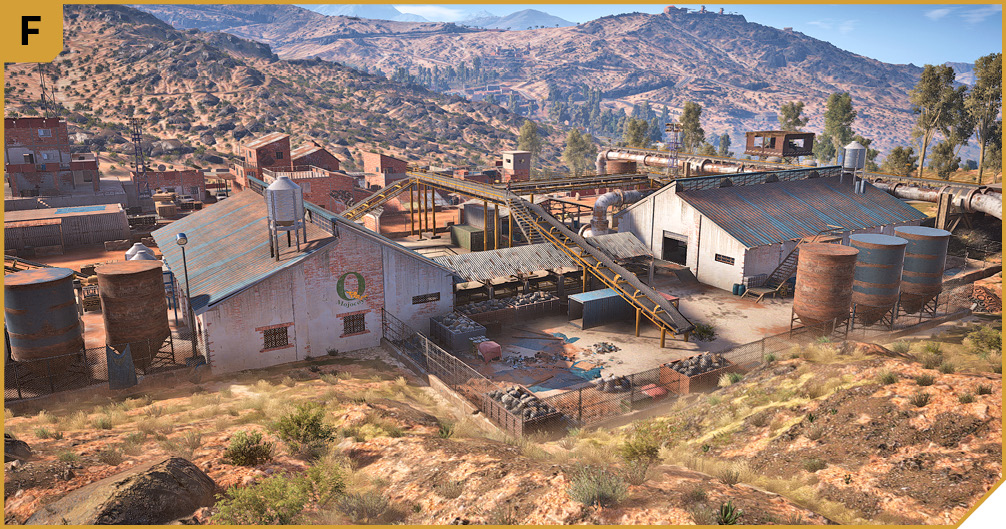
As the windows on the edge of the target warehouse have reinforced wiring, preventing you from smashing and moving through, you can’t enter the base from this area. The perimeter fence is too tall, and it’s reinforced.
However, you are able (with a ranged weapon) to take out all the alarm pole boxes in quick succession, as all are visible from the rock clump just northeast of J. Then quickly tag any snipers on the gantries, or those coming out of E, J, or K. Otherwise, there’s limited use to being here.
Northwest: Shack Ramp and Pipes
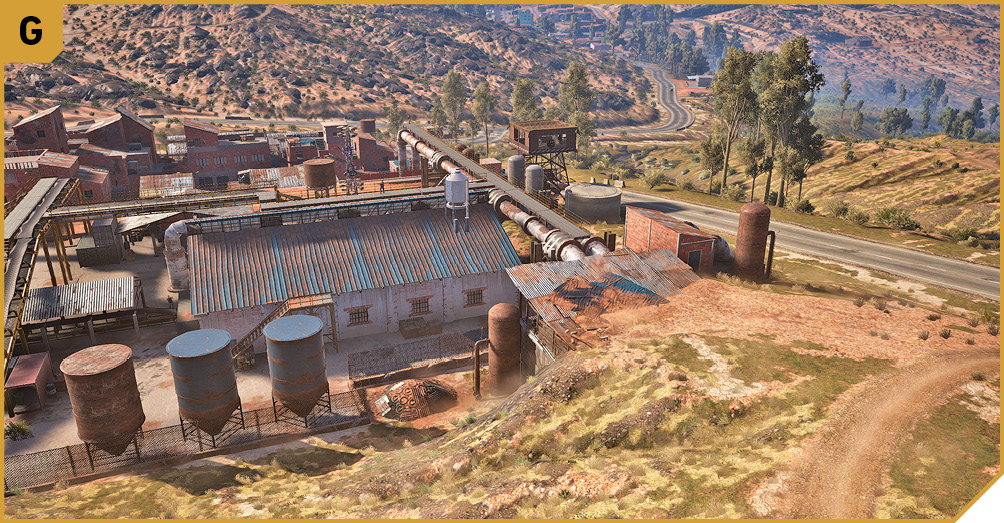
The perimeter fence may not be climbable, but the roof of the dirt shack in the northwest corner certainly is! From here you can land on the gantry and tackle the snipers and minigun operator. Or you can ride a bike and jump, landing directly on the warehouse roof of K. Or sneak under the huge pipes, along the west edge of K, shooting snipers from underneath, shooting up at the minigun operator, and shooting through the windows to drop foes inside the warehouse (K) who can’t return fire. You can also silence the alarm pole from here. But mainly, this allows access onto the gantry that runs between both target warehouses.
East: Main Entrance and Gates
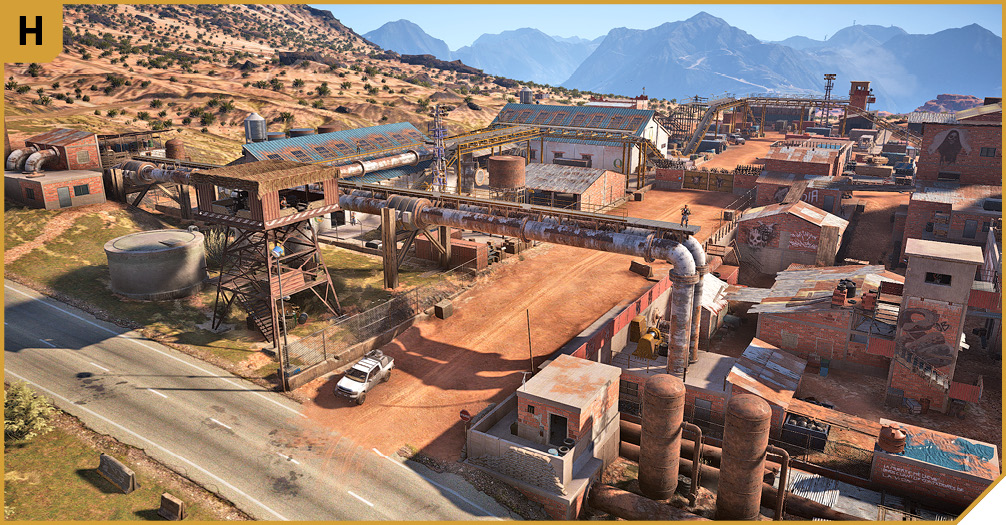
Slightly south of the gate entrance along the main road are two rusting pipes and some corrugated metal you can run across to access the southwestern buildings inside the base. Just north of the gate entrance is a minigun nest, which is highly problematic, so shoot the operator from B, G, or east of H before he spots you.
The road between the north and south areas of the camp is dangerous; wandering down there enables foes to see you from both directions. You can access the southeast corner of the camp from here (and vice versa if you’re clearing the base from south to north).
In general, use this entrance if you’re driving a Santa Blanca vehicle (any white-colored truck with a minigun, for example). Such vehicles are seen by a sensor on the main gate, which then opens automatically. Now you can drive into the base with guns blazing, or attach C4 to the vehicle and dive out before pointing it at the SAM launcher or target warehouse. Otherwise, you’re jammed here with nowhere to go.
South Central: HQ Building and SAM Launcher
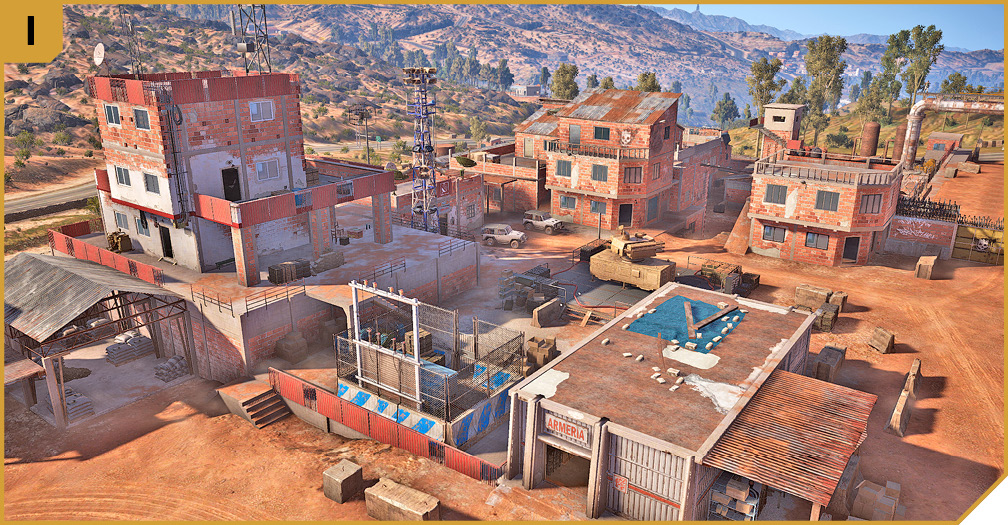
This part of the interior is important enough to consider heading to, if only to halt any possibility of reinforcements and the SAM launcher targeting your helicopter. Sneak in from B or C and shut down the power. Note the armory, comms, and HQ buildings surrounding the SAM launcher (which can be destroyed using C4). The HQ building only has a captain to worry about, and the upper floors contain ammo and a direct view of the target warehouse (J) so you can cover your teammates.
|
 Target: Quinoa Warehouse #1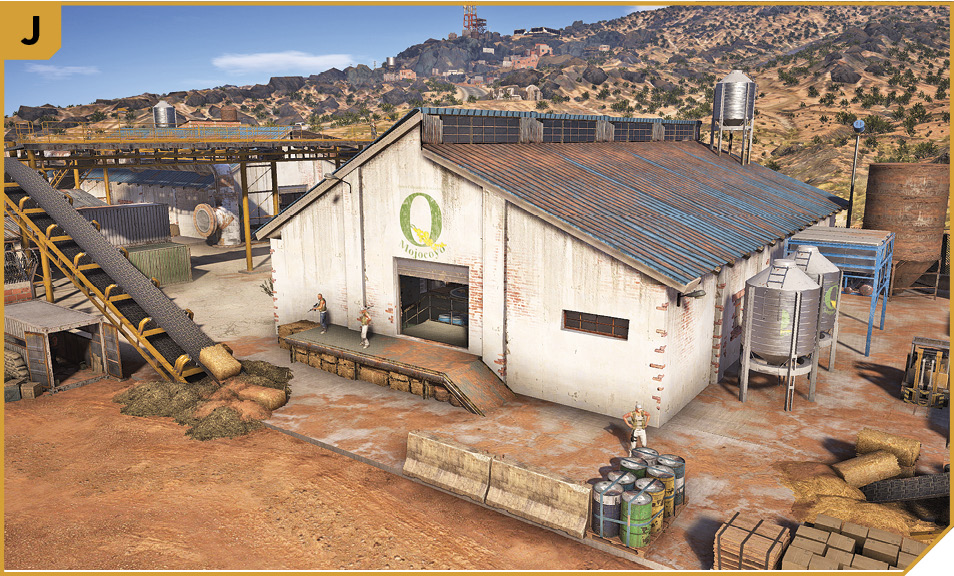
|
 Target: Quinoa Warehouse #2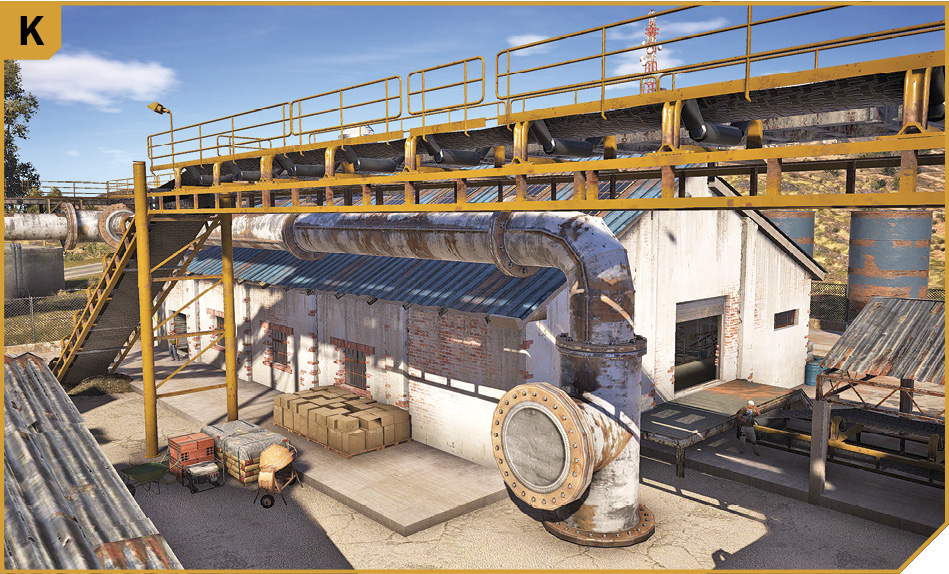
Remanzo Base (Quinoa Factory): Other Tactical Advice
 Going with a clandestine plan, your team has the option to create a distraction elsewhere in the base and enter via the pipe at G, jump onto the roof of K, then head down the metal steps on the north side of the warehouse. Creep around to the Dumpster at the northwest corner of J. Crawl over the Dumpster, down, and into the warehouse (J) and prime some C4. Take down the foe in here if you need to. While still running silent, backtrack using the same route, then enter the other warehouse (K) via the east door. Tag the foe here, and another inside. Prep the second C4. Then retreat back up the metal steps, across the roof, onto the rusting pipes, and out by the shack (northwest). Explode the C4.
Or start at F and tag all three alarm towers. Then enter at G, shooting the snipers and minigun operator. Move onto the roof of K while firing at snipers first (remove them from both towers and the other gantry), then ground foes, using the warehouse roof as cover. Then smash the roof window of K and drop in a grenade. As the enemies dwindle, stay on the conveyor gantry, moving onto the other warehouse roof (J), and repeat the process of smashing the roof window and dropping in a grenade. Leave the way you came, completing the mission without even touching the ground inside the base!
Whether or not you’re worried about the SAM launcher, if you fly high enough and parachute accurately enough, you can land on either of the quinoa warehouse rooftops (J or K), shoot out the roof windows, and drop in a grenade. This completes the mission in moments, but the base is on alert. Escape to the northeast, where there’s the least resistance.
Fancy yourself as a one-man wrecking machine and keen biking enthusiast? Then grab a bike (there are two parked near the southeast entrance) and loop wide around the base so you aren’t spotted. Line up facing south, near the main road to the northwest (G), then accelerate hard, driving south and aiming at the shack roof ramp. Hit the ramp, and land your bike on the roof of the northwest target warehouse (K). Get off your bike, drop a grenade through a window you shoot out, get back on the bike, and nimbly point it southeast (at the second target warehouse icon), driving off the warehouse roof and onto the lower conveyor belt roof. Drive under the upper belt gantry and onto the roof of the second target warehouse (J). Repeat the roof-window smash, drop in a grenade to complete the mission, and have a story to tell your grandchildren.
 All the previous plans are sound and amusing, but involving your entire team allows you to quicken the process. Start by having one Ghost responsible for shutting down the power. He can enter at C and access the generator, then clear the ground foes and HQ captain at I before joining in at J. The second Ghost should start at D, removing the sniper at the tower and all foes to the northeast. Simultaneously, a Ghost should enter at G and use the Solo mission route to tackle the snipers on the gantry up here, as well as the minigun operator on the west perimeter. The fourth Ghost can enter at B, climbing up and into the low-rise buildings and mess hall area, removing foes in these parts, starting with the sniper. Once all enemies are removed except those near the warehouse, have two Ghosts close in on J and two on K, removing all threats before neutralizing the conveyor belts.
Have you driven two Santa Blanca minigun trucks into the base and started raking foes with gunfire (while a passenger lobs a grenade into each warehouse door or window as you pass)? Though you can maneuver between both warehouses, you’re soon stuck and overwhelmed, and reinforcement helicopters can be a real problem. So running and gunning with trucks isn’t recommended. Do use them to escape in, though (there are some SUVs parked by the SAM launcher).
Do you have a drone with explosive capabilities? Then have two Ghosts each fly one into a different warehouse and detonate them simultaneously for a quick end to this operation.
You can ride bikes through the base, up the conveyor belts, and even onto the warehouse rooftops, but this is dangerous and you can’t lob explosives while riding a bike.