
Tom Clancy's Ghost Recon: Wildlands Guide Welcome to Bolivia Remanzo: El Gato
Energy Drinks

Objectives
- Reach the energy drink factory
- Destroy the storage tanks (3)
LOCATIONS
- Factory Electro Energy Drink
REWARDS
- + 350 XP
Brief
The cartel has found a way to hide liquid cocaine inside an energy drink called Electro. Destroying the storage tanks at the energy drink factory will cause enough damage to shut the plant down indefinitely.
Electro-Light It Up!
This operation involves making a large mess of the energy drink facility in Remanzo; there are three storage tanks to find (two are clustered together, hence only two targets on the nearby Tacmap) within the open factory grounds. As this location wasn’t designed to be a military installation, it’s very easy to recon, but has limited ground entry points thanks to a reasonably secure wall. A determined group of Ghosts won’t have much trouble lighting the place up (after turning the lights off at the generator first, if necessary).
Factory Electro Energy Drink: Recon
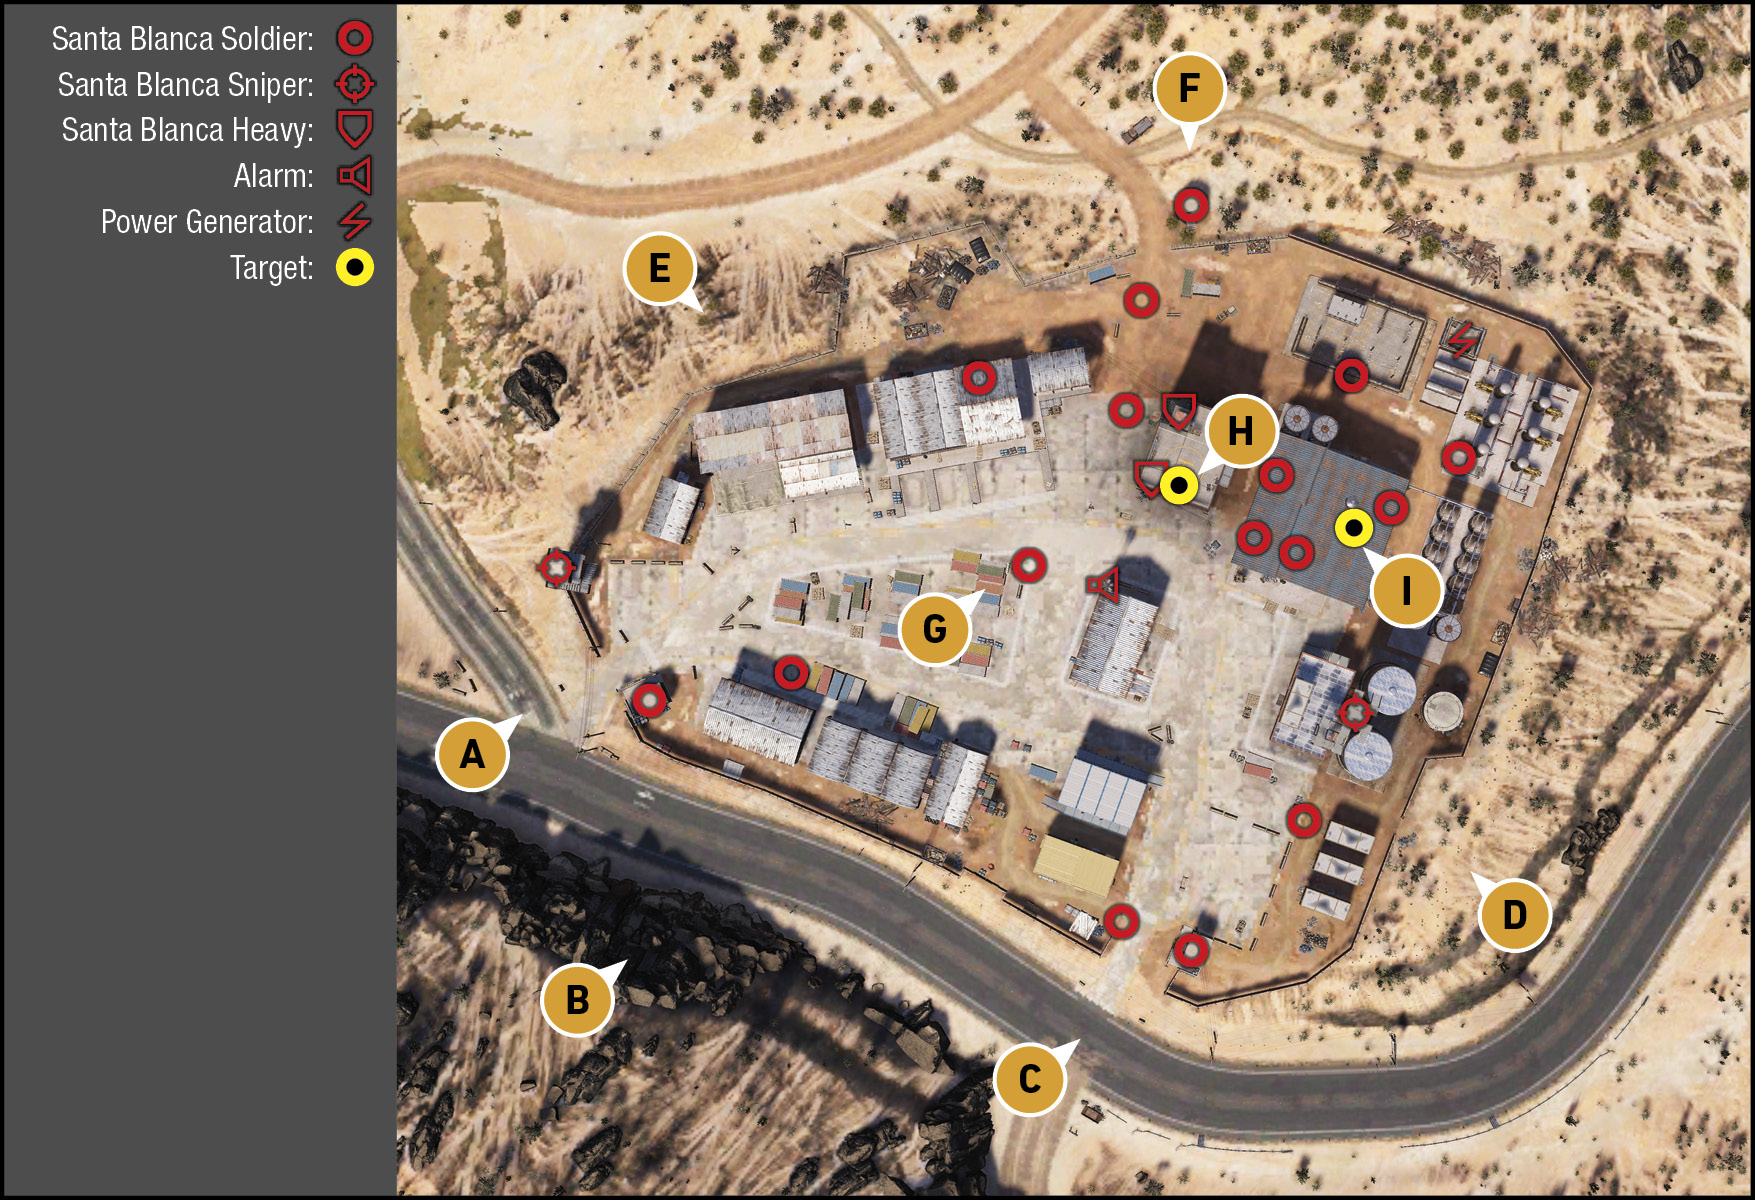
TACMAP
The target buildings (H and I) are in the northeast corner of the facility, and have numerous entrances (and enemies). Farther southwest is the main yard, complete with numerous containers you can run between (and sometimes through), if you’re approaching the target buildings from the southern road. Note the five different access points in from the base’s perimeter; some are vehicle entrances, but a couple are breaches in an otherwise-secure fence or wall.
Southwest: Entrance Checkpoint and Sniper Tower
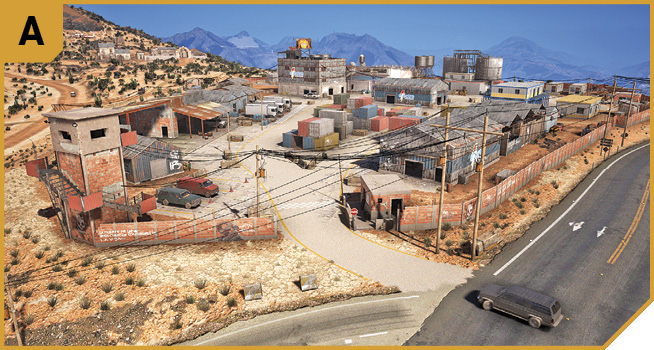
There are relatively few foes at this entrance, though you need to watch the enemy in the checkpoint hut (right) and the sniper tower (left). Either neutralize them using stealth, or start a firefight while accelerating into the base using an armored vehicle. This is also a great spot to start a distraction, so foes move away from the target buildings allowing a teammate in to prep all storage tanks to explode.
Southwest: Rocky Hills
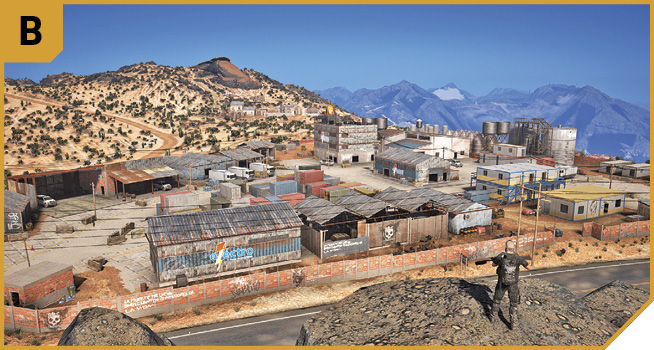
The south side of the road has foothills giving you enough height to tag both the snipers on the west and east sides of the mission area (the sniper on the east side patrols a gantry above two huge cylinder tanks). There are good views of the base, and you can cover your teammates while removing foes at the very limits of your rifle’s range. The only issue is the alarm pole; it’s almost impossible to destroy with a sniper shot from this angle and distance.
South: Entrance Checkpoint and Wall Breach
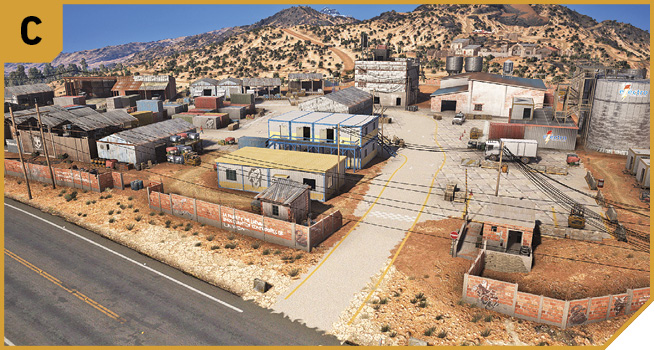
There are two options for base infiltration in this area. You can drive in, passing the brick checkpoint and causing a disturbance (or sneak and fan out to the left and right for stealth infiltrations). Or, you can use a vehicle (or C4) and smash through the weakened fencing just left (west) of this entrance. The latter is loud, but it does allow you to more easily drive into G where you can ditch the ride and hide. Use either point as an extraction route, if you’re leaving under fire and in a vehicle.
Southeast: Wall Breach
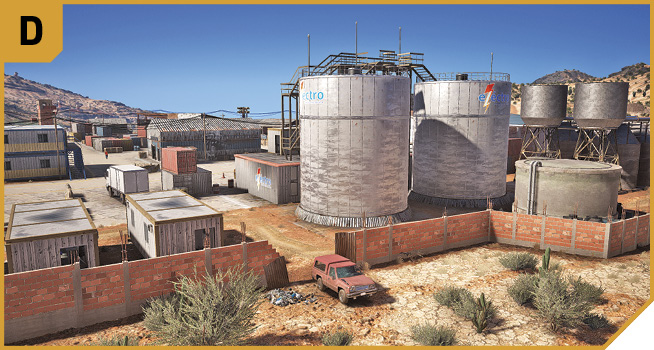
The only place the perimeter is breachable between C and F on the eastern side of the base is at this flimsy piece of fencing between the brick walls. Drive through or use explosives (grenades or C4) and force your way in (or out) at this point. Though you might be making noise, you can quickly scurry into cover, and into one of the three container offices in front of you, or the industrial vats and cylinders to the north.
Northwest: Fence Breach
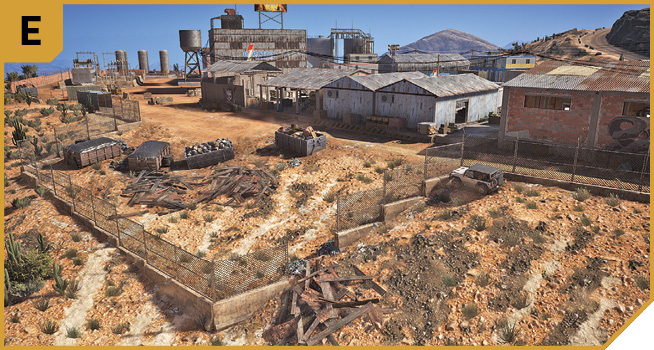
For silent running, you can’t do better than this gap in the fencing. There are few enemies to see you, and you can quickly head east to F, or south to the unloading warehouse and take cover, before reassessing the target priorities. Heading to the unloading warehouse where the three trucks are parked is a good plan, as you can take out the alarm from here, relatively quickly before a full assault commences.
North: Pill Box and Entrance
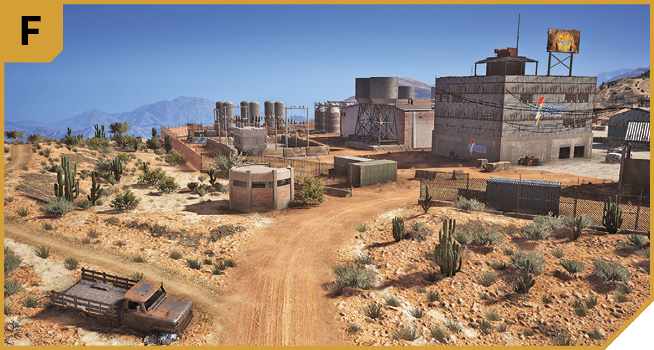
Don’t underestimate infiltration from this direction, despite the enemy inside the pillbox at this entrance. You have sloping ground down from the north, allowing you to head down from San Vicente (the old farmstead where Butch Cassidy and the Sundance Kid made their last stand), stay in relative cover, and snipe patrolling foes from the scrub desert between the farmstead and the pillbox. More importantly, your first shot should be to neutralize the alarm pole, which is visible if you’re directly north of H. You can also take care of the sniper atop the cylindrical vat gantry (east side of the base).
Or, you can stealthily enter this location by creeping in from the east, heading west along the perimeter fence, and killing the pillbox foe at close quarters. Then sneak through the entrance, and into the base, optionally shutting down the power, or planting C4 on the propane tanks to cause a disturbance. Or you can enter either target building and plant C4 with minimal enemy contact.
Alternatively, you can drive a couple of armored trucks in from this direction, and start a carnage-filled spree.
Interior: Warehouses and Container Yard
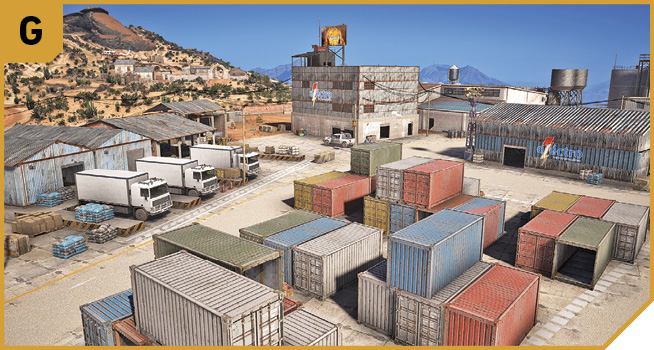
If you’re heading into the base from A, C, or E, you’re likely to need to navigate the yard interior, though this involves some needless maneuvering compared to heading in from D or F. Hang around in this area if you want to attract foes away from the target warehouses, or if you’re wanting to clear the base methodically (and usually silently), and you’re working from southwest to northeast. Or, scurry along the inside of the perimeter wall to the unloading warehouse (north). Play hide-and-seek in the container yard area (middle). Use the warehouses and yellow-and-blue container barracks (south) as vantage points to provide fire-support, take out the alarm pole, and help those assaulting the target buildings. The balcony of the yellow-and-blue barracks is especially great for peeking out of, shooting foes (including the east sniper), and ducking back inside again.
|
 Target: Electro Warehouse, Storage Tank, and Helipad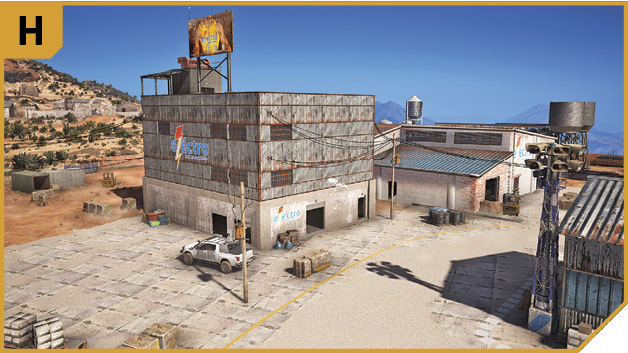
|
 Target: Electro Facility and Storage Tanks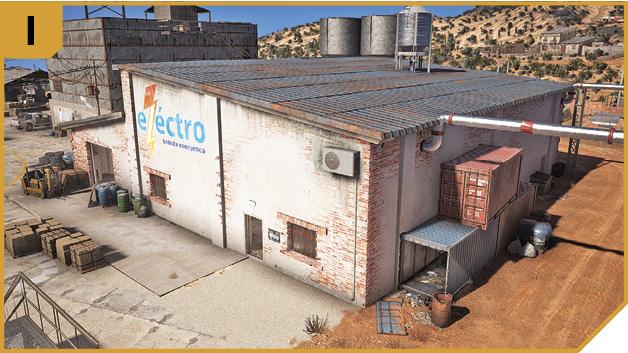
Factory Electro Energy Drink: Other Tactical Advice
 Attempting stealth? Then suppressed sniping at the west and east sharpshooters from F, then the alarm, allows you to then enter via the pillbox (approach from the east or tag the foe through the window slits). Then creep to the facility warehouse (I) and plant C4 inside before climbing the containers alongside the east wall of this warehouse, and onto the roof. Shoot out the tall warehouse window on the third (“02”) floor where the last tank is, and lob in a grenade. Then flee via F, triggering the C4 explosion as you go.
If removing all foes and being stealthy is a plan, start at A and clear the sniper, checkpoint foe, and head into G, looking for patrolling foes and removing them so they fall into areas of cover that can’t be seen by others. Shoot the alarm pole panel, the east sniper, and then order your team in to assault both target structures, focusing on the armored foes first. Don’t forget flashbangs while scaling the interior of the tall warehouse (H), or enclosed spaces, which confuse and temporarily blind your foes en route to an objective completion.
How about landing a chopper, not on the helipad roof of the target building (H), but the roof of the facility building instead (I)? Then shoot out the alarm panel, both snipers, and follow this up by lobbing a grenade onto the helipad roof of the other target structure, directly above the single tank. While that explodes, drop down via the containers, enter via any entrance and lob in a grenade, before retreating back to your chopper and leaving.
The other option is vehicular manslaughter. Drive into the base, quickly disembarking near I, lob a grenade in to destroy both tanks while your teammates engage the enemy, hop back into the vehicle, drive it around to the garage door on the west side of H, and ascend up the tall building to destroy the second tank. Remain here, fending off foes and order your team to regroup at your location, before descending to ground level, picking a truck, and leaving.
 With three other humans backing you up, you have the added benefit of approaching at multiple angles, enabling both snipers and the alarm panel to be shot simultaneously. Split your team so that two go for one tank, and two go for the twin tanks, halving the time needed.
Don’t forget to cause a ruckus either at the propane tanks near the generator (northeast) or the sniper tower (southwest base entrance) while others sneak in and complete the detonations.