
Tom Clancy's Ghost Recon: Wildlands Guide Welcome to Bolivia Itacua: La Yuri Y El Polito
El Polito’s Sports Car
Objectives
- Reach El Polito’s garage
- Steal El Polito’s car
- Drive El Polito’s car to Itacua Charlie
LOCATIONS
REWARDS
- +350 XP
Brief
El Polito has a thing for high-end sports cars with the latest electronic gear. If we could get our hands on that car, our techs could pull a lot of intel from its onboard systems. The car is located at Santa Blanca’s Itacua base. Get in, get the car, and get out.
The Getaway
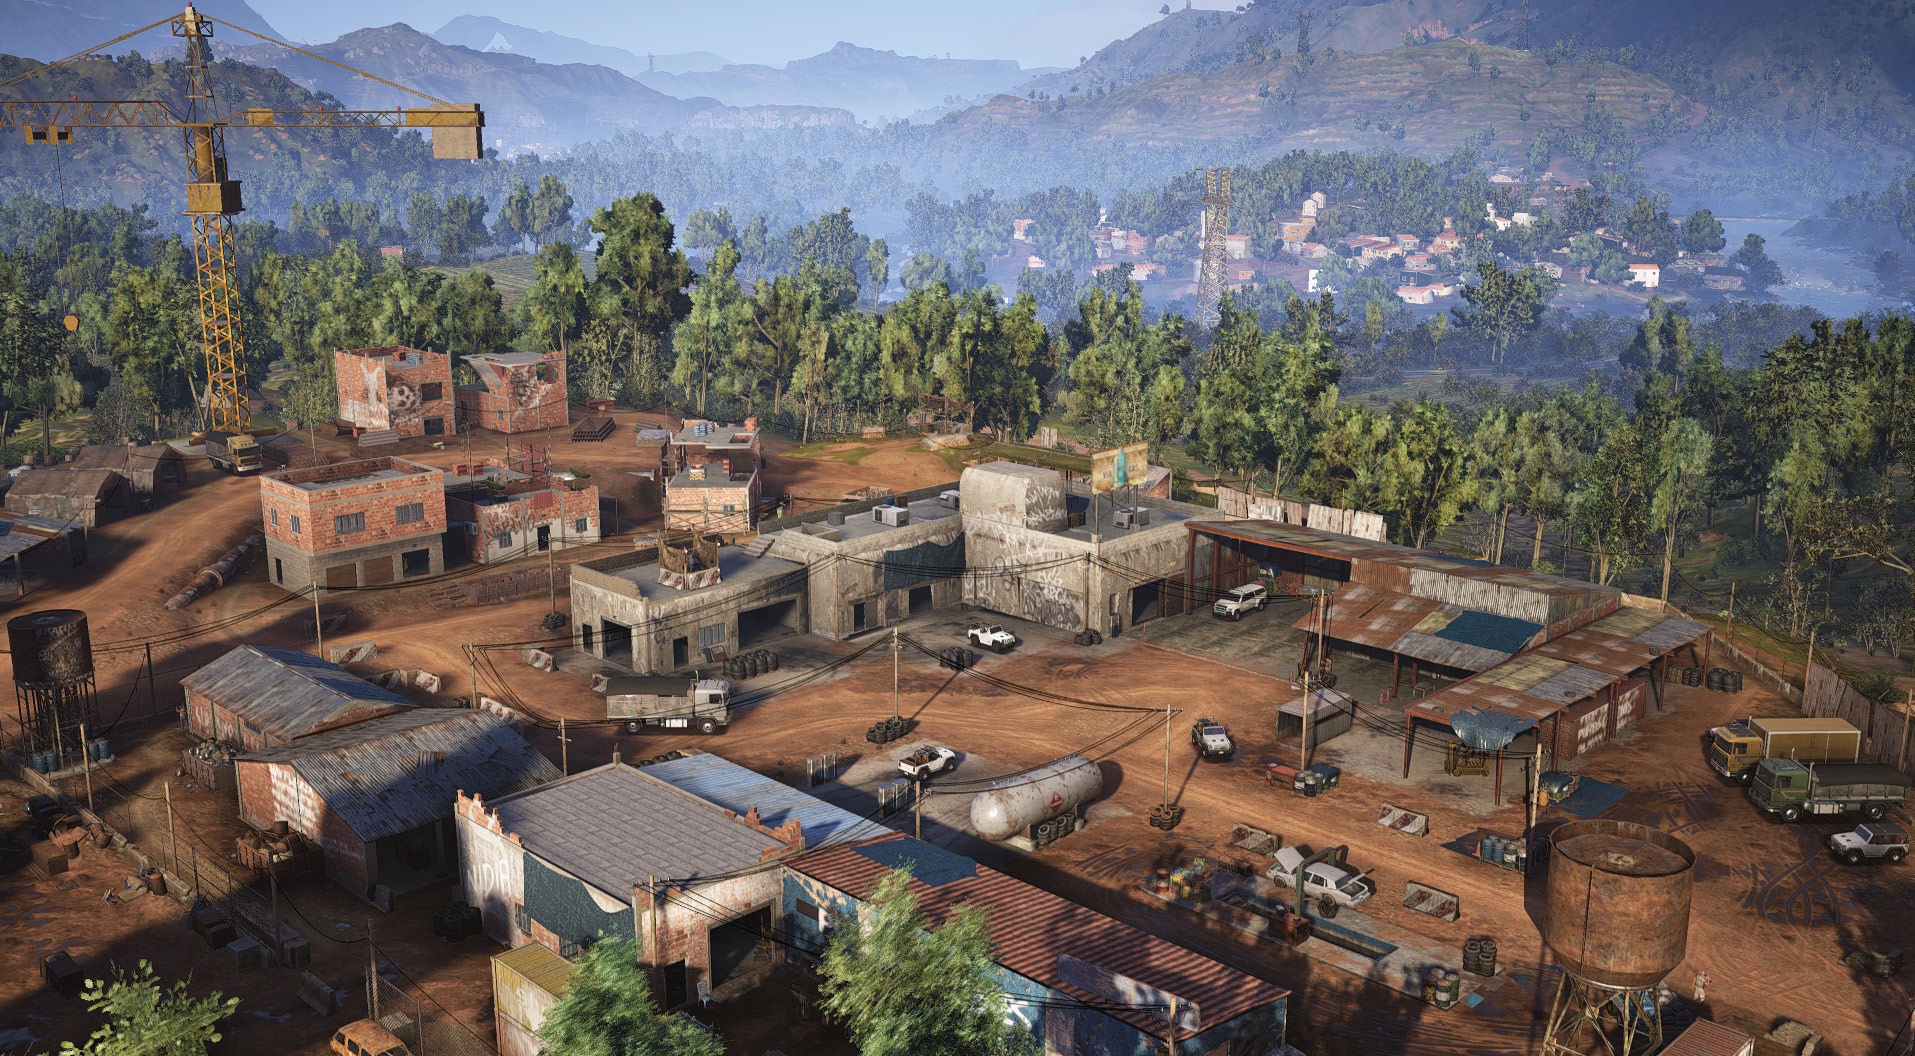
Head to the southeast part of the Province, and inspect a large mechanic’s yard, with additional structures to the north and some impressive fortifications. Approaching from the main south entrance is unwise, as the mounted weapon above the garage can make short work of your squad. Instead, fan out and approach with a different plan.
Itacua Base: Recon
TACMAP
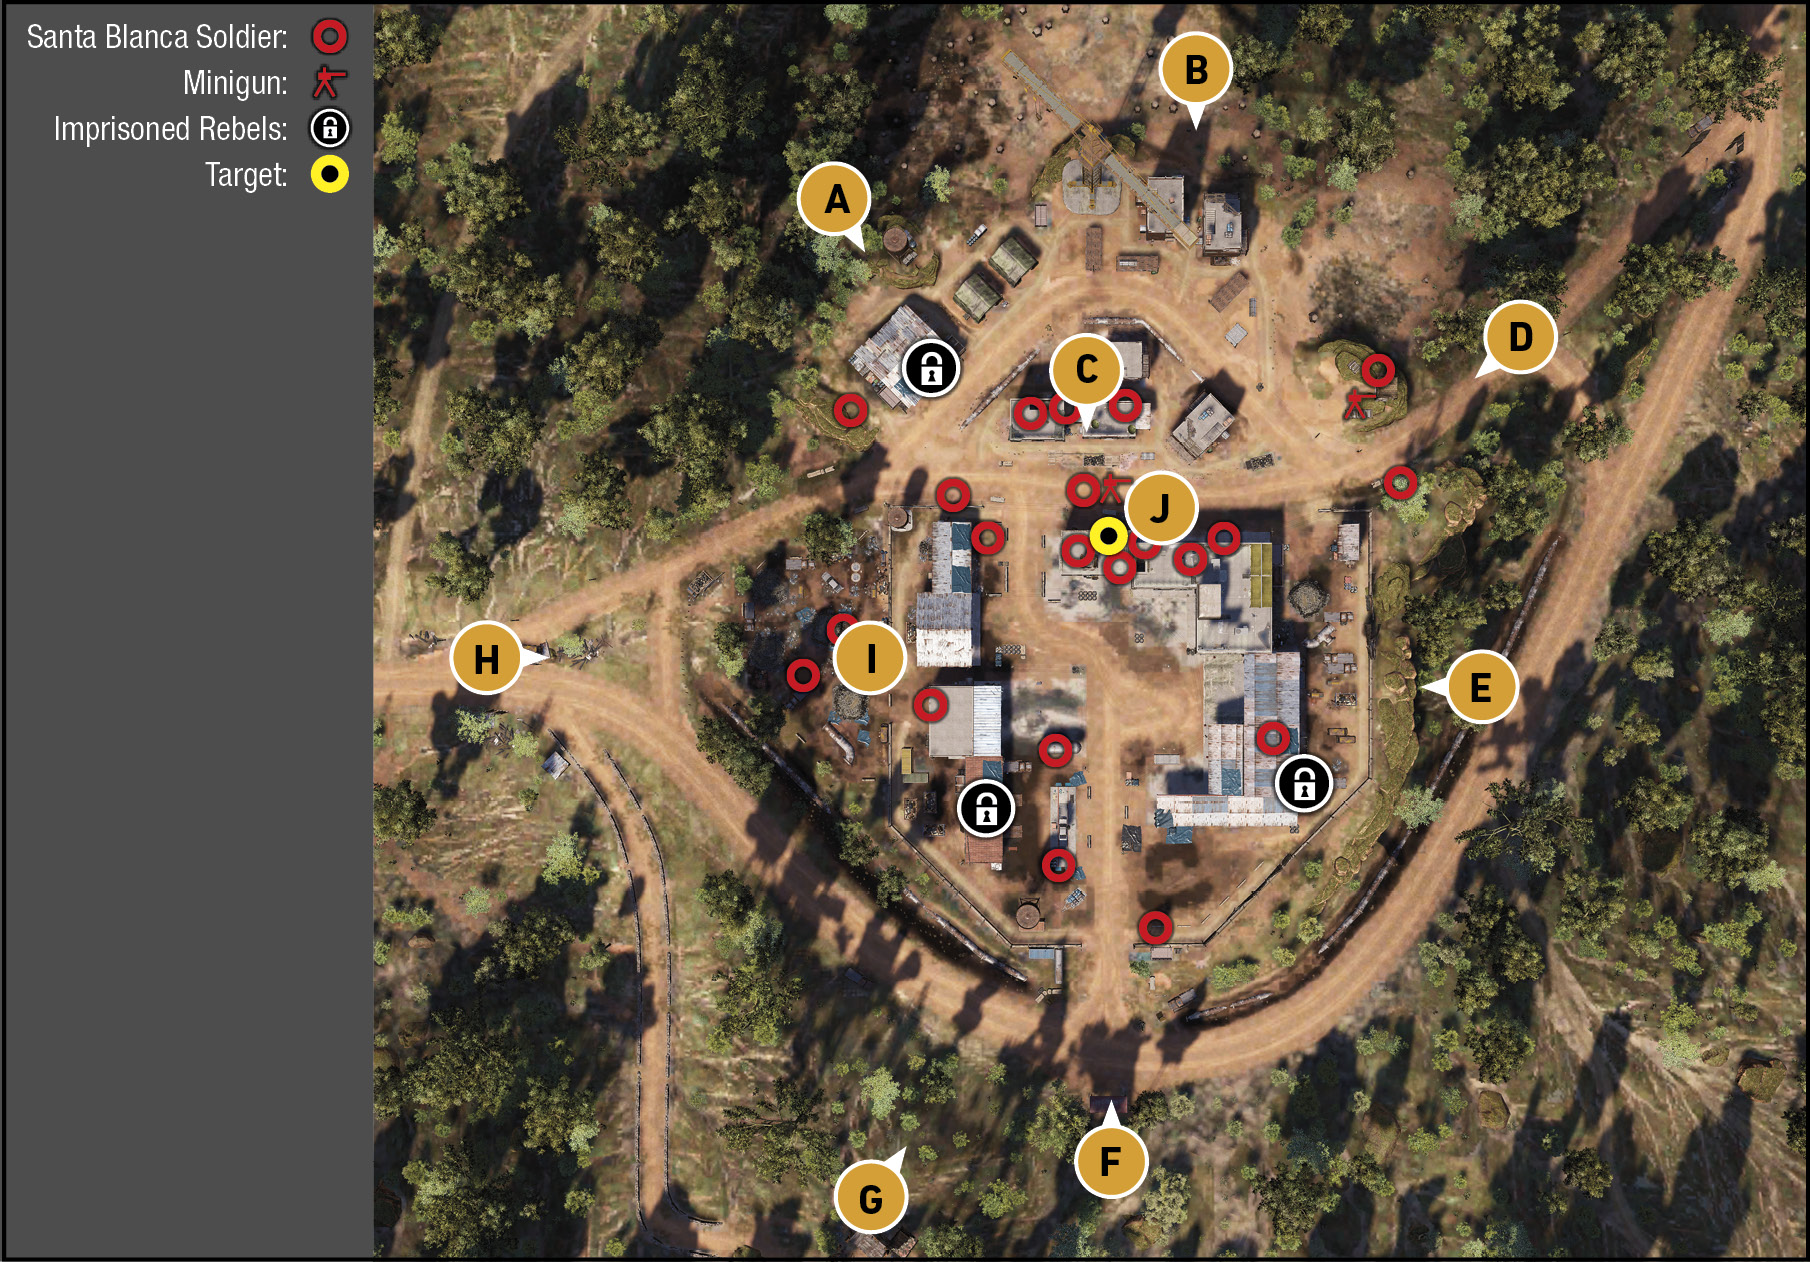
This location is quite compact, especially as there are around 20 enemies to encounter en route to the garage. Note that not all of them need to be neutralized. You’re here to clear a path to the car before escaping in it, rather than completely removing all threats (though the latter is always beneficial, as there are rebels to free from three cells if you remove all cartel threats).
Tree Stumps And Barracks
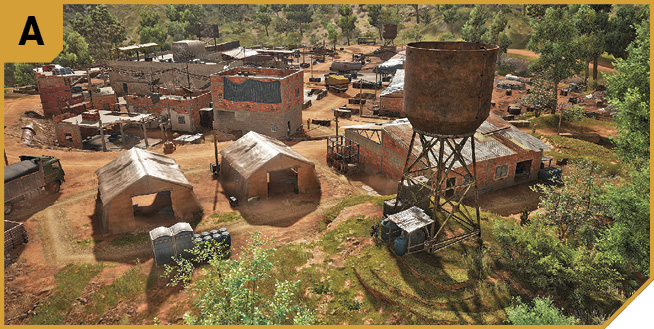
Approaching from this direction is advantageous, as you have the height advantage, most of the enemy is congregating south of you, and night-time infiltrations have around four enemies sleeping in the two tents, making them easy kills. From here you can fan out, removing threats in and around the warehouse mess hall (southwest), or moving to B. There are rebels to free at the mess hall, too.
Crane and Brick Towers
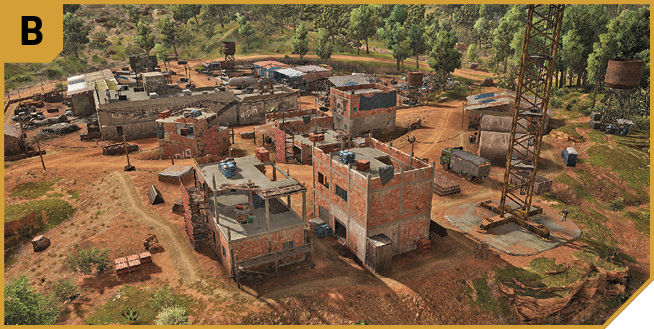
The two unfinished brick towers near the crane are incredibly helpful for providing covering fire over much of this area, and a competent sharpshooter can remove threats both at C and D, as well as the rooftop foes at the mounted weapon on the garage roof at J.
Comms Building And North Buildings Cluster
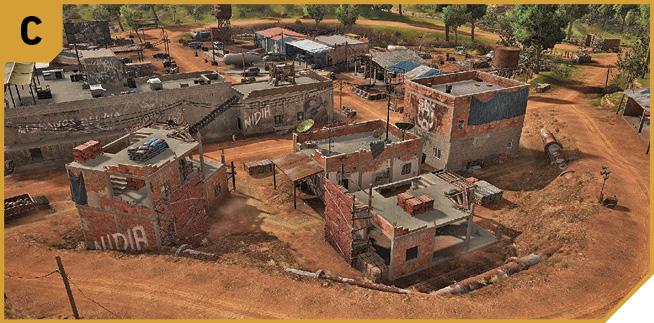
The four buildings in the northern interior of this base are problematic to hold if you haven’t properly removed foes that are flanking the area at A and D first. Expect at least three enemies within this quartet of buildings. Suppressed fire takedowns are useful as you advance south, and the two outer (east and west) and taller buildings have rooftops to ascend and snipe from.
Northeast Entrance
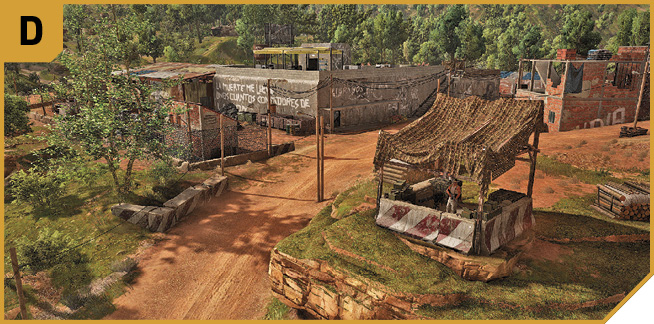
Though careening in from the road to the northeast is possible, it’s not encouraged as there’s a minigun nest and a second foe at this side entrance. It’s better to remove these threats either from behind (after securing A, B, and C for example), or by approaching from E.
Fence Gap
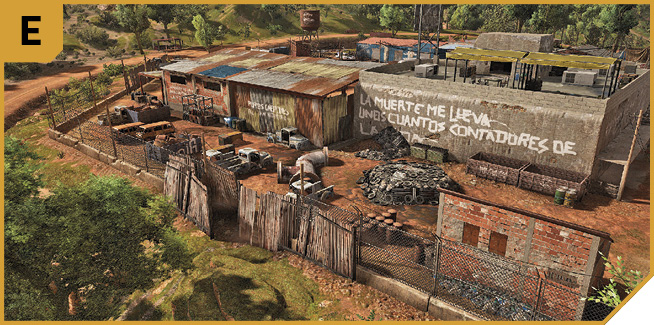
The perimeter at this point is actually a wall, rather than offering no defenses at all like the northern part of this base. So head up from the road with the exposed pipe, and optionally enter here; you can quickly remove threats at D, before advancing west to the northeast corner of the main L-shaped garage structure, and beginning threat takedowns close to the objective, as well as on the roof to remove the minigun threat up there. Time this with a second Ghost, and perhaps sniper support from B or C.
South Entrance
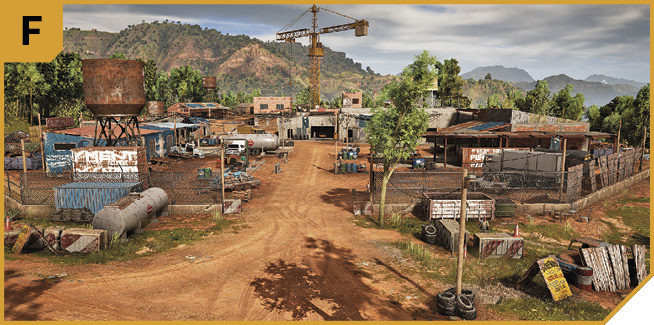
A textbook area for not infiltrating into; there are explosives the enemy can detonate, the minigun nest directly north of you is a huge problem, and at least five enemies can quickly ascertain your location and return fire, some holed up on the roof of J. Use this area as a distraction point, blowing up the red explosive barrel to the right of the entrance, or the propane tank to the left, but do this from range (west of G, for example), before the rest of your team enters elsewhere.
Note that the sports car should be quickly driven from J directly south, and out of this exit; it’s the easiest way to quickly flee the area without attempting to make a series of sharp turns on uneven terrain you can get stuck on.
Sniper’s Ruin
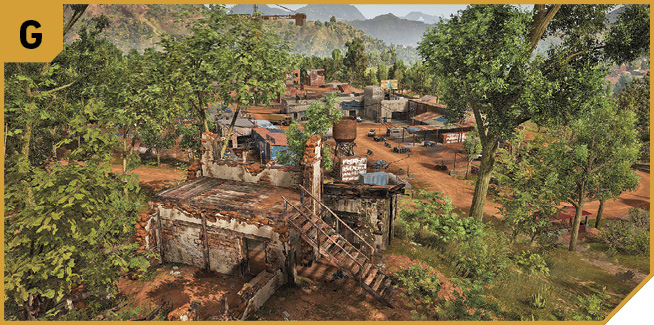
If your team likes sniping, and wishes to remove tactical threats with impunity, have one of your squad take up refuge at the small ruined structure atop the low hill southwest of the base entrance. The views are excellent; you can tag foes at I, J, and the main forecourt. If you’ve additional teammates taking up positions at B and/or C, you can rain fire down on the foes as you quickly whittle them down, or provide cover for Ghosts infiltrating from E, F, or H.
Western Y-Junction
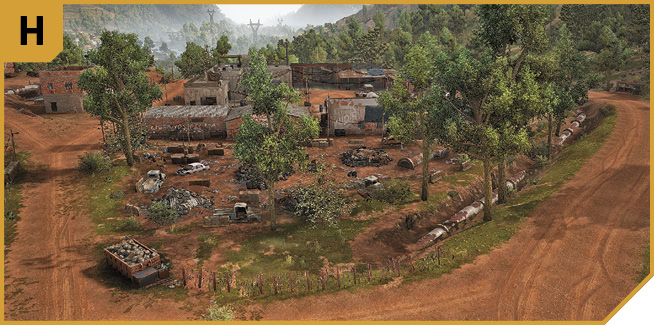
If you’re in a Co-op Mission, it’s possible to infiltrate from here, but the wider expanse and foes who have better cover than you make this direction undesirable. It is, however, a good place from which to drive a well-armed vehicle in to start causing havoc, if you aren’t interested in a stealthy approach.
Tire Yard
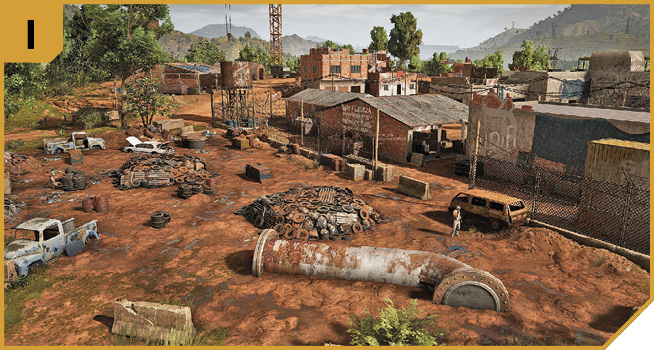
Two or three cartel gunmen are patrolling this mud-filled yard of rusting debris and tire piles. Though the road to the north is a little less easy to infiltrate due to a lack of cover, heading from west to east, using the debris as cover, and traveling between the two long buildings on the west side of the forecourt (where there’s a rebel cage to break open), offers better infiltration opportunities.
|
 Target: Sports Car And Mechanics’ Forecourt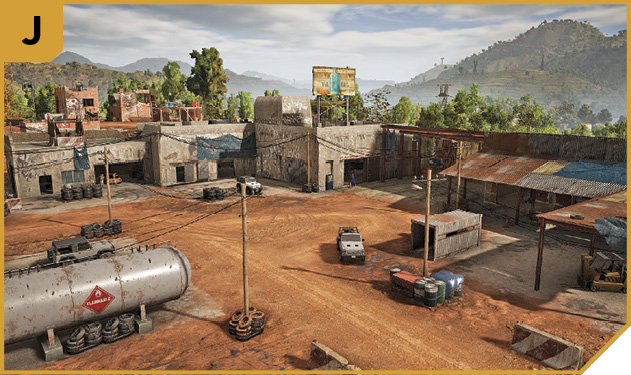
Itacua Base: Other Tactical Advice
 Though you can infiltrate from any direction, using the height advantage by moving north to south from A or B is an optimal plan. Use stealth and suppressed fire as you work your way from A to B, and then into C without being spotted. Then bring the rest of your team in and around D and attack the garage at J. Or, position your crew south of J, so the main focus of the enemy attack is toward them, while you enter the garage from the north and obtain the car.
 The toughest opponents are those at D and J, so neutralizing the ones near the minigun nests is of paramount importance. Station a sniper at B, another at G, and then infiltrate with a third Ghost coming in from A to clear that area, then C, before advancing on J. The fourth Ghost can head in from E, before neutralizing foes at D and then entering J from the northeast doorway. Splitting up and keeping the enemy unsure of the direction of enemy fire means you can make short work of them. Or, you can have one of your team dash in heading south from B or E (optionally while others set up explosives at the propane tanks for distraction purposes), into the garage and take off in the car while the others retreat.
Itacua Charlie: Hacking the GPS
After obtaining the vehicle, simply follow the road after tagging Itacua Charlie on your Tacmap, and try not to total the vehicle on your way to this extraction point. Park, and Bowman takes it from here.