
Tom Clancy's Ghost Recon: Wildlands Guide Welcome to Bolivia Tabacal: Madre Coca
Madre Coca

Objectives
- Rendezvous with the rebels
- Talk to the rebel in charge
- Follow the rebels to the meeting
- Kill Madre Coca
LOCATIONS
- Taller Mecanico(Rebel Garage)
- Buchone House
REWARDS
- + 500 XP
- + 3 Skill Points
- Light Machine Gun: El Baston
Brief
Madre Coca reached out to the rebels, asking to negotiate the release of Salazar, her protégé and right-hand man. Weakened and desperate, she might be willing to turn on El Sueño if the right amount of pressure is applied.
Tricky old Bitch
Madre Coca wants to talk, and a small group of Rebels working out of a mechanic’s garage in northern Tabacal have the location where she wishes to meet—her compound on a steep hill to the northeast. Could this be a trap?
Buchone House: Recon
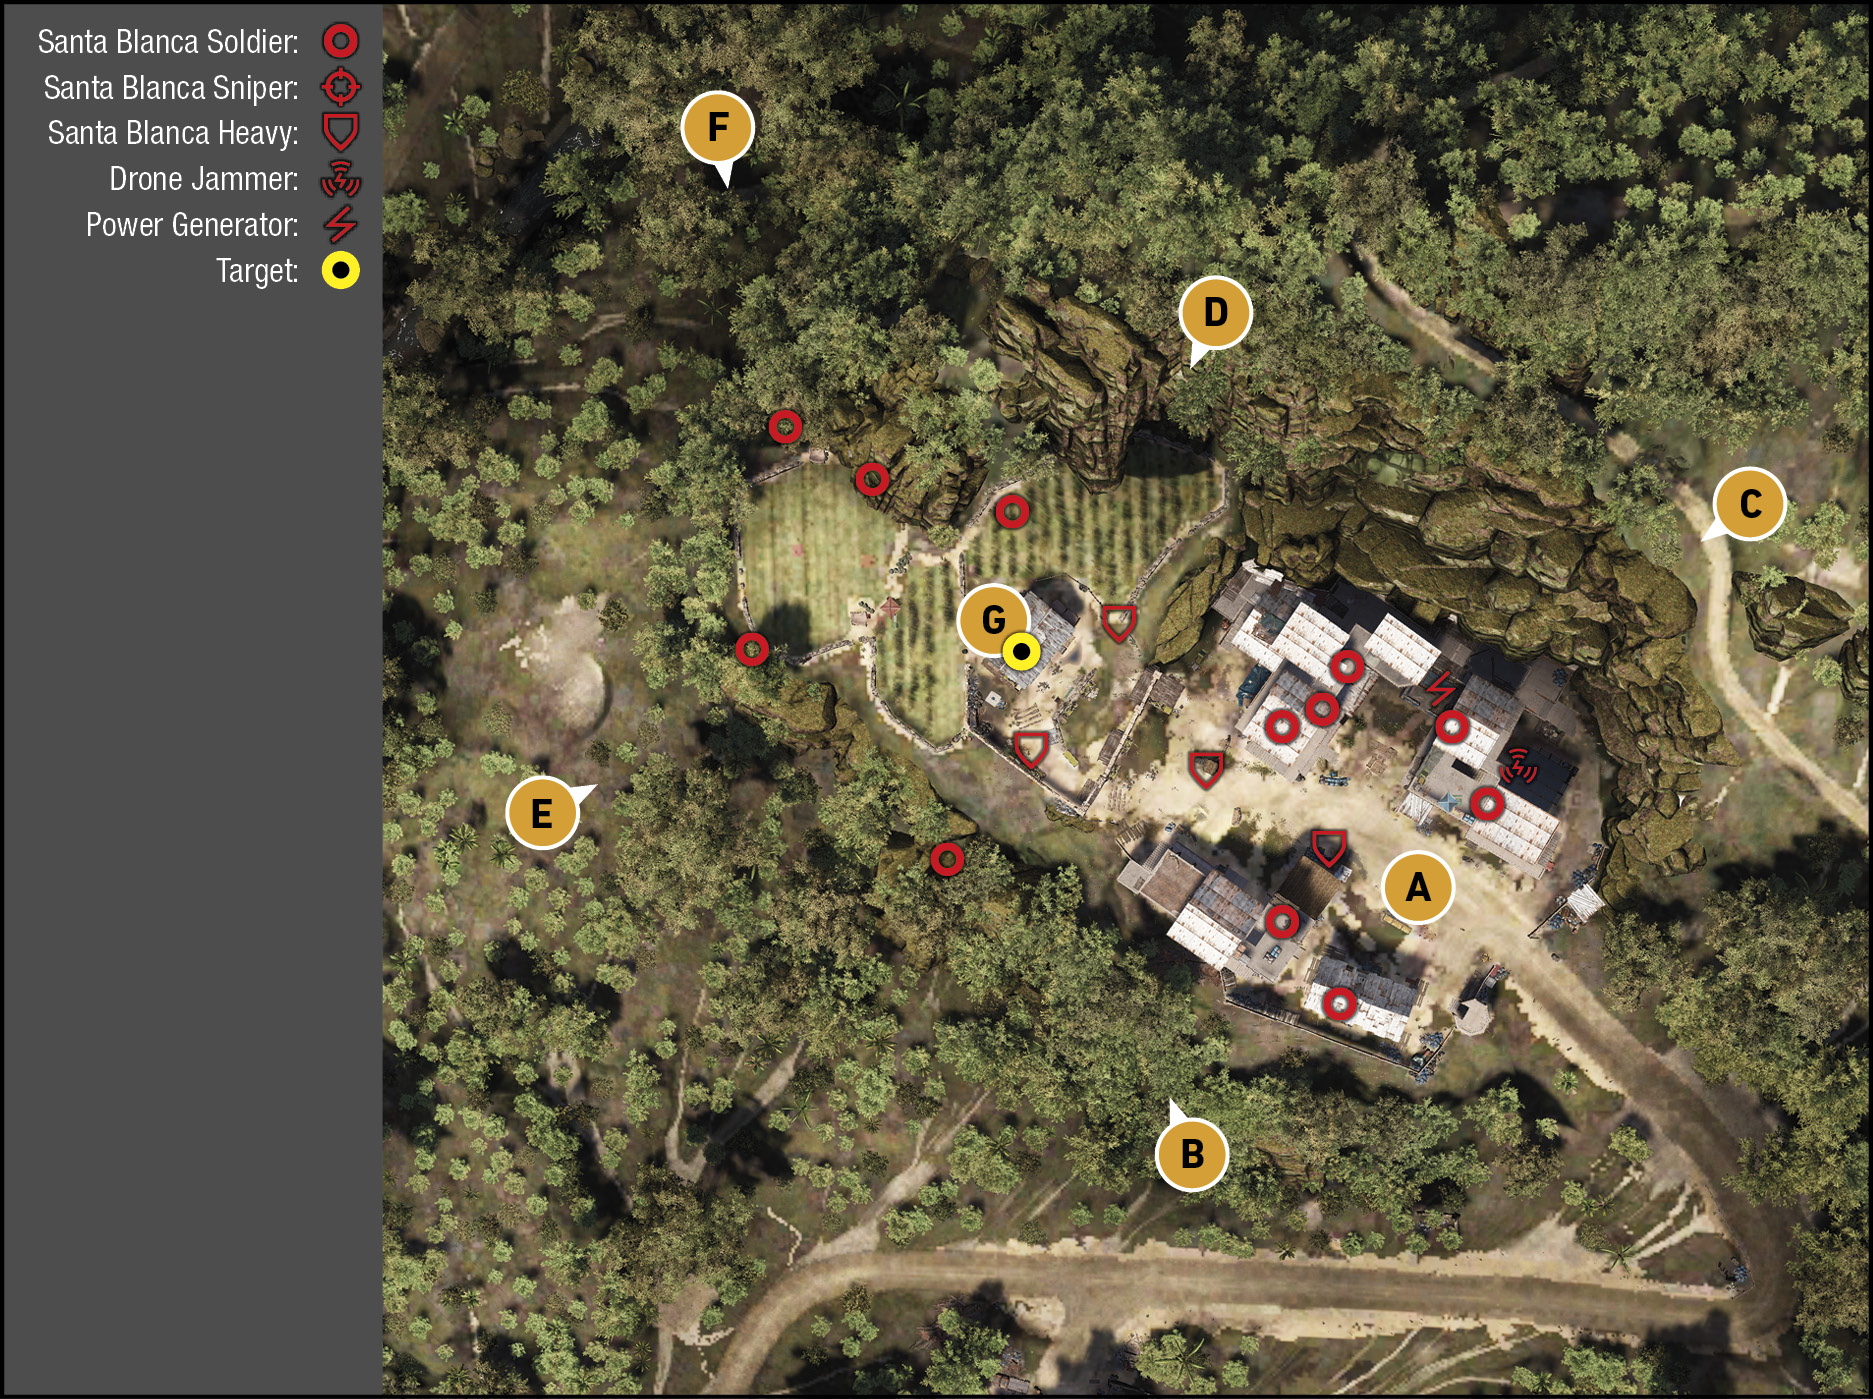
TACMAP
Think of Buchone House as two distinct areas. First, a main courtyard with shack structures dug into the northeast cliffs, along with a trio of structures including an armory on the south side. Then, on the northwestern side of the compound on the slightly higher ground is a small-walled hacienda cottage and coca plantation where your target begins. If you chose to follow the rebels, the battle is already under way. If you chose to scout this area, you can try stealth tactics; either way it’s time to mow everyone down…or just Madre Coca, depending on your tactics.
Lower Courtyard
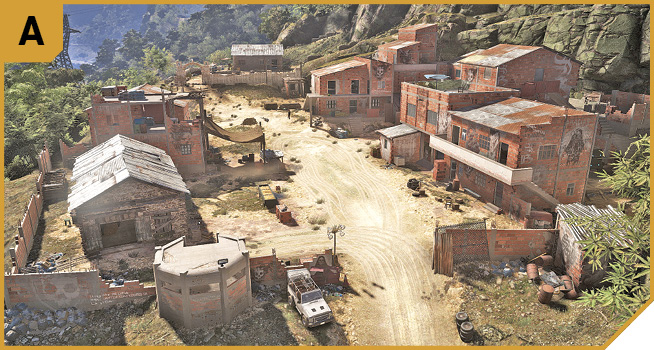
Assuming you’re here and the ambush takes place, scurrying for cover towards the south buildings is the best bet, as you can make your way towards Madre Coca’s cottage more easily and in cover. Let the rest of your teammates focus on the enemies, and (in Co-op) have two Ghosts head for G, the target’s house. Expect heavy fighting from foes inside and on the roofs of the northeast buildings; either sprint and clear them house-to-house or fire from the southern buildings and claim the armory. Grenades, flashbangs, and other projectiles are encouraged. Note the Rebels are fighting with you, easing this firefight considerably.
Note that you can peel off from your team (in Co-op) prior or just after the ambush, and move to the northeastern area of the courtyard, behind the building closest to the entrance, and deactivate a radar jammer (allowing others in your team to use explosive drones, for example). Moving through the rear of the buildings is a good way to outflank the enemy, too.
South Perimeter
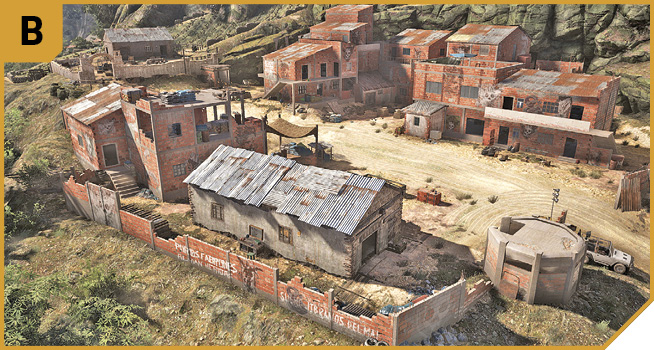
If you’re playing Co-op, you can have one Ghost peel off and use this perimeter before the ambush takes place, or move here yourself when the fighting starts. The pill box is empty (thankfully), and you can more safely move northwest, through the farm barn, the three story brick structure, and around to the armory, removing foes on this side so you can focus your firing on the remaining foes across the courtyard. Or, you can creep on the outside of the ruined brick perimeter wall, all the way to the old archway into Madre Coca’s cottage grounds.
Cliff Path Sniper Point (Rock Outcrop)
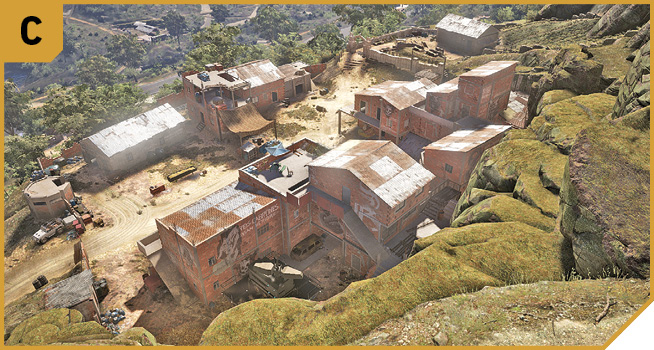
Before the ambush, or if you’re using stealth, you can hike up here, and have an exceptional view of the entire base. When the ambush starts, you can train your sniper rifle on the armored foes, and Madre Coca herself, as the views here are exceptional, and the likelihood of being attacked is extremely low.
Cliff Top Sniper Point (North)
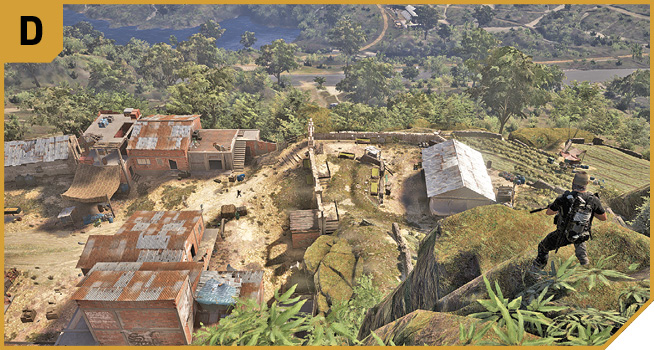
Similarly, you can stand atop the rocky outcrop just north of the Madre Coca cottage, and perform the same sniping plans, or lob grenades down at the enemy. It’s another great spot from which to provide supporting fire and to watch the carnage unfold.
Southwest Coca Field, Low Wall
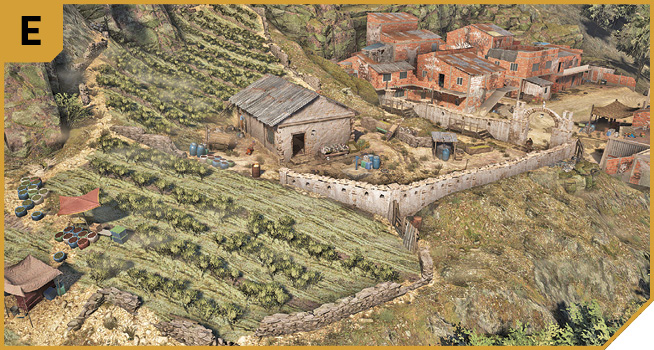
You can continue to creep along the southern perimeter of the compound, though the steep ground and enemies in the field are more difficult to spot and react to. You can hike up from the road below too if you’re attempting to swarm Madre Coca’s position from different directions.
Northwest Coca Field
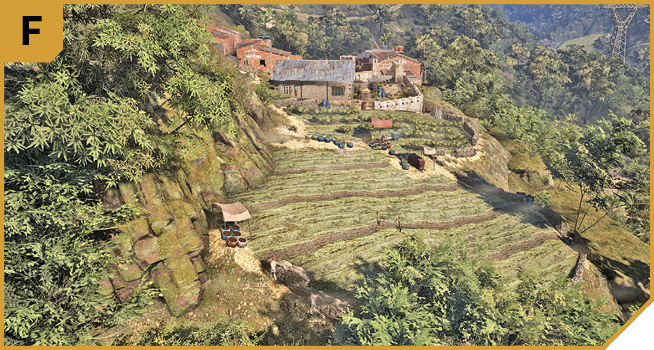
If you’re heading down from the mountain stream to the edge of the coca field, you can deal with the foes in the field and sneak across to attack Madre Coca’s compound from the rear, thus avoiding any lower courtyard shenanigans. Skirt the north rocks to gain a height advantage over the foes milling about in the garden outside the cottage itself.
|
 Target: Madre Coca’s Cottage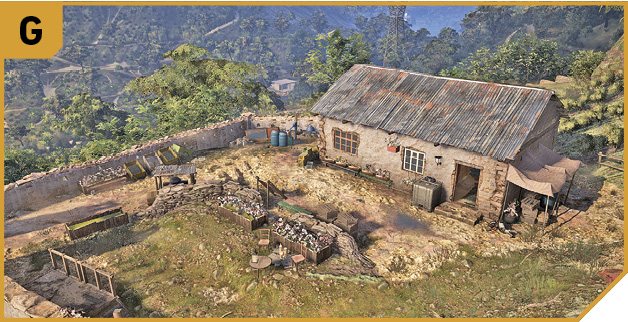
BUCHONE HOUSE: OTHER TACTICAL ADVICE
 If you chose to be ambushed, order your men to attack the enemies on the northeast side of the courtyard while you run to B, and sweep the buildings to the south, using the cover provided by these structures. Be patient, wait for more rebels (or order some more), and keep the armory in preparation for storming up the steps into the cottage garden. Grenades from the half-built brick building help soften up the targets, and you can wait for the armored foes to appear from the target cottage and defeat them from cover. Then order everyone to storm the cottage and bring down Madre Coca from all directions.
To avoid the ambush, approach from F, ordering your team to storm the target cottage, and sit back, training a favored weapon on Madre Coca, and any foes in the nearby coca field, and take her down when she appears. Use grenades thrown into the cottage to bring down the armored foes too. Or, hike up to C after destroying the drone jammer, and fly an explosive drone into the cottage, detonating it as close to Madre Coca as you can.
 If ambushed, split off in all directions with one Ghost heading up the south perimeter, one clearing the north courtyard buildings after destroying the jammer, one hiking up to C, and a fourth Ghost reacting depending on the situation (driving an armored vehicle around, helping remove foes, or softening up areas with grenades or sniper fire).
To avoid the ambush, approach from B, C, E, and/or F; stealthily taking out foes in the coca field without raising any suspicions, and then blanket bomb the interior of Madre Coca’s cottage, shooting out the windows as a second Ghost lobs in a flashbang, then a regular grenade, and clear the foes on the higher ground first. Then leave, or help tidy up the remaining enemies in the courtyard.