
Tom Clancy's Ghost Recon: Wildlands Guide Welcome to Bolivia Ocoro: El Emisario
The Boat Lab

Objectives
- Reach the boat
- Open the gas cylinder
- Short-circuit the fuse box
- Escape the boat before it explodes
LOCATIONS
- Boat Lab
REWARDS
- + 350 XP
Brief
One of Ocoro’s cocaine production sites is located aboard a converted fishing boat near Puerto Grande. Find the boat lab and destroy it.
We’RE on a Boat!
Once the settlement of Puerto Grande is optionally neutralized, launch a boat from the Fisherman’s Hut at the cove northwest of town (or farther along the river). Or, use a helicopter to reach the small cluster of tiny islands in the large river to the northwest. This is a heavily-fortified compound. When you reach the boat, head upstairs, unscrew the gas canister, then short-circuit a fuse box just to the right of the canister, on the same wall. Thirty seconds later, the boat explodes, so immediately flee to a safe distance outside the explosion radius indicated on your map.
Boat Lab: Recon
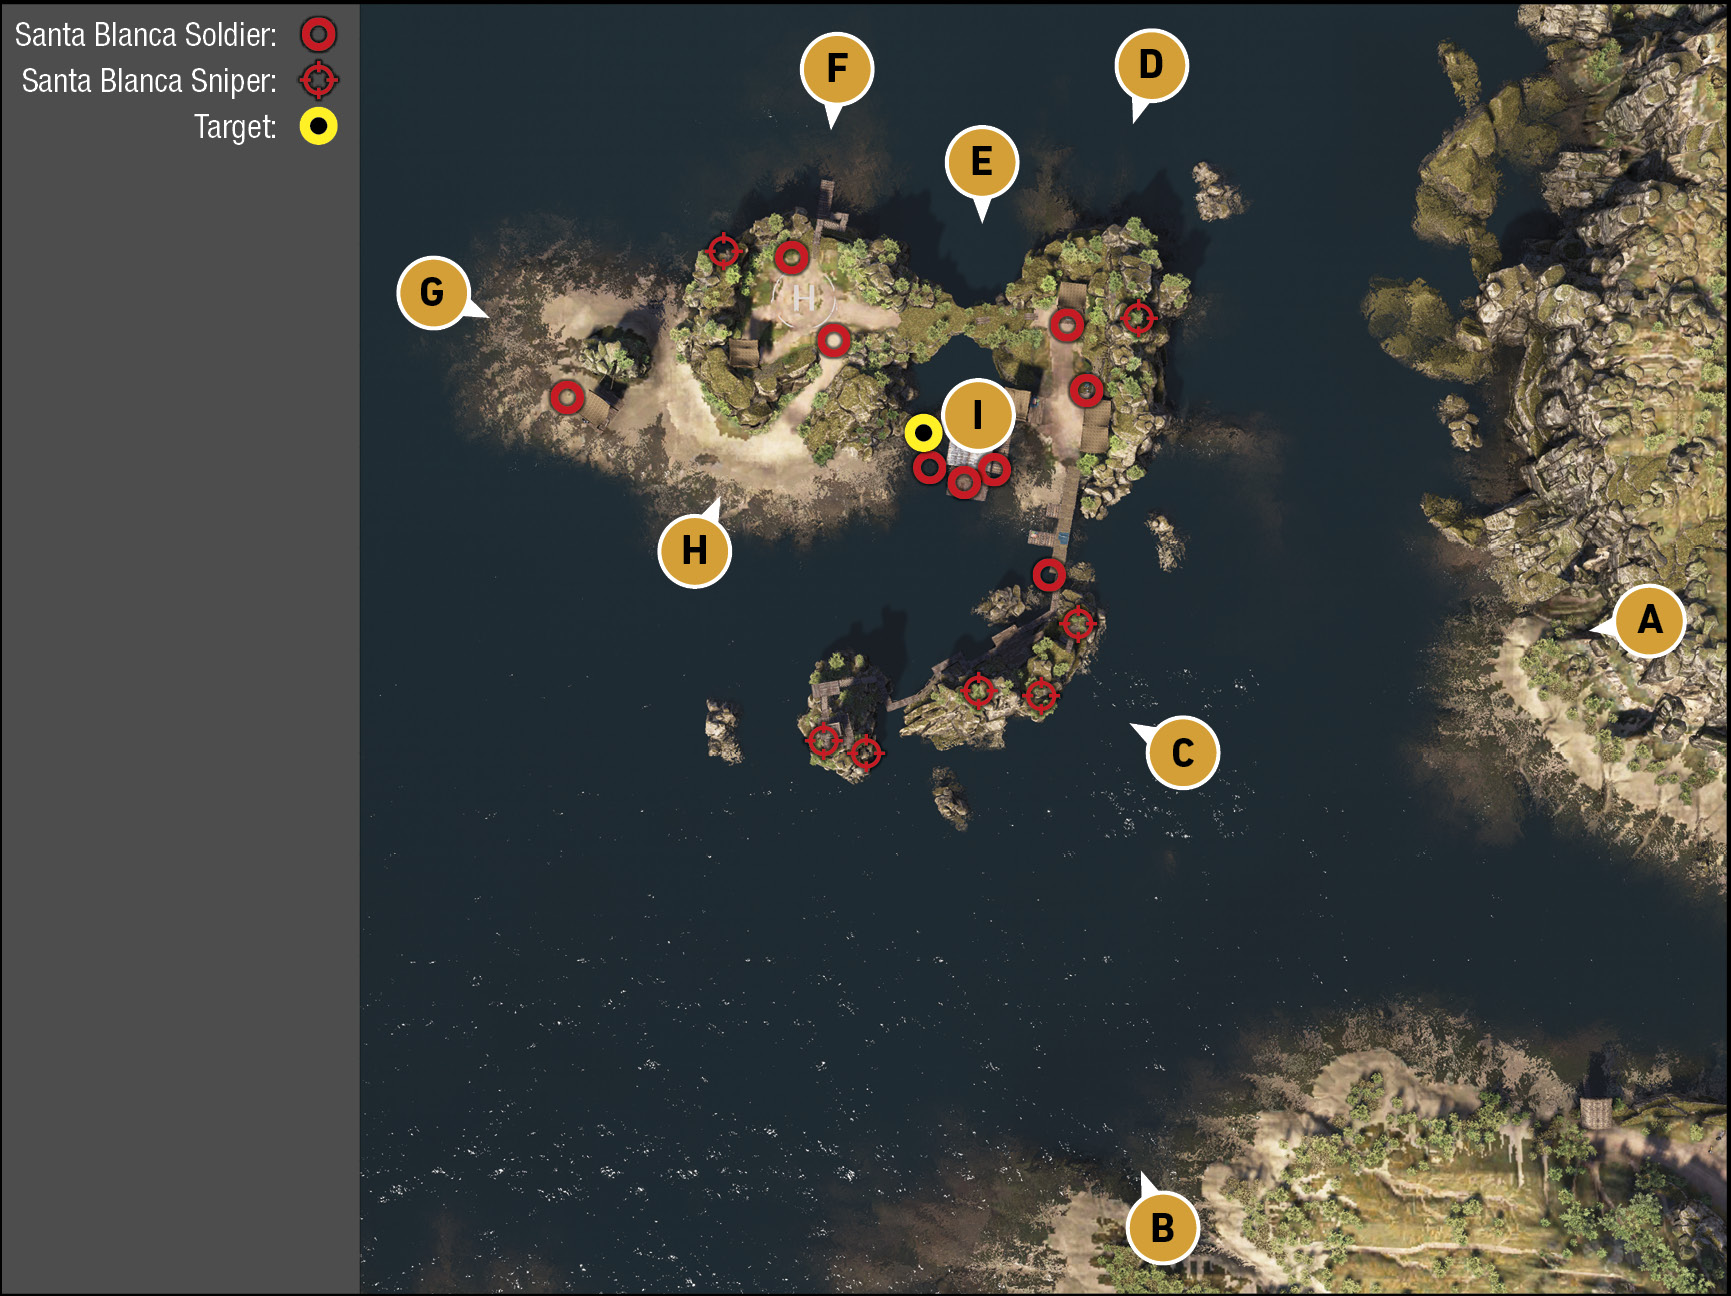
TACMAP
Split this island cluster into a north and south section, separated by a rickety pier to the east, with the objective boat moored in the central-north area, surrounded by land and a predominance of snipers. The sheer number of long-range attackers means a stealth crawl, or boating assaults, are the best ways to achieve the forthcoming boat explosion.
Clifftop Sniper (East)
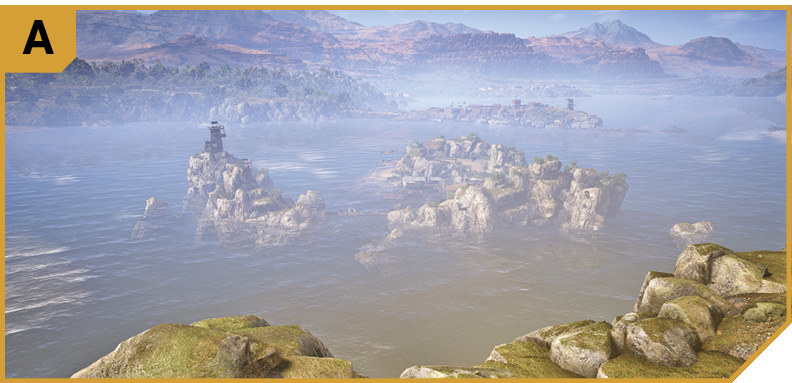
The cliffs to the east of the islands do allow you to tag the foes along the eastern side of the island using a sniper rifle, which can whittle down the foes before the main assault begins. The flat ground atop these cliffs also makes a great embarking point if you’re using a chopper to get the job done.
Beach Sniper (South)

Similarly, the southern beach and low ground to the south of the island offers long-range sniping opportunities to remove the threats along the southern island. This isn’t quite as helpful as having your own boats move slightly closer to line up better shots, but it’s reasonably helpful if you’re planning a slow-and-steady completion.
South Island Assault Point
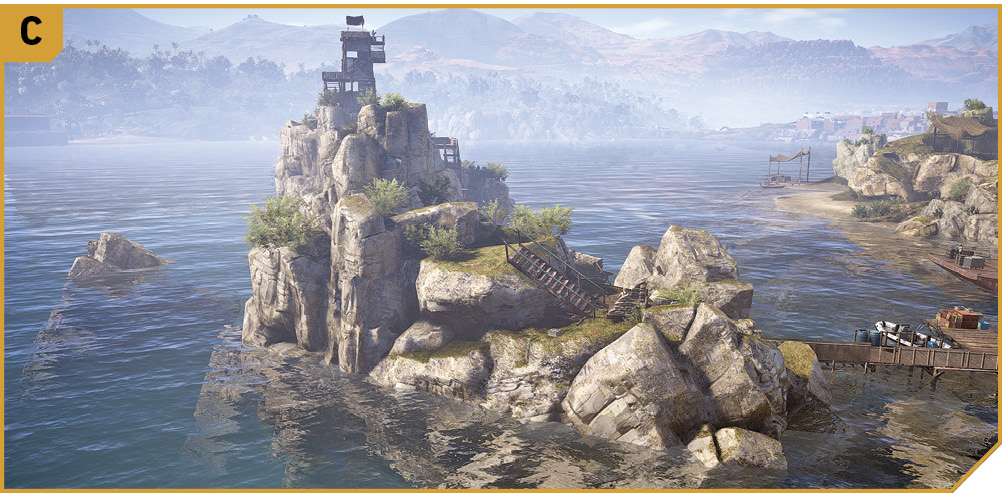
Most of the snipers are scattered across the rough rocky slopes of this narrow set of tiny outcrops. As disembarking at the wooden pier bridge just north of here essentially announces your arrival, moor a boat at C, and climb up, slowly working your way westward and tagging every single foe with suppressed fire until you’re at the top of the western sniper tower. The foes to the north won’t know what’s going on if you’re adept. Then assault north.
Northeast Island Assault Point

Climb out of a boat and up the sloping rocks at this point, and you can start removing the foes in the northeast corner of the island, starting with the sniper. The two ground foes should then be tackled, before the enemies on the target boat itself. This should be done while the rest of your team tackles enemies from different directions.
Bridge And Tunnel
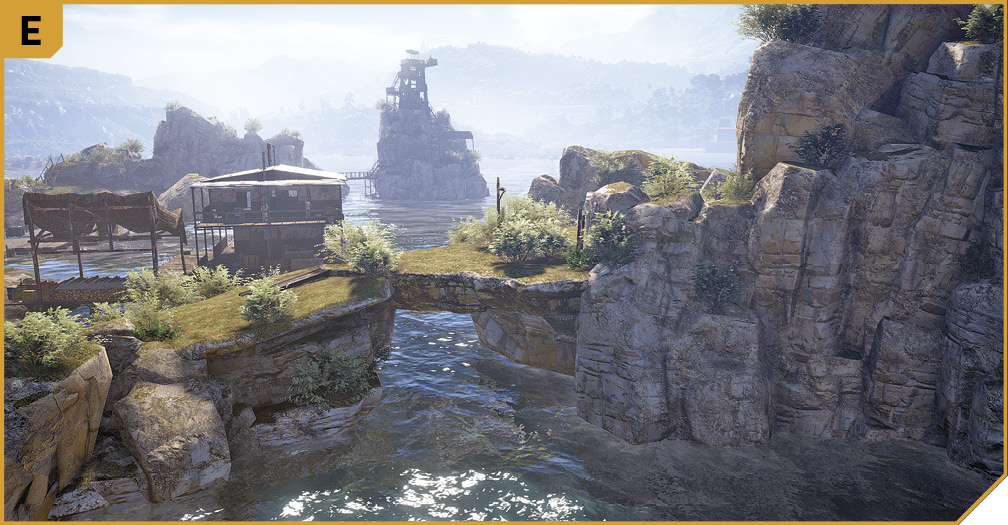
Access across the north side of the island is easy if you’re on the rocks, moving east to west or vice versa. But don’t overlook the small arch of rock under the bridge, allowing a boat to pass into and out of the island area. Use this as an alternate assault or departure point if you’re leaving by boat.
Northwest Island Assault Point
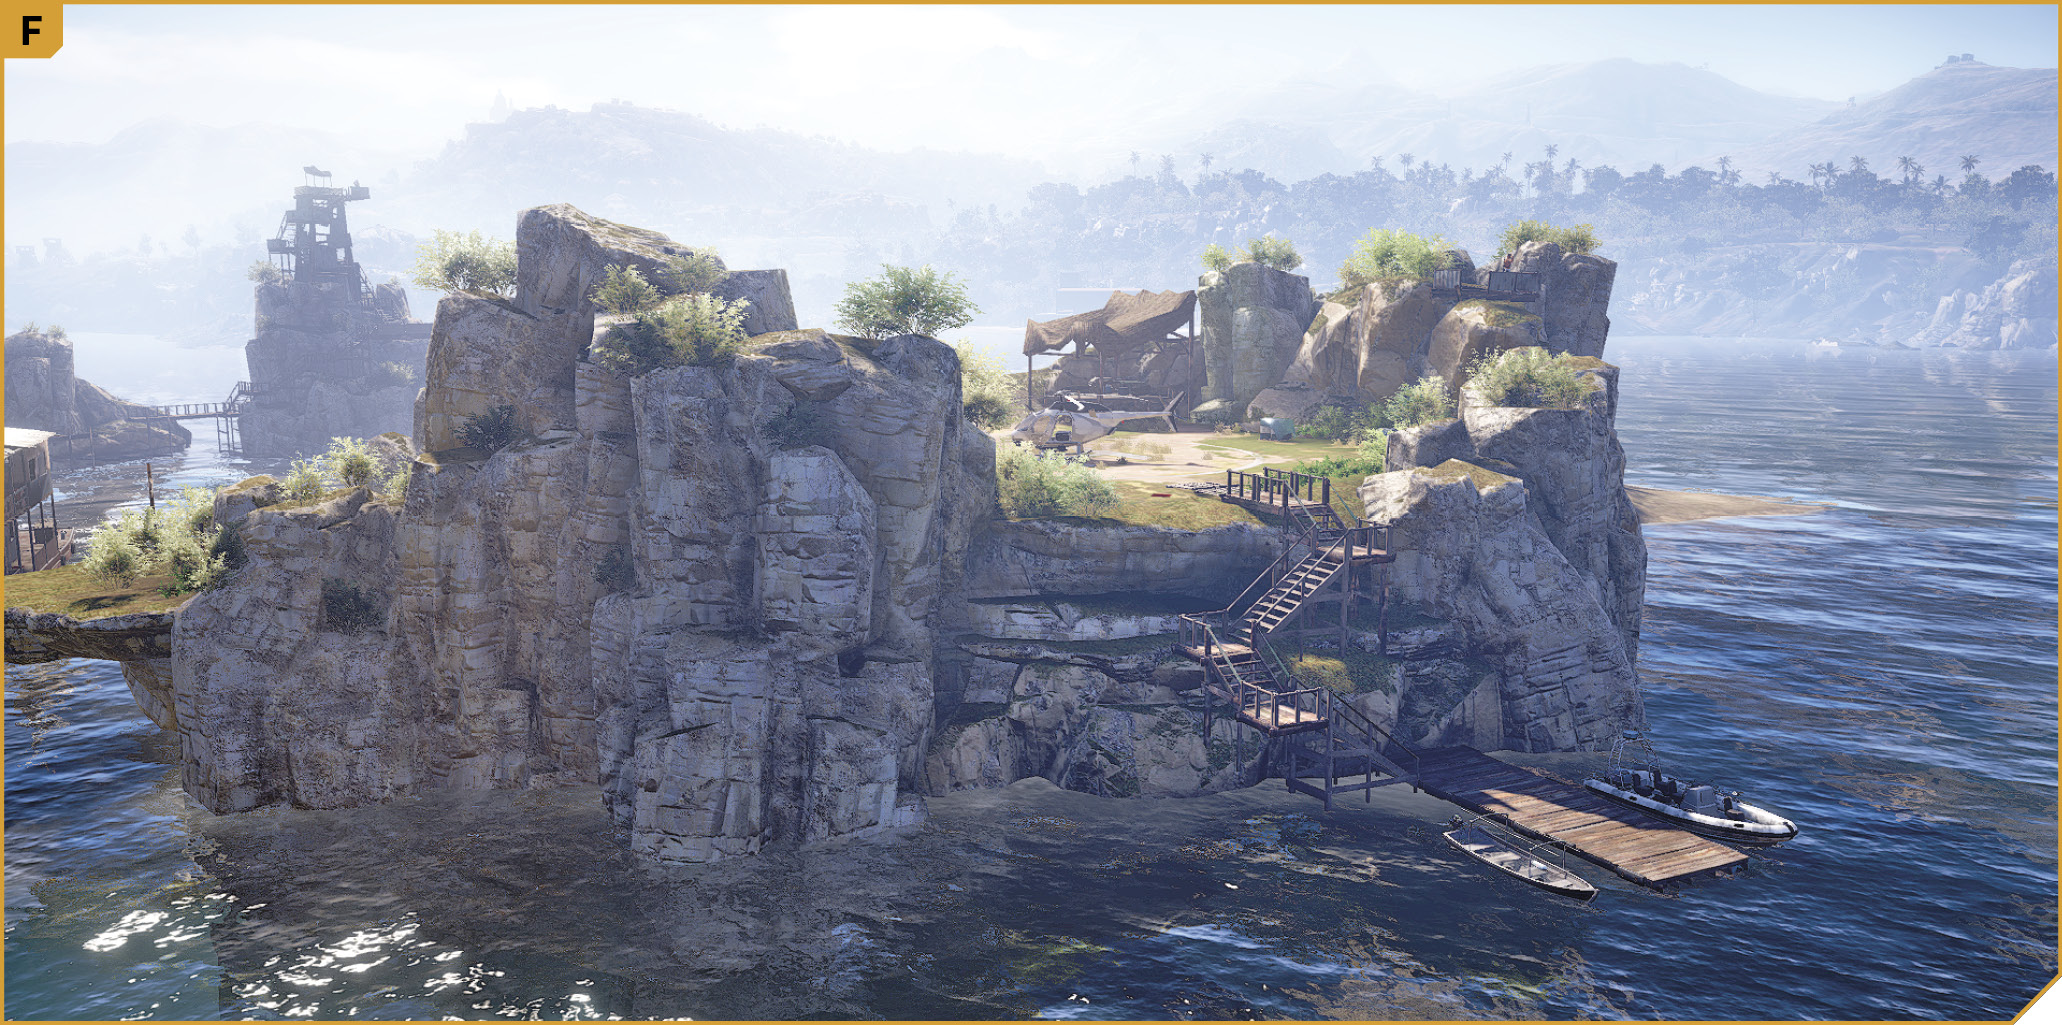
The jetty here is the easiest method of accessing the island, allowing access to the helipad, and a trio of foes including a sniper that’s difficult to get a bead on. Have a fellow Ghost shoot him from elsewhere on the island as this assault begins (from the southwest sniper tower after removing foes from C, for example). If you’re moving to defensive positions at the rocks on the perimeter of the helipad, you can start your takedowns from this point; this is a good defensive spot.
Fisherman’s Beach (Northwest)
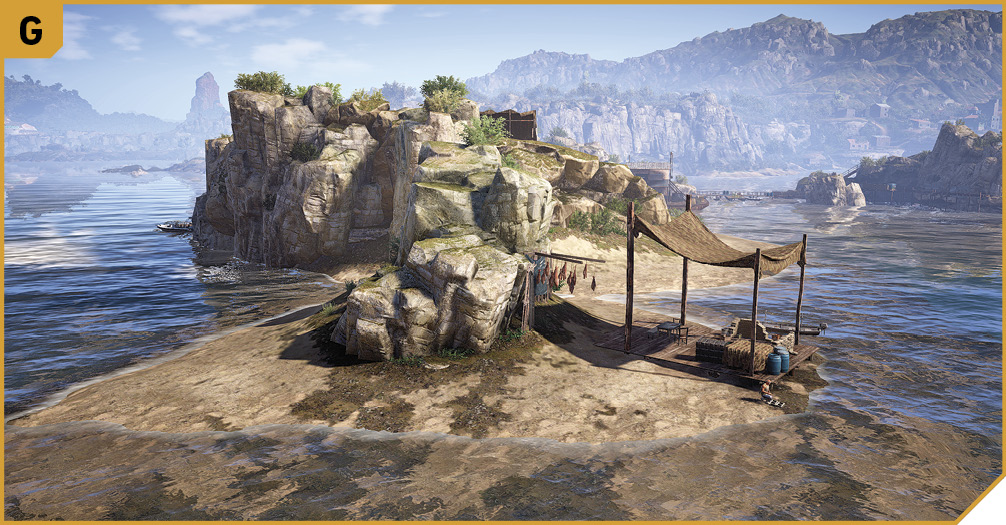
The northwestern tip of the islands has a single foe, and a shallow beach area. The rock outcrop and sandbags on the wooden platform are great locations for hiding and providing long-range distraction or takedowns against the snipers to the south, or foes on the target boat itself. Plus, the beach to the east is easily accessed once the coast is clear.
Interior Beach Slope

The sandy slope here leads up to the helipad, but disembarking without removing the foes dotted around the outer islands is a serious mistake, as you’re easily taken out from all angles. Use this as an extraction point once the objective is met, and there are still stragglers you’re not attempting to kill; you can quickly leave via boat or chopper from here.
|
 Target: Floating Boat Lab
Boat Lab: Tactical Advice
 A great plan is to concentrate on the snipers while your fellow Ghosts are directed to assault the boat itself. This means disembarking at C, and removing the five snipers along the southern island area, then the long-range removal of the sniper at F. With only one sniper left, you can mop up ground troops at F and I, with your Ghosts assaulting the beach itself. Move to the boat lab and complete the objective, watching for stragglers (especially the sniper on the perch to the northeast).
 There are many possibilities for success with four Ghosts assaulting here. Have two boats harassing foes and maneuvering in different directions around the perimeter of the island; each boat has a driver and a sniper, and sweeps the island until all enemy snipers are down. Death from above is also an option. Pilot a chopper and circle the island, removing snipers with precision shots rather than raking the area, as there are innocents to protect.
Or, you can try a more stealthy approach. Have one Ghost drive a boat and drop off fellow Ghosts at C, D, and F (in that order). By the time the Ghost at C has removed all the south island snipers, the Ghost at D should have removed foes in the northeast. Then the Ghost at C can tag the sniper at F so the helipad can be secured. The boat driver can then assault at G or H.