Tom Clancy's Ghost Recon: Wildlands Guide Welcome to Bolivia Koani: Boston Reed
Flight Plan

Objectives
- Interrogate the ATC (air traffic controller)
- Send a message to the buyer
- Steal a bush plane and fly to Media Luna
- Reach Media Luna airstrip
- Interrogate the buyer
LOCATIONS
- Koani Air Base
- Media Luna Airstrip (Media Luna Province)
REWARDS
- + 1,000 XP
Brief
Boston Reed uses a corrupt air traffic controller at Koani Airport to hide his smuggling flights from the authorities. Interrogate the ATC and find out everything he knows.
Land of Confusion
The vast air base in Koani Province is in the northwestern corner, mere meters from Koani Bravo. The relative low ground and vast expanse of salt flats around the mission area make this area fairly easy to traverse but a little more difficult to recon, thanks to some installations that require investigating and neutralizing. Note there is significant enemy presence here, but some of the air base can be optionally ignored.
Koani Air Base: Recon
TACMAP
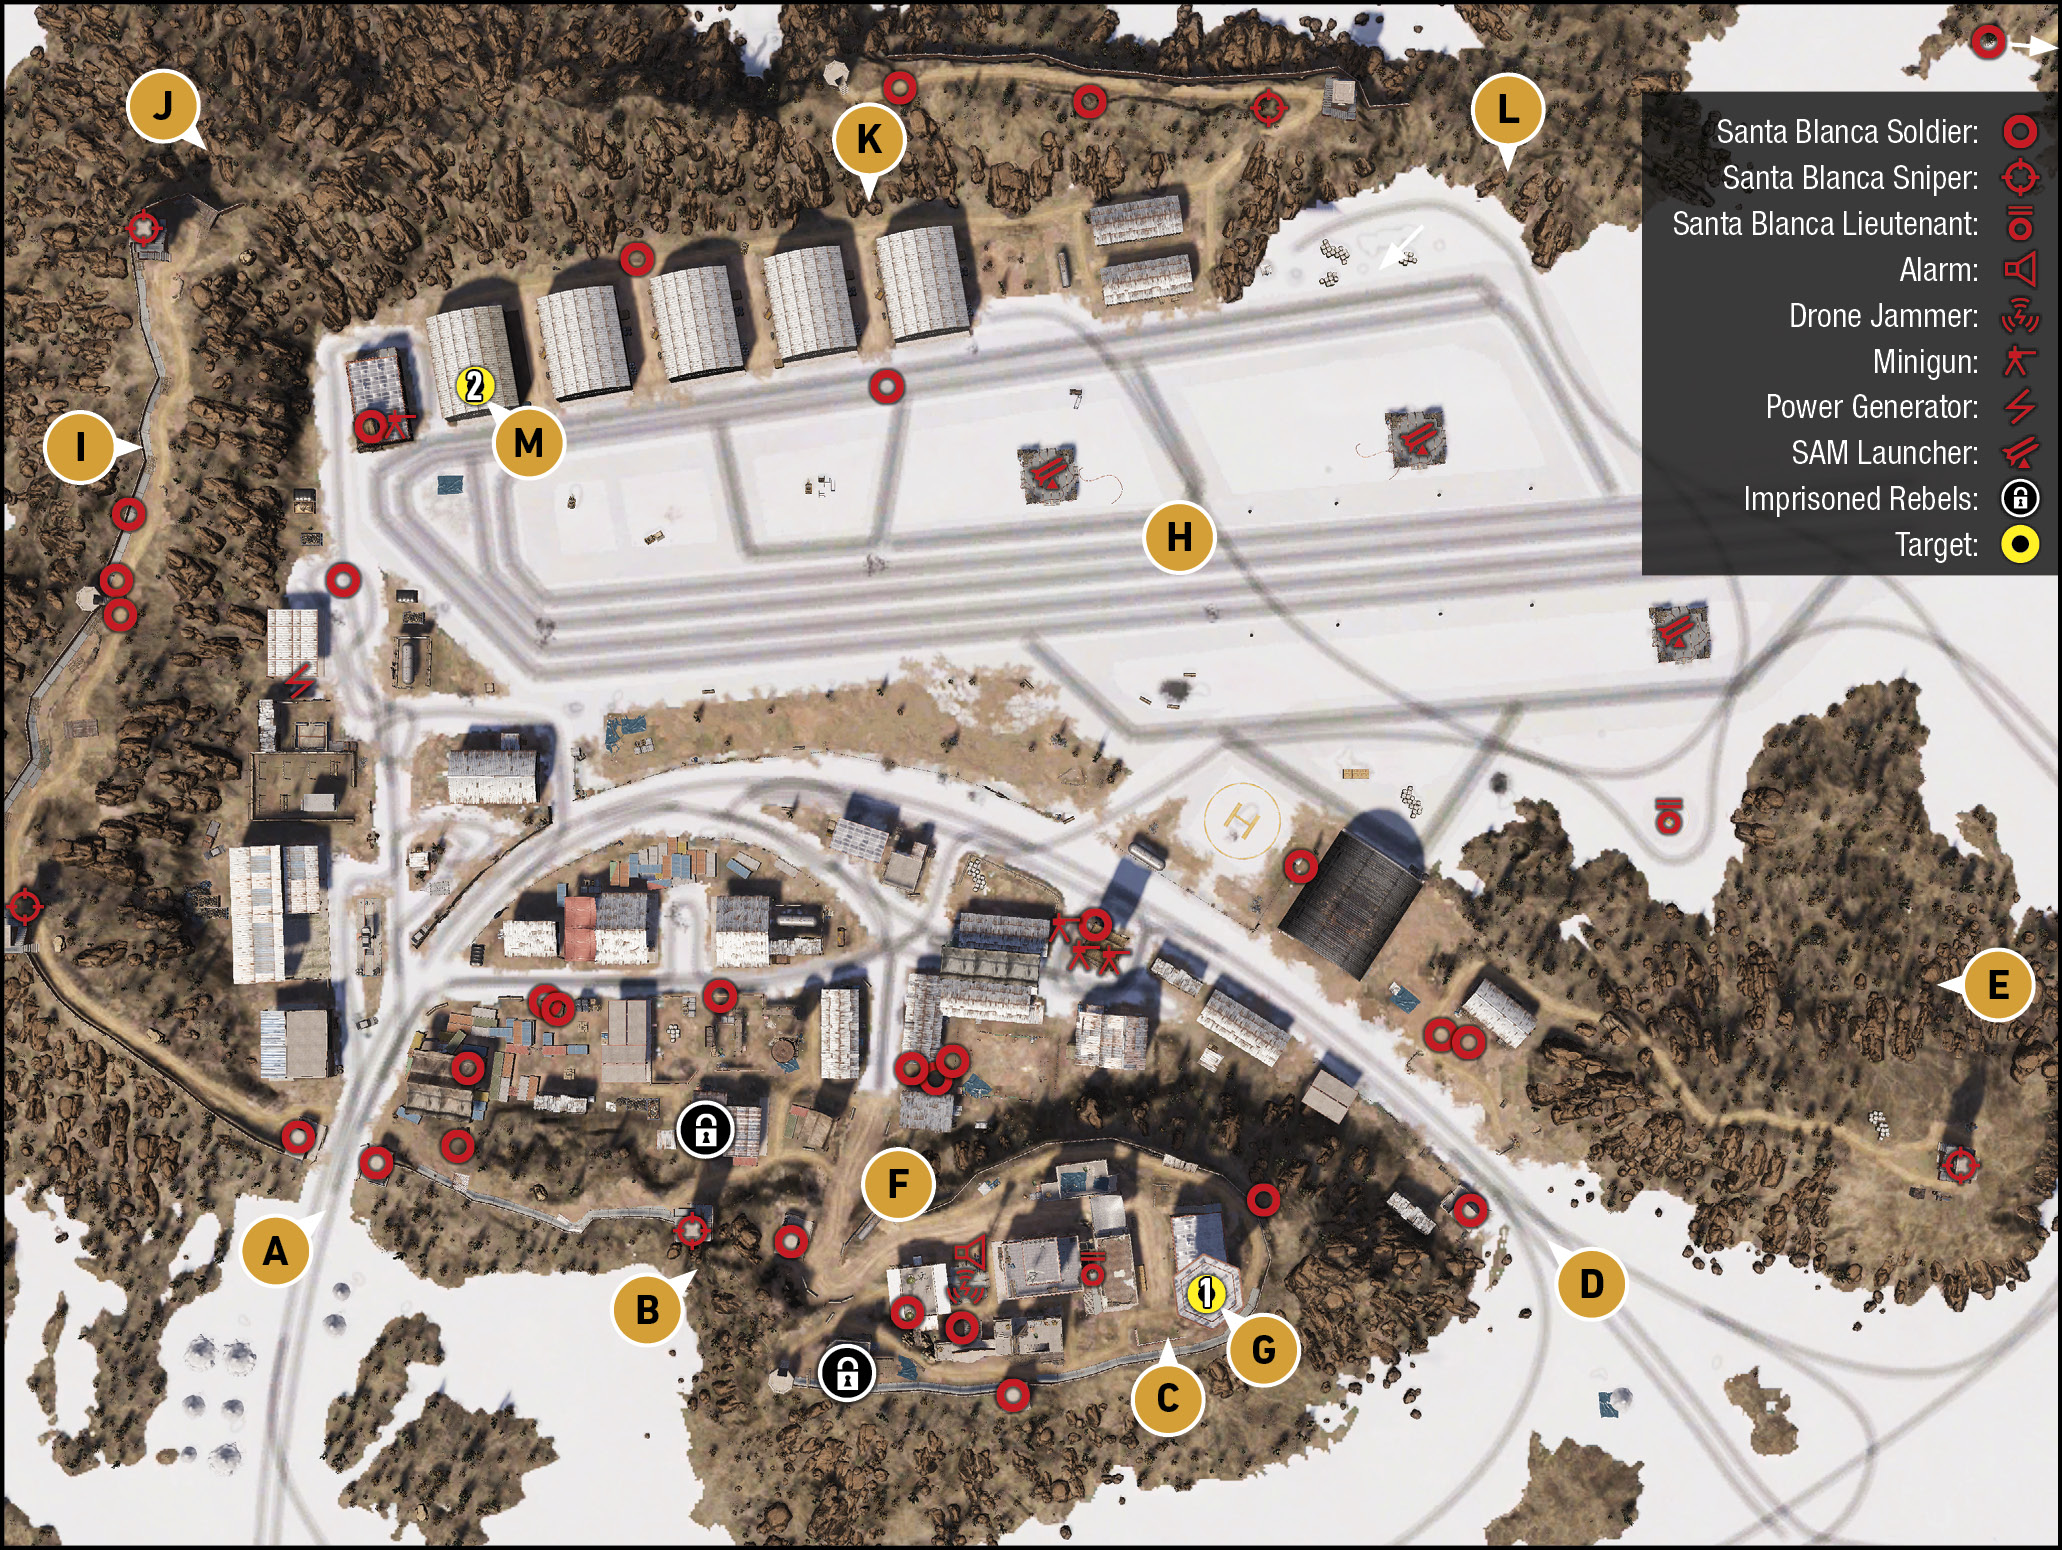
The first things you should notice when approaching the air base are the five sniper locations; the towers are easily spotted, and dotted around the entire base perimeter, including the north peninsula where you don’t have to go (yet). As there’s a secondary target (a plane in the northwest hangar to appropriate and use to fly to a neighboring province), don’t limit yourself to removing just the foes on the main air base itself. Think of the base as two separate adjacent locations—the south peninsula where the main base is, along with the ATC to interrogate; and the north peninsula with the runway, the plane you need to steal, and the hangars with the fewer enemies and sniper towers. You can clear the area north of the looping road without raising an alarm if you’re competent enough. Night-time attacks are encouraged.There are around 38 total enemies, including those on the northern peninsula, though only one is a captain, and there are only five snipers. The rest are fodder.
Koani Air Base: Recon
Southwest: Base Entrance
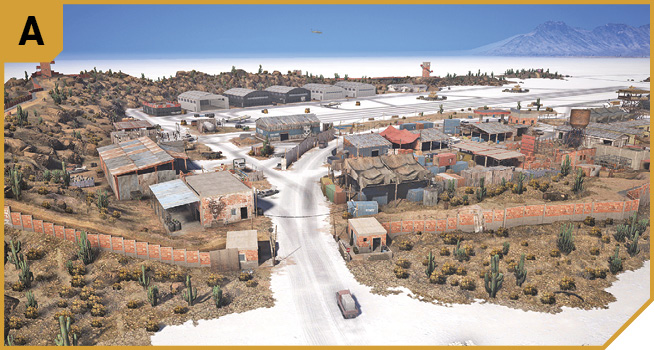
Approaching on foot, if you can silence the foes at the two checkpoint huts, you can easily start maneuvering eastward along the inside of the brick perimeter wall, or gradually removing foes as necessary in the main part of the base (F). You’re also able to remove the sniper from the tower at B, as well as the alarm pole panel with a long-range shot, just before entering.
Or you can sneak northwest toward the sniper tower and I, using the slightly higher ground to move around the garage buildings and down to shut off the generator (to plunge the base into darkness to aid in sneaking).
Otherwise, this is a reasonable place to drive into, with or without guns blazing. You can easily reach the runway if you want to distract the enemy with your erratic driving, or to head to H to start destroying the three SAM sites.
You can also make an immediate right after the checkpoint and drive all the way into the main base (F), up the dirt track, and along the inside of the south wall to the foot of the control tower without leaving your vehicle or facing much in the way of blockades. This is advisable if you want a quick target completion and don’t care who sees you.
Southwest: Sniper Tower Perimeter Gap
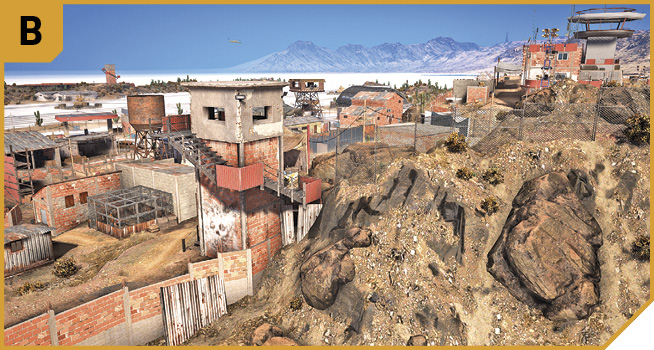
The south wall is impressively impenetrable, but there’s a slight gap (and good sniping opportunities to destroy the alarm panel) just south of the sniper tower, where the mesh fence starts on the vertical rocks. Climb up and into the base at this point. You can sneak up and remove the sniper in the tower (even using a melee grab), and there are two rebel cages very close by, which you can unlock.
Use this access point to sneak eastward, along the south perimeter, pausing only to deactivate or destroy the drone jammer at the foot of the alarm pole. Then continue on to the control tower, or use your height advantage to drop foes from medium range in the main base below (north of you [F]).
South: Perimeter Wall
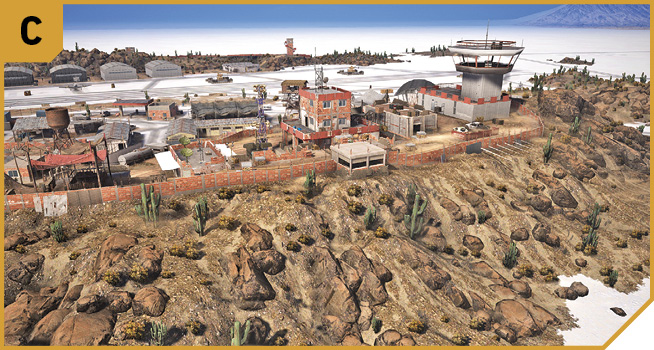
From west to east, there’s a pill box, rebel cage, comms building, drone jammer and alarm pole, HQ building, armory, and lastly the control tower itself. You can’t access the control tower from the outside. If you’re inside, use the cover and relatively few enemies these buildings afford you to conduct sweeps, removing foes as you head to the control tower and remaining stealthy for as long as possible. Suppressed fire and melee takedowns are recommended, after killing the lights at the generator.
Southeast: Base Entrance
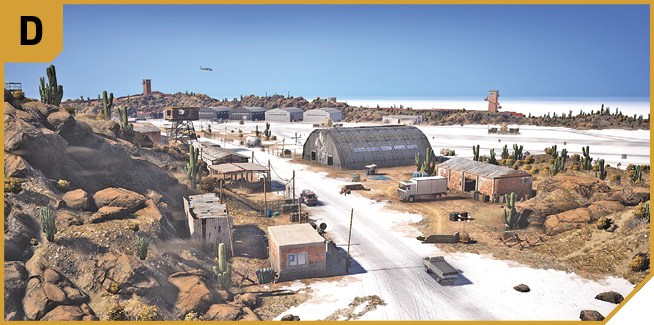
This base entrance features a minigun tower in the distance along the main road and is a little more open, so a direct route in is only wise if you want to create havoc, or you’re in a vehicle and want to create a distraction, as you can easily reach the runway (H) or drive into the base and take the first left after the minigun tower to head up onto the dirt road and around to the control tower.
If you possess a modicum of stealth, it’s worth heading in on foot from E, using the small brick warehouse as cover and dropping the enemy at the checkpoint hut and the minigun operator as you secure this area of the base.
You can then visit the lone hangar in the area, overlooking the SAM launchers to the north. This is a great place for a competent sniper to shoot from; you can remove foes on the runway, across at the north sniper tower (L), and those patrolling the path atop the northern rocky peninsula, though you need to predict-fire their location slightly, as they’re about 250 meters away. You can stay in the hangar, using its roof as cover, and hit the alarm panel and the minigun tower operator, and cause a distraction by stealing the attack helicopter or blowing up the nearby propane tank, while teammates get on with the objective.
It’s also possible to head west from here, along the south side of the main road and up the hillside to the north brick inner perimeter of the control tower area. You can then reach F, and a break in the wall, while remaining on this higher ground—helpful if you’re sneaking into F and G.
Southeast: Peninsula Sniper Tower
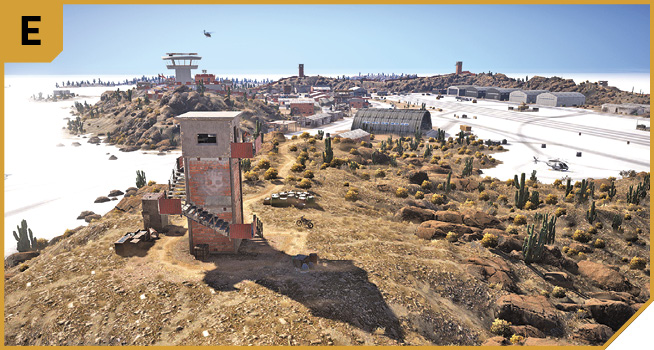
Approaching from the salt flats or the main road (but driving off way before D), head up onto this promontory of rock and a single foe in the sniper tower. You can then move to D, H, or L depending on how you’d like to neutralize the enemy, and what the rest of your team are up to (and areas they are covering). Remove this sniper to avoid being attacked from behind when moving through D.
South Peninsula: Base Interior
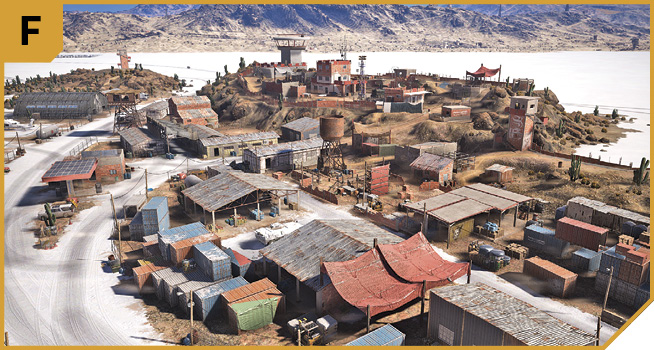
This is a mass of buildings at ground level, with a higher elevated plateau to the southeast where the alarm pole, drone jammer, HQ building, and control tower are. Enter F from anywhere in the base, but learn some landmarks in this maze, like the rusty water tower in the middle, by the mess hall and barracks, which should be checked for foes depending on the time of day you enter the base.
Note the parked APC along the main east-west road inside the base. Use it to shrug off enemy attacks between objectives, or to create distractions.
There are numerous explosive barrels you can use to distract the foes here, though the containers and buildings you’re moving between are numerous enough to make stealth takedowns across the entire base something worth considering.
The upper base to the southeast is more difficult to infiltrate, assuming you don’t want to give the game away and drive up there in a vehicle. Instead of attempting to get past the security hut on the dirt road, enter via the open metal container just north and across the road from the comms building and alarm pole. Then neutralize the drone jammer and alarm and creep through the HQ building, or along either brick perimeter wall to the HQ building itself.
Make sure you ascertain the location of the two rebel prison cages in this area, if you wish to call on reinforcements without the Rebel Support feature.
|
 Target: South Peninsula Control Tower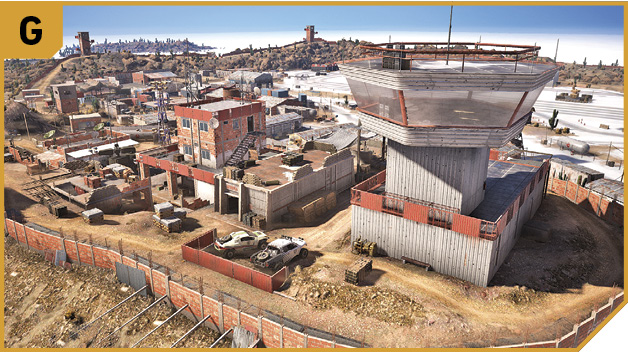
North Peninsula: Runway
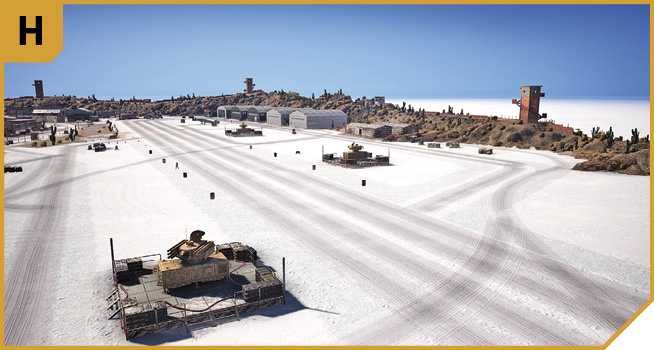
This massive stretch of salt flats contains very few enemies and even fewer places to hide. Running along the northeast corner is a line of hangars. The one farthest west, next to a low building topped by a minigun, houses a plane (and your second objective location). Along the west is the generator and a small garage area, mostly devoid of enemies.
On the runway itself are two old planes (both usable) and two helicopters (one small, one large) close to the lone hangar northwest of D. Of greater concern are three SAM sites dotted along the middle of the runway. Either ignore them and hope for the best when your plane takes off, have a teammate in a separate aircraft to act as the “missile sponge,” or head to each SAM site and destroy it with explosives.
Hitting the SAM site with a grenade, mine, or C4 is a good way to kill two birds with one stone and remove these threats as well as create a distraction while your fellow Ghosts get on with both objectives. Or, if you’re intent on remaining stealthy, use C4 and wait to detonate.
West: Perimeter Gap and Pill Box
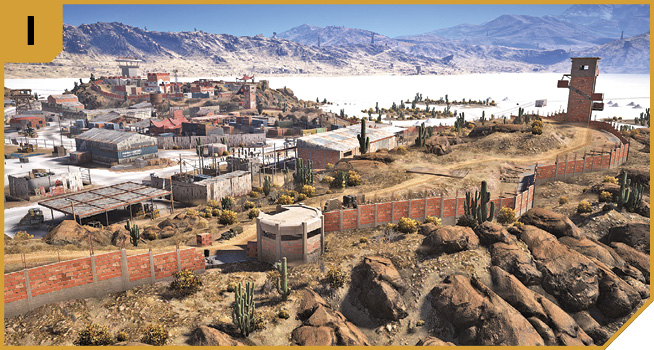
As long as you’re competent enough to drop the two or three foes (one in a pill box and two patrolling the pathway surrounding the airfield), you can sneak in through this break in the wall, between the sniper towers to the north and south. Enter via A, or I itself, climbing the low rocks without venturing too close too quickly, as you’re easily discovered.
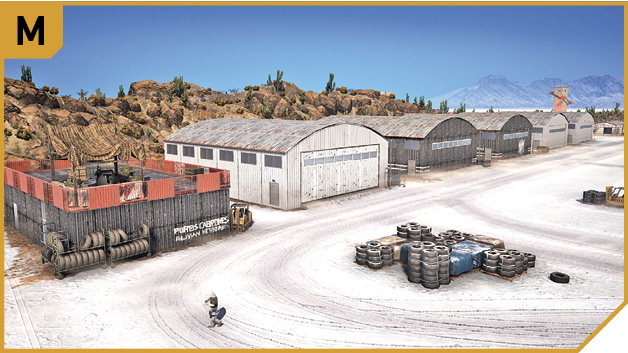
Now you can reach the generator and plunge the entire base into darkness (and remove the threat of reinforcements without having to shoot the alarm pole). You can also shoot both snipers in the towers and then advance toward F or M, depending on whether you have teammates intending to complete the initial objective. It’s worth heading to M and removing the minigun operator to assure a smooth transition to the plane.
Northwest: Perimeter Gap and Sniper Tower
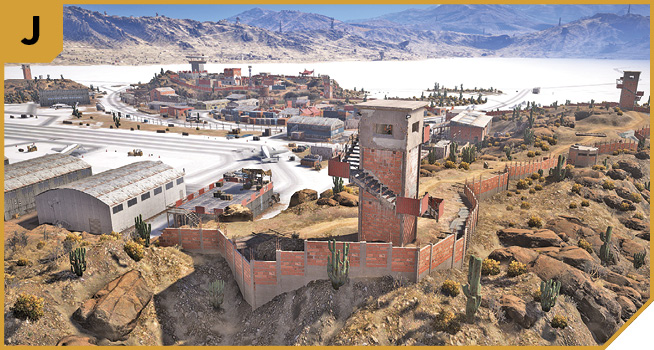
This is a good sniping point, assuming you hike up this rocky hill from the salt flats to the north (or maneuver around from I or K). Drop the sniper in the tower, then attack the foe at the minigun nest (M) from behind, and anyone on the north side of the airport. If you’re playing Co-op, you can then head to M and wait for the plane to be accessible.
North: Perimeter Gap and Patrol Path (Pill Box)
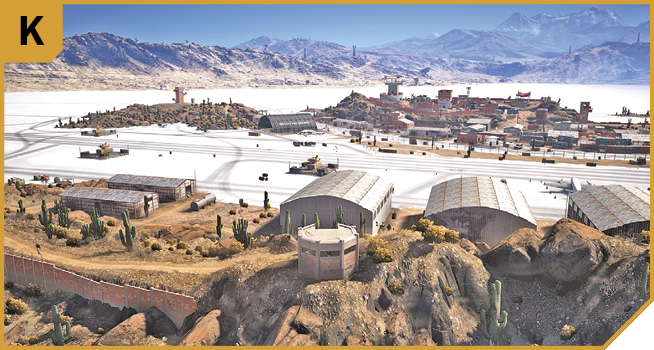
Between J and K, there is no perimeter path north of the hangars. But there are foes (three) in the area from K (a pill box) to L (a sniper tower). Head to K to remove this foe, snipe the tower sharpshooter at L, or head down to the SAM sites in the airfield (H).
Northeast: Outer Infiltration Point
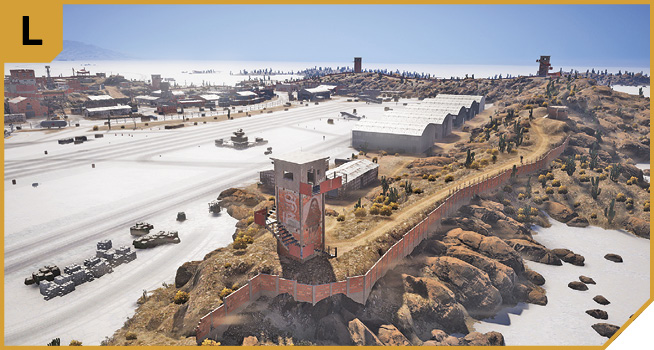
Moving westward from the solar panels on the salt flats, you can easily snipe the tower sharpshooter from distance, or work your way there from a different direction and assault the tower with close-assault weapons. Remove foes between here and K, and look south toward D. Plan to steal a helicopter and/or destroy the SAM sites (assuming others are completing the objectives).
|

Koani Air Base: Other Tactical Advice
 For the least amount of hassle, enter at B, shoot the alarm panel, and sneak along the inside of the south perimeter wall (C) to reach the control tower. After interrogation, use the dirt trucks parked at the base of the tower, carefully (but hastily) driving down through F, then across H to the hangar at M. Get out, ignoring the minigun operator (enter on the east side so the minigun can’t shoot you), and taxi out of the runway at speed, evading SAM shots with deft flying.
If you’re fine with facing all enemies after you speak to the ATC, parachute (or jump from a helicopter) onto the roof of the control tower. This can be the low roof or the actual tower roof, as there’s a roof hatch you can drop down (but not climb out of). After your chat with the ATC, use either of the dirt trucks parked by the control tower to flee, if your other vehicles have been compromised. For stealth planning, enter at I at night, cut the power at the generator, then sneak to G, back to M, and out of here. This can be done without raising suspicion until you start the plane!
A good route to take to completely neutralize the enemy before talking to the ATC is to start at L and work counter-clockwise around to A, then continue across to F, then across to E, and back to F, then up to G. Or, have your team start attacking foes at F, while you rush the control tower and help defeat the enemy with medium-to-close-range fire. While you speak to the ATC, have your team head to M, and by the time you drive there, the area should be reasonably secure.
If you want to cause a disturbance, have you or your rebel friends do it away from both the control tower (G) and the hangar (M). The SAM sites and the west side of the main base between A and F are good options.
 Split up your team into two fighting forces to finish both objectives in record time, and with much less back-and-forth maneuvering. Duo #1 should enter at I or J, cut the power at the generator, and clear the airport of SAM sites using C4 and silence (trigger the C4 as the plane takes off). Duo #2 should enter at B, sneak along at C, and remove the drone jammer. One teammate should interrogate the ATC while the other waits to drive one of the parked trucks at the base of the control tower. As soon as the hangar opens, Duo #1 should escape in it. Duo #2, meanwhile, should cause distractions, or drive directly to one of the other planes or a helicopter, and follow in a different aircraft. Or split up Duo #1 and have each teammate fly an aircraft (the target plane and a second craft), one providing interference to any incoming SAMs for the duration of the trip.
Other options include one Ghost being responsible for tackling all foes on the north peninsula, a second heading in from I to remove foes between there and B, and two more Ghosts assaulting the main base itself.
Use the APC parked northwest of F in the main base; this is an armored distraction that can keep going despite the cartel’s most relentless attacks. It’s good for driving out to the SAM sites (have a teammate lob grenades from the APC) while other Ghosts get on with the mission.
In the Air Tonight
After taking off from Koani Airport, exhibit some defensive piloting if you haven’t neutralized the three SAM launchers on the runway. You may need to attempt further defensive dives and swoops to avoid SAM fire as you progress in a path to the airstrip indicated on your Tacmap. Feel free to check your map and fly around areas you know have SAM sites if you’re worried about being struck (especially as the plane is on its last legs).
Your destination is the province immediately to the east of you—Media Luna. The airstrip you’re landing on tops a large rock plateau, so it’s important not to overshoot! Make a note that the airstrip, which is unmarked, is extremely close (380 meters or so) to Media Luna Alpha. You’re here to demolish a small contingent of cartel thugs and grab the buyer for Boston Reed.
Media Luna Airstrip: Recon
TACMAP
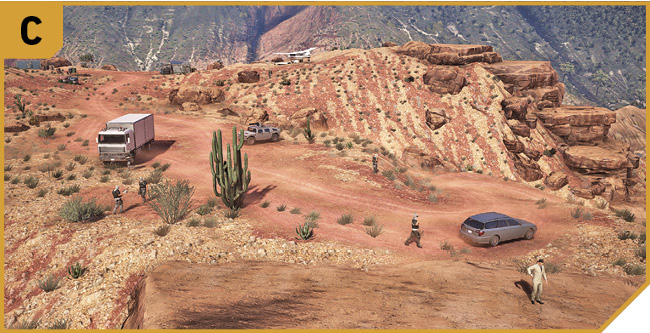
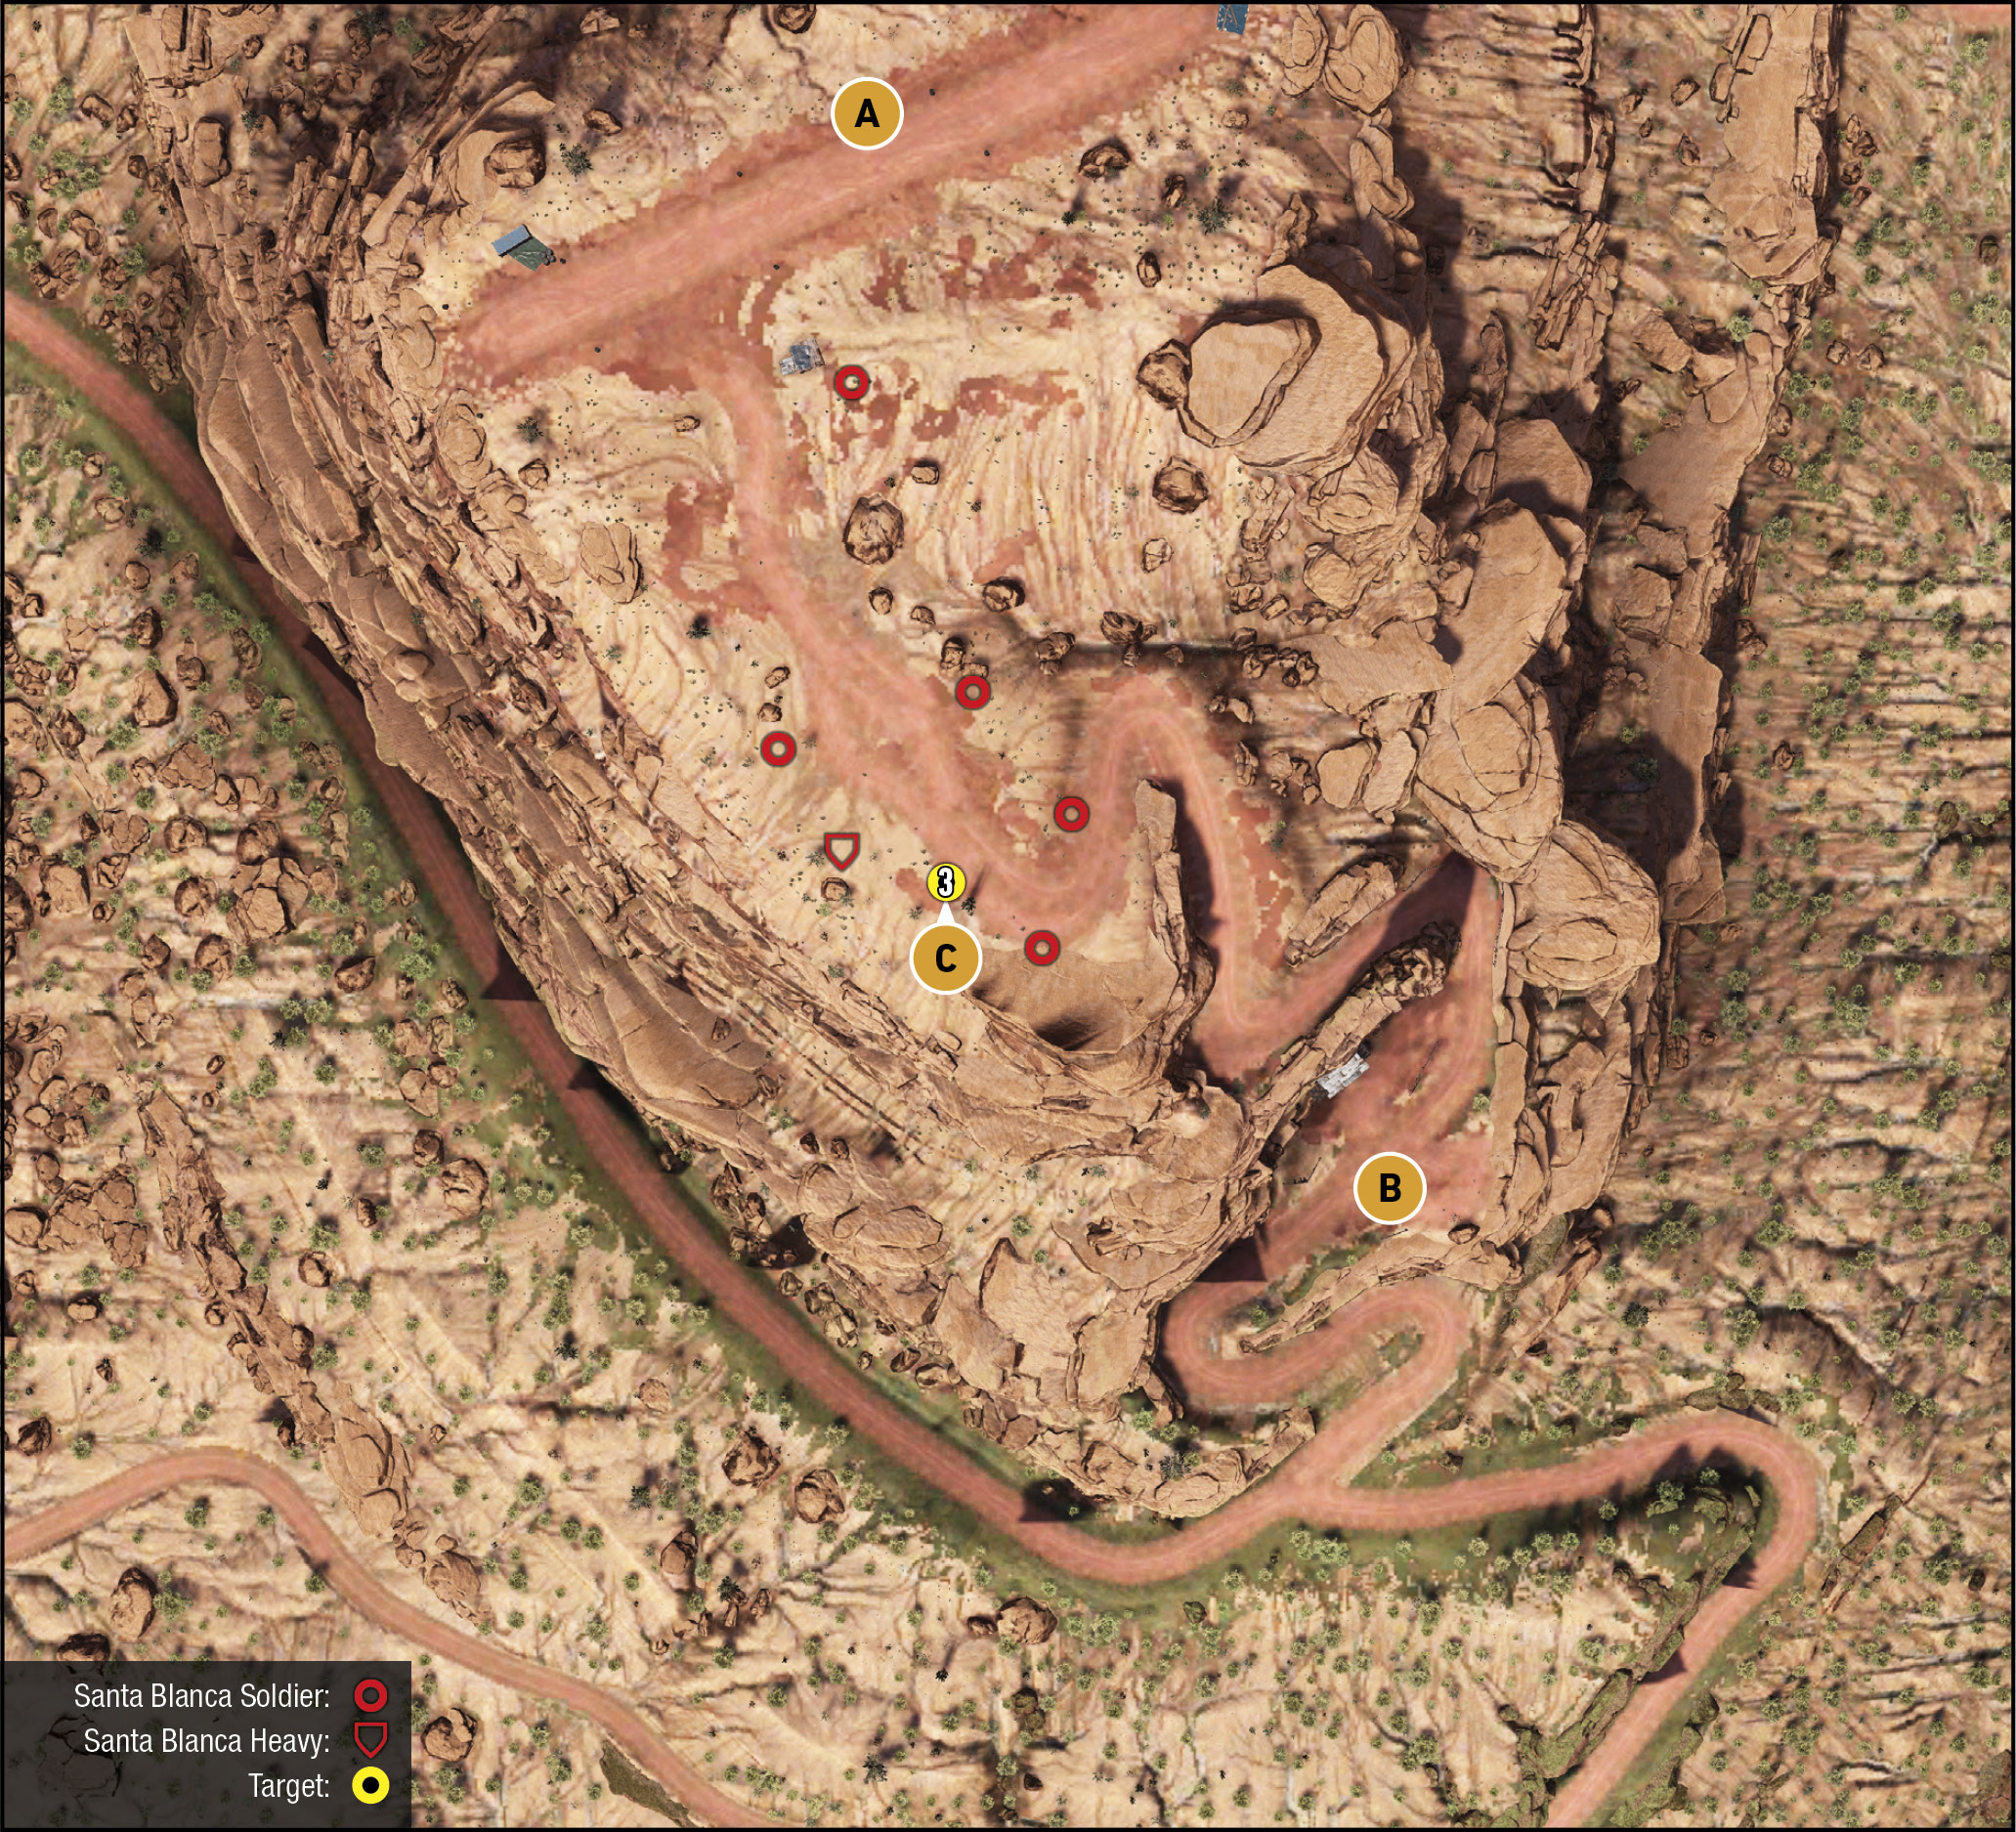
You’re landing a plane on a flat mountain plateau, then engaging half a dozen cartel members (who may be situated near a military SUV). All of them should be defeated; only the buyer in the sharp suit needs to remain unharmed.
Airstrip
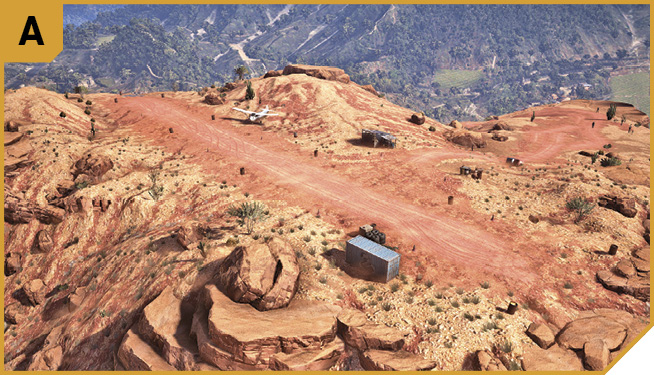
This runs roughly east to west, so make sure you approach from this direction, as a north-south landing can result in you landing on the group of enemies. Try landing from west to east so you can disembark on the eastern side, moving southwest onto the flat rocks overlooking your target. From here, you can easily eliminate the cartel guards and move down to engage any stragglers.
Lower Road
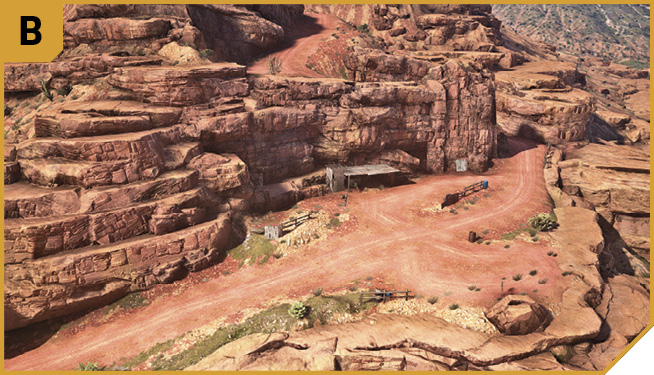
There’s a small chance that your target decides to run, but the long and winding road from the airstrip and lack of vehicles means you’ll soon find him cowering. If, for any reason, you need a vehicle, call in a Rebel Support drop, or move quickly northeast to Rally Point Media Luna Alpha.
Media Luna Airstrip: Recon
|
 Target: Buyer