
Tom Clancy's Ghost Recon: Wildlands Guide Welcome to Bolivia Koani: Boston Reed
Train Graveyard
Objectives
- Recon the train cemetery
- Locate the Santa Blanca lieutenant in charge
- Interrogate the Santa Blanca lieutenant
LOCATIONS
- Train Cemetery
REWARDS
- + 1,000 XP
Brief
There is reason to believe that Boston Reed, the cartel boss in Koani, is running a smuggling network behind El Sueño’s back. Suspicious activity has been reported at the train cemetery near the border. Sweep the area for intel on Reed’s activities.
A Miss-Carriage of Justice
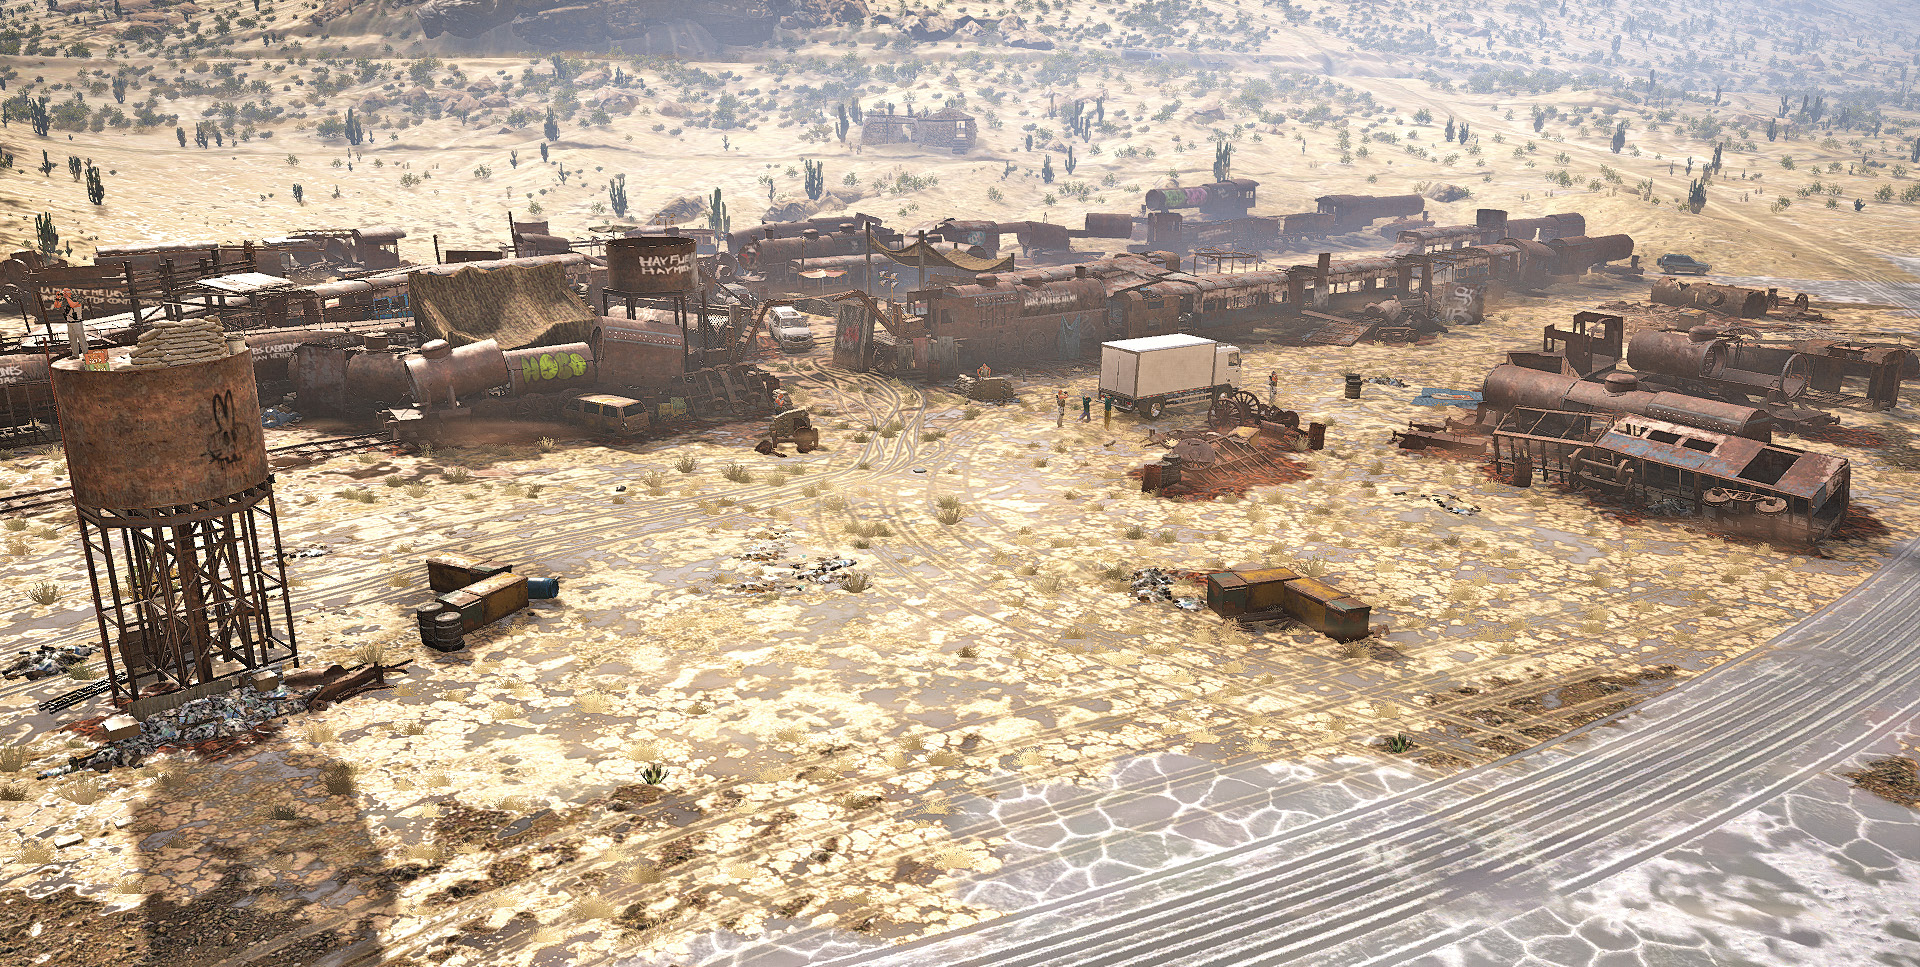
Almost due west of Koani Alpha is a sprawling flat cemetery for rusting train hulks, carriages, and other decades of debris. Within the mission area are over 20 foes, including two snipers and a cartel lieutenant. The target is the only cartel adversary you need to keep alive—either after effectively storming the cemetery, or chasing down the lieutenant if he’s allowed to escape.
Train Cemetery: Recon
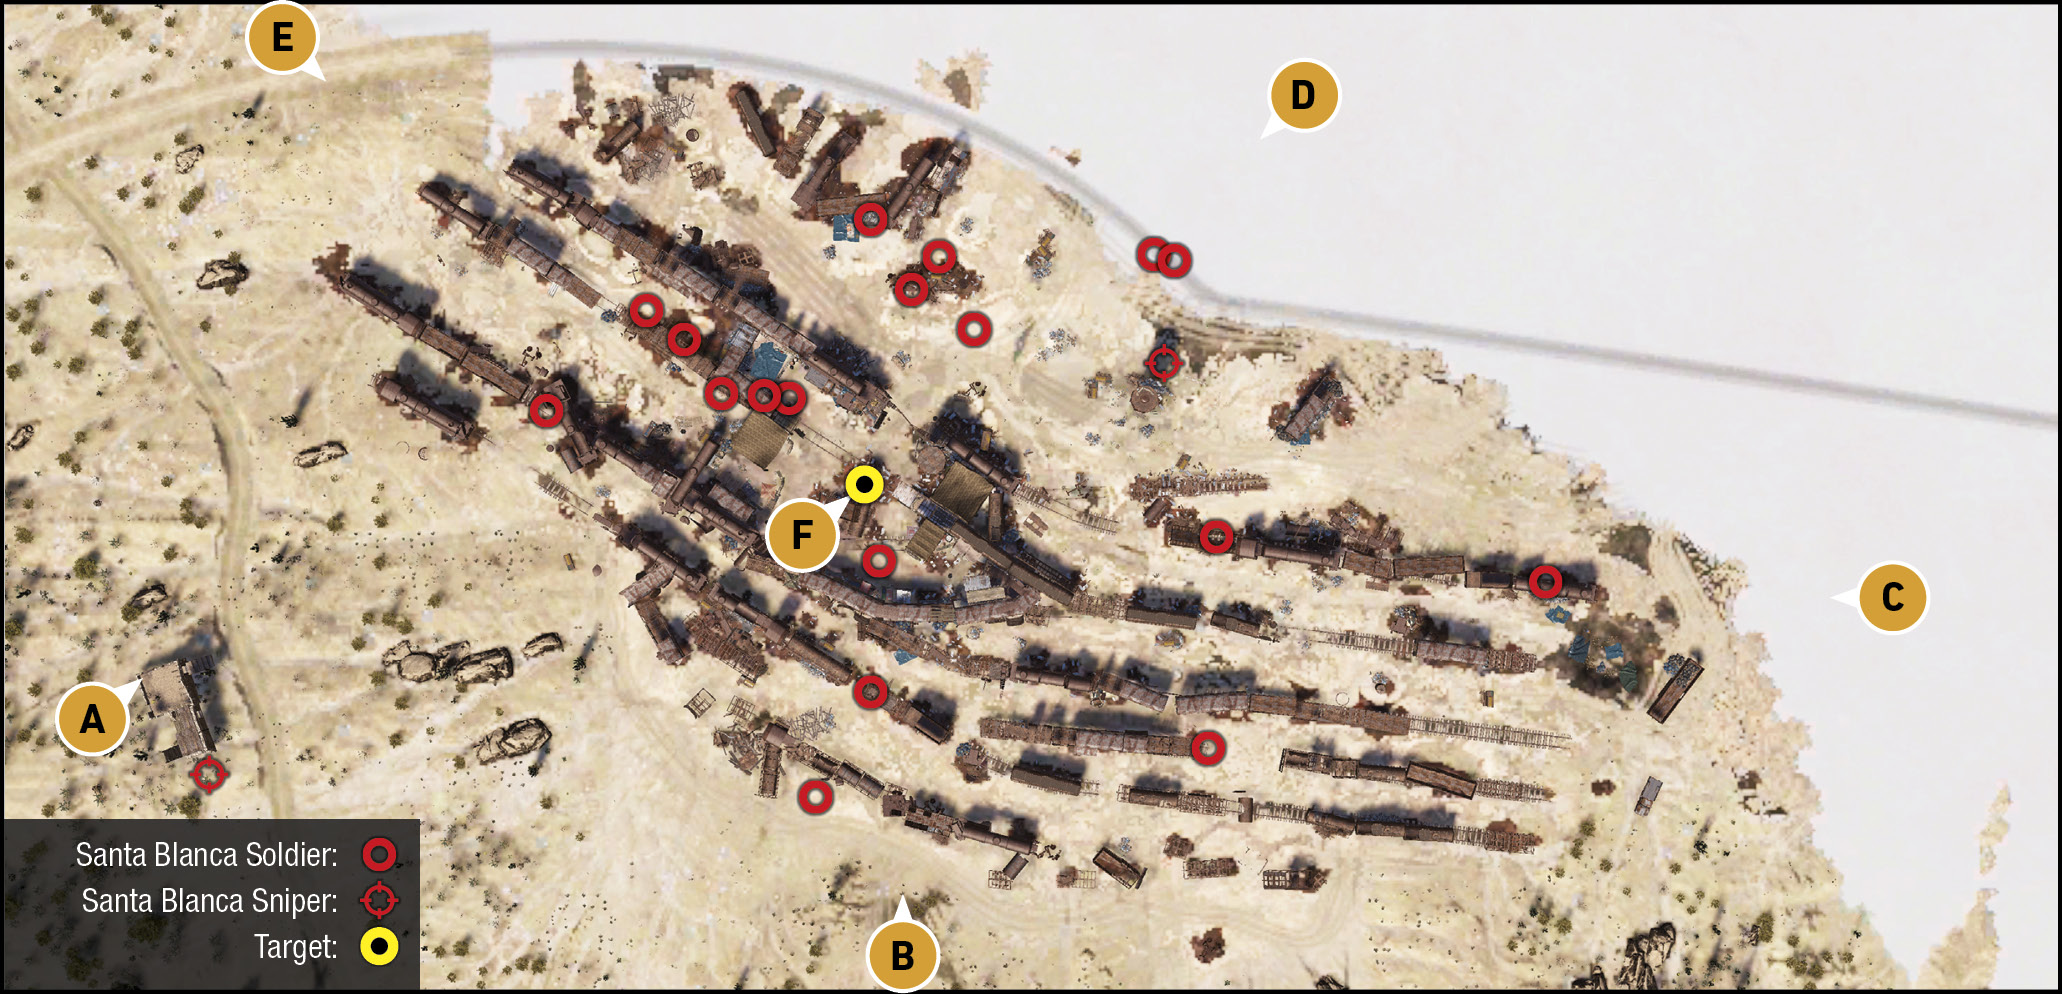
TACMAP
The train cemetery is large and has no real structure to it, save the central base area, which has a small cage with a prisoner to optionally rescue (where the lieutenant begins). This area has three or four vehicles the lieutenant can use to escape on or in. Outside this are tendrils of snaking train debris, which you can move around, hide behind, or climb on top of or through. This is a fantastic area for remaining unseen and gradually whittling down enemies until only the target is left, and he’s not even aware his guards have been neutralized. That is, if you have the skills.
Southwest: Sniper Ruins
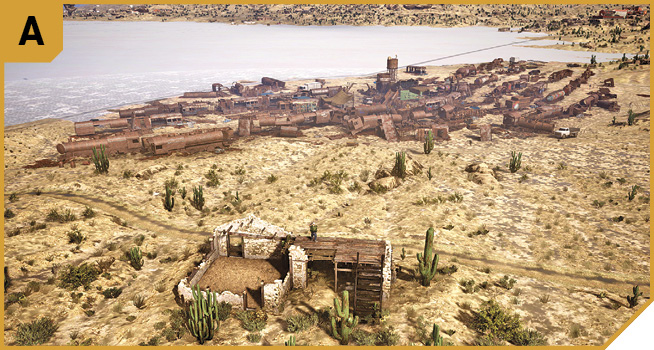
An exceptional observation spot, once the sniper is removed from their post. Scan most of the area with a drone, then start popping heads from west to east before moving in and finishing the enemy.
South: Low Rocks
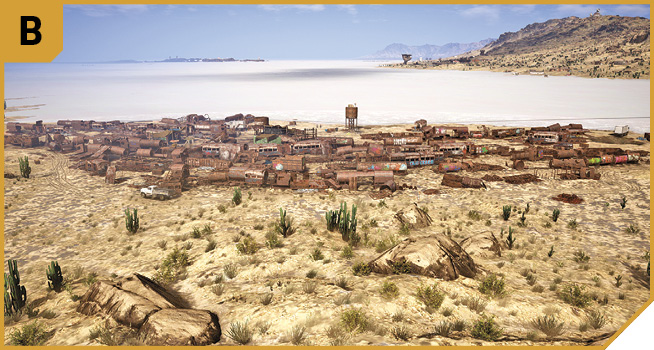
Apply the same tactics here as at A, with the added benefit of your drone being able to tag pretty much everyone in the camp (just move a bit farther north if you’re out of range). With every foe easily spotted, you can then wind through the rusting debris before a final assault on the main camp.
East: Mass Grave and Salt Flats
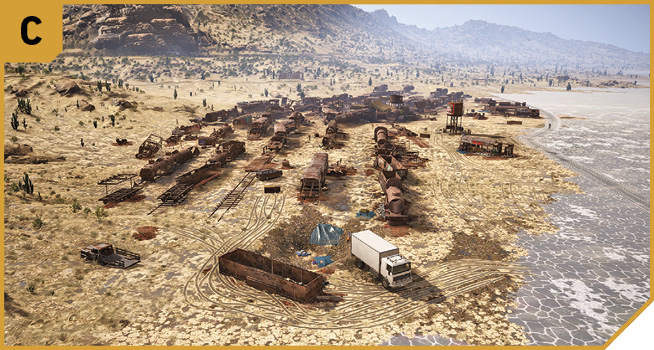
Stay here if you’re backing up a teammate and are in a vehicle ready to give chase, or you want to systematically work east to west, removing threats as you go. You could also recklessly drive directly to the target’s central camp from here.
North: Cemetery Entrance
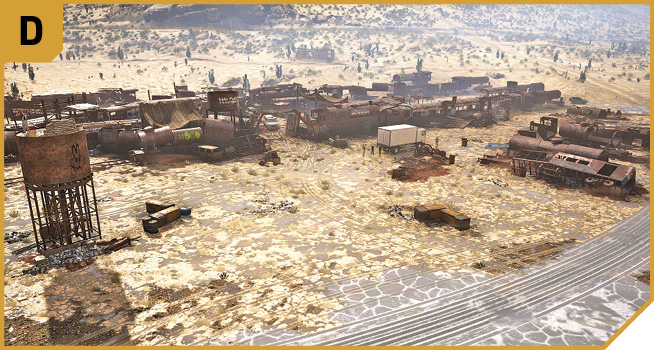
This is the easiest and closest way into the target’s central camp area, and you can use the main road to reach a cluster of rusting debris by the roadside, offering good protection as you tag the sniper on the water tower, the one at A, and then gradually pick off enemies one by one until only a few are left and you assault the camp with a shotgun, or the lieutenant makes a break for it and you switch to a vehicle.
Northwest: Main Road
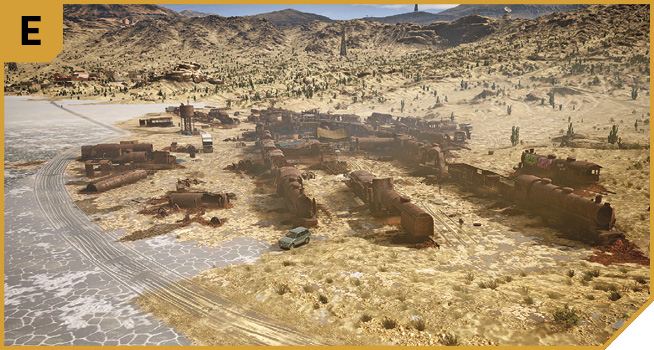
Head here if you plan to remove enemies working west to east, or you’re parked here watching for the lieutenant to escape.
|
 Target: Cartel Lieutenant and Central Camp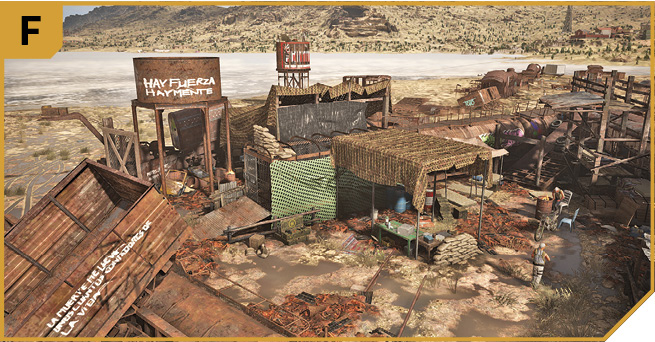
Train Cemetery: Other Tactical Advice
 The first plan is to locate somewhere reasonably safe and with a view, to recon the enemies in the graveyard. Both A (after removing the sniper) and B are excellent choices. Once you’ve sent up a drone and tagged all foes, you can shoot at least half of them from this location. Then creep slowly down into the cemetery and remove as many of the rest as you can (snipers take priority), before reaching F and apprehending the lieutenant.
Or you can stalk the enemies from the beginning, using the location on your mini-map, and see how many you get before the lieutenant is startled. Have your teammates head to D where the highest concentration of enemies is.
Or you can make a lot of noise, shoot both the snipers, and wait (in a fast vehicle) for the lieutenant to escape. He can head in either direction along the main road running west to east along the north side of the area on the salt flats, so placing mines on the road is only marginally useful.
Or you can creep into F, place mines or C4 on each vehicle, step away, and destroy the vehicles (make sure both the Landrock off-road vehicles, the SUV, and any bikes are destroyed), leaving the lieutenant no vehicle to escape in. Then toy with the remaining foes until all are dispatched, and finally collar the target. Or, drive directly into the center of the camp from D with guns blazing, drive out again so the lieutenant has time to find a vehicle and escape, and give chase.
You can also fly in using a chopper and rake the area with gunfire, taking care not to explode any barrels near the lieutenant. Then follow him by air as he escapes, dropping down to the road in front of the fleeing vehicle and flagging him down with guns pointed, tires shot out, or land near a vehicle you can apprehend to continue the chase. Remember to come back here afterward to mop up foes and release rebels, as well as gather collectibles.
 Pick the Solo plan that’s most appealing, with the added benefits of being able to attack from all directions simultaneously. Place a Ghost at A, B, C, and D and start whittling down the base enemies until the lieutenant makes a move.
Park a chase vehicle next to each Ghost, or have one Ghost responsible (and ready at D) for giving chase.