
Tom Clancy's Ghost Recon: Wildlands Guide Welcome to Bolivia Espiritu Santo: La Santera
The Advisor

Objectives
- Locate the Santa Muerte Sanctuary
- Kill the advisor
LOCATIONS
- Santa Muerte Sanctuary
REWARDS
- + 1,000 XP
Brief
Esteban Ibarra is La Santera’s advisor and the cartel’s chief point of contact with the cult. He regularly delivers sermons to the faithful from a sanctuary in Espiritu Santo. Go to the sanctuary, find Ibarra, and kill him.
Santa Murder Sanctuary
Mid way between Rally Points Delta and Alpha, in the northeastern jungle of this province, is a small chapel where La Santera’s advisor is rousing some rabble. The place is well-guarded, but consists of only one structure, the church itself. Be aware of additional foes to the northwest, down the hill at the Espiritu Santo Base (you storm this during Main Mission: La Santera); keep the bloodshed to the hilltop to the southeast.
Santa Muerte Sanctuary: Recon
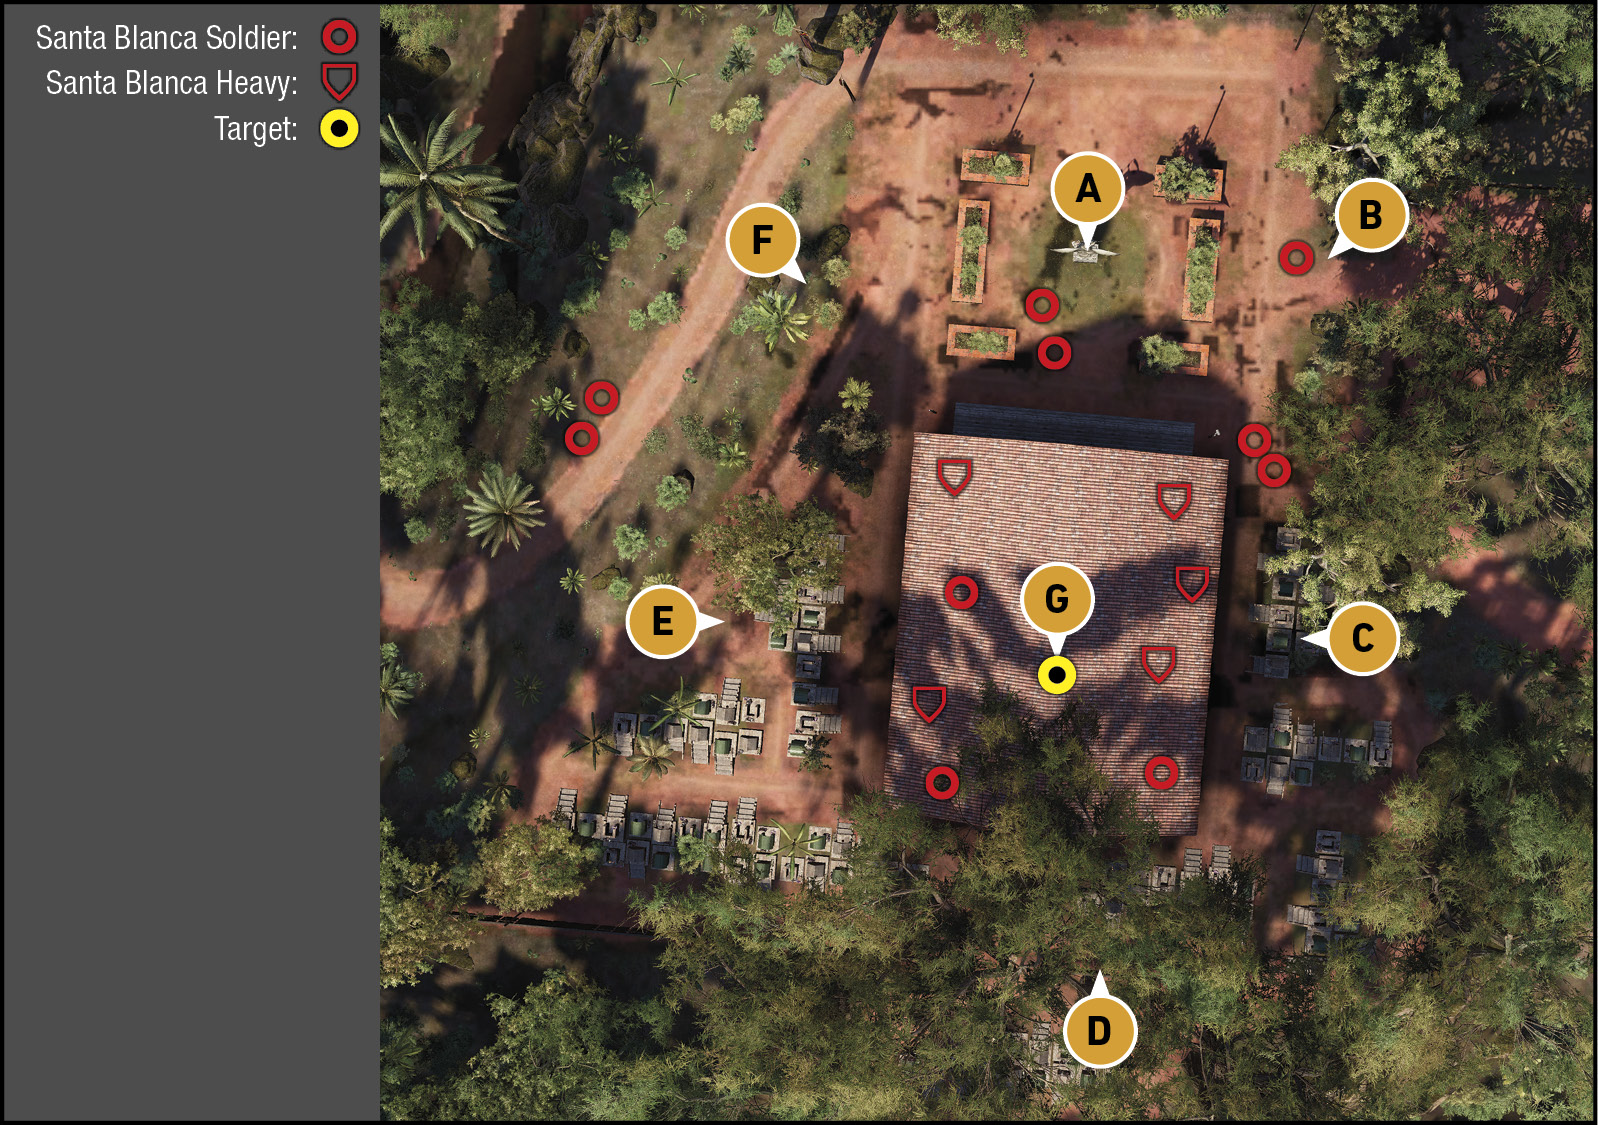
TACMAP
This hilltop chapel is surrounded by jungle, and is a relatively flat plateau. The area is porous (the wooden fencing is easily leapt over or run around, making it only useful as cover), and aside from the gravestones, there are few other hiding spots. You need to balance when to take the life of the advisor against taking on over a dozen foes at once, with many of them heavily-armed. Note the main downhill road to the east, where the advisor can escape if you let him. There’s a second, more indistinct trail to the west, which leads to the Espiritu Santo Base; it’s best to stay away from there as that only leads to further fighting.
North: Buttress Trees and Jungle
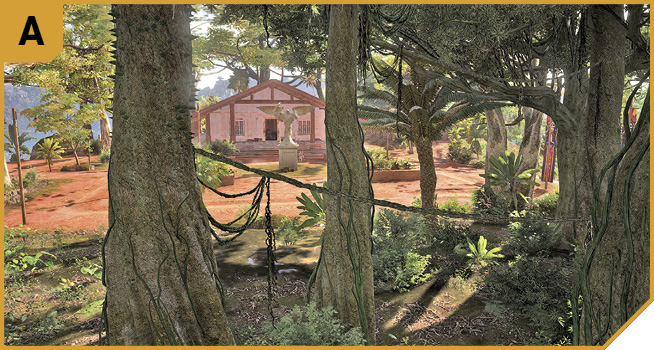
This is a good spot to send up a drone, and start any type of assault you wish. You can carefully set up a single sniper shot to take out the advisor at the far end of the chapel interior, then mow down any foes or retreat back into the jungle. Or, you can remove threats silently in the front area where the statue is, to take care of as many enemies as you can before they realize an attack is under way. The low brick planters make good cover, allowing you to lob in flashbangs, smoke, or more lethal grenades into the chapel.
Northeast: Parking
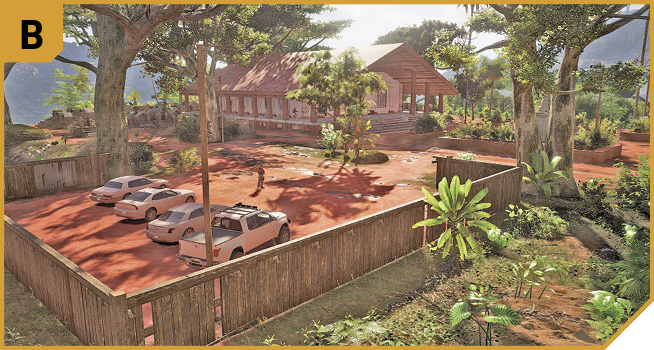
There’s usually a foe wandering the parking lot where four vehicles are, and another two patrolling this side of the church. Hop over the fence, use the vehicles and fence to hide behind, and drop these enemies before an assault begins in force. Or, wait here and tag the advisor when he tries to flee (he usually heads out of the doorway on the east side of the chapel, which you have a good visual on). If combat becomes too problematic, hop behind the fence again.
One of the best plans is to sabotage all of the vehicles parked in the lot with a mine and/or C4, as the advisor, when spooked, takes one and drives off. Not if it explodes, however!
East: Main Road and Graveyard Sniping
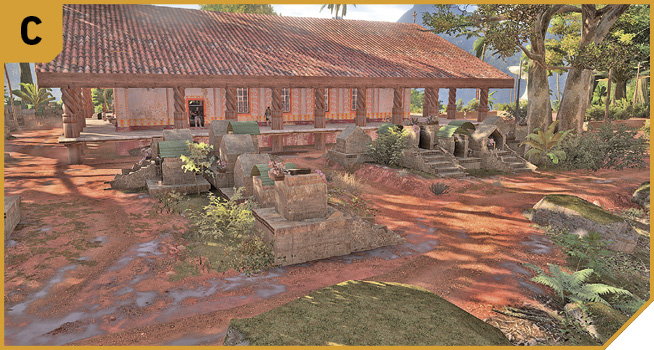
This is the main road into and out of the mission area, and you should park farther down the hill, then scramble up and use the graveyard as cover. With patience and minute readjustments, you have the capability to fire directly at the target with a sniper rifle from the gravestones. There’s also a possibility of tagging the target through a window, too. This is prior to anyone spotting you, as the target usually flees.
It’s worth placing mines at the main road entrance, to stop the advisor from getting too far if you let him escape. Just make sure your own vehicles don’t drive over these explosives!
South: Graveyard and Perimeter Fence
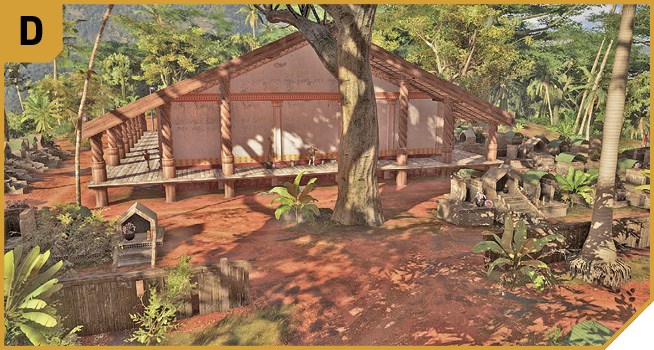
If you’re going to be assaulting the chapel from any direction, this is it. It has the least amount of clearing, and fewest foes guarding it, allowing you to split your team and storm both rear (southeast and southwest) doorways into the chapel, with guns blazing and flashbangs thrown. Otherwise, the graves and fencing are useful as cover.
West: Graveyard Sniping
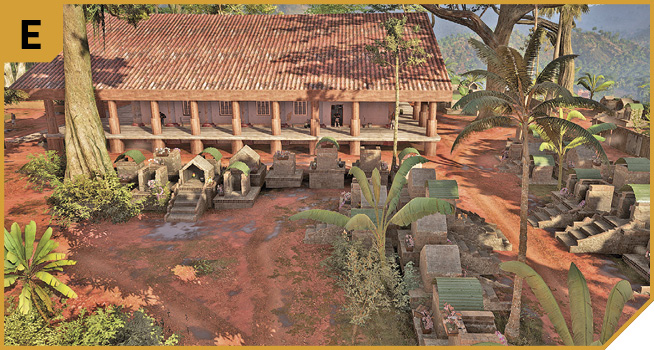
Use this area when skulking around to a different infiltration spot, or to set up a possible sniper shot, which is difficult, but not impossible, as you can just about get a direct line-of-sight to the target prior to the enemy realizing where you are. You can elect to storm straight into the rear of the chapel from this point, too. Just be aware of the contingent of heavily-armed troops preparing to stop you.
Northwest: Trail Entrance And Flags
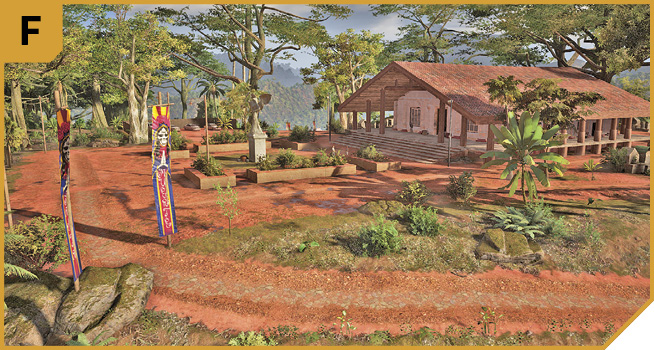
There are two flags at the border of the church property, and a winding dirt trail down to Espiritu Santo Base. Note that two base guards walk the trail here, so this isn’t usually the best direction to head in from as you don’t want to attract any more reinforcements. From the flags, you have reasonable views of the property, and can hide behind the low planters south of A.
|

Santa Muerte Sanctuary: Other Tactical Advice
 If you’re here for the stealth, just snipe the target from C or E. Then flee in the vehicle you came in, or one you steal from B. If you’re here to wipe everyone out, begin at A or B, and remove the foes patrolling the outskirts of the mission area, so only the enemies on the wraparound porch or inside of the chapel remain.
Then order your team to storm the front, while you take the sides, and outflank them. Flashbangs, smoke, grenades, and close-assault weaponry (shotguns or machine guns) are recommended.
Or, for a more cunning plan, prep the vehicles in the parking lot to explode by placing a mine or C4 on them, create enough of a ruckus for the advisor to flee, and watch as the vehicle he chooses explodes. If he survives and gets out, shoot him. A variation of this plan involves you mining the main road (C) so his vehicle drives over a mine as he’s escaping.
Another variation is to set C4 on the vehicles in the parking lot, and when the advisor chooses one, get into your own vehicle, and follow him until he’s away from the rest of the enemies. Then detonate the vehicle.
Otherwise, should the advisor escape, chase and ram his vehicle with extreme prejudice; he isn’t needed for questioning, so you can be as violent at ending the advisor’s life as you wish.
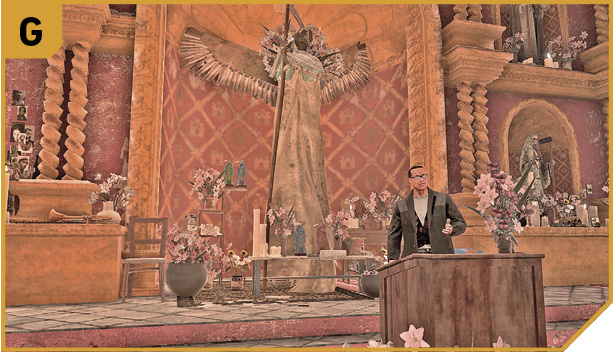
 One important difference between Solo and Co-op planning is you can simultaneously breach all three doorways using a mixture of grenades and close-assault weaponry. A fourth Ghost can provide back-up by taking down foes on the outside of the building. A good team should be able to end the advisor’s life in seconds, before he has a chance to escape. Then use the interior pews and pillars as cover.