
Tom Clancy's Ghost Recon: Wildlands Guide Welcome to Bolivia Pucara: DJ Perico
The Bodyguard
Objectives
- Interrogate DJ Perico’s former bodyguard
LOCATIONS
- Pilca Mine (Station)
REWARDS
- + 500 XP
Brief
DJ Perico’s former bodyguard, Arturo Ruiz, works for the cartel at Pilca’s mine. Find Ruiz and see what he can tell us about Perico.
On The Trail of Marco Garcia
With evidence of the bodyguard’s location, it is time to head down the precarious cliff road north of Pilca Village, to the mine entrance and station platform. The mission area isn’t that involved, and the takedowns before bodyguard interrogation are but a prelude to the trickier missions to come.
Pilca Mine (Station): Recon
TACMAP
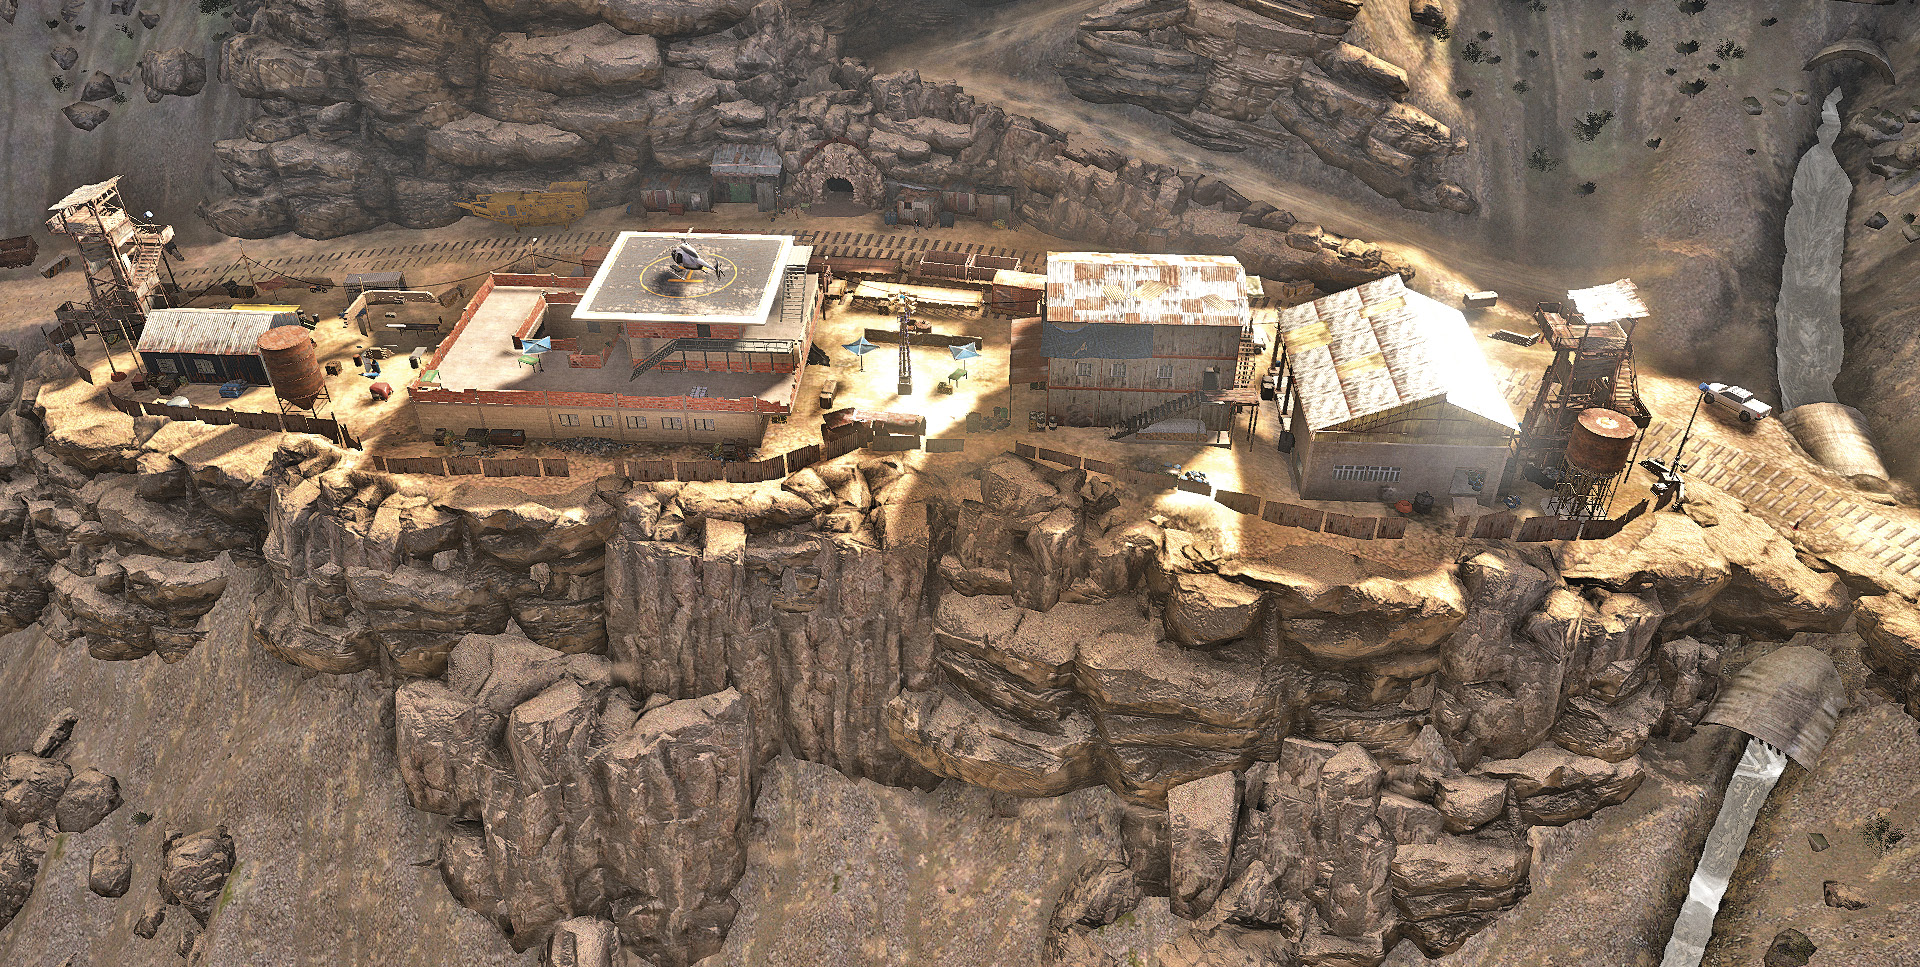
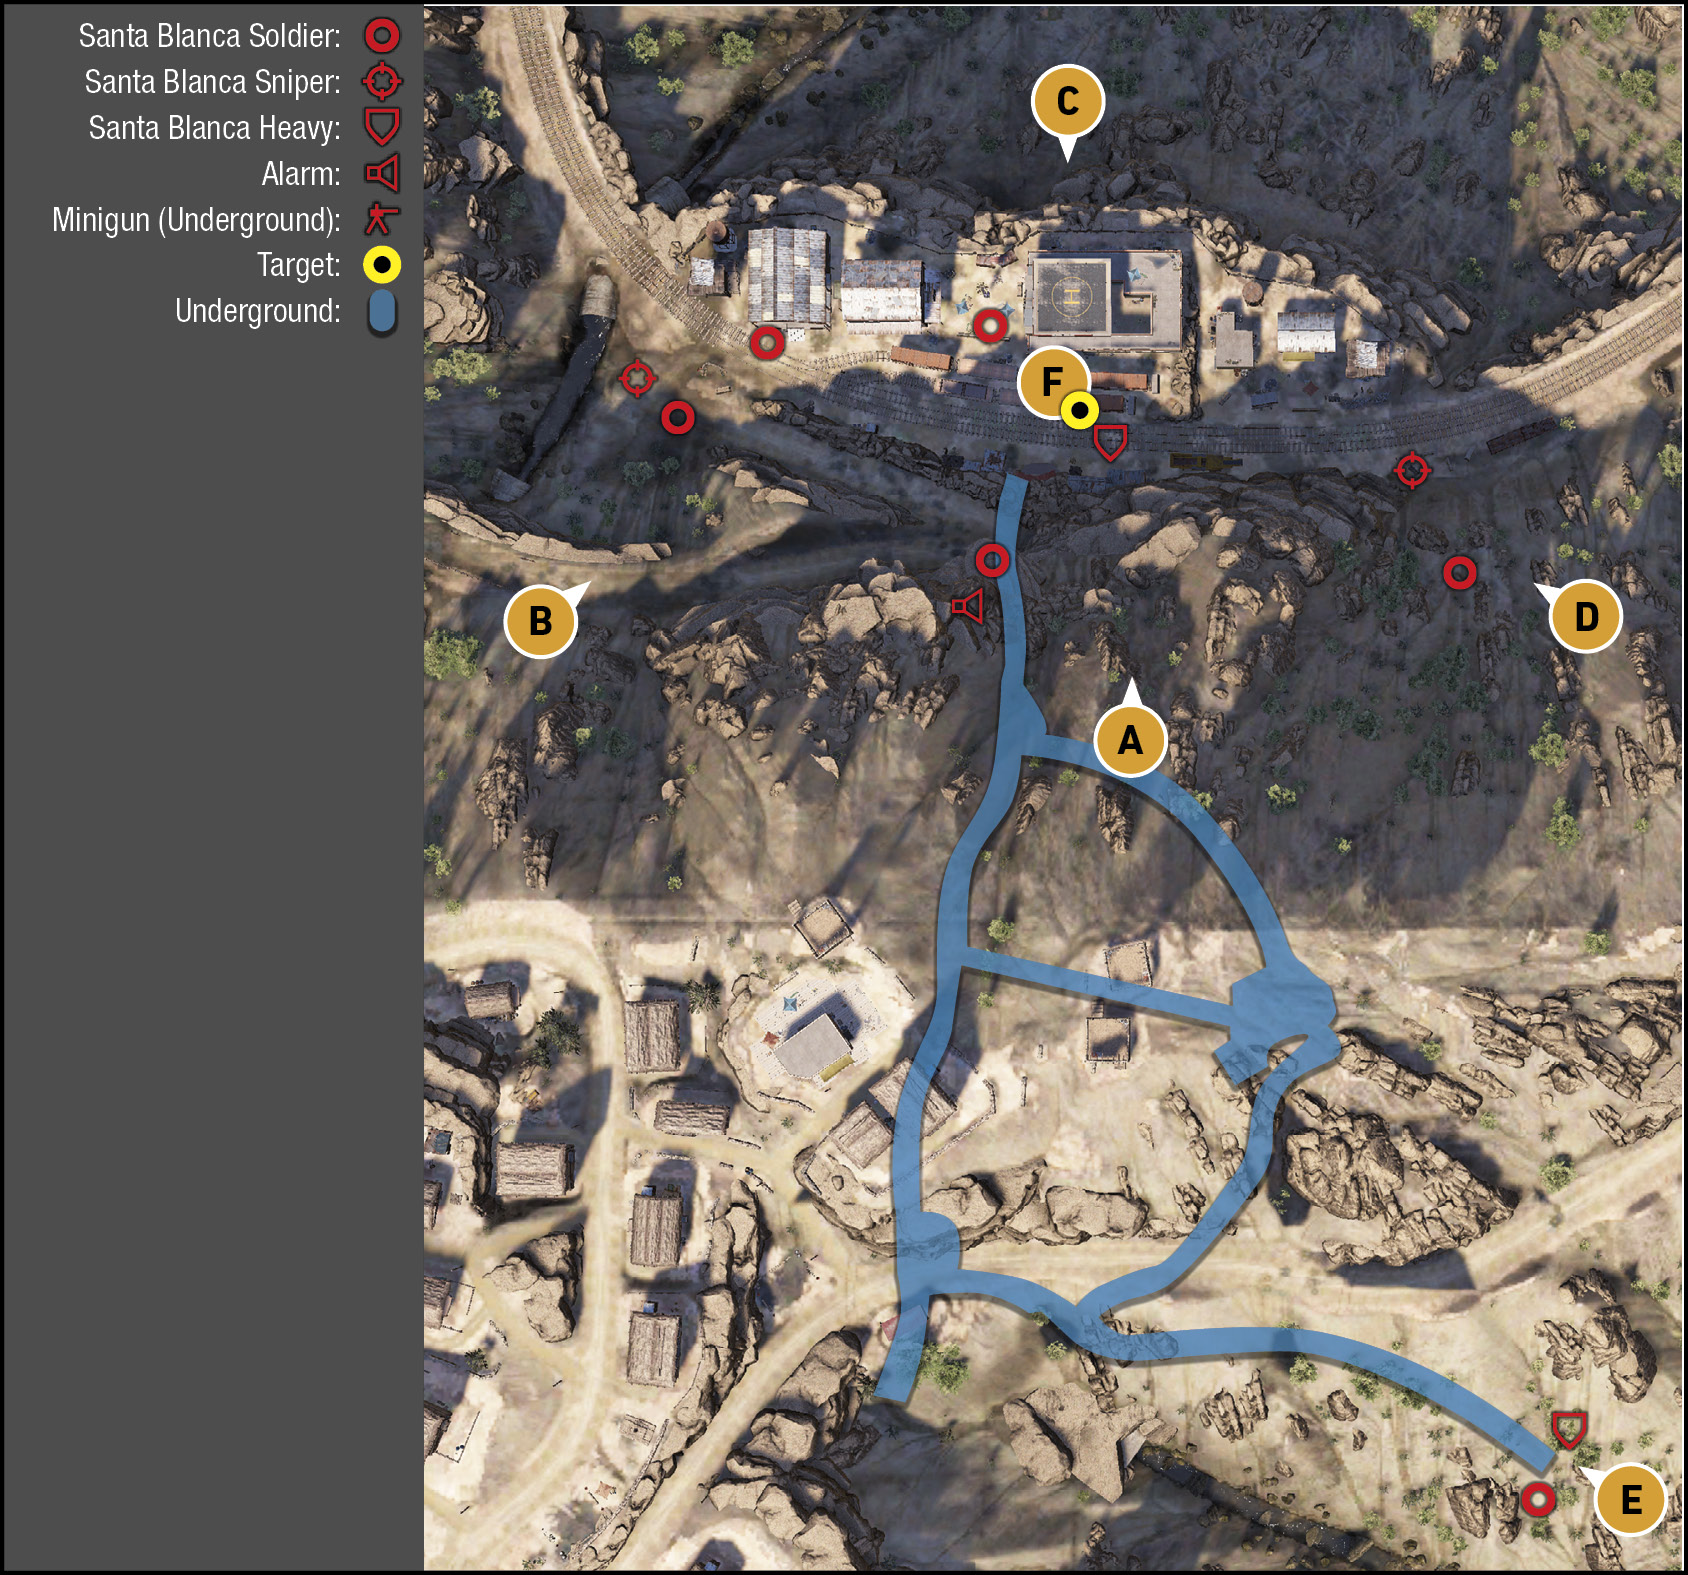
This consists of two sniper towers, one at each end of the platform, and a small rail yard with a warehouse, metal two-story shack, and brick helipad structure where your target is hiding. The place is easily navigated, can be attacked from above (if you’re sure of your footing), and there’s a mine entrance in the south wall, leading to a labyrinth of tunnels under the village to the south, which is optional to search (expect a minigun emplacement and at least five more foes compared to the surface if you decide to venture underground). Also note the alarm in the upper center of the platform; it’s the only real defense this location has.
Cliffs Above Mine Entrance
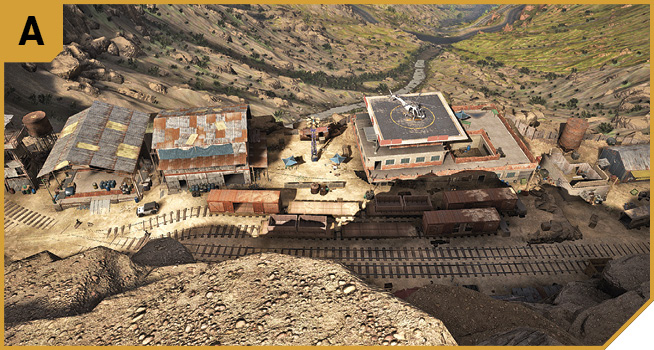
The mine is directly below you, with an entrance at “railroad track” level. But for this mission, it’s worth stationing a friendly here so they can easily tag both the snipers in each tower, and foes milling about the platform and tracks. A great vantage point, especially for throwing out a drone.
West Side Cliffs and Road
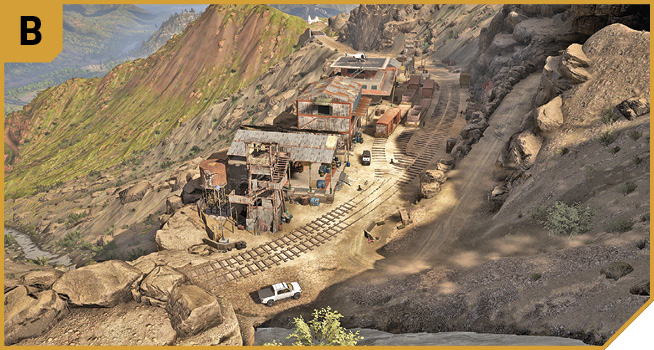
This is a good place to start your assault, as the road isn’t too precarious, you can peel off and find a rocky outcrop to snipe from if you aren’t concerned with close assault, or you can start the methodical sweep from west to east from this point. Feel free to stay farther up the road and bring long-range attacks to bear before descending further.
North Cliff Edge
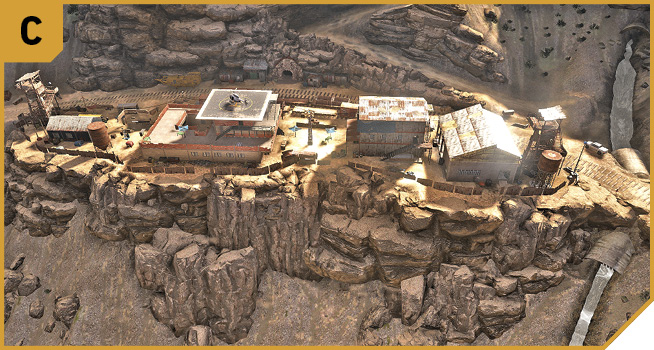
This isn’t a direction to infiltrate from, unless you’re flying in. Instead, use the rickety wood fence to crouch behind, hopping over at the helipad building to easily reach the target. This is the route to take if you want to finish this with no bullets fired, or you want to loop around and outflank the enemy.
East Side Cliffs and Railroad
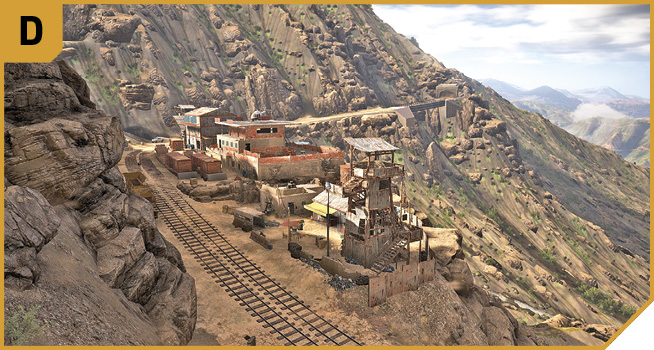
You can also approach via the railroad, or scramble up the scree slopes on this side of the area, but it isn’t quite as amenable to your safety; though in Co-op one Ghost can hike along the tracks and attack from the east, sweeping through westward while others fire from the opposite direction.
PILCA VILLAGE MINE ENTRANCE
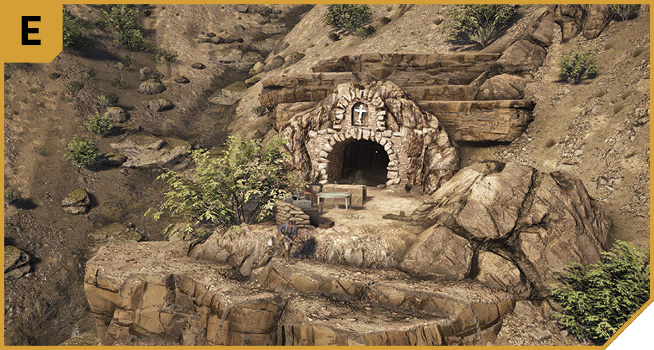
If you’re wanting a truly sneaky method of reaching the station, you can opt to locate the old mine entrance by a steep mountain stream, up from the railroad tracks on the rough terrain east of the main village. There are two easily-removed guards here, and a series of tunnels (with innocent mine workers as well as foes) to maneuver through, until you reach A. Along the way, watch for the minigun nest in the western junction chamber. Follow the guide map, which shows all tunnels, so you don’t get lost.
|
 Target: Helipad Structure and Bodyguard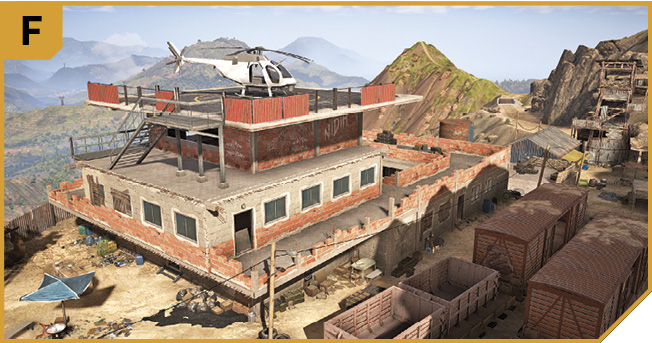
Pilca Mine (Station): Other Tactical Advice
 Feel free to land on the helipad roof of F, descend one floor, and while your team guards the structure, conduct the interrogation. Or, creep in from B or D, using the north cliffs and hop over the fence at C, and into the helipad building, then up to the target without engaging the enemy.
Alternatively, drop the two snipers on each tower from A, along with any and all other enemies that venture out of cover. Then descend to B, and sweep from west to east, mopping up survivors, and using the main structures as cover. Or, enter from E, moving along the mine tunnels, tagging foes and ignoring miners, until you appear at A, where you can launch the attack more directly, as the target is much closer, and you can always back into the mine and more cover.
 Any of the previous plans work well here, though for an extra peace of mind, station a sniper at A and B, and conduct a pincer maneuver with a third Ghost heading east from B, and a fourth west from D, until everyone is dead except the bodyguard. Feel free to direct a couple of your team to move up through the mine interior from E, so you have additional troops on the ground at A, ready to reach the target more directly than heading in from the east and west, where you’re more easily spotted.