
Tom Clancy's Ghost Recon: Wildlands Guide Welcome to Bolivia Mojocoyo: Antonio
Western Cocaine Cache

Objectives
- Destroy western cocaine cache
LOCATIONS
- Cocaine Hideout (West)
REWARDS
- + 500 XP
Brief
We have intel on three large cocaine shipments that are being stockpiled in Mojocoyo prior to being shipped to Remanzo for packaging. Locate these drug caches and destroy them.
Scrapping A Shipment
In the remote part of the Province alongside one of the minor roads is a scrapyard where the cartel is holding a shipment of cocaine. Compared to the two other locations where stocks are hidden, this has a greater number of foes and defenses to worry about. But the cocaine is in the process of being unloaded, and is still outside the warehouse, making it much easier to destroy.
Cocaine Hideout (West): Recon
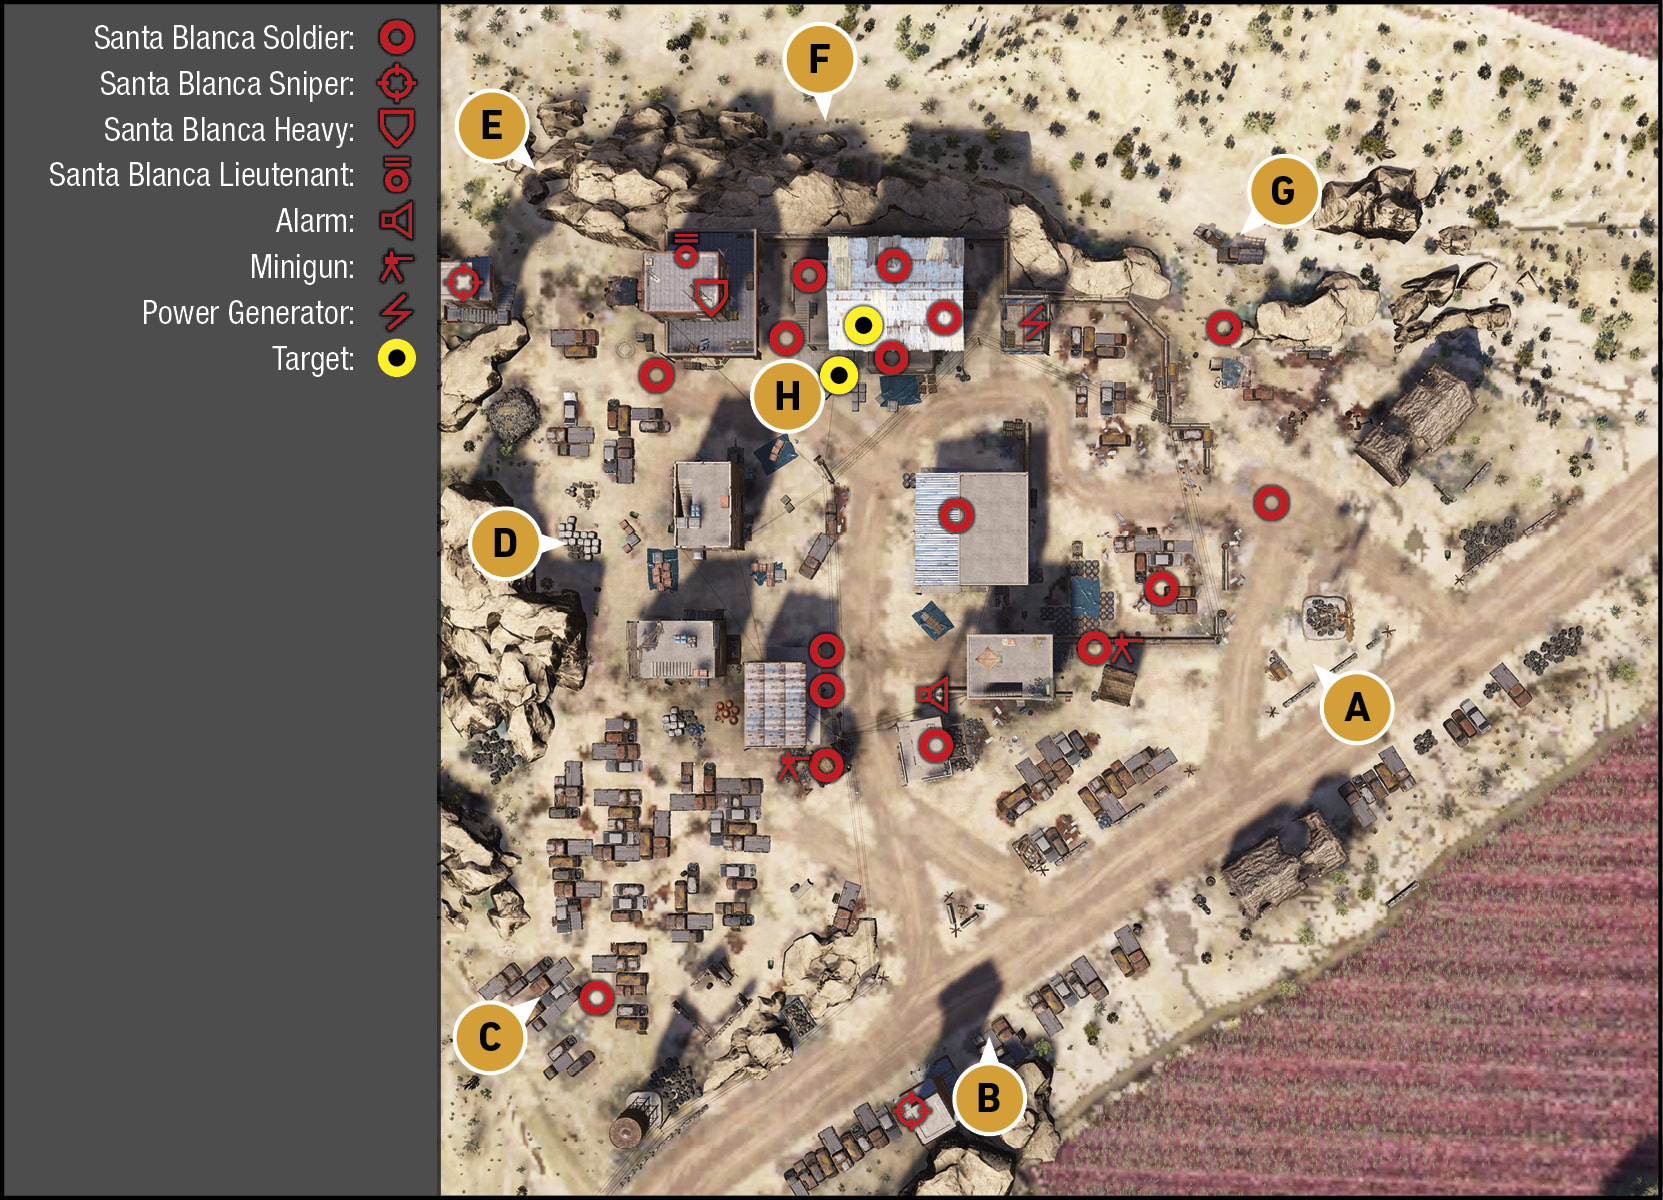
TACMAP
This was once a farmstead, and the cocaine crops can be seen partly surrounding the base. As usual for enemy encampments by a main road, the main defenses of the camp are pointing in that direction (south), including both minigun nests, meaning a more cunning plan is to locate the cocaine warehouse on the northern edge of the base and infiltrate there. The main part of the camp is a cluster of seven buildings between the unloading road that runs directly to the warehouse, where the cocaine is outside of. Add a couple of sniper towers, a total of around 20 enemies, and you need to be a little more concerned than normal when assaulting this location.
Southeast Road (Windmill)
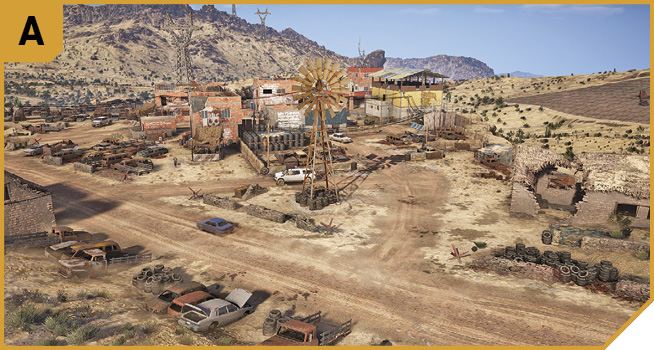
Watch out for the minigun nest closer to the main entrance road into the camp (B), and use the ruined cottage and small old parking lot with rusting cars. There are surprisingly few foes between here and the objective. You can sneak in behind the stack of tires and assault the buildings, including breaking the windows of the garage and jumping through. Or, you can break the lock to the generator and turn off the power. It’s a straight shot (and within grenade range) between the mesh fence to the cocaine, too.
South Road (Main Entrance)
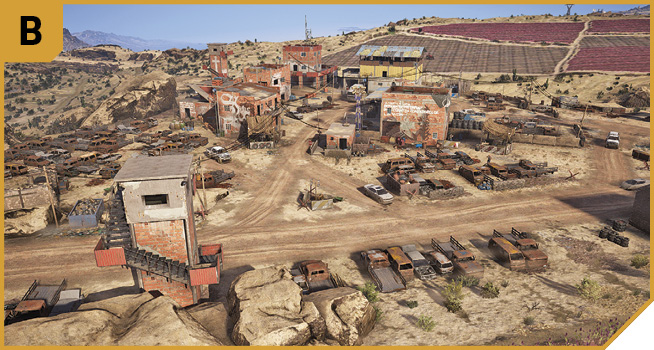
Unless you’re wanting to tear through the main road to the cocaine stash using a vehicle, the two minigun nests, sniper, and foes in this general area make this a tough place to infiltrate from. It’s worth removing the sniper in the tower, but do it from A, C, or D as there’s a little too much open ground between you and the target when entering here.
Southeast Water Tower (Car Graveyard)
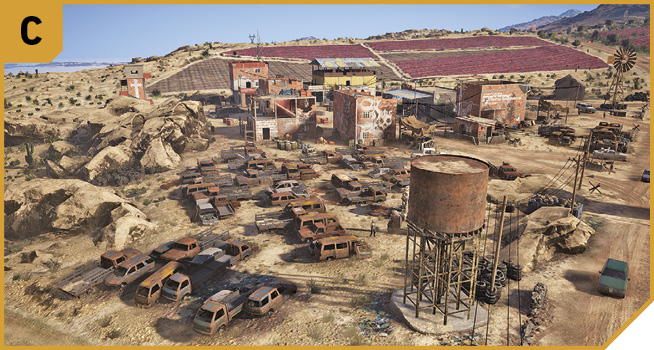
Though you need to watch for foes spotting you from the north (including the sniper at the tower near E), heading in via the water tower and rows of rusting cars is worthwhile. There’s only a single foe in the vicinity, you can easily shoot out the alarm box near the main entrance, and assault the unfinished brick buildings, or continue north to D. Note the low windows in the brick building adjacent to the minigun nest you can smash, allowing access into the brick structure on the left side of the main interior road.
West Tire Pile (Rock Outcrops)
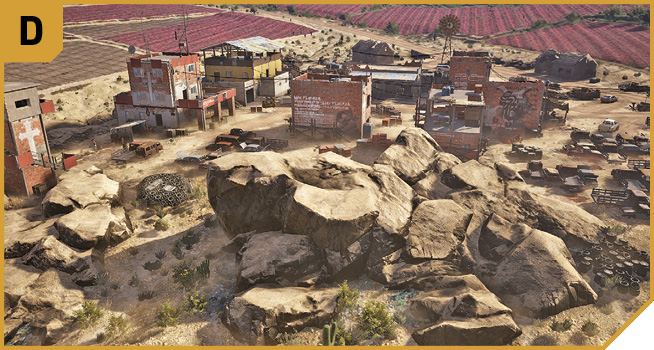
As long as you take out the sniper in the tower to the northwest (E), climbing on this rocky outcrop is a great way to gain some height without having to enter the base itself, and allows you a direct visual on the cocaine stocks, as well as foes in the vicinity. Provide covering fire from here.
Enter the base via the pile of tires and small number of rusting vehicles, before removing the more troublesome foes in and around the HQ building just west of the cocaine warehouse.
Northwest Desert (Sniper Tower)
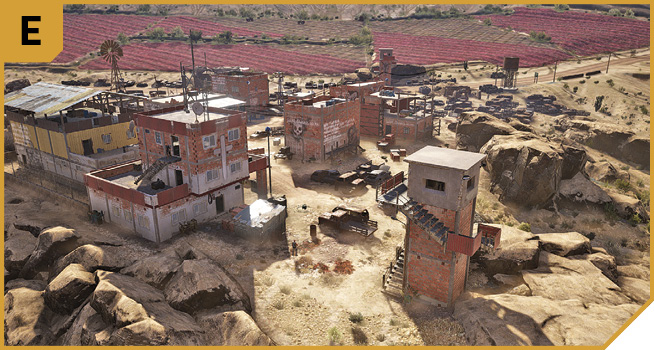
This offers similar access to D, and you can climb atop the sniper tower to offer cover, though this isn’t as flexible as firing from the rocks at D, as the tower doesn’t have good views of the target area. Instead, use this to infiltrate from, towards F or H, or if you’re wanting to assault the HQ building.
North Desert (Rocks And HQ Building)
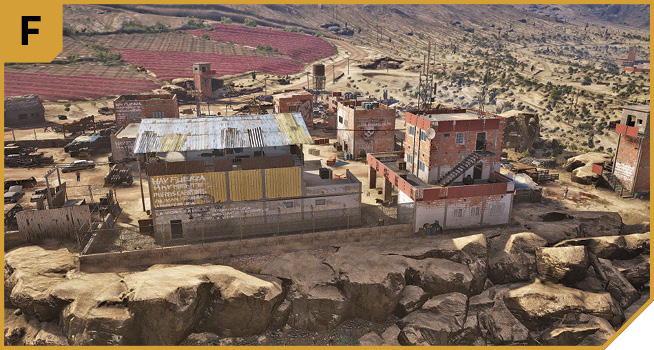
Climbing up the rocks to the perimeter fence and HQ building allows you to sweep in from the northwest (E), or smash a window in the HQ building and vault through, if you’re storming in from the outside. Or, if you sneak in through the door, you can ascend to the top floor office, where you can shoot out the window overlooking the stockpile and lob a grenade down from relative cover, as well as firing down at the main road inside the base. Just be wary of the armored foe, lieutenant, and other enemies in and around this building.
Northeast Desert (Fence and Generator)
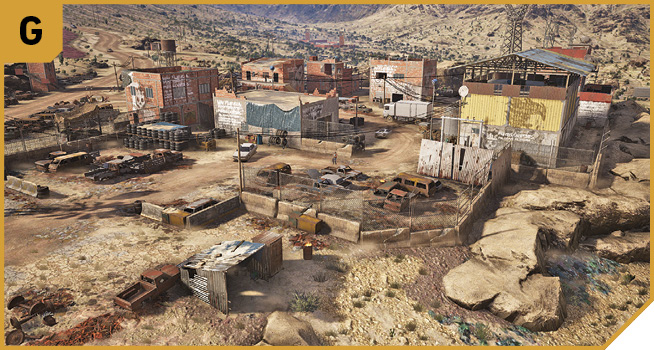
There’s little reason to try entering from this angle, unless you’re moving to A or F, as the fence is sturdy and high enough not to allow you into the base.
|
 Target: Cocaine Stock and Warehouse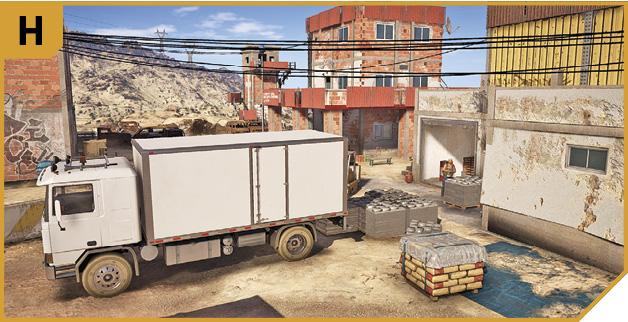
Cocaine Hideout (West): Other Tactical Advice
 If you’re wanting a quick in-and-out plan, sneak in from G, around the back of the cocaine warehouse by the generator, and enter the cocaine warehouse building itself via the corner doorway (northeast corner). Then lob grenades through the garage while shooting any explosive canisters, and retreat the way you came. Have your team distract foes in another part of the base. Or, if a complete removal of foes is more your style, enter from C, removing the sniper in the south tower, shoot out the alarm box, clear the foes in and around both minigun nests, then sneak north via D, tag the other sniper in the northwest tower, order your team toward the target and provide covering fire, then advance past the HQ building to the cocaine.
Or, strafe the cocaine by driving a vehicle in from A, or a helicopter. Optionally land on the garage roof (just southeast of the unloading truck), bomb the shipments, and leave via chopper.
 Have a Ghost responsible for the south portion of the base; dropping the sniper, destroying the alarm, and removing both minigun operators and foes in this side of the base. At the same time, assault from D and G; one foe using the rock outcrop at D to provide cover and removing the northwest sniper, while two Ghosts sneak in using the Solo route around the generator and into the cocaine warehouse. Then go for the cocaine.
Drive two well armored vehicles into the base from different directions, dropping grenades as you reach the cocaine. Mix this up using a chopper and vehicle. There’s no need to add foes unnecessarily, so shoot out the alarm box as you enter.