
Tom Clancy's Ghost Recon: Wildlands Guide Welcome to Bolivia Montuyoc: Carl Bookhart
The Instructors (Optional)

Objectives
- Kill Santa Blanca’s military training instructors (3)
LOCATIONS
- Montuyoc Training Base
REWARDS
- + 350 XP
Brief
We have confirmed the location of Santa Blanca’s main training base in Montuyoc. Attack the base and eliminate the cartel’s military instructors.
Complex Instructions
Among the largest hostile locations you enter is this sprawling training base in northeast Montuyoc Province. The place is so large, bristling with so many defenses, and the three targets are separated enough that it makes sense to infiltrate at two separate times (unless you’re in Co-op mode). Tackle the smaller hillside-base section to the southwest first, removing the instructor from the HQ building. Then turn your attention to the northeast section, moving into the training course and dropping another instructor before assaulting a second HQ building for the final target takedown.
Montuyoc Training Base (Overview): Recon
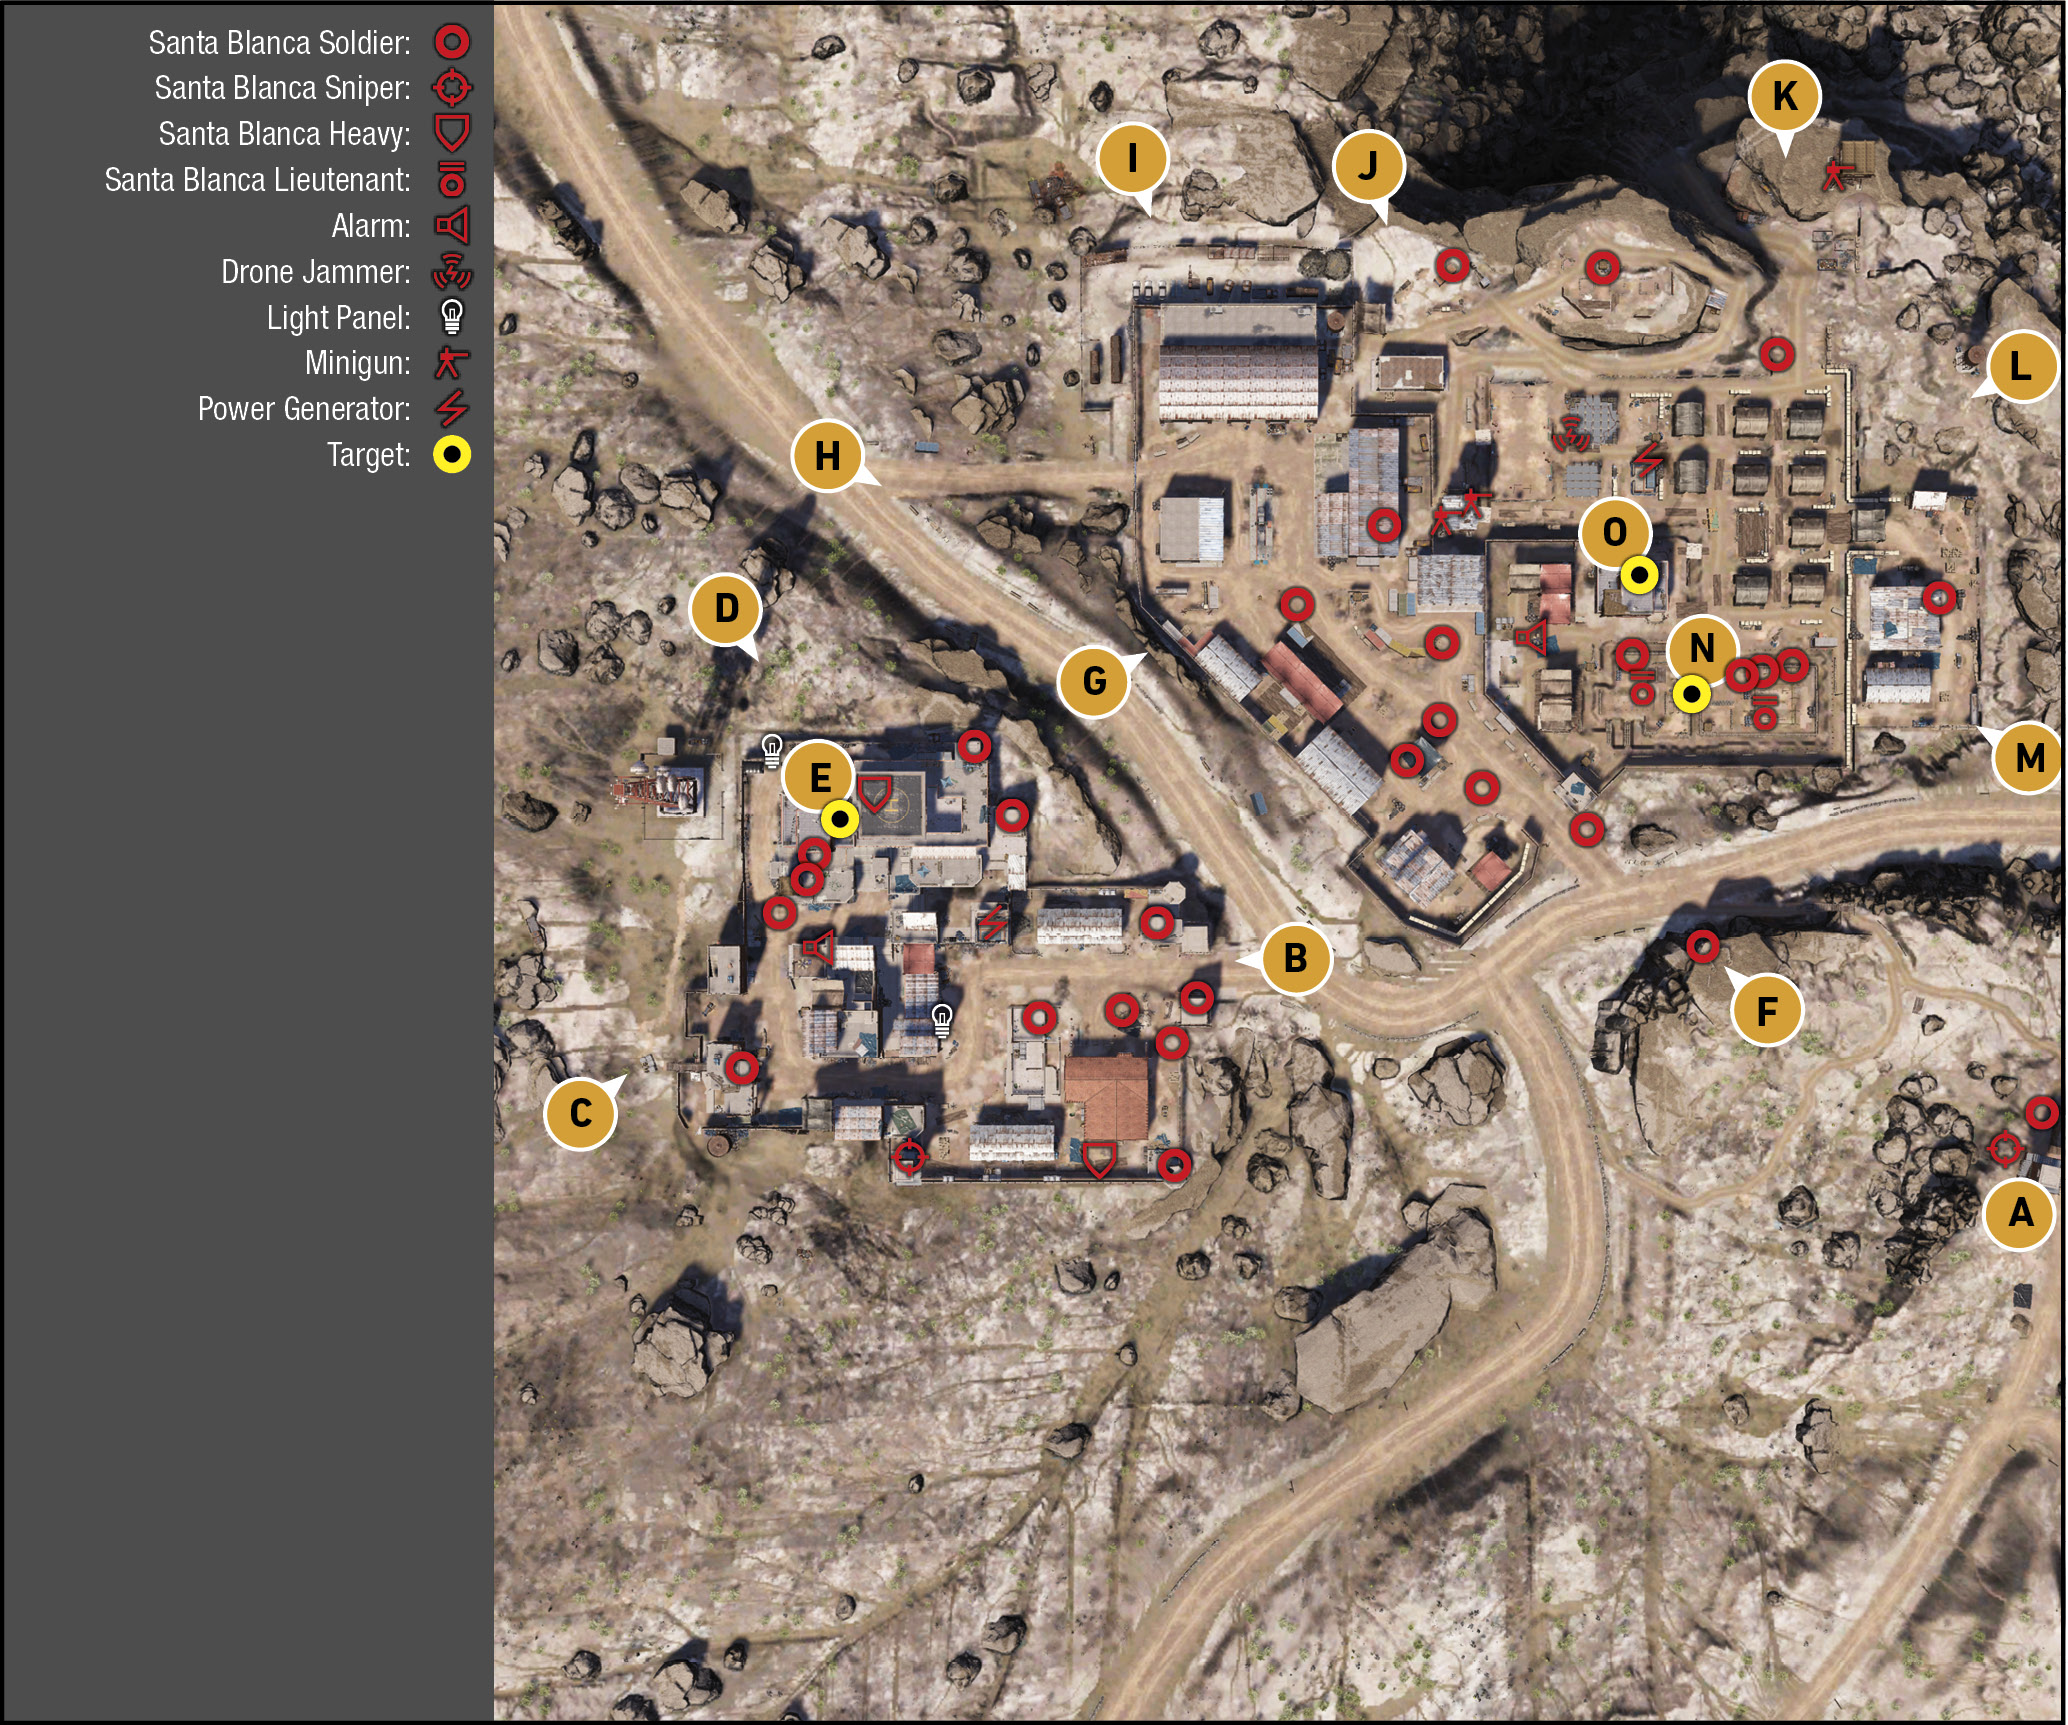
TACMAP
Note our three separate sections and two sets of Solo and Co-op tactics for this large base. Bisected by the main road, the southwest-base section is on a hill with a mainly flat yard dotted with construction equipment, along with a mess hall and clinic. The rest of the base contains multi-floor structures, so finding your way through this concrete and brick maze can be tricky (unless you circumvent this and go straight for the target). Perimeter-skulking is usually safer than alleyway infiltrations. Northwest is the HQ building itself, which features multiple entrances and is attached to a rooftop helipad. Note the perimeter is impressively well-sealed; aside from the main entrance to the road (B), there’s only one weakened area (C).
The northeast-base section is larger but far less oppressive when you assault it. This is mainly due to the lack of tall structures close to one another. Instead, there’s a road and unloading yard to the southwest (close to the main road) and a large truck warehouse to the northwest (which is a great infiltration point). Lax perimeter reinforcement along the north side of the base allows access in to deactivate or destroy three installation points, or foes in the tent barracks to the northeast. Your two targets are relatively close; one is inside the HQ building (center-east inside the camp), and the other starts at the assault course in the southeast part of the camp, which is easily spotted from the hillside to the south.
Montuyoc Training Base (Southeast): Recon
Southwest: Lone Sniper Tower
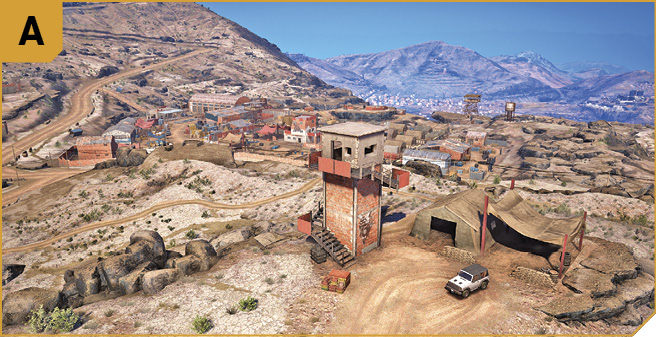
This is part of the overall base but isn’t within the perimeter walls of the southwest- or northeast-base locations. The hillside to the southwest has a manned sniper tower, along with a small tent and second foe. Removing these two individuals is easy, doesn’t trigger any alarms, and allows you to take a look at the entire base from a good vantage point. You can quickly off the foe at the sandbag overlook, too (F). Head here if you need a Santa Blanca vehicle (for entering the gates at H, for example).
Montuyoc Training Base (Southwest): Recon
East: Main Entrance
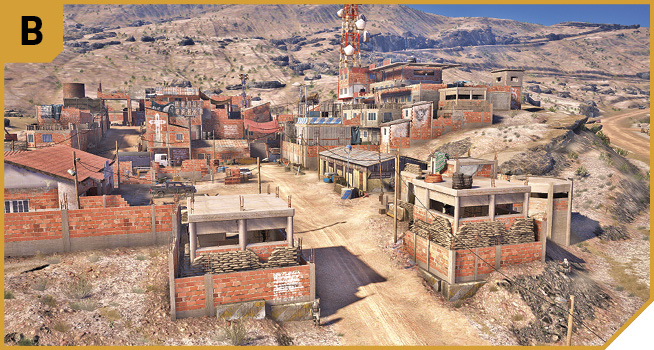
The entire east wall is too tall to climb over, forcing you to enter at this location if you don’t wish to access the more cunning route at C. The two pill boxes are elevated, allowing you to sneak under them to find cover in the muddy yard. Try sneaking to the right (northwest), into the barracks building (especially after night). Learn the base interior layout so you can sneak (or storm) up the concrete steps to the west and infiltrate the helipad structure and HQ building. Along the way, stop at the generator to deactivate it to kill the lights.
Or, once through the main gates, head left into the clinic, into the mess hall, and remove the sniper from the tower. This grants access to the continuation of the main road up and around toward the minigun nest and HQ building. Use the multitude of buildings along the way as cover, watching for the foe at the half-built structure near C as you go.
This is also the entrance to use for a more violent, vehicle-based assault. Drive in, following the road around to park behind the HQ building, and then storm the structure to defeat the target. Leave via the vehicle or helipad, C or B (the way you came).
Southwest: Gantry Steps and Wall Gap
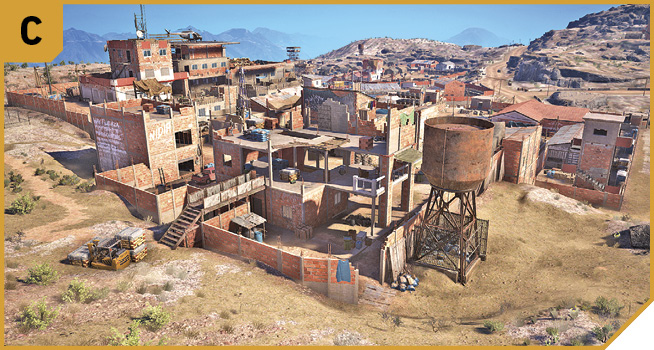
This is a more cunning option, and the only other interior access point to this part of the base. Outside the gantry steps and gap in the corner of the wall, you have the elevation to shoot out the alarm pole panel before crossing into the half-built brick building. From here, you can gain some height and shoot the sniper on the south tower before creeping north to storm the HQ building (from either the main road to the west, or the concrete steps to the east, under the HQ structure).
Northwest: Sniping Rocks
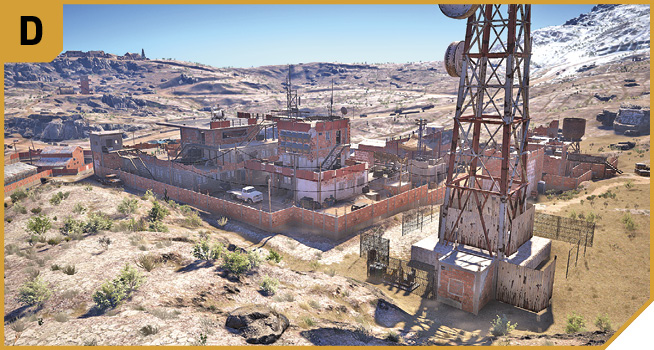
Though you can’t enter the base from here, you can use the drone to get a good look at the layout. If you’ve removed the drone jammer south of K in the other base section, you can also fly the drone into the HQ building to explode in the face of the target. You can snipe the alarm pole panel from here, which is helpful. Sometimes you can distract the target with a grenade or flare; when he heads out of the HQ building, snipe him.
|
 Target: Instructor (HQ Building)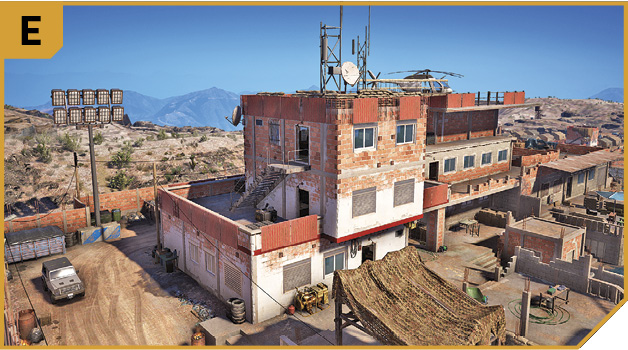
Montuyoc Training Base (Southwest): Other Tactical Advice
 Employ the following tactics, which assume you’ve patiently removed the alarm pole panels at both bases first, and have deactivated the drone jammer.
Shoot through the brick wall of the HQ building with a sniper round from D. That should do it. Or, fly an explosive drone in through an opening in the HQ building.
Need to actually enter the base? Head in via C after removing the alarm panels, and avoid the rest of the base by heading north, entering the HQ building, and removing the target. Keep ascending, and shoot out the windows of the helipad building so you can continue east, maintaining your height advantage and dropping foes along the way. Stay at this height, making the foes come to you or shooting them in the yard until only stragglers remain. Then descend and finish the foes in this part of the base.
Or start a massacre in an armored truck with a mounted minigun. Drive through the main entrance (B), then a couple of times around the yard, before parking it up at E and finding a high-up hiding spot.
Once you’ve removed the target, you can leave in the chopper on the helipad roof and fly it across to the other base section, strafing the ground at N to hit the next instructor before landing on the soccer pitch. Deactivate the SAM launcher first, or avoid those missiles.
 Solo plans present viable options here, but you can work in unison with teammates at the other base section so three of you each tackles an instructor simultaneously, with a fourth Ghost backing up where necessary.
At night, sneak in at C and head north between the buildings, shutting down the power at the generator to kill the lights. Then the rest of your team can enter at B and start removing foes as you close in on E. With the camp in darkness and no hope of reinforcements, stay stealthy as long as possible. Remove foes at the barracks, then sweep the entire area and finish off the instructor last.
Montuyoc Training Base (Northeast): Recon
Sandbag Outlook and South Entrance
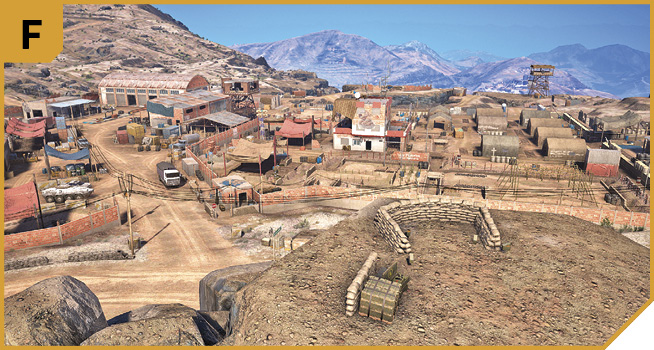
A single foe guards sandbags above the main road. This is a great place for taking in both sections of the base, as well as easily sniping the alarm pole panel and the target on the assault course (N). Note the steps down to the road just east of the vantage point.
The main entrance is wide, and you can easily drive a truck in here, all the way to the west gate or the truck warehouse (I). The only issue is the number of foes in the vicinity, inside the base, and on either side of the road. Unless you’re causing havoc (or a distraction), find a quieter spot to sneak in. And if you’re driving around maniacally, make sure you use a cartel vehicle so you can use the automatic gates at H.
West: Main Road Perimeter
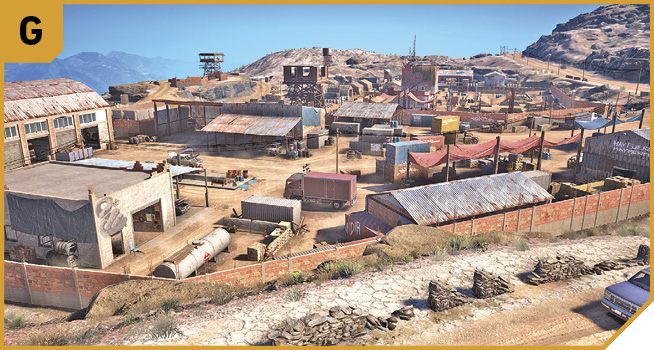
This isn’t utilized much, as it puts you between two sets of enemies, and parking or running about on this stretch of road can draw attacks from two directions. However, firing at the propane tank or the foes in the unloading area on the west side of this base section is a good distraction tactic. Tag the alarm pole panel from here, too.
Northwest: Gate Entrance
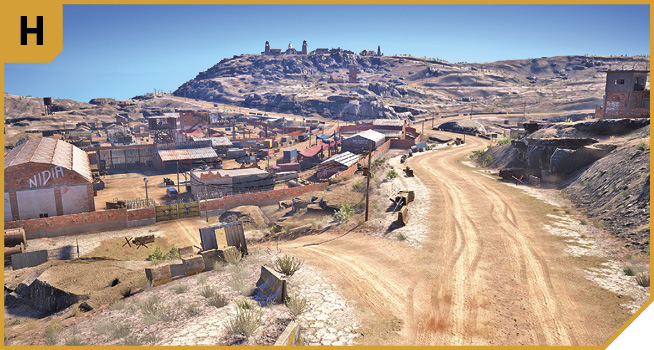
If you want to move all four Ghosts into this base section and attempt some semblance of stealth, pick a cartel vehicle, head through these gates, and park near the large open garage, armory, or truck warehouse (all in the northwest corner). Then infiltrate past the soccer pitch, shooting out the alarm pole when you get a chance, and deactivate the generator, SAM launcher, and drone jammer in quick succession. There are few foes here, though slow driving is recommended.
Northwest: Perimeter Breach to Truck Warehouse
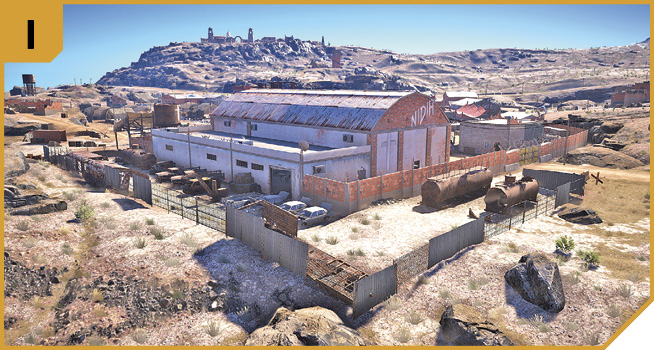
The open garage into the truck warehouse in the northwest corner is the safest way into this location, if you want to sneak to the installations north of the HQ building to cripple the enemy’s ability. A single Ghost can do this (usually without encountering anyone), enabling an all-out assault afterward with a chopper, explosive drones, or other outlandish plans once the defenses are down.
North: Tire Pile to Plateau
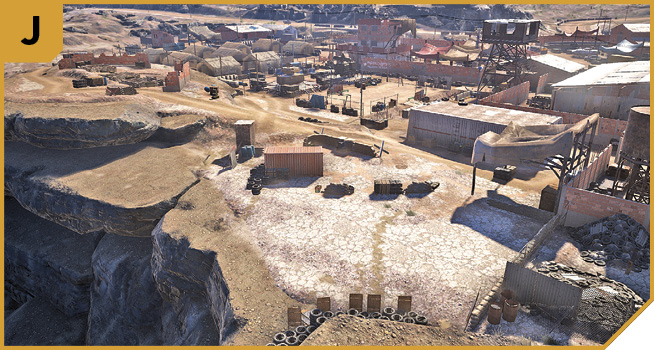
This is an alternate entrance to I, allowing quick access to the installations. Or you can sneakily remove the few patrolling foes on this side of the base so there are fewer to fight later. This offers good views of the alarm pole too, from the elevated plateau and brick construction wall.
Northeast: Minigun Tower to Barracks
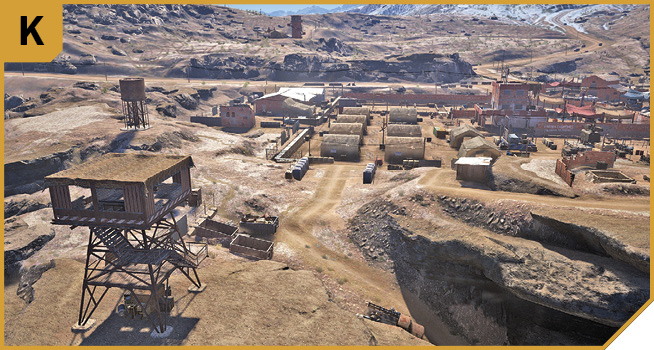
Advance on the barracks after night, in case you can neutralize multiple foes more easily. Otherwise, the barracks tents are an excellent place to hide, before you quickly head to the adjacent installations (drone jammer, SAM launcher, and generator), the HQ building (west), or the assault course (south). You have reasonably clear shots to both targets from here too, though the instructor in the HQ building needs to be brought down with a sniper round through the brick wall.
Northeast: Side Yard and Mess Hall
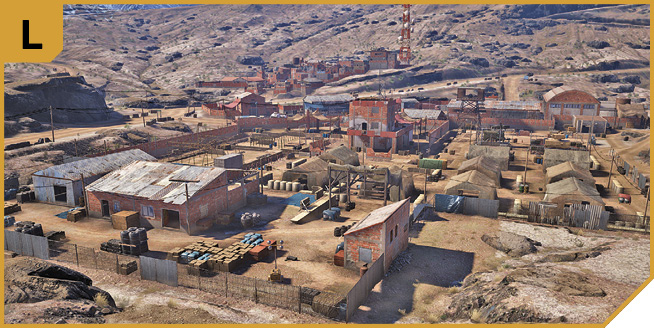
The fence can be jumped here, and the slightly elevated area comprising a side yard and mess hall navigated. This offers the same takedown opportunities as K, though you can head south to the perimeter of the assault course to mow down the target and cluster of foes there, including two captains.
East: Fertilizer Warehouse
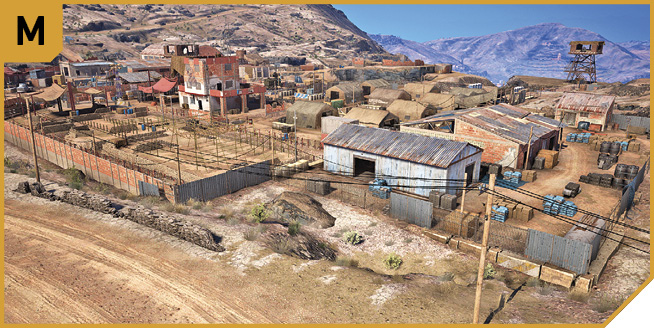
The perimeter fence here is lackluster and the patrol guards minimal, making this another good spot to infiltrate from. You have slightly elevated positions to view across the assault course, shoot out the alarm panel, or move toward the tent barracks and installations.
|
 Target: Assault Course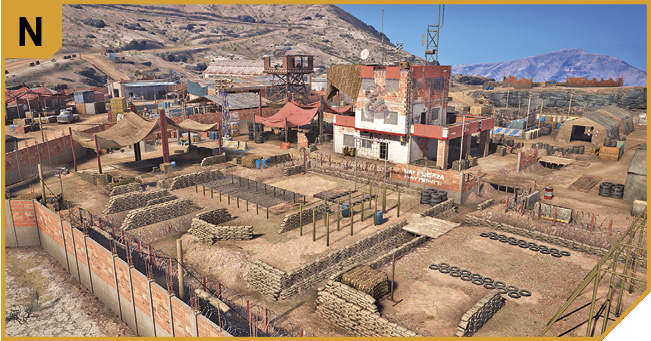
|
 Target: HQ Building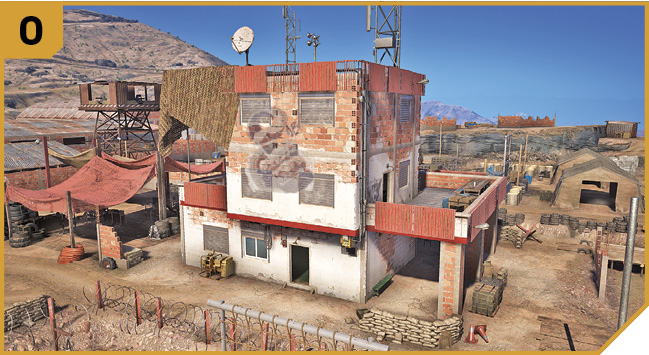
Montuyoc Training Base (Northeast): Other Tactical Advice
 The following tactics assume you’ve patiently removed the alarm pole panels at both bases first, and have deactivated the drone jammer.
Once the foes at A and F have been (silently) removed, stand at F and shoot the target at O through the brick wall of the HQ building. Before the target at N can react, reload and drop him. Done! Or send an explosive drone into the HQ building to remove the target there, before removing the other target from F or M.
To clear all foes from this base, attack at night so you can check for enemies in the barracks. Remove the single enemies between J and M, along the north, northeast, and eastern perimeter, without making enough noise to alert anyone. Then head to I and work your way southward from the truck warehouse to F, stalking and removing patrolling foes until you’re discovered. Leave the targets and the assault course enemies until last, as they’re usually hemmed in and can be tackled like prey from distance.
A drive from F to I while shooting foes makes for the beginning of a solid plan, but waking up the rest of the enemies does nothing to aid an assault on the area containing the targets.
To execute a closer assault, sneak in from K, heading directly for the HQ building (after deactivating any installations you deem problematic). Kill the target inside the HQ building first (silently if you wish), then head out onto the balcony and mow down foes on the assault course. Projectiles are helpful here, as is hitting any explosive barrels or scenery.
Dodge the SAM launcher and fly into this base in a chopper. Land it on the soccer pitch and instruct your teammates to tackle the foes to the southwest along the yard road, while you head to the targets. You trigger the alarm if you haven’t already removed the poles.
 The many Solo plans work well here, though you can attempt an even quicker takedown with a Ghost heading to F to remove the sniper at A and foes below the tower and on the sandbag overlook. A second Ghost should head in from K and deactivate every installation, while Ghost #3 tags the target through the brick wall of the HQ building and Ghost #4 removes the assault course foe. Then advance and catch the rest of the foes in crossfire.
Assign a Ghost as a forward-assault specialist, responsible for neutralizing the alarms and installations while the rest of the team enter via chopper (land on the soccer pitch) or trucks for a more violent, vehicle-based massacre.