
Tom Clancy's Ghost Recon: Wildlands Guide Welcome to Bolivia Barvechos: El Pulpo
El Pulpo’s Right-Hand Man

Objectives
- Reach the Sipuco silver mine
- Interrogate the mine manager
- Free Wagner (04:00)
- Grab Wagner
- Extract Wagner to Barvechos Charlie
LOCATIONS
REWARDS
- + 500 XP
Brief
Sueño has sent his accountant, El Pulpo, to audit Nidia Flores’ books. It’s possible that Sueño suspects Flores of skimming off cartel funds. Pulpo’s assistant is currently at the Sipuco silver mine. We need to grab him and find out what he knows.
Finding Your Quarry
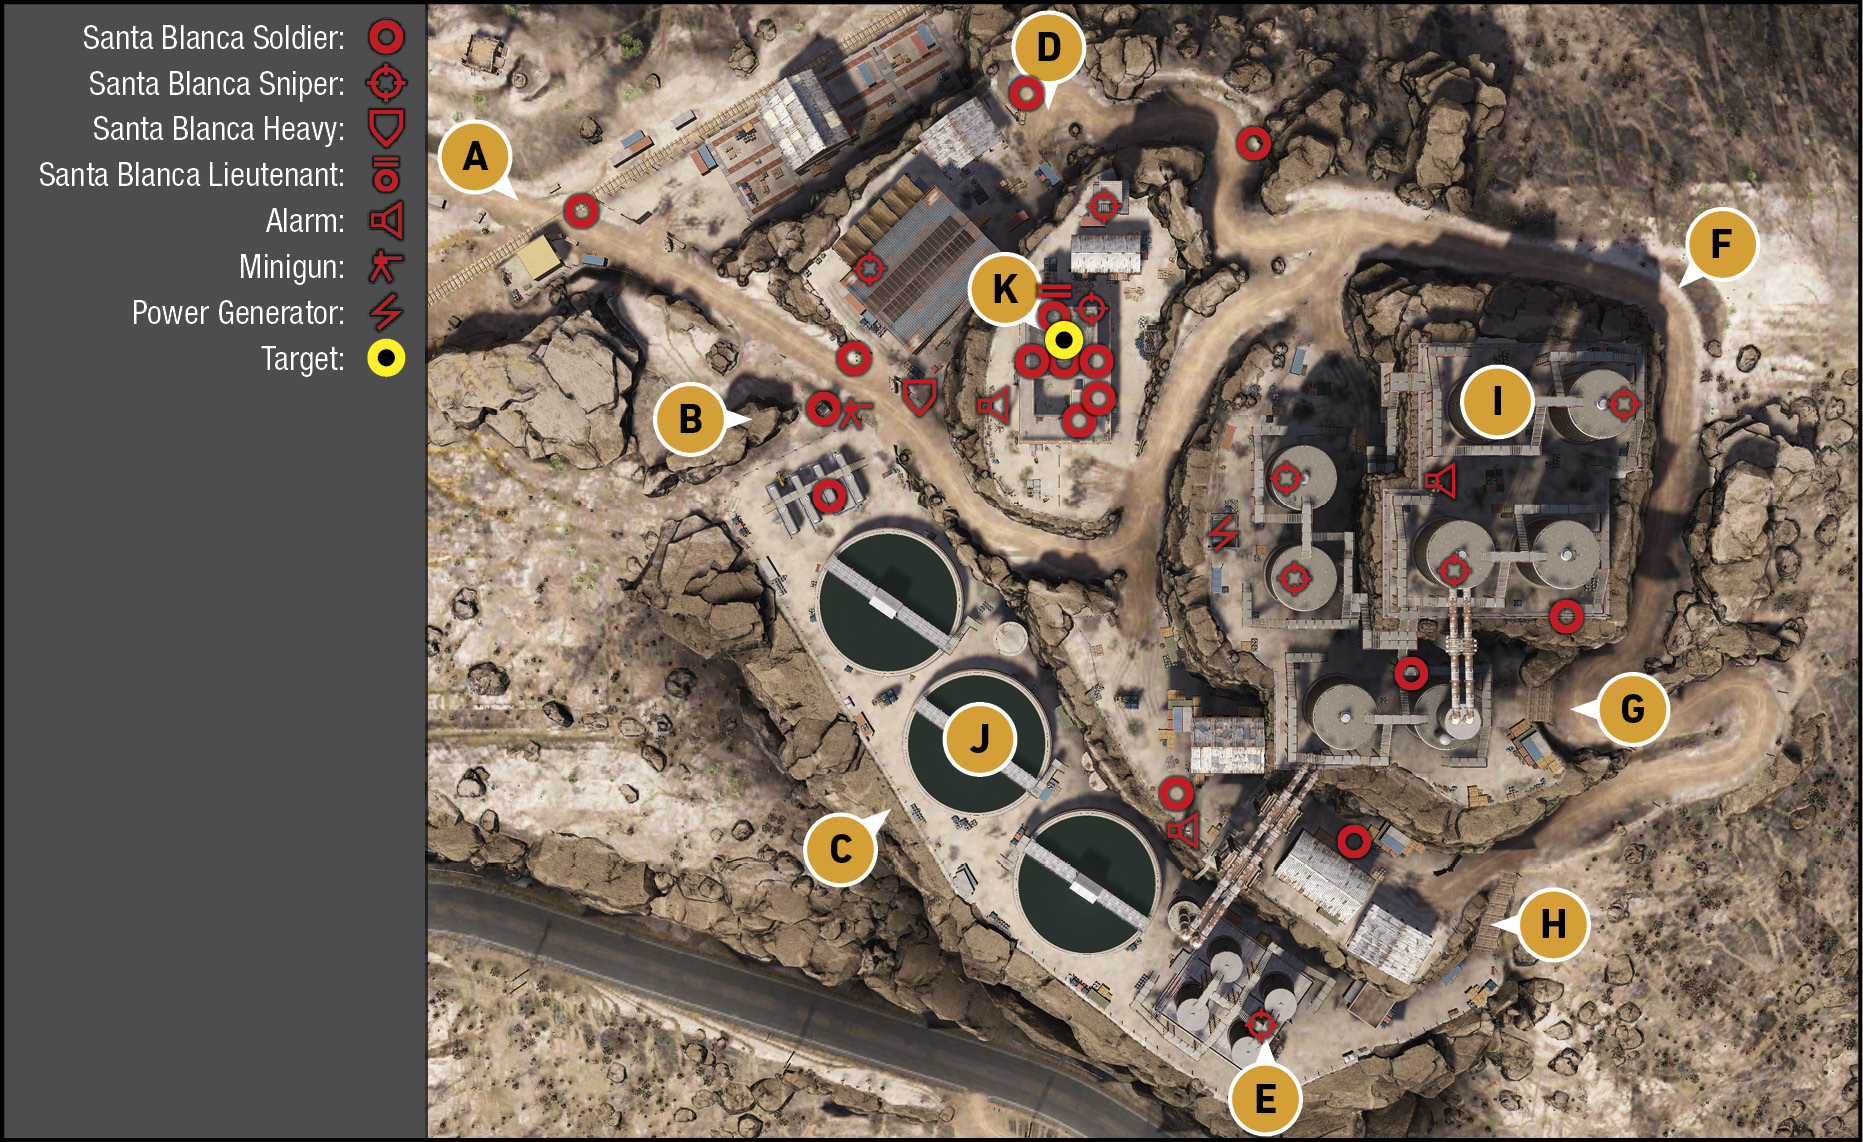
The silver mine facility, tagged on your Tacmap as “Barvechos Mine”, is a sprawling set of industrial cooling towers, vats, and structures on a hill just south of the mine quarry itself. In the three-story structure with the helipad on the roof is the mine manager; he knows where Wagner is being held. Unfortunately, he’s well-guarded.
Barvechos Mine: Recon
TACMAP
Even a cursory check of the map reveals there are more snipers than many other missions you may have completed before, and that a large cluster of foes are in and around the target building, out of a total of 25 or so in the area. This creates a number of logistic problems, such as getting to the mine manager without accidentally shooting him, and engaging foes that have a huge height advantage. The trick is to utilize some of the Skills you’ve acquired, along with infiltration through routes that aren’t immediately obvious.
Northwest Railroad Checkpoint
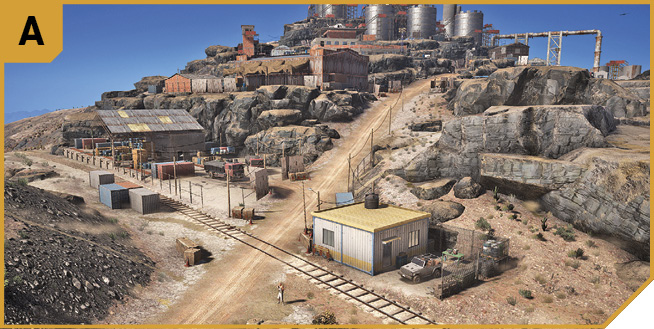
A lone foe, usually with binoculars, is in this area, which is downhill from the target building. This location is great for driving down when you’re attempting the next objective, but heading into the mine, you’re easily overwhelmed by the minigun nest farther up the hill. Snipe the foe from the ruined cottage on the hill to the north, then sneak to B or D away from the road, unless you’re attempting a multi-vehicle frontal assault.
Northwest Entrance and Minigun Nest
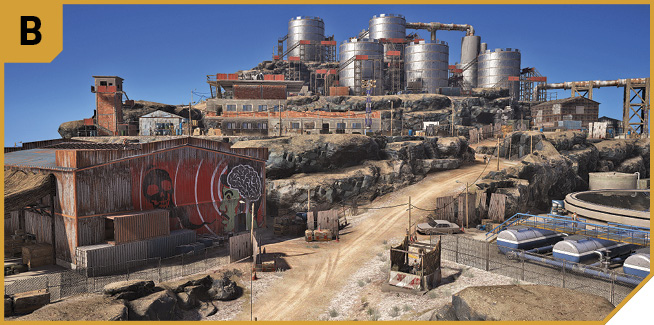
Near the corrugated machine warehouse with the red and green graffiti is a minigun nest with draped tarp, no roof (making it easy to snipe from above or a helicopter), and a number of foes (including an armored one) along the hillside road into the mine. Just southeast is the start of the vat area (J).
A run directly up the road is almost suicidal, so use the large rock clumps near the vats, climbing to the vantage point to tag the minigunner, and the sniper atop the machine warehouse, as well as foes near and around the vats. Or ignore foes if you’re slipping in toward J.
Southwest Vats Perimeter Fence
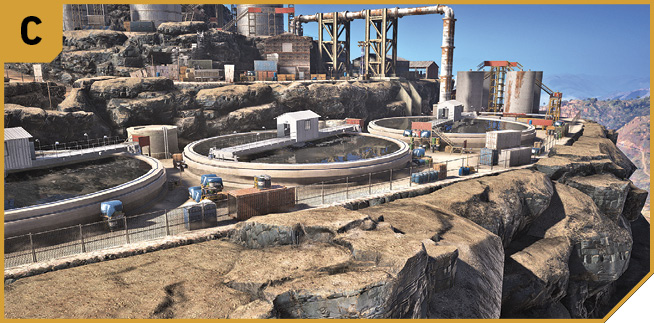
It’s quite a hike around the southwest perimeter of the mine facility, but you’re able to move along the mesh fence, and climb over it (and back again) at any point if you’re wanting to move to and from J. Head around this perimeter to reach E, H, and G, or if you’re moving from there.
North Railroad Tracks and Sniper Tower
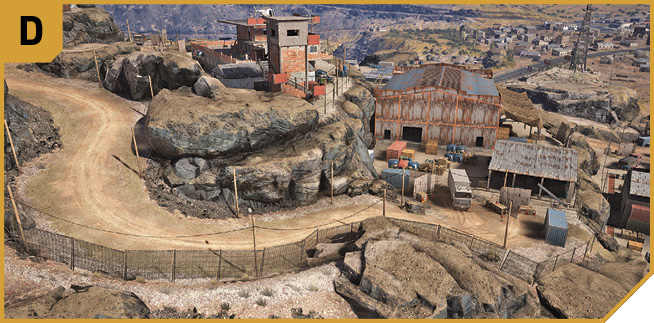
There are two snipers to worry about: one on the machine warehouse roof, and the other atop a brick tower. However, both can’t see you if you remain close to the rock wall and head east along the tracks, peeling off to D by climbing the rocks and the low mesh fence. Move up the winding dirt road (watching for one or two lone foes you can easily drop with suppressed fire while maintaining silent running). Tag the sniper atop the nearest cooling tower above you if there’s a danger he’ll spot you.
From the road, climb the rocks between the road and the sniper tower, and you have access to the tower itself. Climb up, remove the sniper, and you have a commanding view of the target building yard, and access onto the roof of the machine warehouse (where you can snipe the sniper much more easily). This is a great place to hole up and cover other Ghosts as the assault on the target building commences, especially as you’re usually low enough not to be bothered by the snipers at the cooling towers (I).
South Perimeter: Small Towers and Steps
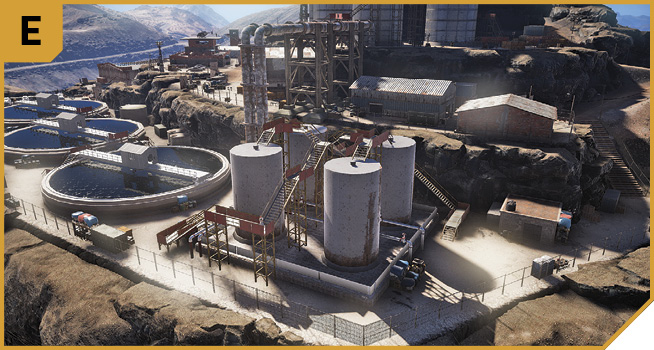
There are fewer enemies as you skulk around the south perimeter of the mine, but the sniper on the gantry connecting the cluster of four smaller cooling towers can cause trouble. This gantry doesn’t lead anywhere, but you’re close to the steps up to the warehouse and access to H.
Northeast Cooling Tower Perimeter (Fence Gap)
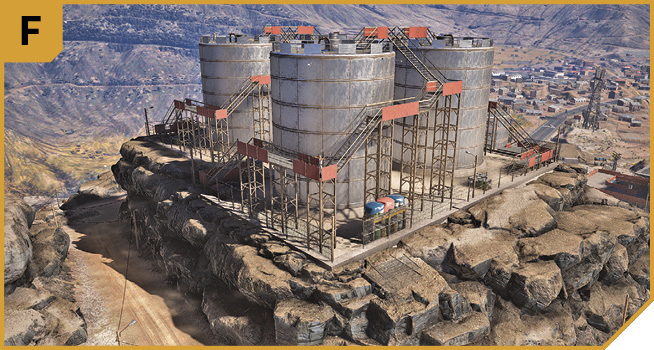
Though you have difficulty climbing the fence (it’s just too tall), the northeast corner of the cooling tower area (I) atop the hill has a section of fallen fence, making it an exceptional infiltration point. From here you can quickly scale the cooling towers, and take out the troublesome snipers here. You can also vault over the fence halfway along the eastern perimeter side, too.
West Perimeter: South Cooling Tower Gantry
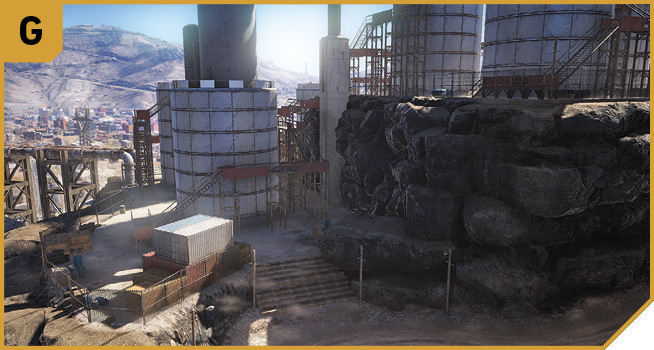
The winding road ends at H, but more important is the next section of rock outcrop above it, where the twin cooling towers to the south of the main cluster are. Enter here, and you can find the gantry steps up to the top of these towers. Use the red metal fencing on the bridge between the towers to view and snipe at the foes atop the towers northwest of you. Then move into the main quartet of towers and start a final ascent, until the area is neutralized.
Southwest Perimeter: Unloading Warehouses
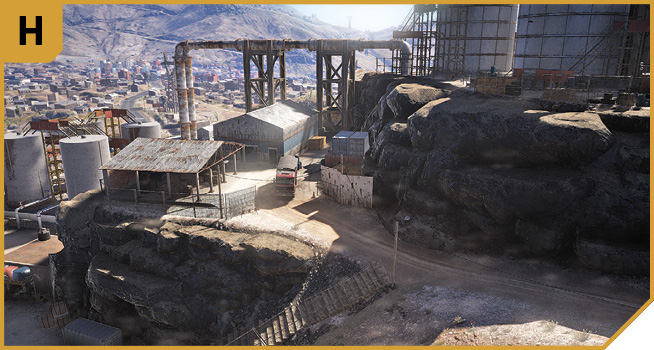
The two warehouses here are lightly guarded, and allow you access northwestward, along the middle plateau between the vats (west) and cooling towers (northeast). From this container yard you can destroy one alarm pole (floodlight), use containers to stand on and snipe at the target building, or climb up by the cartel flag, up to the west edge of I, where the generator is, and shut it down.
Cooling Towers
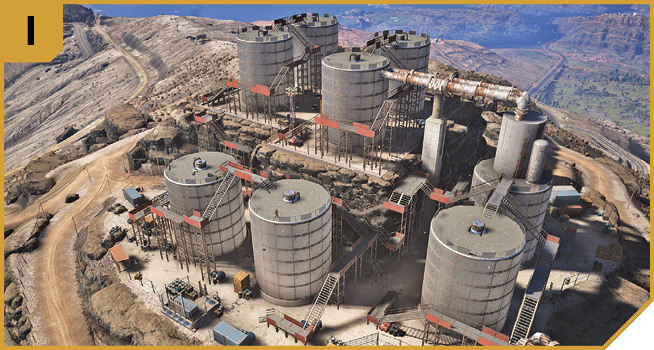
A cluster of four towers, two more to the west, and two to the south make up the top of the mine hill. Foes are mainly snipers, and spread out from tower to tower, making them difficult to remove, but you’re usually not overwhelmed by foes. Enter via F, G, or climb up from the containers after moving northwest from H. Note the alarm floodlight and generator on the western side of this area. Climb the gantries, remove the guards and do it quietly so the mine manager isn’t spooked into escaping.
Vats
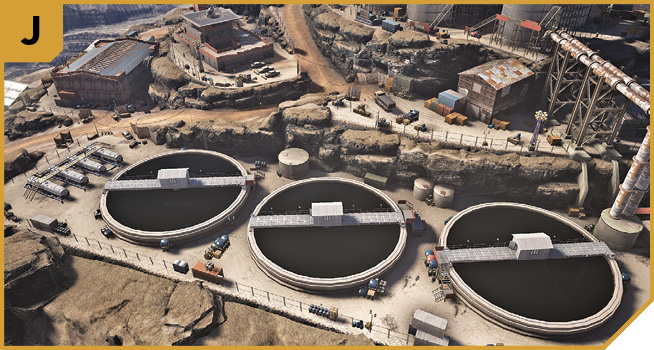
Roughly on the same level as the target building, the southwest portion of this area consists of three huge (but flat) vats. There’s little here but a couple of foes, and a place to block the escaping mine manager if he flees in a vehicle, and you haven’t foreseen this eventuality. Usually though, this area is rarely traversed.
|
 Target: Mine Manager Building (Helipad)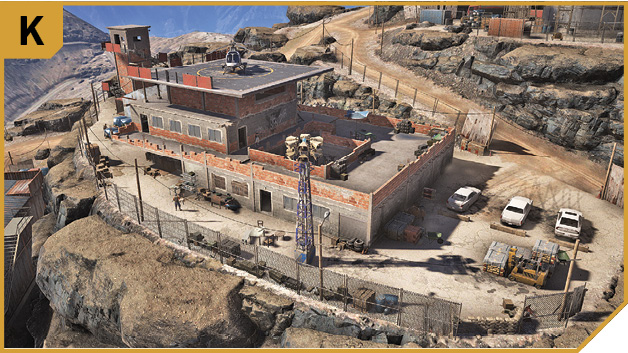
Barvechos Mine: Other Tactical Advice
 If you’re attempting a clean sweep of the area, start by tagging the foe at A, moving to D, heading up to F, and clearing the entirety of the cooling towers (I) of foes. Head down to remove enemies near H and E. Then retreat back to D, climbing over the rocks to neutralize the sniper at the north end of K near the helipad building, and the sniper atop the machine warehouse (near B). Then head down the main road after tagging the three cars with C4. Remove the armored foe, and remaining enemies near and around the minigun nest.
Assuming the alarm hasn’t been raised, you can now assault the building. As the manager has no car to escape in, he surrenders outside the doorway on the west side of the helipad building. After interrogation, use the helicopter to reach Wagner.
Other plans include assaulting the main road using a digger parked along the road before you reach A (west of A). This is ludicrously dangerous, but blocking the path the manager could take is always helpful. Using a helicopter and watching for strafing innocents is another plan, especially as you can easily track the manager if he escapes.
 A much more comprehensive tackling of this mission area is possible with four human squad-mates. Have one start at A, moving to D, then to the north sniper tower and secure it with a view of the target building just south of the tower.
Ghost #2 can run to F, and start neutralizing snipers across the cooling towers, and remain up here to provide fire support, as well as clearing the southeast area of the mine facility.
Ghost #3 should follow the first Ghost, but break off at D and move to the three cars parked outside the target building, and prime them with C4, destroying them before the manager reaches them, so he gives up rather than your needing to chase him.
Ghost #4 can clear B, then use the truck (or a digger parked west of A) to block the road just to the east of the railroad, so even if the manager escapes, he doesn’t get far.
Parachuting onto the target building roof is possible, but usually after another Ghost has removed the sniper up here. Then the Ghost can descend and flush the manager and foes out.
Have one Ghost prepare a chopper for the next part of the mission, ideally stealing the one atop the helipad roof of the target building.
Down In The Hole
After the manager is interrogated, it seems Wagner, Pulpo’s right-hand man, is about to suffer an execution down at the base of the massive quarry just north of the mine facility (and northeast of town, if you interrogated the manager at the Santa Muerta chapel). Speed is of the essence! Take a chopper, or drive a vehicle down the hill directly north, and into the quarry hole. Get there as fast as you can!
Barvechos Mine Quarry: Recon
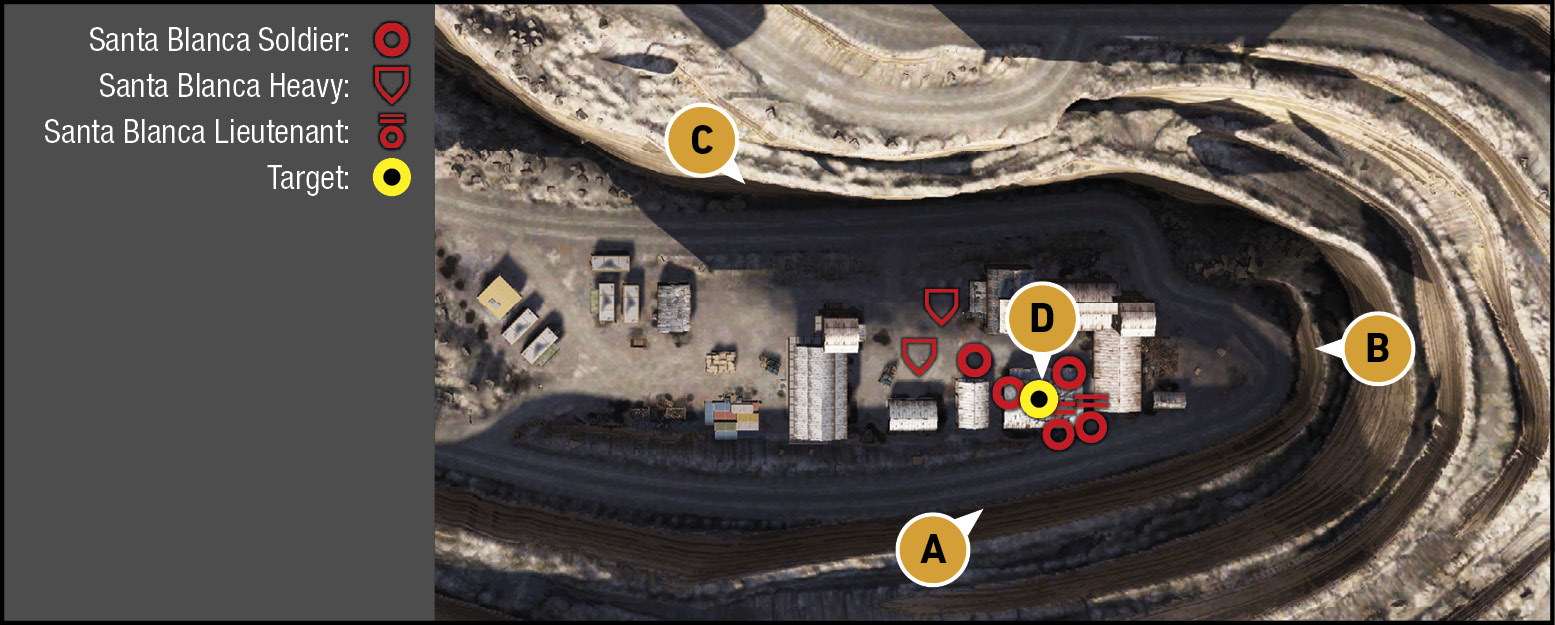
TACMAP
The massive silver quarry has numerous roads around the ridges, but these take too long to utilize (though they are recommended when extracting Wagner to the rally point). Simply land your chopper west of the building cluster (south of C), and investigate the warehouses. Aside from two heavily-armored foes in the middle of the building yard, most foes are in the southeast warehouse.
Quarry Lip (South)
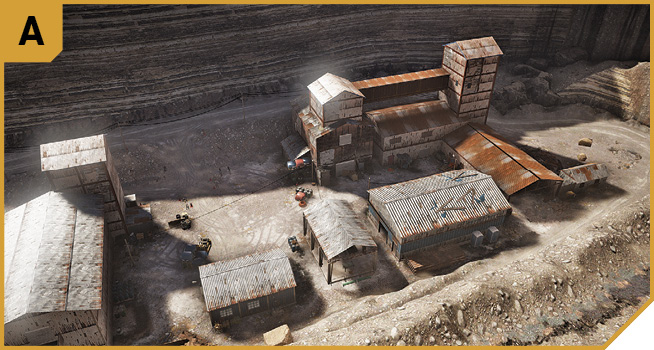
Head for this point if you’re using a ground vehicle to reach the quarry. One of the fast cars is preferable, over a truck. Drive to this point, launch off the side, and land in the yard after tumbling out of the seat. If you prime the car with C4 before leaping, and judge the jump, you can drop the car on the foes in the yard in a fiery explosion. Though you might want to keep the vehicle when extracting Wagner.
Otherwise, this makes a good sniping spot for shooting foes in the yard, and a lousy place to stand when assaulting the building Wagner is in.
Quarry Lip (East)
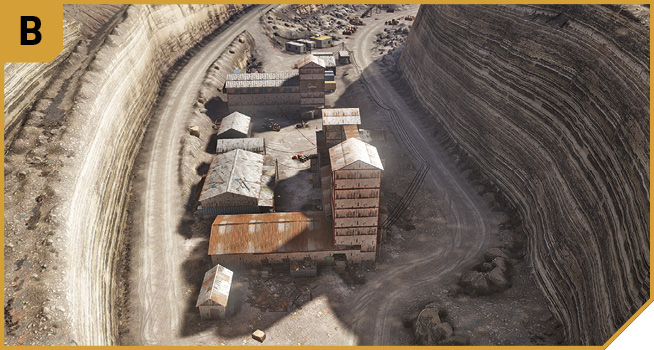
Manually falling down the lips of the quarry gets you killed, and though you can stand here and tag the foes in the quarry yard, there’s little you can do to help during the assault on the warehouse itself. Why are you here, again?
Quarry Lip (Northwest)
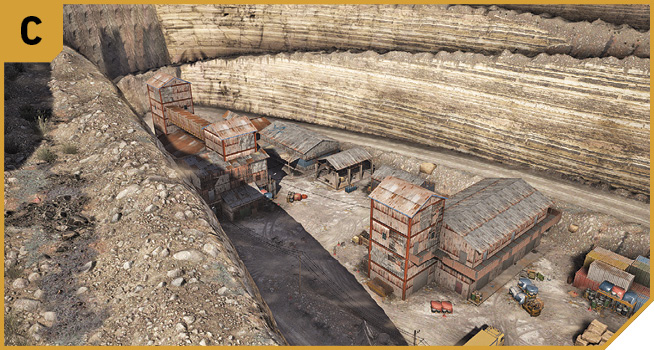
Another good sniping spot to drop a teammate off if you’re landing in the vicinity using a helicopter, though this position isn’t helpful after the foes in the yard are dealt with.
|
 Target: Wagner’s Warehouse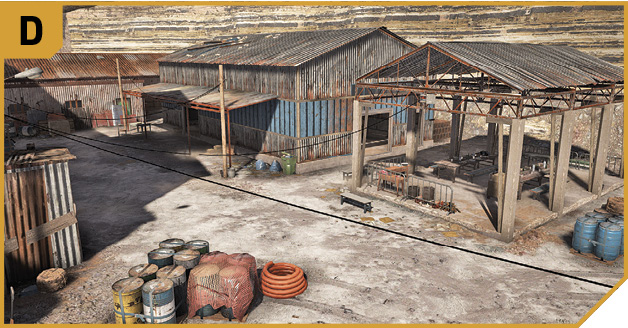
Barvechos Mine Quarry: Other Tactical Advice
 A helicopter gets you here quickly, and makes extracting Wagner afterward a breeze. Immediately have your teammates storm the warehouse while you deal with the enemies in the yard. It’s usually better to land the chopper to the west, and assault the foes on foot, than strafing with the chopper (as it takes time for each fly-by).
Storm the warehouse via either entrance, or remain in cover behind a nearby building corner and let your teammates take the brunt of the enemy fire. A flashbang helps out nicely here.
You could head here via a ground vehicle, but this takes longer, giving you less time to prepare for Wagner’s warehouse rescue.
 The same plan applies in Co-op, though you can drop foes onto rooftops surrounding the warehouse (including the warehouse itself). This does little to help, as you’re better served storming from the ground via both entrances, advancing from the corners of adjacent buildings, with a fourth Ghost shooting from the roof of the east warehouse, through the windows.
While Wagner is getting interrogated, have two Ghosts check the quarry roads for incoming reinforcements, and lay mines to stop them, or otherwise neutralize these foes. Have another Ghost drive up in an escape vehicle so bundling Wagner into a safe truck or chopper involves the least amount of walking as possible.
Extraction to Barvechos Charlie
Assuming you didn’t hit Wagner in the previous building appropriation, after a quick chat, you need to get him to Barvechos Charlie. The ideal way is via helicopter, which is short, uneventful, and easy. Or, you can drive him. Pass any enemies by the side of the road without engaging them.