
Tom Clancy's Ghost Recon: Wildlands Guide Welcome to Bolivia Barvechos: El Pulpo
The Bank Heist
Objectives
- Interrogate the bank manager to get the vault code
- Open the vault door
- Defend the vault until the rebels arrive (3:00)
LOCATIONS
- Barvechos Base
REWARDS
- + 500 XP
Brief
Flores keeps hundreds of millions of dollars in cartel profits in a vault at the Banco de Barvechos. The loss of this fortune will put Flores in a very dangerous position. We need to breach the vault and defend it until the rebels can clean it out.
Hit the Vault, Then the Road
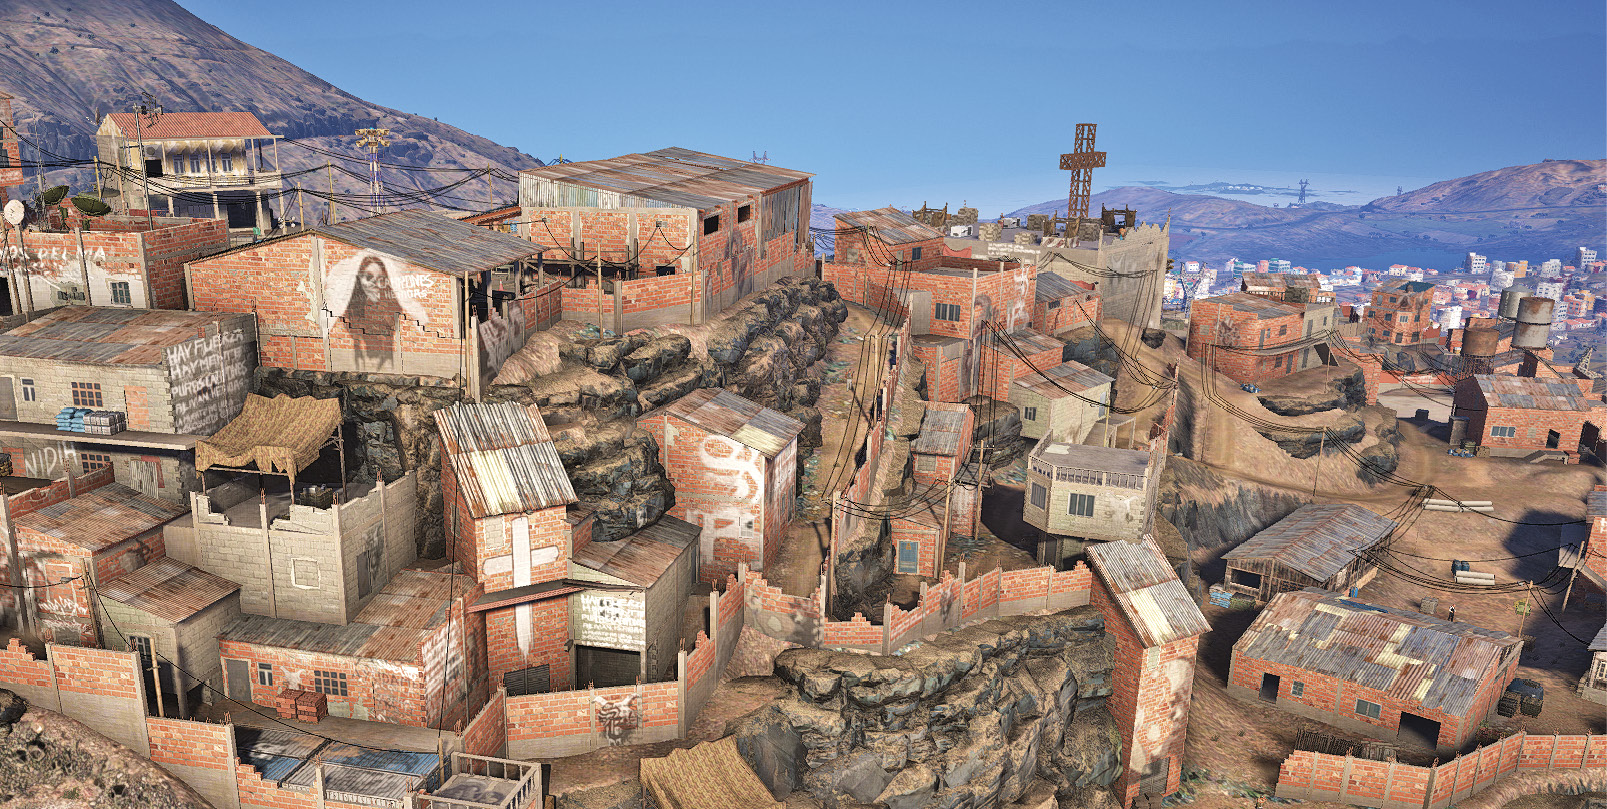
Less than 800 meters on the other side of the hill north of Barvechos Bravo is a fortified mountain village where the cartel stores all of its Brazilian cocaine profits. Not for long! After locating the manager hiding in the north of the settlement, you extract the vault door combination, allowing access into the bank, through three floors of enemies, to open the front doors. Then it’s a tense three minutes as you defend yourselves from cartel reinforcements, until the rebels arrive.
Barvechos Base: Recon
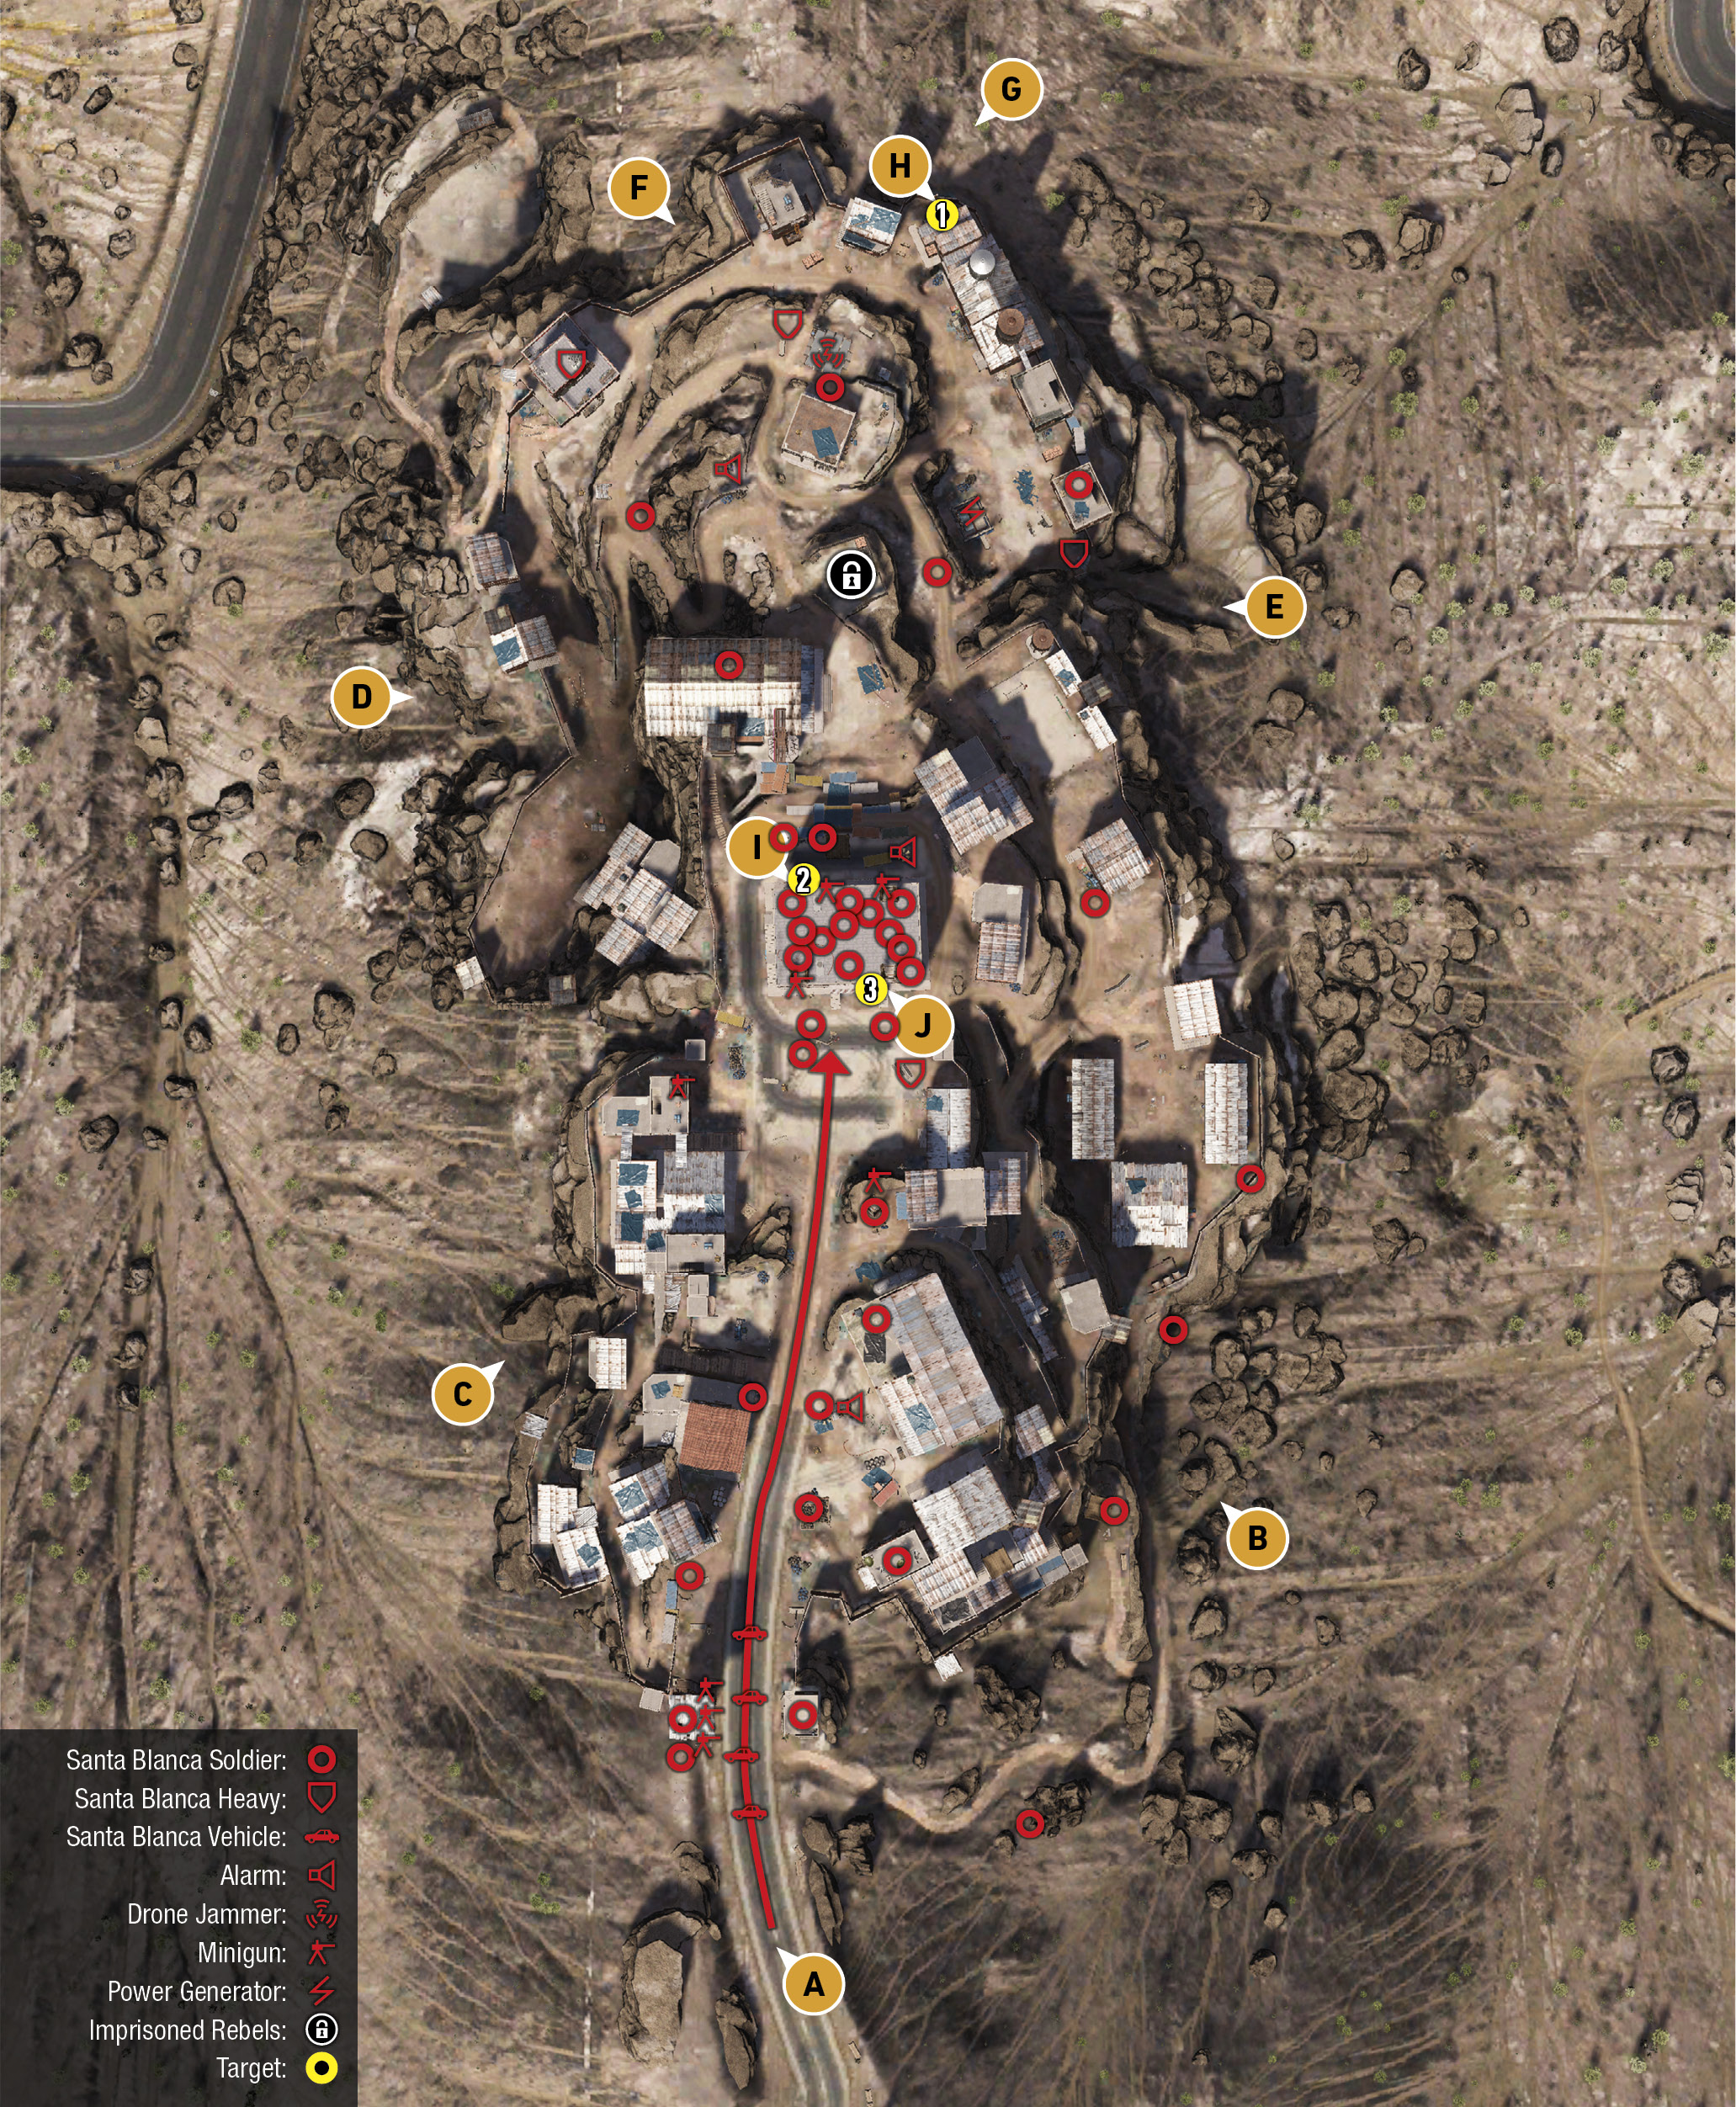
TACMAP
There are around 40 enemies inside this base, but all are regular thugs you’ve mown down countless times before, with the exception of around three heavily-armored foes. There are fewer at the rear (north) end of the town than the front (south), but those are the armored enemies. The biggest concentration of adversaries, as you’d expect, is on, around, and inside the bank itself. There are around a dozen inside the tight chambers of the bank, so prepare for close combat, utilizing shotguns or your favored close-assault weaponry, once the bank is stormed. The majority of this settlement is made up of half-built or dilapidated brick structures. Though you can search alleys, spend most of your time planning to defend the bank, after inserting into the north end of the base to remove the jammer, generator, and grab the manager.
South: Main Road Entrance
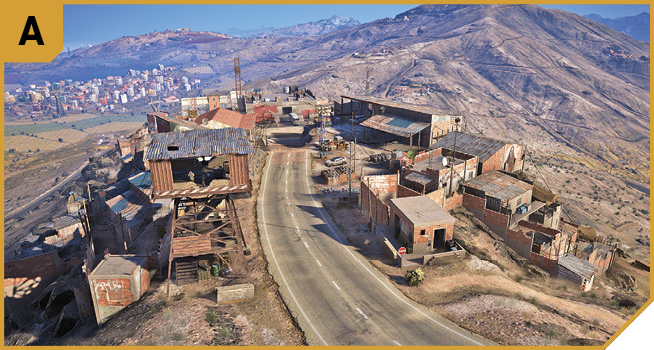
Along the only road in and out of the base, there’s a security checkpoint hut and a minigun tower to worry about, along with scattered patrolling foes in the vicinity. It’s worth holding back from heading into the base from this direction, at least until one of your team has sourced the vault code from the manager, or the base usually goes on alert and the manager leaves his initial location.
Just prior to the bank defense starting (while you’ve got the code from the manager, but before the timer starts), you may wish to clear this area of foes (assuming you haven’t triggered the alarm). Work from building to building, and then place explosives on the road to soften up incoming vehicles during the defense itself.
Southeast: Alleys and Minigun Nest
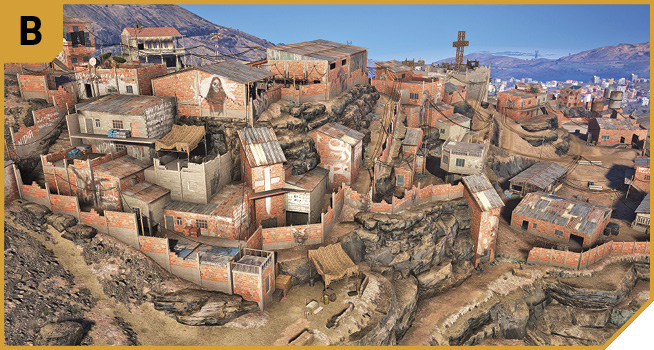
This isn’t a military base, so the perimeter is soft, the walls easily climbable, and the alleyways recommended for stealth infiltration. From here, you can head up the alley to the minigun nest on the right (east) side of the road, just before the bank yard. You can remove the foe with stealth here, if you’re keen on keeping enemies to a minimum.
The building immediately east of the minigun nest has a flat roof you can climb onto, and a metal-roofed storage garage on the east side of the yard itself. While defending from the garage interior is questionable (you’re easily overwhelmed), the extra height on the roof of either connected structure allows you to lob explosives down on foes parking up, shooting enemies before they use the minigun atop the roof of the building across the yard to the west, and crossfire opportunities abound during the defending phase.
Southwest: Alleys and Minigun Roof
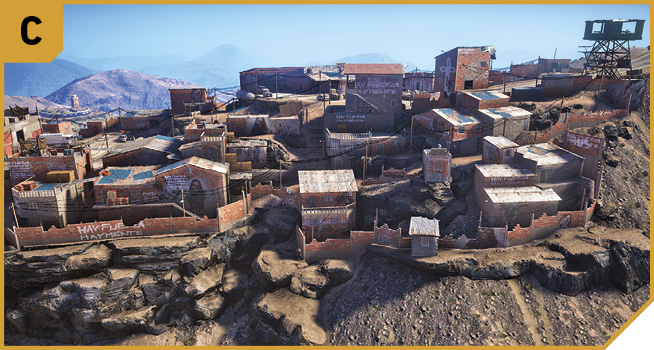
Though the rocky ground is steeper to climb from this side, the views of the bank are arguably better when you reach the cluster of brick storage buildings and shacks on this side of the bank yard. The building with the minigun on the roof (usually unmanned) is a good place to offer up cover during the defending of the bank, as you can watch enemies head down the road, and detonate traps, lob explosives, and shoot foes with immediacy. Just watch for enemies coming up the stairs from below, or along the corrugated metal roof sections linking the other structures.
The big advantage of defending from here, aside from stopping the enemy reaching a minigun nest that can fire right into the front of the bank, is spotting enemies heading up the exterior stairs to the roof of the bank. If you have teammates up there, you can shoot the enemy, or at the very least, warn them.
West: Zig-Zag Path, Church, and Armory
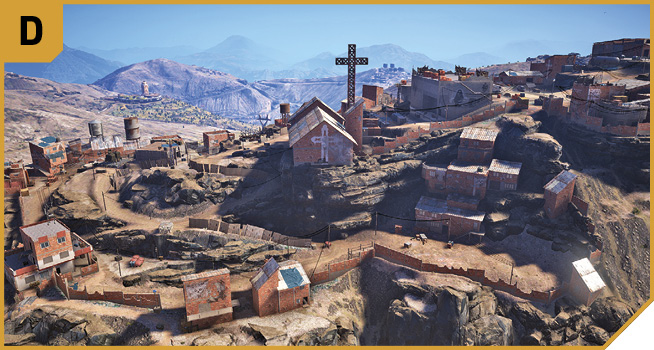
This route, below the cliff the church sits on, allows you to ascend the zig-zag path into the church, which is helpful if the bank manager is in this area. There are few enemies, an armory, and both the jammer and generator are easily accessible (destroy the generator first so no reinforcements arrive before the defending of the bank vault begins). Sending a Ghost in here first to remove the jammer is helpful, as you can then scan and plan afterward. Note the cage of rebels near the church. Freeing them can cause a distraction, though it’s better to do this just before the defending phase, so they can help during this critical time.
Northeast: Generator Insertion Point
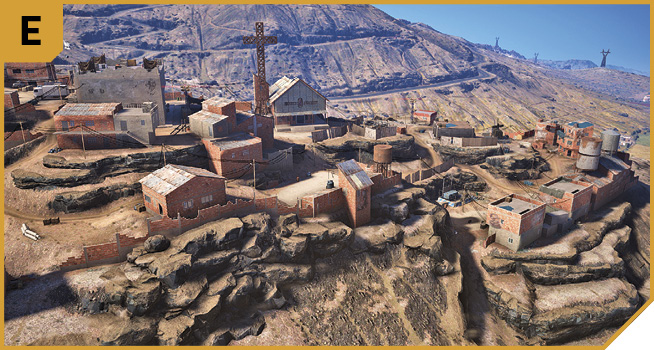
There’s usually only a single foe between you and the deactivation (or destruction) of the generator, below a rocky outcrop in this part of the map. You’re also close to the bank manager (if you managed to get here without alerting the enemy).
Northwest: HQ Building And Insertion Point
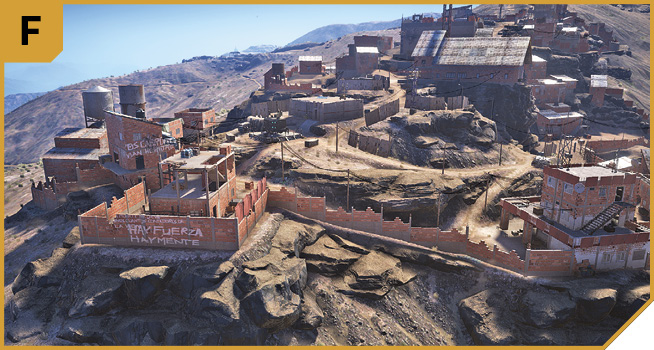
There are few foes, and the jammer and generator are both easily accessible from the wall by the HQ building (just watch for armored enemies).
North: Insertion Point
Head over the wall, and to one of the brick buildings in the row of structures just east of the HQ building, and you’re likely to find the bank manager. Removing the jammer (also easy from this insertion point) allows you to pinpoint his exact location.
|
 Target #1: Bank Manager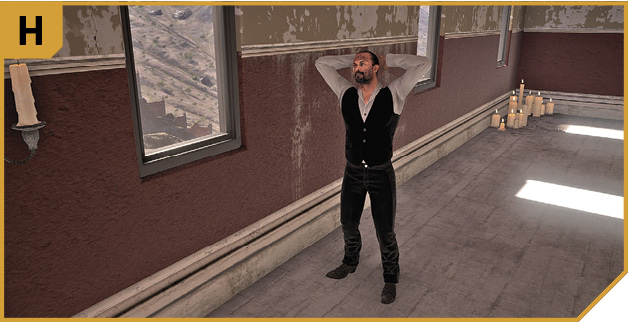
|

Barvechos Base: Other Tactical Advice (Manager Interrogation)
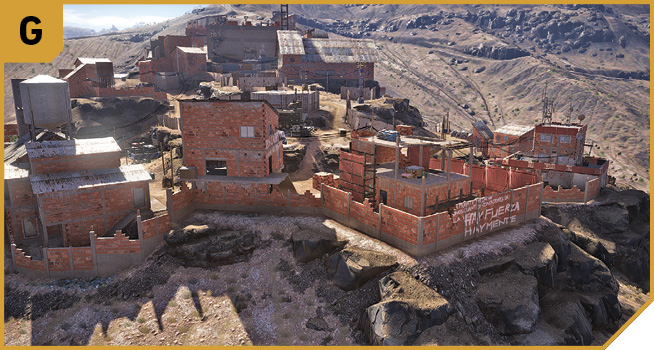
 The manager moves, so zoning in on his exact location (he usually starts at H) is imperative. Loop around to G, insert yourself there, optionally moving to deactivate the generator so no further foes are summoned before the bank defense starts, and then disable the drone jammer in this area, before or after the bank manager is found.
You can start an assault heading north downhill from A, but this just brings more foes to a stronghold already bustling with foes. You are able to remove the three alarm pole panels with ranged shots, but this should be done en route to G, and it’s much easier to deactivate the generator instead.
Before the vault opening, if you don’t want additional foes following you into the bank, or attacking during the defending phase, conduct a street sweep using the guide map to note the expected number of foes in a given area, and apply close-assault takedowns accordingly.
Another reason to take out foes before opening the vault is that you can quickly escape the bank if the foes inside become too difficult to kill; you want to have this flexibility without worrying about foes you missed on the way in.
 Use Solo tactics, with the added bonus of being able to infiltrate from multiple locations at once. For example, your priority is deactivating the generator (or alarms), then finding the manager, and finally conducting a sweep of the village to remove all enemies (enter from B, C, D, and E, removing foes around the bank, then to the north, then loop back to A to finish off the remaining stragglers after opening the cage and freeing the rebels near the armory).
Barvechos Base: Other Tactical Advice (Vault Opening)
 Storm the armory once the foes throughout the town are neutralized, and there are no reinforcements incoming. The bank takedown is easier if only the foes inside the bank are left.
Make slow and determined progress from room to half-finished room once you’re upstairs from the vault, and secure the vault, lower floor, main floor, and roof. Then start preparing for the defending phase. Do NOT access the south gate until the bank and surrounding area are fully prepared!
 Storming the bank is tricky as the confined space means you can’t really fan out to help the lead Ghost, though you should have three Ghosts heading through the bank while the fourth heads up to clear the roof, and causes a distraction for the foes peering out of the south gate.
Barvechos Base: Other Tactical Advice (Defense Preparation)

 Adequately preparing before opening the south gate is key to an easy victory. Attempt any or all of the following:
Note the infiltration points the enemy could use around the bank. There’s the south gate (overlooking the yard where the enemy vehicles park). There’s the vault door (northeast corner exterior). There’s the exterior steps to the roof (west wall). Booby-trap all these locations with mines (automatic takedowns) and C4 (triggered takedowns). Make sure no one encroaches on you!
Take up defensive positions around the yard, including the minigun atop the west building (booby-trap the path to the minigun too, including the roof ramps). There’s the rooftop to the east. To a lesser extent is the building on the west side of the road, across from the minigun nest.
Booby-trap and block the main road at its narrowest location; you’re creating a chokepoint. Park two rows of vehicles across the road so enemy vehicles have to stop. The road just east of the minigun nest is ideal, as it’s close enough to the bank and surrounding defenses for you to mow down or detonate traps or lob grenades at foes who stop there.
Make sure you’ve freed the rebels near the armory, and call on Guns for Hire from Rebel Support. Ten heads are better than four!
Barvechos Base: Other Tactical Advice (Defending Phase)
 When the area around the bank is prepped, trapped, and able to be defended to your satisfaction, open the south gate and start the defense. Additional foes on foot appear, usually to the south, and up to five ground vehicles and a helicopter appear. For Solo players, stay inside the bank at the ground floor, placing a mine on the stairs down to the basement, and use the cover here while ordering your team out into the main yard, and the buildings around to the east and west. The bank interior is somewhat safer; there’s an ammo box, and you can quickly repel foes, and back away from the main door. Heck, you can even step behind innocent bank workers and use them as a human shield (which is fine as long as the enemy shoots them!).
Prep the yard with C4 so you can detonate them when a vehicle passes over them, as well as at the entrance. Resupply again and again from the ammo box; once you use up C4 and mines, use frags.
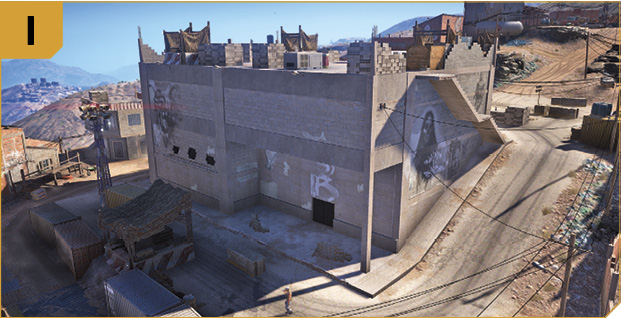
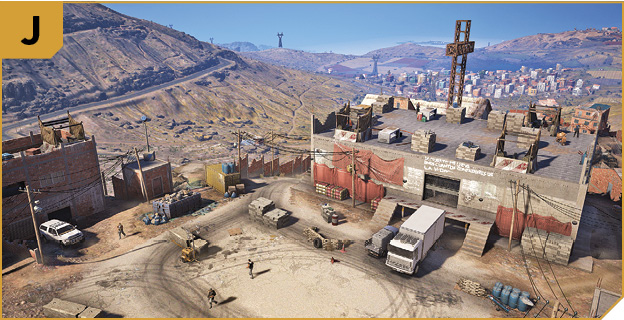
 In Co-op, you have the luxury of placing Ghosts in four different tactically-helpful locations. Have one at J playing the Solo role. Have another at I, stopping foes at the vault, with the option to run to the exterior roof steps to help a foe there if necessary. Have a third Ghost on the roof, able to lob grenades down, shoot foes before they man any miniguns, and detonate traps (as well as acting as a spotter if you call on a Rebel Mortar, for example). The fourth Ghost can camp on the rooftop of the building west or east of the yard.