
Tom Clancy's Ghost Recon: Wildlands Guide Welcome to Bolivia Special Missions
El Muro

Objectives
- Locate El Muro
- Extract El Muro to San Mateo Alpha
LOCATIONS (Media Luna)
REWARDS
- + 350 XP
- +10 Skill Points
- +15,000 Medication
Difficulty

Brief
El Muro has turned on El Sueño and the cartel kingpin wants him dead. El Muro has protected Sueño for many years, and he knows many of Sueño’s secrets. Find El Muro and extract him before he slips out of the country or Sueño’s people kill him.
Buitre Force
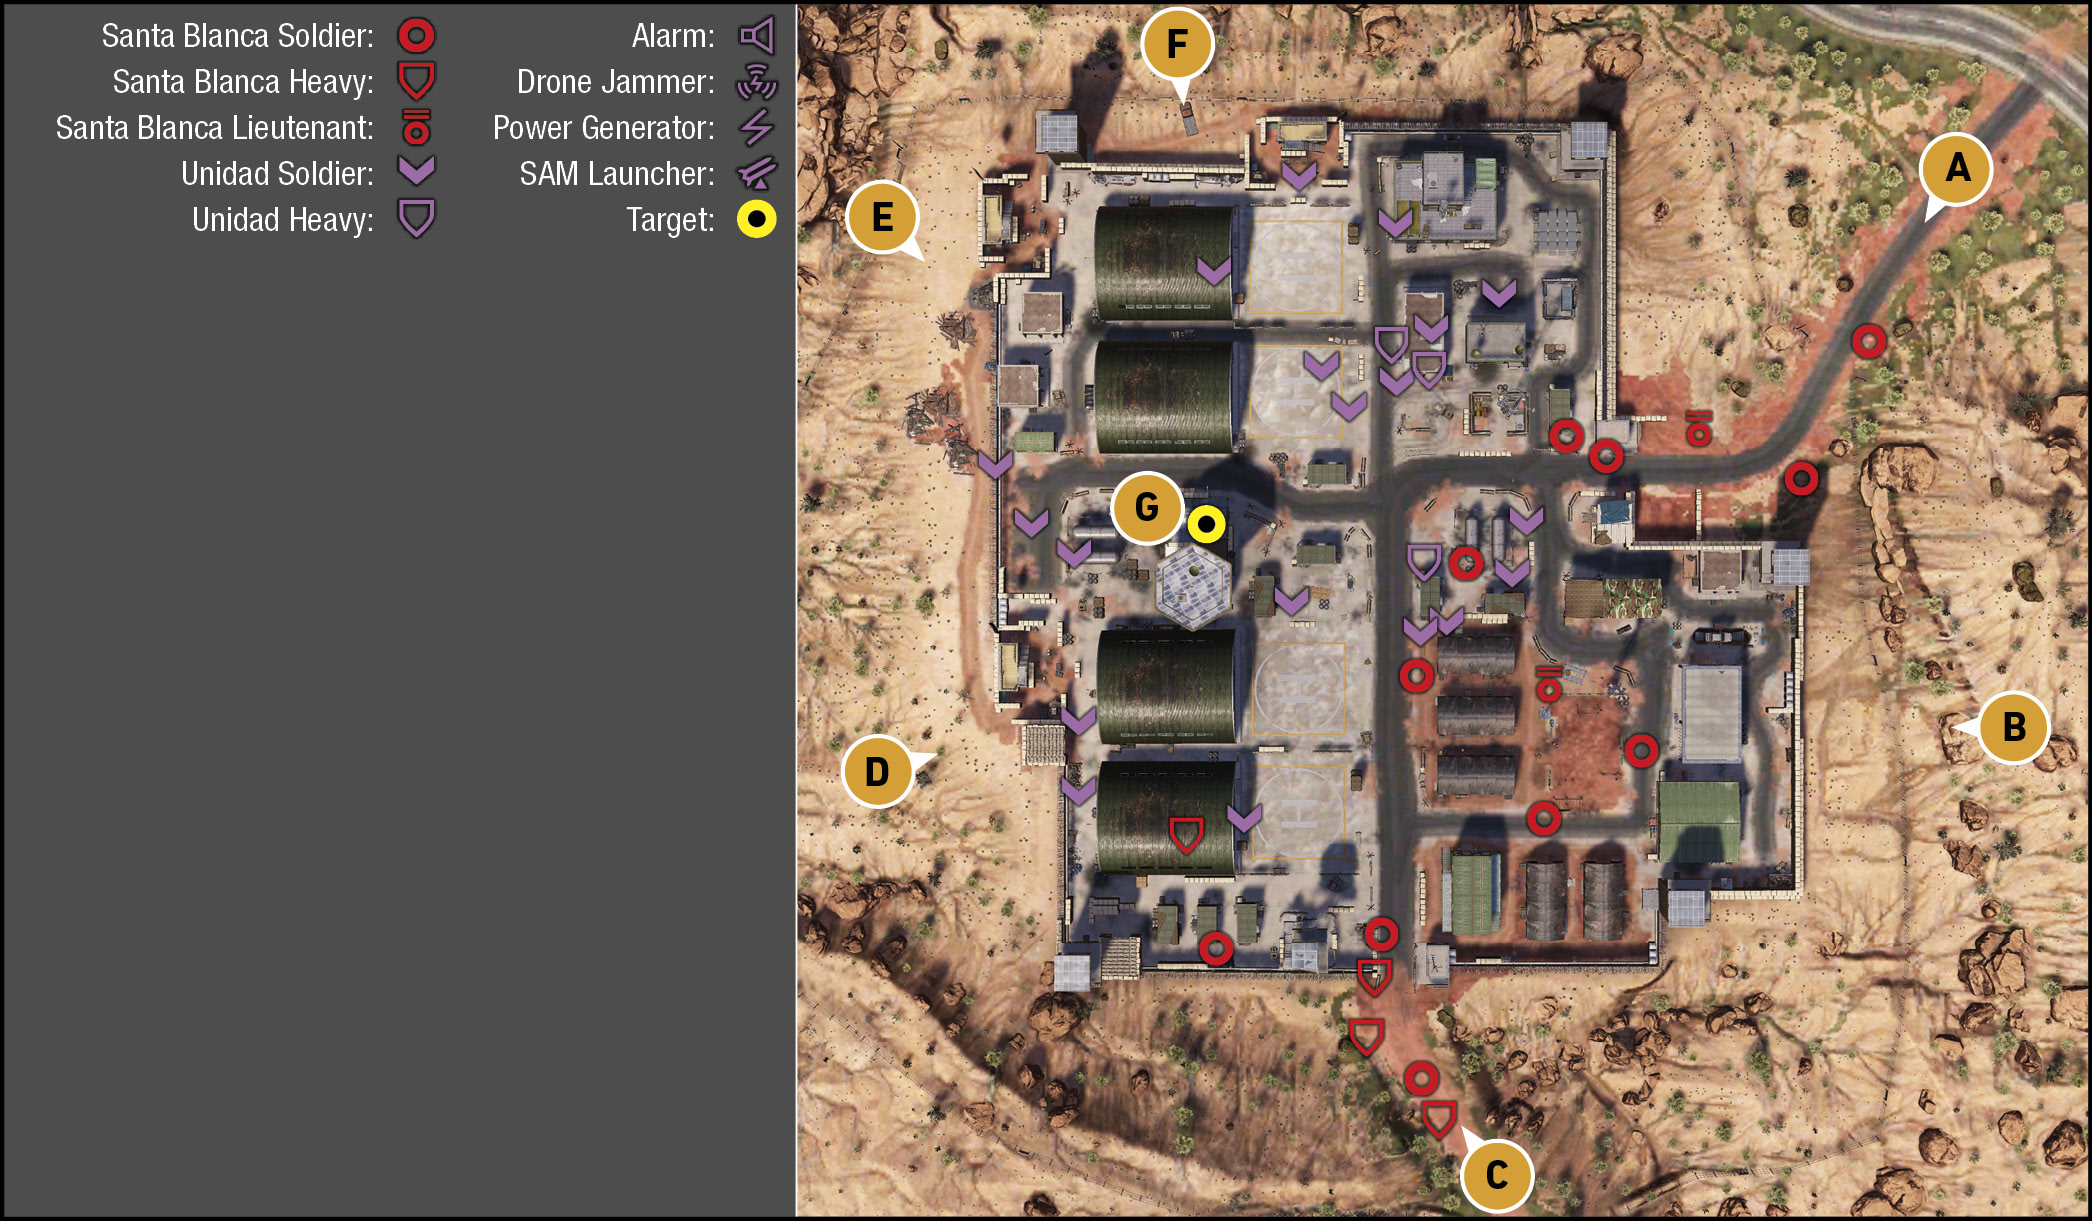
You’re around 800 meters from this Unidad fortress if you begin this sortie at Media Luna Alpha. As you arrive, it’s immediately obvious the cartel are engaging Unidad in a vicious firefight from the two main entrances (northeast (A) and south (C)), making stealth tactics secondary to immediate infiltration and extraction. However, approach from the wrong direction, and El Muro leaves; usually in an armored SUV or APC, meaning a fraught chase is in the cards. Only after you’ve collared El Muro can you extract him to the rally point in the neighboring province (to the south) of San Mateo.
F.O.B. Buitre: Recon
TACMAP
This relatively flat base features a set of buildings in each quadrant, though there’s no time for sightseeing now the base is under attack. Northeast is the HQ building, comms and armory, drone jammer and generator. Southeast is an alarm tower, barracks, mess hall, and other sundry structures. The entire west side of the base features four huge hangars, helicopters (including a gunship!) and a control tower where El Muro appears from.
None of the sniper towers are currently manned, as the battle is waging primarily on the ground, aside from Unidad helicopters circling above, and raking the ground with machine gun fire.
Northeast: Main Entrance
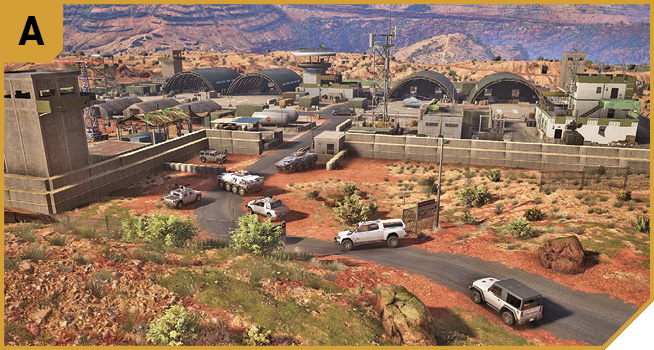
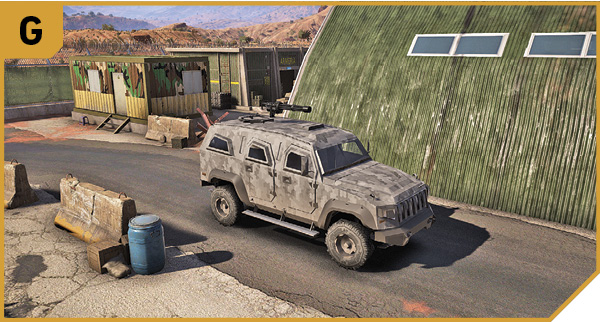
This entrance is a chokepoint filled with vehicles, cartel members launching an assault inside the base, and Unidad soldiers fighting back. It’s a storm of bullets here, and assuming you survive to get inside, El Muro usually manages to escape before you can grab him. The only antic worth trying is the stealing of a vehicle (ideally an APC) and driving it into the base, directly at G, to stop El Muro (but not run him over!). Then get out, stow him, and escape.
If you desperately need to use a drone, move to the northeast wall and lob a grenade so it explodes on the other side, at the drone jammer.
East: Perimeter Fence
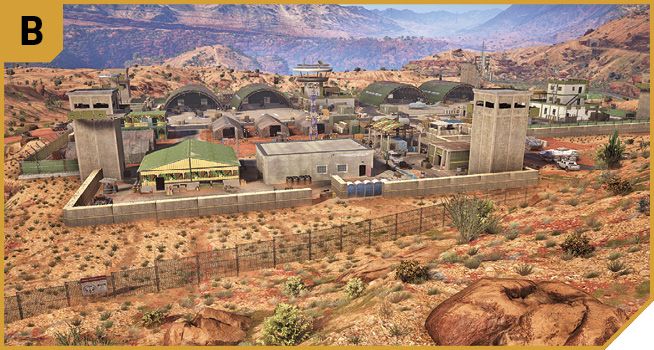
You can’t get through the fence and secondary block wall from here (though you can move between both walls if you enter from A or C). This offers little help, though you can use your binoculars to check the control tower for El Muro’s whereabouts.
South: Main Entrance
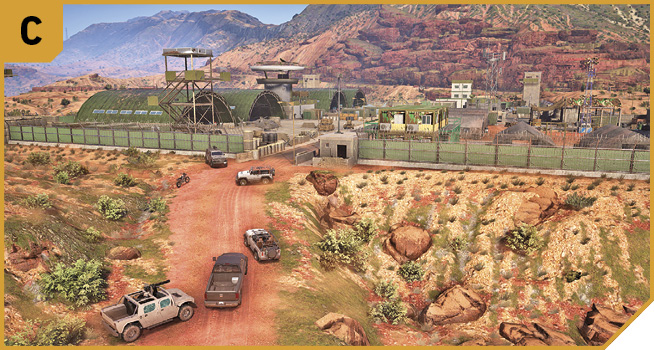
The fighting is almost as fierce at this location, which features groups of Cartel soldiers moving northwards up and into the barrack and hangar areas, and Unidad forces fighting back. This is just like A; heading in on foot is almost suicidal, so push through here in an armored vehicle, or find one (like the APC parked across from the hangar on the main road) if you need a vehicle to chase El Muro in. Note this is the route El Muro usually uses to escape (though he sometimes heads out of A, too), so soften up his vehicle with explosives. However, the other enemies usually detonate anything except C4 before you have chance to use it. Blocking the exit chokepoints with vehicles would be advisable, but there are too many enemies.
Southwest: Wall Gap Infiltration Point
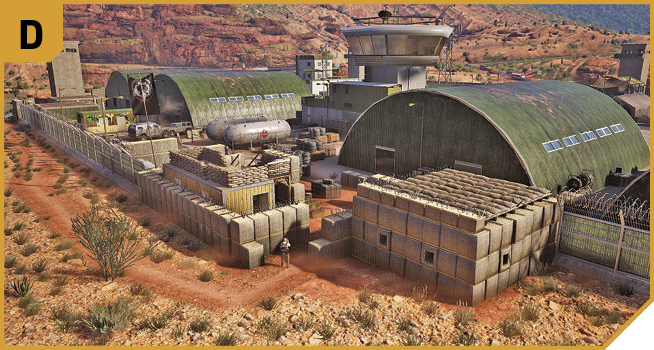
Enter through the gap in the block wall, turn left (north) and head directly for the steps down from the control tower to apprehend El Muro. Good work! Got there too late? Find a nearby vehicle and engage in pursuit.
Northwest: Wall Gap Infiltration Point
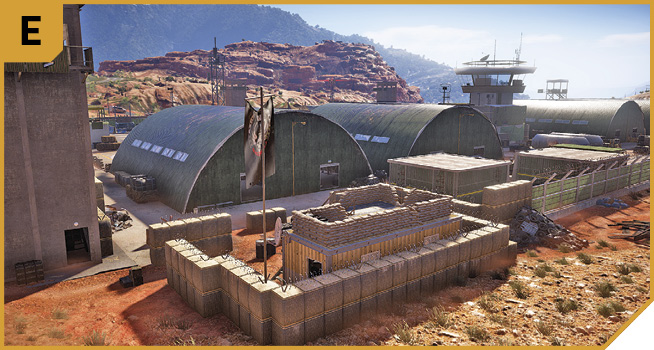
Enter via the gap in the block wall by the tire pile, turning south for a direct view of the parked vehicle El Muro may attempt to steal. Rush it, passing the hangar on your left, and apprehend your target. Or give chase if you’re too late.
North: Perimeter Wall And Wall Gap
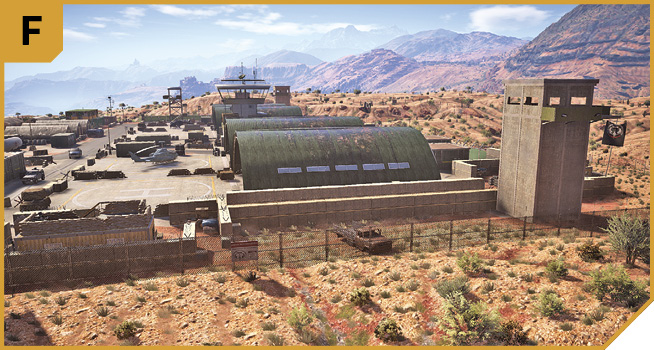
While the rocky outcrops south of the road, but north of the initial fence provide little help, if you enter via E, then skirt around to the north (or head east), you can enter the helipad by the north hangar. It’s only a short sprint to the gunship, allowing you to follow El Muro with superior firepower at your disposal.
|

F.O.B. Buitre: Tactical Advice
 Despite the chaos, this one is pretty straightforward. If you want to grab El Muro before he has time to get into an armored vehicle, approach quickly from D or E, rushing the control tower, and grabbing the target before he reaches a vehicle. Approach from any other location, and there’s usually no time to reach the target before he starts up his vehicle, and escapes, usually heading south past C.
Before the infiltration, start south of C, and drop some mines and C4, so you can soften up El Muro’s vehicle before you head into the base. This doesn’t always work, and you don’t want to overdo it and destroy the vehicle, but it can help him slow down.
You could also try flying an explosive drone in, and detonating it close to El Muro’s escape vehicle, so he has to find a different truck, allowing you more chances to grab him.
Is El Muro escaping? You could do worse than stealing the helicopter gunship, and flying after him, using the spectacular firepower of the craft to weaken El Muro’s vehicle until it’s too damaged and he leaves it, at which time you need to land, grab him, stow him in the gunship, and extract to the Rally Point.
 With additional teammates with lightning-fast tactical brains, you have the added benefit of being able to encroach on El Muro from both D and E simultaneously, as well as dropping mines and C4 along the main road out of the base, just in case the grabbing goes awry. You can also prep C4 on the vehicle El Muro is running to, before he reaches it; just make sure he isn’t outside the vehicle and exposed to the blast you’re intending for his vehicle, or he dies.
El Muro: Recon
TACMAP
The armored truck (or sometimes a Unidad APC) moves at speed and takes more damage than other vehicles, though you can slow it right down by shooting the tires out (SUV) or ramming, or detonating explosives (APC). Catch him before or after he drives by the large Unidad base, or you may have additional foes to worry about. When you reach the vehicle, simply engage it until El Muro leaves the vehicle, and stow him in an extraction vehicle (which could be the vehicle your team is using, a second vehicle, a helicopter including the gunship if you stole it from the base, or even the truck the general uses, with you driving instead).

El Muro: Other Tactical Advice

 This gets a whole lot more simple if you ensure your takedown location isn’t any other enemy stronghold. You cannot wave down the truck with your guns pointed at the driver; El Muro usually just runs you over. However, you can grab him from the SUV (this is possible, but difficult), but not the APC. Note the windows of both vehicles are bullet-proof, but you shouldn’t be aiming at El Muro’s head anyway—we want this guy alive!
Or, you can ram him off the road (in Co-op, each player can use a vehicle to pin him more quickly, and from multiple sides), or bash the vehicle until it catches fire. You can also all ride in a stolen APC and ram the enemy vehicle while shooting at it (but not the driver). Or, you can attach C4 to the vehicle before it leaves the base, or place it on the road El Muro takes. Do the same with mines, though pre-planning is needed.
With Co-op friends, station one at the base to trigger the general fleeing, and the rest at a road junction, with a blockade of vehicles (stolen from the base prior to triggering the ambush), as well as C4 all ready to go, and mines ready to be placed (but not placed in case a civilian vehicle drives over it). Have a fourth Ghost fly in piloting a chopper, in case you want to air-lift El Muro to the Rally Point.
In Co-op, due to the distance and winding roads to the RP, you may wish to stop El Muro’s vehicle, then bundle him into a helicopter for the extraction. Once you’ve extracted the target, the mission then continues.
Extraction to San Mateo Alpha
The journey to the rally point in the next province south of La Cruz should be uneventful, as long as you speed through any Unidad checkpoints, exercise caution when driving the tank-like vehicle you’re likely to be driving up the narrow dirt trails (as it’s easy to flip on a tight turn), or you use a helicopter. Once El Muro is delivered to Bowman, the mission concludes.