
Tom Clancy's Ghost Recon: Wildlands Guide Welcome to Bolivia Montuyoc: Carl Bookhart
Full Load (Optional)
Objectives
- Destroy the mortar shell crates (4)
LOCATIONS
- Supply Depot
REWARDS
- + 500 XP
Brief
Santa Blanca stores small-arms ammunition and mortar shells for its training program at an outpost in Montuyoc. Raid the outpost and destroy the crates of mortar shells to further disrupt their operations.
The Crate Escape
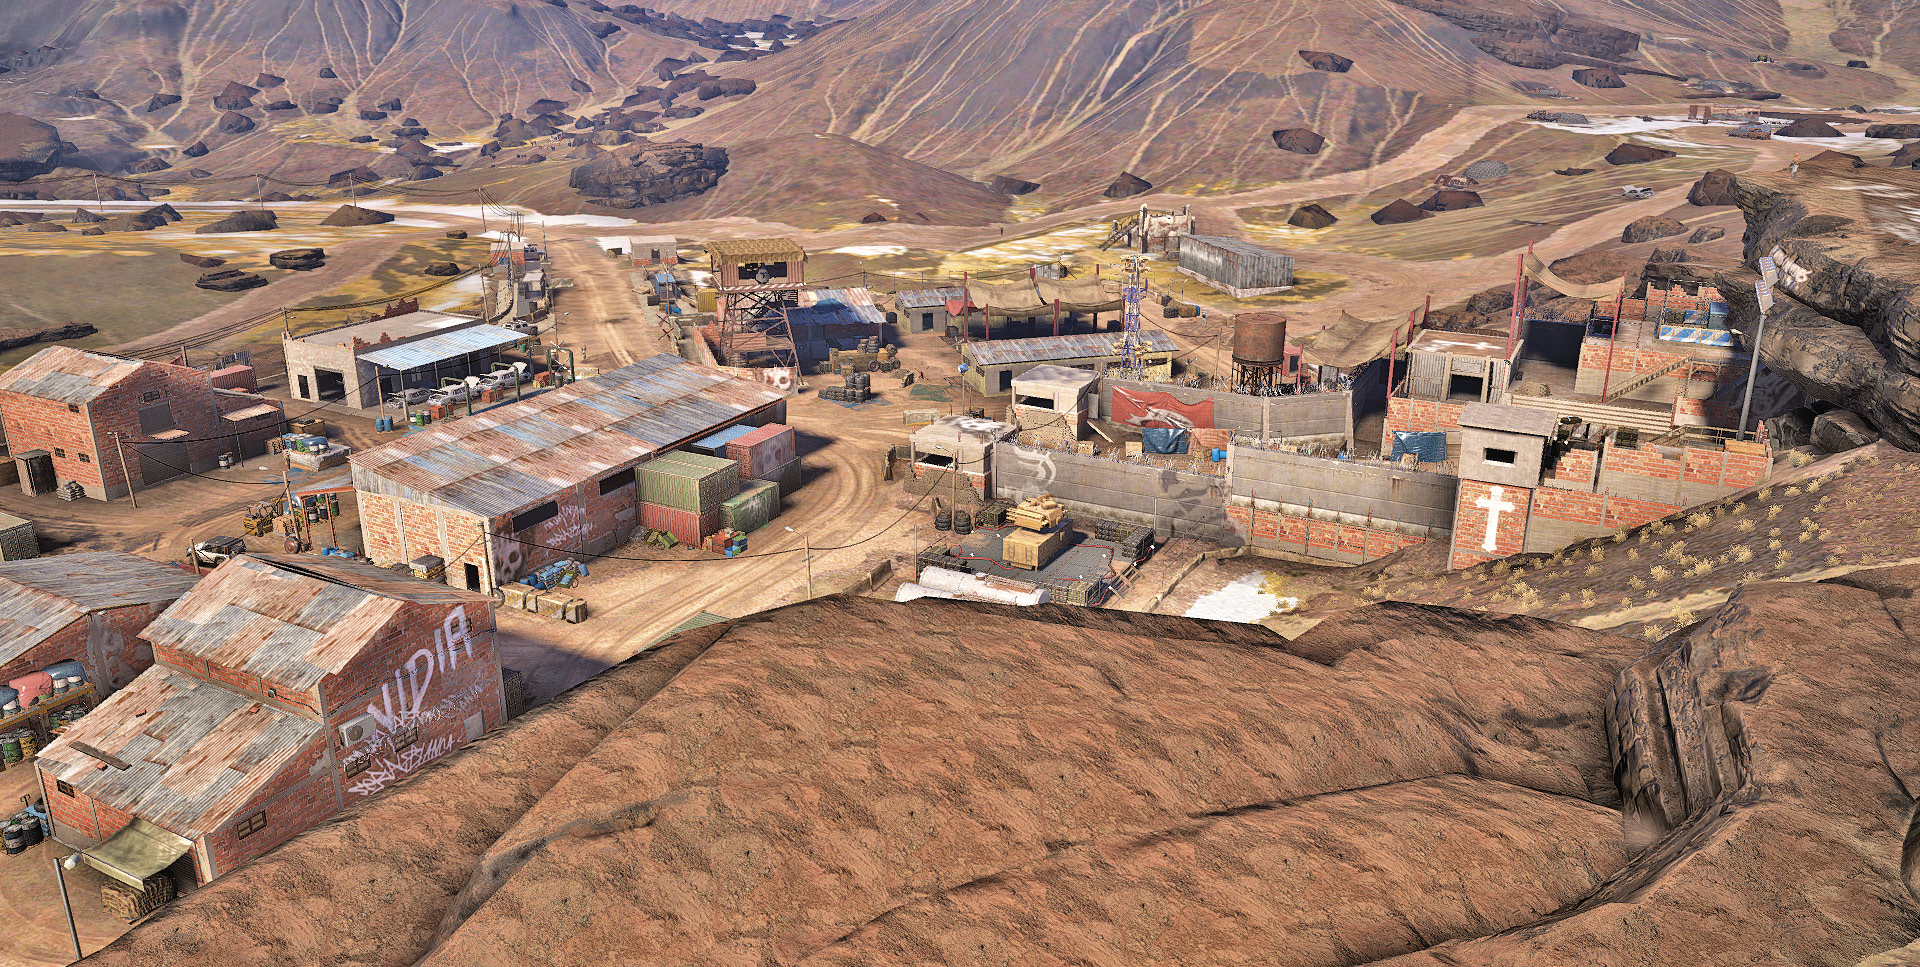
Head north about 1.6 kilometers from Montuyoc Bravo to find a reasonably large supply depot with stockpiles of mortar shells in four separate locations. Removing the enemies here is secondary to destroying the shells, one case of which is located within a depot cave on the eastern hillside of the base. Once the fourth (and last) mortar case is destroyed, the mission concludes. Note that each crate is small, about the size of a suitcase.
Supply Depot: Recon
TACMAP
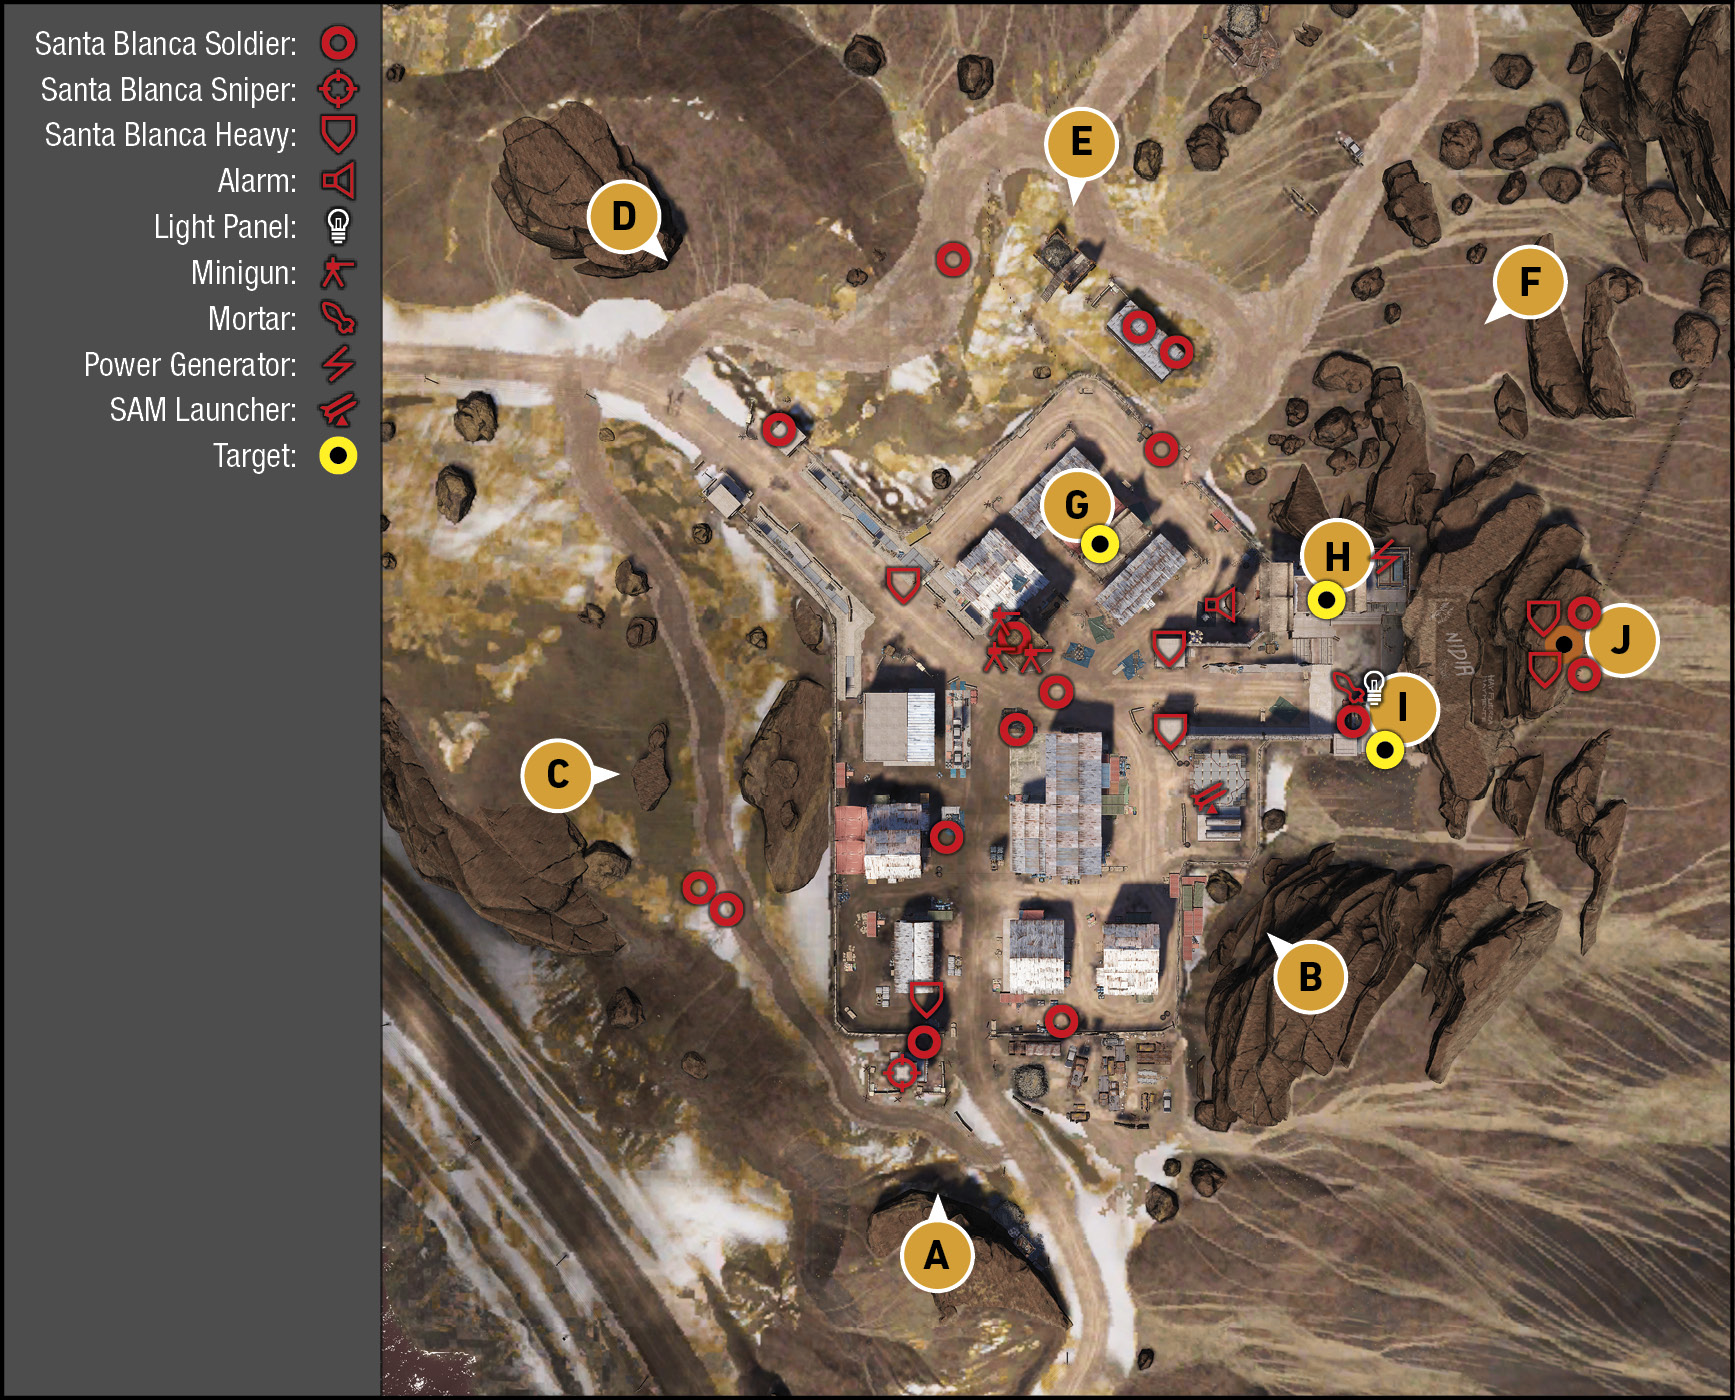
The depot base contains a number of interesting areas within its walls, which are impressive on the south and west sides, but rather porous to the north and east. Be aware of the sniper tower to the south, and take note of the road running north to south through the base, which offers access if you decide to storm the area in a vehicle. The main central warehouse and a smaller storage structure to the southeast can be climbed, creating opportunities to snipe some of the target crates. North are the mess hall and barracks, while the concrete-walled eastern side features manned pill boxes, an armory, generator, alarm pole, and mortar, all leading into the mountain itself and a shallow depot cave. It’s wiser to enter there from the north or south, rather than attempt a direct approach.
South: Rock Outcrop and Sniper Tower Entrance
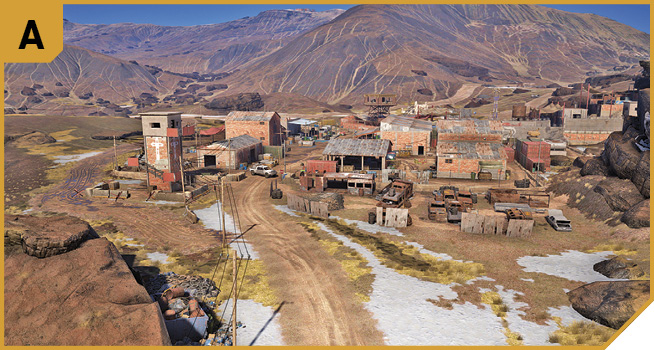
The flat rock outcrop is a good ranged spot from which to take out the sniper atop the tower, as well as the two patrolling foes moving outside the perimeter at C, the foe in the minigun tower, and the alarm pole panel. There are relatively few foes at this entrance, allowing you to slip in stealthily. The perimeter fence is too high to climb, which leaves the road into the base for access. From there you can spread out, moving to the targets and optionally climbing the roof of a south warehouse to get a ranged shot at one of the crates.
Southeast: Rock Outcrop and Side Infiltration
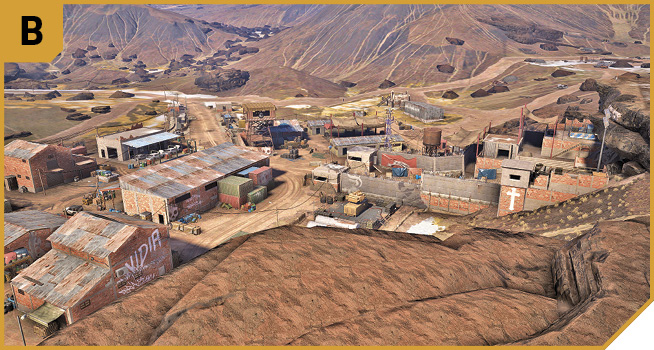
The biggest weakness of this base is revealed when you approach from the southeast and utilize this rock outcrop. This is a sniper’s dream. You get great views of the entire base, enabling you to remove the alarm panel as well as foes in the minigun and sniper towers. You can also encroach into the base itself, down to the SAM launcher, then up to the large metal-roofed warehouse via climbable stacked containers. The roof allows shots at G from a distance.
Or you can sneak to the exterior rocks above the cave (J), or the entrance to the depot cave (I), hopping over and circumventing the two armored foes just south of G in the pill boxes. From here, lob in grenades, or take up defensive positions and quickly destroy crates. This is a safe route for those attempting stealth, who wish to remove the first three crates using C4 and a single timed detonation, usually after the crate at J is destroyed.
West: Muddy Perimeter
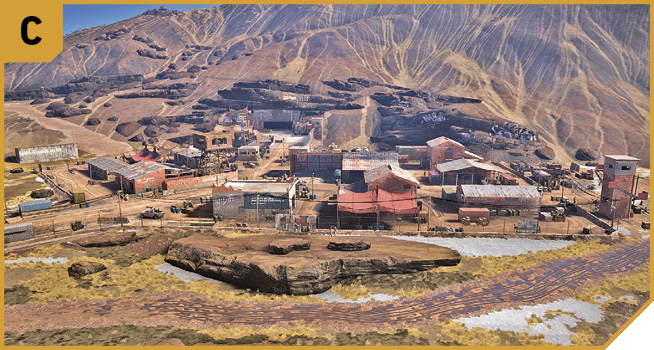
Two foes may be patrolling outside the base, and this is where you find them, along the muddy tire tracks by the east perimeter fence. The fence itself is sturdy and can’t be climbed, and the ground and rock outcrops aren’t high enough to offer an advantage. However, you can knock out the alarm pole, minigun operator, and sniper from this direction. Otherwise, use this if you want to sneak between A and D.
Northwest: Outer Rock Outcrop and North Entrance
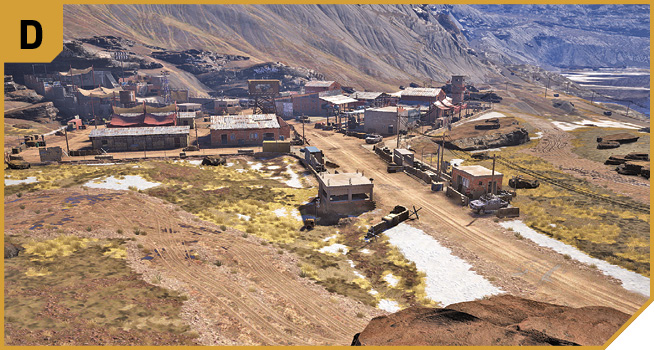
The base’s two outer pill boxes aren’t particularly well-manned, and the sniper’s rocks by this less-defended entrance make this a good location to sneak in through (especially at night). Note the tunnel by the right (south) pill box, which allows you to sneak underneath the main base road and appear just west of the minigun tower by a small mechanic’s garage. Use this for stealthier infiltrations. Or sneak along the northeast side of the main road and into the mess hall to remove the crate at G.
Don’t forget the sniper’s rocks are a great spot from which to defeat the minigun operator, alarm pole panel, and sniper on the south tower from a distance. You can even shoot the crate at I from here, at extreme range!
North: Ruins
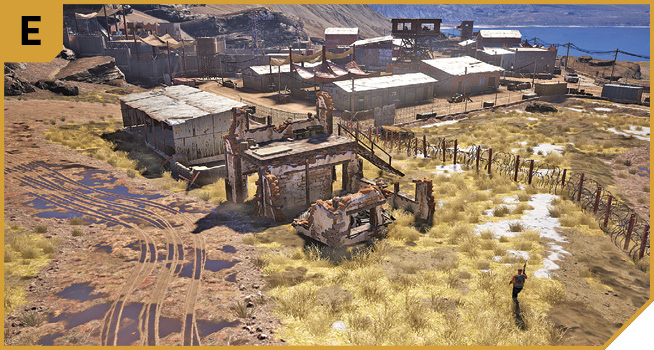
Don’t approach from the mountain to the north and east of the base, as a pretty impenetrable barbed-wire fence runs along this entire side of the base, forcing a hike. Instead, head in from D and around to here—a small set of ruins and a shack-like metal warehouse with some foes you can easily overlook. This spot is important for the quiet removal of all foes. The top of the ruined cottage can also be used for defense and is a great place to cause a distraction, though it doesn’t have the commanding view of the base that other locations do. You can also remove the alarm pole and minigun operator from here.
Northwest: Outer Rock Outcrops
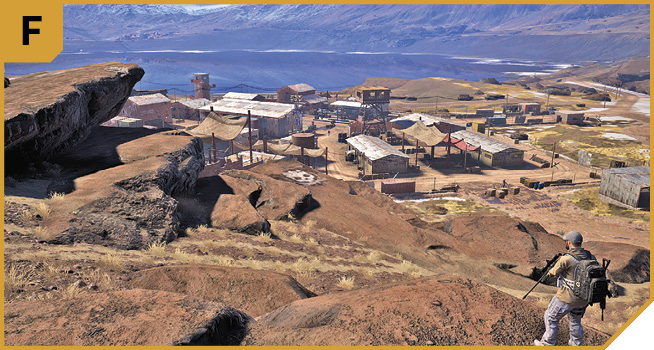
As long as you don’t mind being dropped in by chopper, or hiking in from B or D or the small rusting dump north of the Tacmap, you can settle in for some excellent sniping views and infiltration routes. Watch for the patrolling enemy as you move to the area above J. Snipe the installations and foes in towers to gain a clear view of the crate at G.
Furthermore, you can assault the generator and the crate at H easily, which grants immediate access to the cave.
|
 Target: Mortar Shell Crate (Mess Hall)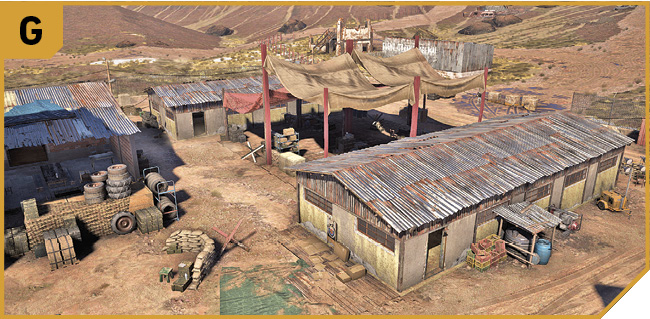
|
 Target: Mortar Shell Crate (Armory)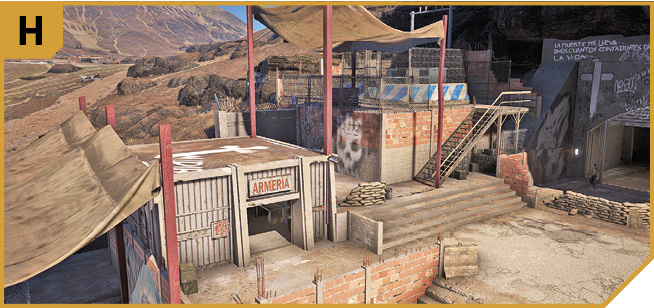
|
 Target: Mortar Shell Crate (Mortar)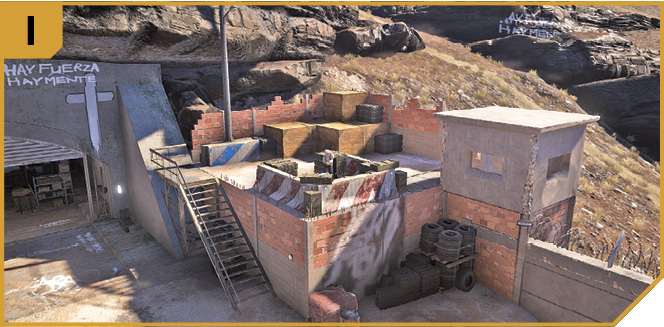
|
 Target: Mortar Shell Crate (Depot Cave)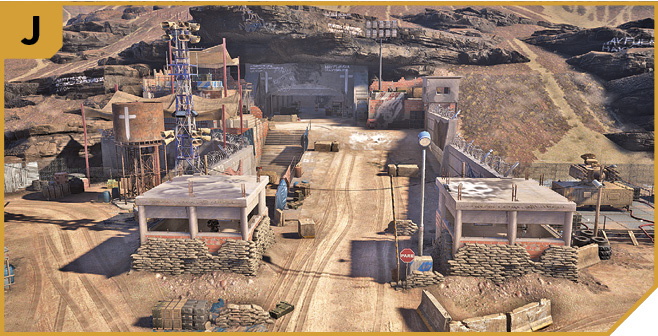
Supply Depot: Other Tactical Advice
 For maximum stealth and minimal frantic scrambling, work your way around to the rocks above J, dropping the patrolling foe who may be in the vicinity. With no enemies aware of your presence, you can shoot out the alarm panel, then the foe manning the mortar. Then snipe the crates at G and I. Lob a grenade so it explodes just inside the armory, destroying the third crate at H. Then sit back, launch an explosive drone, and fly it into the cave depot to detonate the last crate. You may wish to try the drone explosion first, before the enemies realize they’re under attack.
Or enter at night from E, avoiding or removing foes at the ruined cottage before sneaking in through the barracks to plant C4 at G. Creep east and around to the generator at H, into the armory to plant a second C4 charge, then tackle the mortar foe with a melee or suppressed-fire takedown and plant your third C4 charge. Lob a grenade into the depot cave, flee up the slope by the generator (H), and detonate the C4. Optionally remove the alarm pole panel before you make a sound.
Alternatively, drive an armored vehicle into the base (usually from D, as it’s easier to reach J from here), passing the minigun tower and between the two pill boxes and concrete walls to head to the depot cave. Get out, shoot the crate in J, then clear the immediate area with shots to the crates at H and I. Return to the vehicle, speed out, then loop around to shoot the mess hall crate (G) from the scrubland near E. This isn’t an exceptional plan in Solo, but the vehicle affords you cover. This plan is better utilized in Co-op mode, when your team can focus on each crate as you pass it.
 Solo tactics work well here, though with four crates and four players, having a teammate responsible for each crate is one option.
You can also attempt to infiltrate from A or B, with one or two Ghosts removing the alarm and sniper and then climbing atop one of the two warehouse roofs, where a direct line into G and H is available. Meanwhile, the other two Ghosts should infiltrate from B, the rocks above J, or F.
The crate at J is the most difficult to destroy, so go for it first. Try piloting an explosive drone in, then destroy the other three crates in whatever manner you wish, as they’re all exposed. For example, assuming a Ghost has neutralized the alarm and SAM launcher, you can fly about in a helicopter, strafing the ground. Remember to create a disturbance in an area like A, C, D, or even G so foes rush to that area, allowing easier access to the depot cave.