
Tom Clancy's Ghost Recon: Wildlands Guide Welcome to Bolivia Mojocoyo: Antonio
Eastern Cocaine Cache

Objectives
- Destroy eastern cocaine cache
LOCATIONS
- Cocaine Hideout (East)
REWARDS
- + 500 XP
Brief
We have intel on three large cocaine shipments that are being stockpiled in Mojocoyo prior to being shipped to Remanzo for packaging. Locate these drug caches and destroy them.
Who Wants to Break an Addict’s Heart?
This is one of three similar missions to complete in this province, involving the scouting of a general area. When you reach it, simply look around for a cluster of buildings, and begin a more specific recon. Then home in further on the actual warehouse where the cocaine is being stored, and destroy it in whatever manner you see fit. Cartel member neutralizing is simply a perk of this job.
Cocaine Hideout (East): Recon
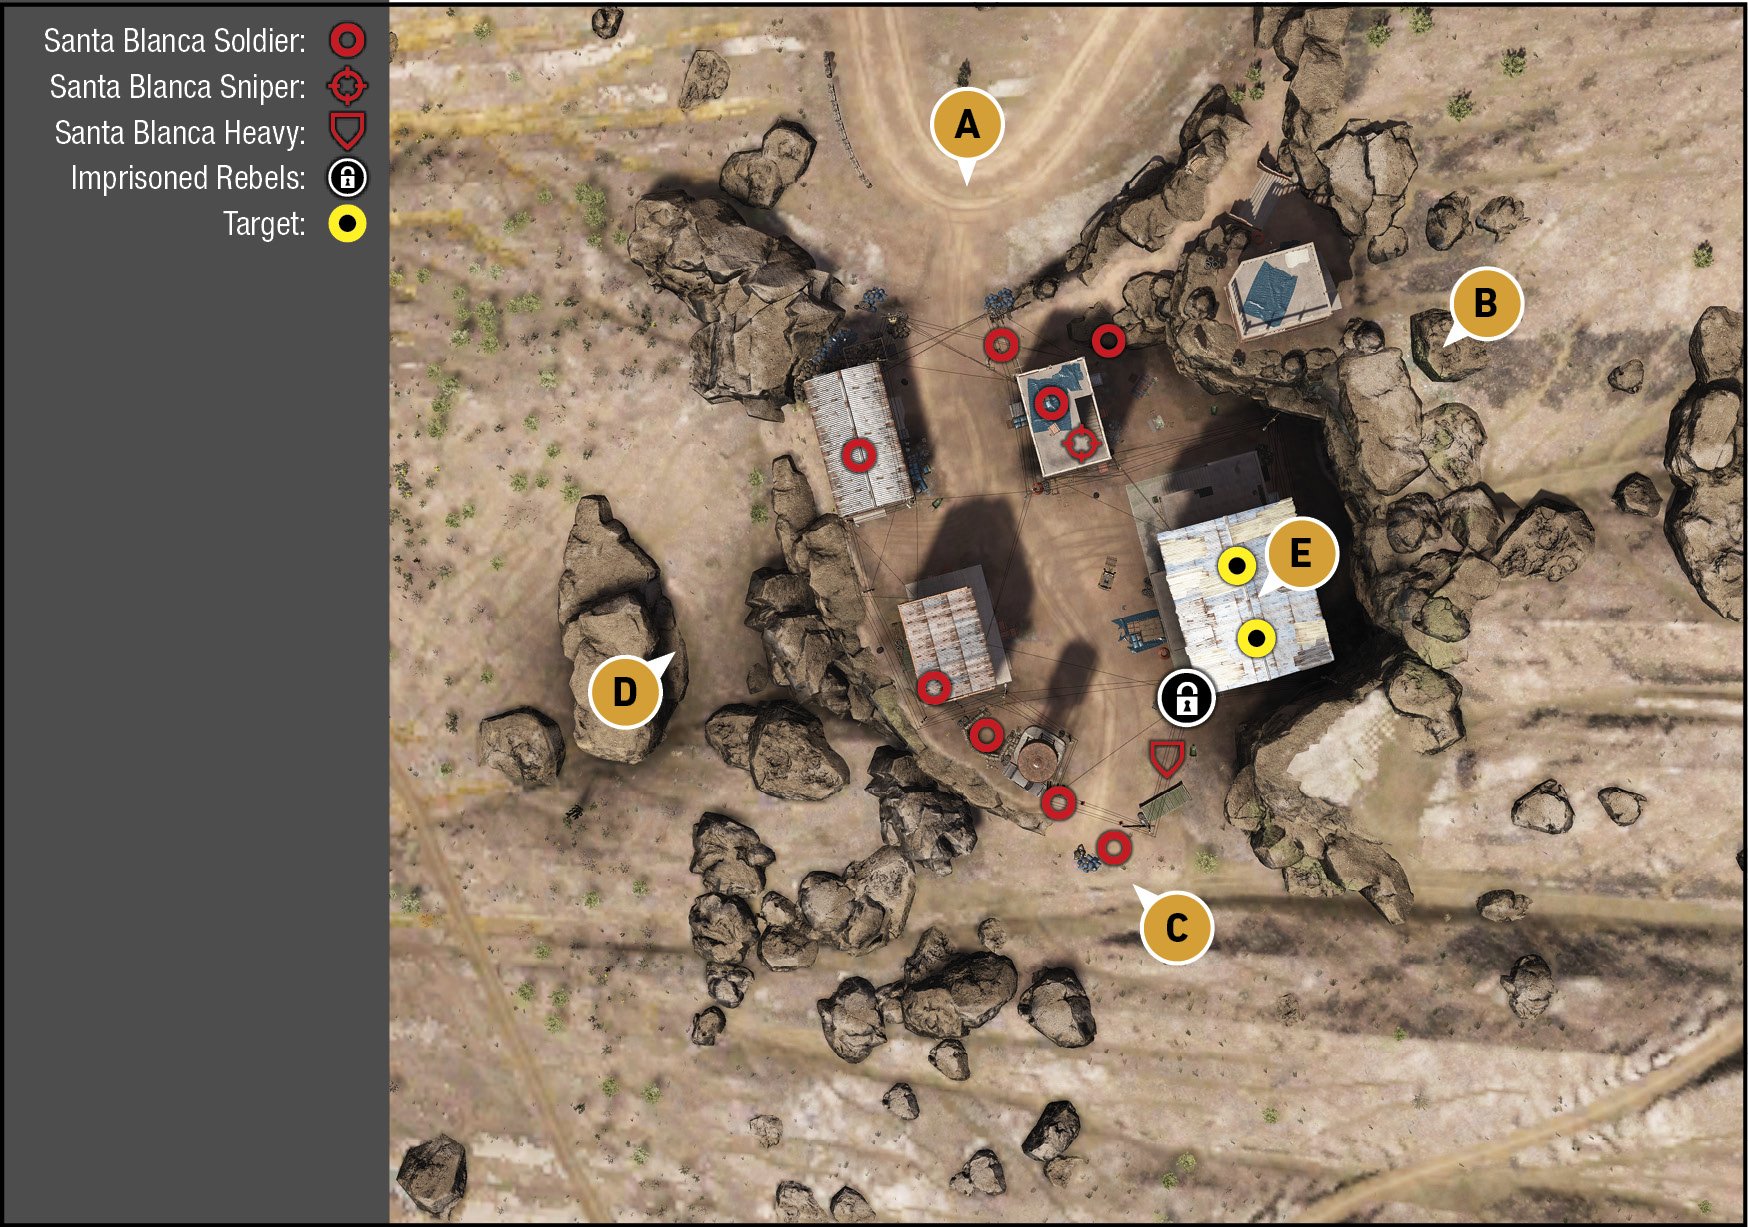
TACMAP
Halfway down a mountain at the apex of a dirt road switchback is a small cluster of buildings. The gang graffiti is unmistakable, though the area is compact, and slopes up to the east. Expect around ten foes to trouble you, including a sniper and armored foe. The heaviest fighting is in the central yard and southwest corner, where the majority of the foes are patrolling, but they can quickly reach the cocaine warehouse if you’re not proficient at takedowns. Release the imprisoned rebels for some extra help.
North: Road Switchback
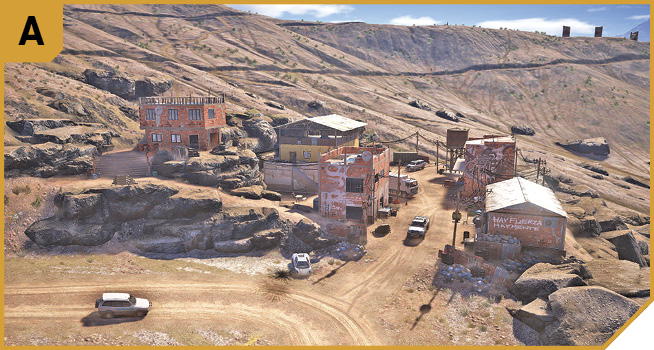
This tight turn on a reasonably flat slope, and the dirt road running through the base north to south, isn’t a particularly stealthy way to infiltrate, as you’re easily seen by the sniper and foes on the higher ground. If a disturbance is created first, you can more easily slip in and work your way round.
This is also an entrance to use for less subtle methods of entering the base, such as speeding in with an armored vehicle, all guns blazing, lobbing grenades into the warehouse as you pass it, and speeding out of the south exit (C).
Eastern Hill
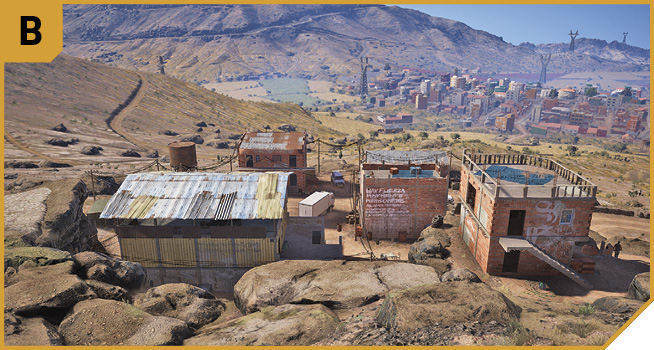
This is the preferred method of reconnoitering the base, and entering it with a stealth plan of attack in mind. Due to the lack of enemies close to the target building, you can slip down the rocks quietly, into the cocaine chamber, and set it alight without firing a shot (though that comes immediately afterward).
Or, you can quietly tag any foes you can see, enter the cocaine building, climb the stairs, and use the covered roof area to rain fire down on the majority of the foes to the west.
South: Water Tower and Defenses
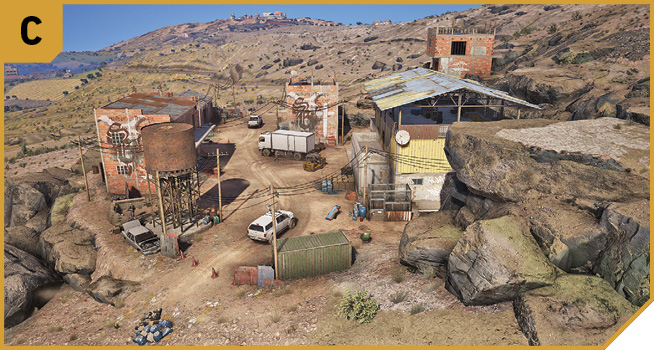
This area of the base is perhaps the most well-guarded (until you make a noise and the foes scatter); there are sandbags, a small two-story barracks structure made of brick, and although the cocaine building is close, wading through these foes can be tricky. So creep down the hill from the southeast.
Or, you can mount an assault, or even a distraction (setting off explosives away from the base near this exit, or driving around like a madman to attract the foes) while the rest of your team completes the objective.
West: Perimeter Outcrops
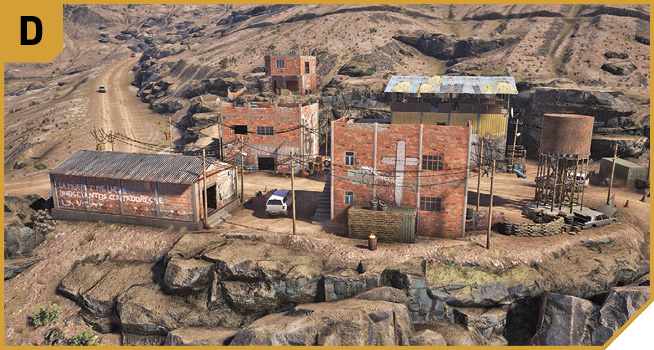
The rocky outcrops the west side of the base is close to provide a modicum of cover when you’re heading to the perimeter of this base. Use an infiltration from this direction to easily enter either of the two western structures to clear them of foes. Pay special attention to the two-story barracks structure (southwest), with easy exterior stairs access, and windows to shoot enemies through (remembering they can see you, too). Despite the number of enemies close by, the top floor (bedrooms) of this building are worth storming and shooting down from, as the only access point are those outside steps.
|
 Target: Cocaine Warehouse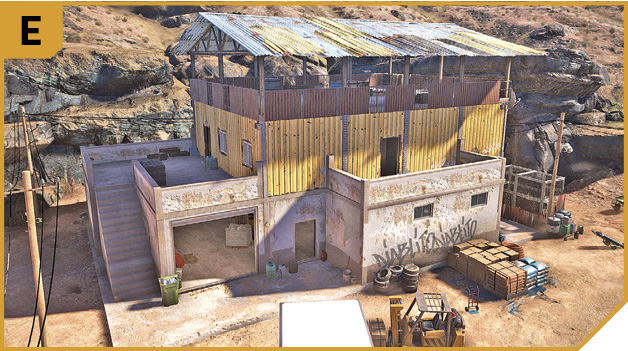
Cocaine Hideout (East): Other Tactical Advice
 If you’re in need of a stealth plan, head in from B, and tag the sniper on the roof, and any guards that don’t slump over in an area where they can be spotted by others. Then enter the southwest ground-level doorway of the cocaine warehouse after heading down from your hill vantage point, optionally free the rebels outside (though that’s difficult without being spotted), and prep three packages of C4 to ensure detonation. Retreat out, explode, and the mission completes. Or, fly in an explosive drone to take out the cocaine shipments.
Alternatively, refrain from triggering the cocaine explosion, head to the covered roof of the base, and start raining death down from above while the rest of the team storms the main yard (just north of C). Then you can fully liberate this location. Flashbangs are also good to bring for assaulting rooms enemies have fled into, and are refusing to die in.
 A similar plan is also recommended, though you can add to the crossfire opportunities by having a Ghost approach from A, B, C, and D simultaneously. The cartel thugs won’t know what hit them!
Or, attack from a helicopter and a truck (two Ghosts in each) if you want to light everything up; the truck players being responsible for destroying the cocaine, while the chopper duo kills anyone who isn’t a rebel trapped in a cell.