
Tom Clancy's Ghost Recon: Wildlands Guide Welcome to Bolivia P.N. De Agua Verde: Carzita
Carzita’s Assistant

Objectives
- Locate Carzita’s assistant while remaining undetected
- Place bugs while remaining undetected
- Leave the area undetected
- Locate Carzita’s assistant
- Kill Carzita’s assistant
LOCATIONS
- Patuja Mansion
- Alicia Town
REWARDS
- + 350 XP
Brief
When Carzita is away from the province he depends on a trusted assistant to run the complex and take care of VIPs. Locate Carzita’s assistant and eliminate him.
Silent, Not Deadly
You can reach the Patuja Mansion from air, land, or sea, but it’s imperative you don’t enter the grounds of this structure without realizing that mission failure is a very real possibility if you’re spotted by the enemy. You’re here to place three bugs inside this structure, and leave without bloodshed. Or failing that, bloodshed you can keep a secret from the other foes guarding this place.
Patuja Mansion: Recon
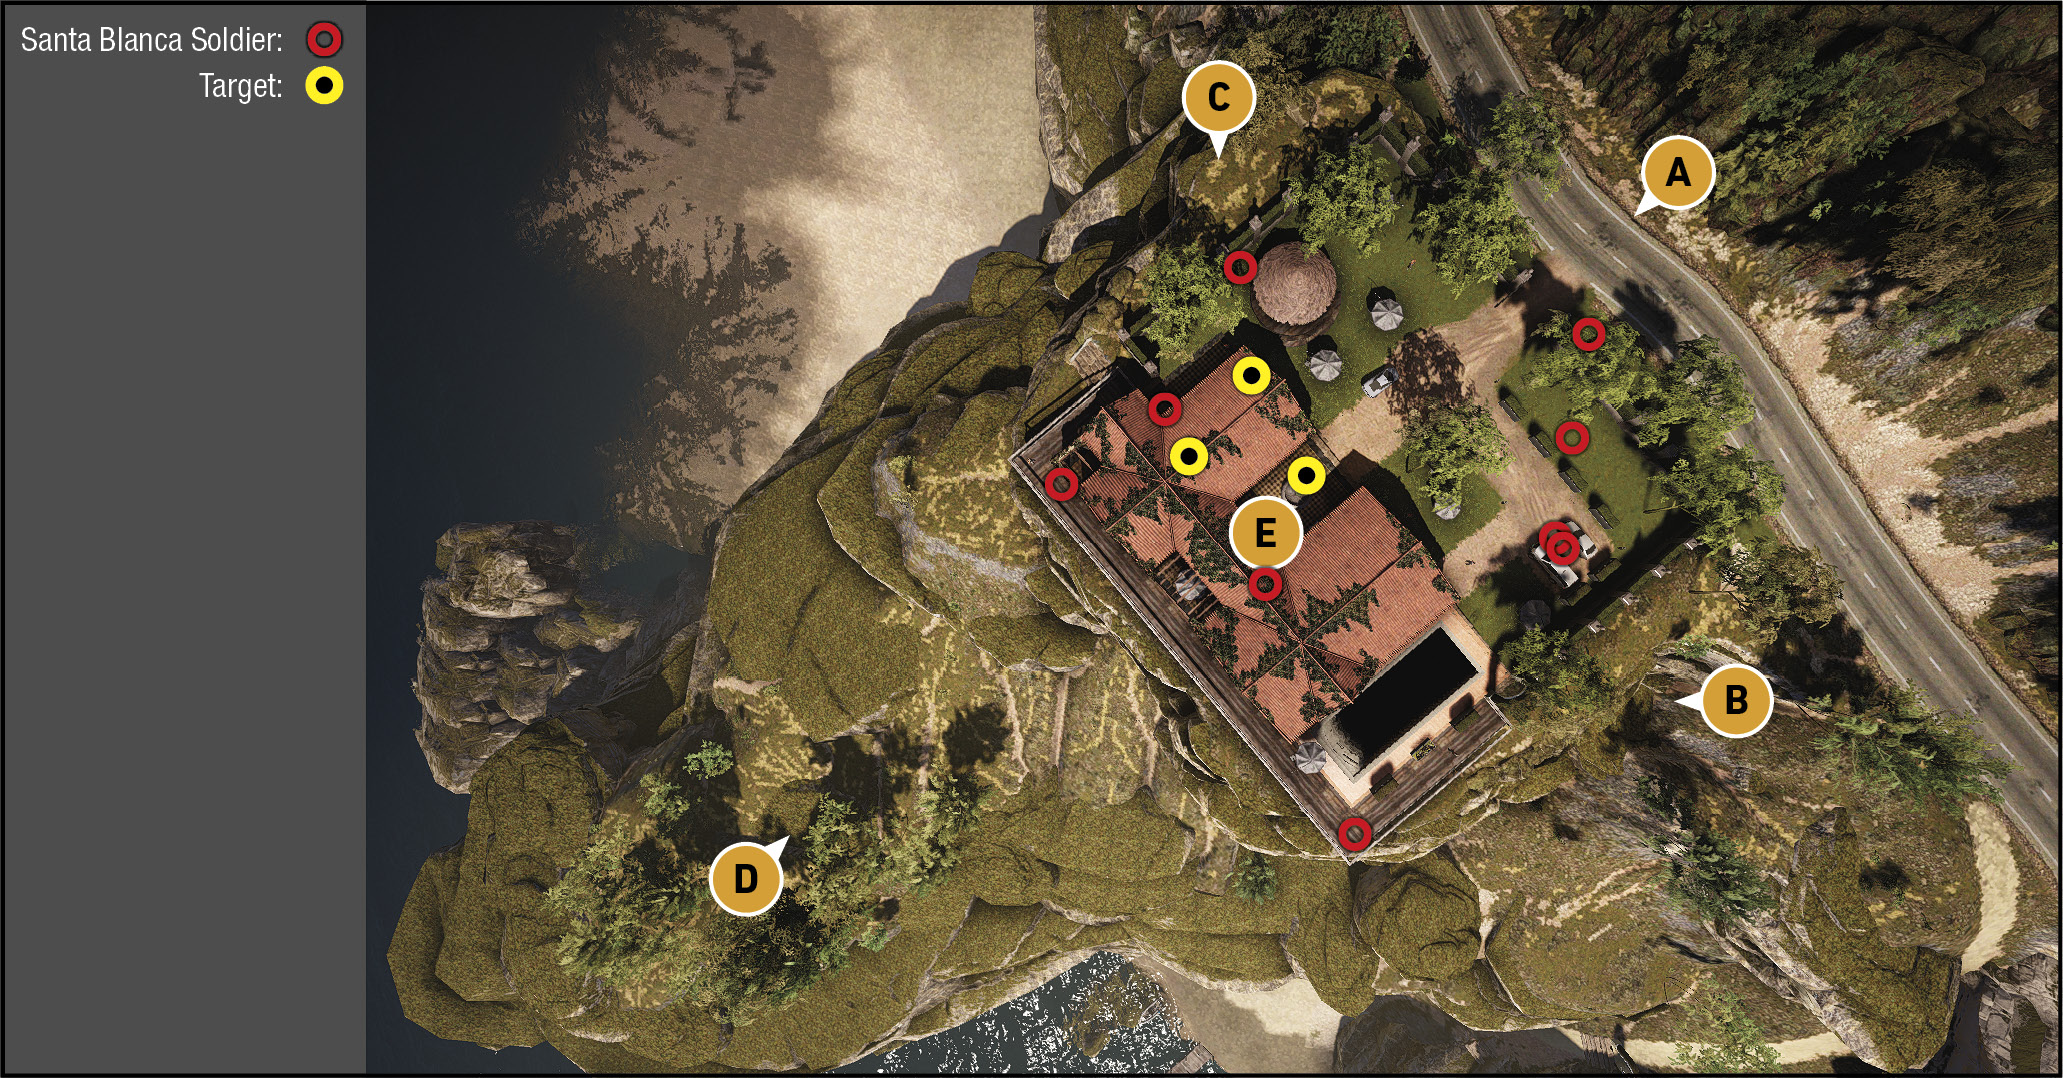
TACMAP
The mansion is a single-level building on a rocky lake outcrop, close to the main road, with around six cartel goons guarding it. Extreme stealth is required here, as the mission fails should you be discovered by any of them, or if any of them find the dead body of one of their ilk.
Main Entrance and Road (Northeast)
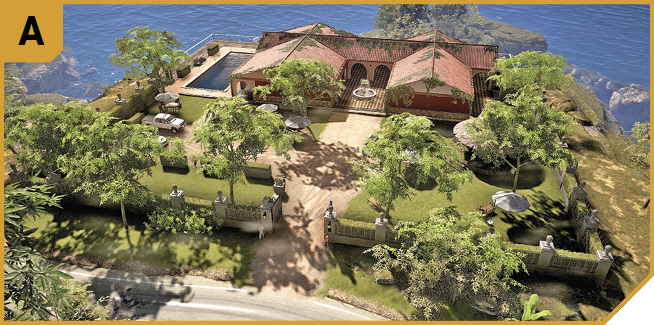
Perhaps the least-advisable method of entry is through the entrance, not least because of the two guards on either side of the entrance, and the others patrolling the front yard inside. It’s best to avoid this area.
Beach Access and Southeast Perimeter
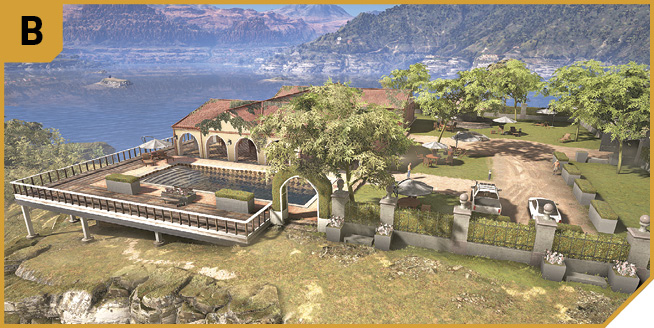
If you’re approaching by boat, dock at the small jetty and hike up the path to the main road. But the main infiltration point here is the leafy archway between the hedge and the pool balcony. Have one teammate slip in here, in-between enemy patrol paths. You could silently execute the three foes on the rear balcony that faces the lake, but it’s easier to creep left through the arch, using the planters as cover, around the deck and into the house. You can be easily spotted though, so consider infiltrating at C instead.
Northwest Perimeter
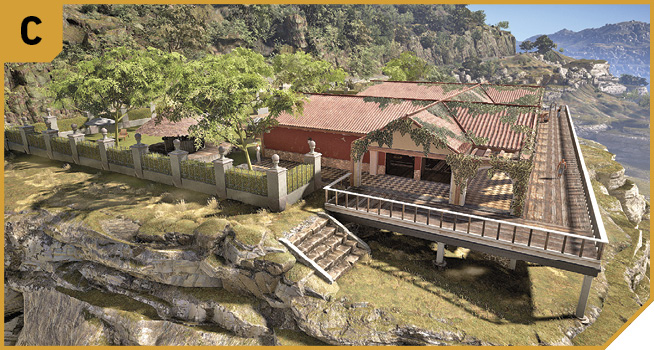
The infiltration point here is optimal as you have cover by the perimeter wall, and you can quickly slip over the tile walkway and into the kitchen and dining room of the mansion without being spotted.
Southwest Outcrop
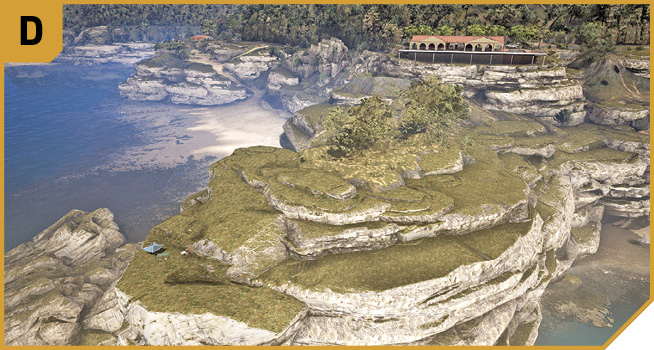
Landing a chopper here is possible, as long as you aren’t too close to the mansion. It’s also a great place to extract from, so your team doesn’t have to scramble down rocks to the beach or risk being spotted. Note the underside of the deck is a good spot to hide and send a drone up from, as well as where the rest of your team should hide if a single infiltration is going on.
Patuja Mansion Interior
Once you close in on the hot zone, the objective markers update, indicating three locations within this two-room mansion where a bug must be planted. They are:
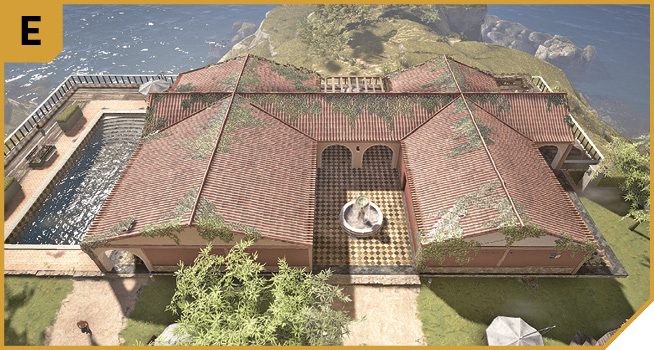


Northwest Kitchen and Dining Room: Picture of the virgin Mary; left corner wall of the kitchen.
Northwest Kitchen and Dining Room: Vase in the south corner, left of the cabinet with the candles on it.
Southeast Living Room and Bedroom: Under the bed.
Between the two main interior chambers is a fountain courtyard, with access between the areas. Use a drone to ascertain the openings you can enter on each interior room. Stay low and behind scenery. Enemies don’t usually enter the interior rooms, allowing a quick bugging of each objective before retracing your steps and extracting the team.
Patuja Mansion: Other Tactical Advice
 Leave your team outside, approach from C, and in-between guard patrol routes, enter the kitchen and dining room, place both bugs, cross through the fountain courtyard into the bedroom, plant the third bug, and retrace your steps out of here.
You could also parachute down onto the roof, drop into the fountain courtyard, and complete the mission.
 It’s usually best to have the most competent member of your team enter here while the others hang back, as risking two or more of your team being spotted isn’t worth the slight takedown advantage you have. Instead, make sure your other teammates let you know if any foes are coming up on your position, so you can dart between the bugging locations expertly, rather than stumbling into foes and ending this mission prematurely.
Execution at Alicia Town
Bowman lets you know Carzita’s assistant is under protection somewhere inside the town of Alicia, on the western side of the Province. You’re to enter the settlement, and remove the assistant in whatever manner you deem necessary. This could be a firefight, or a single sniper round. Whatever you decide, the assistant needs to be neutralized, not captured.
Alicia Town: Recon
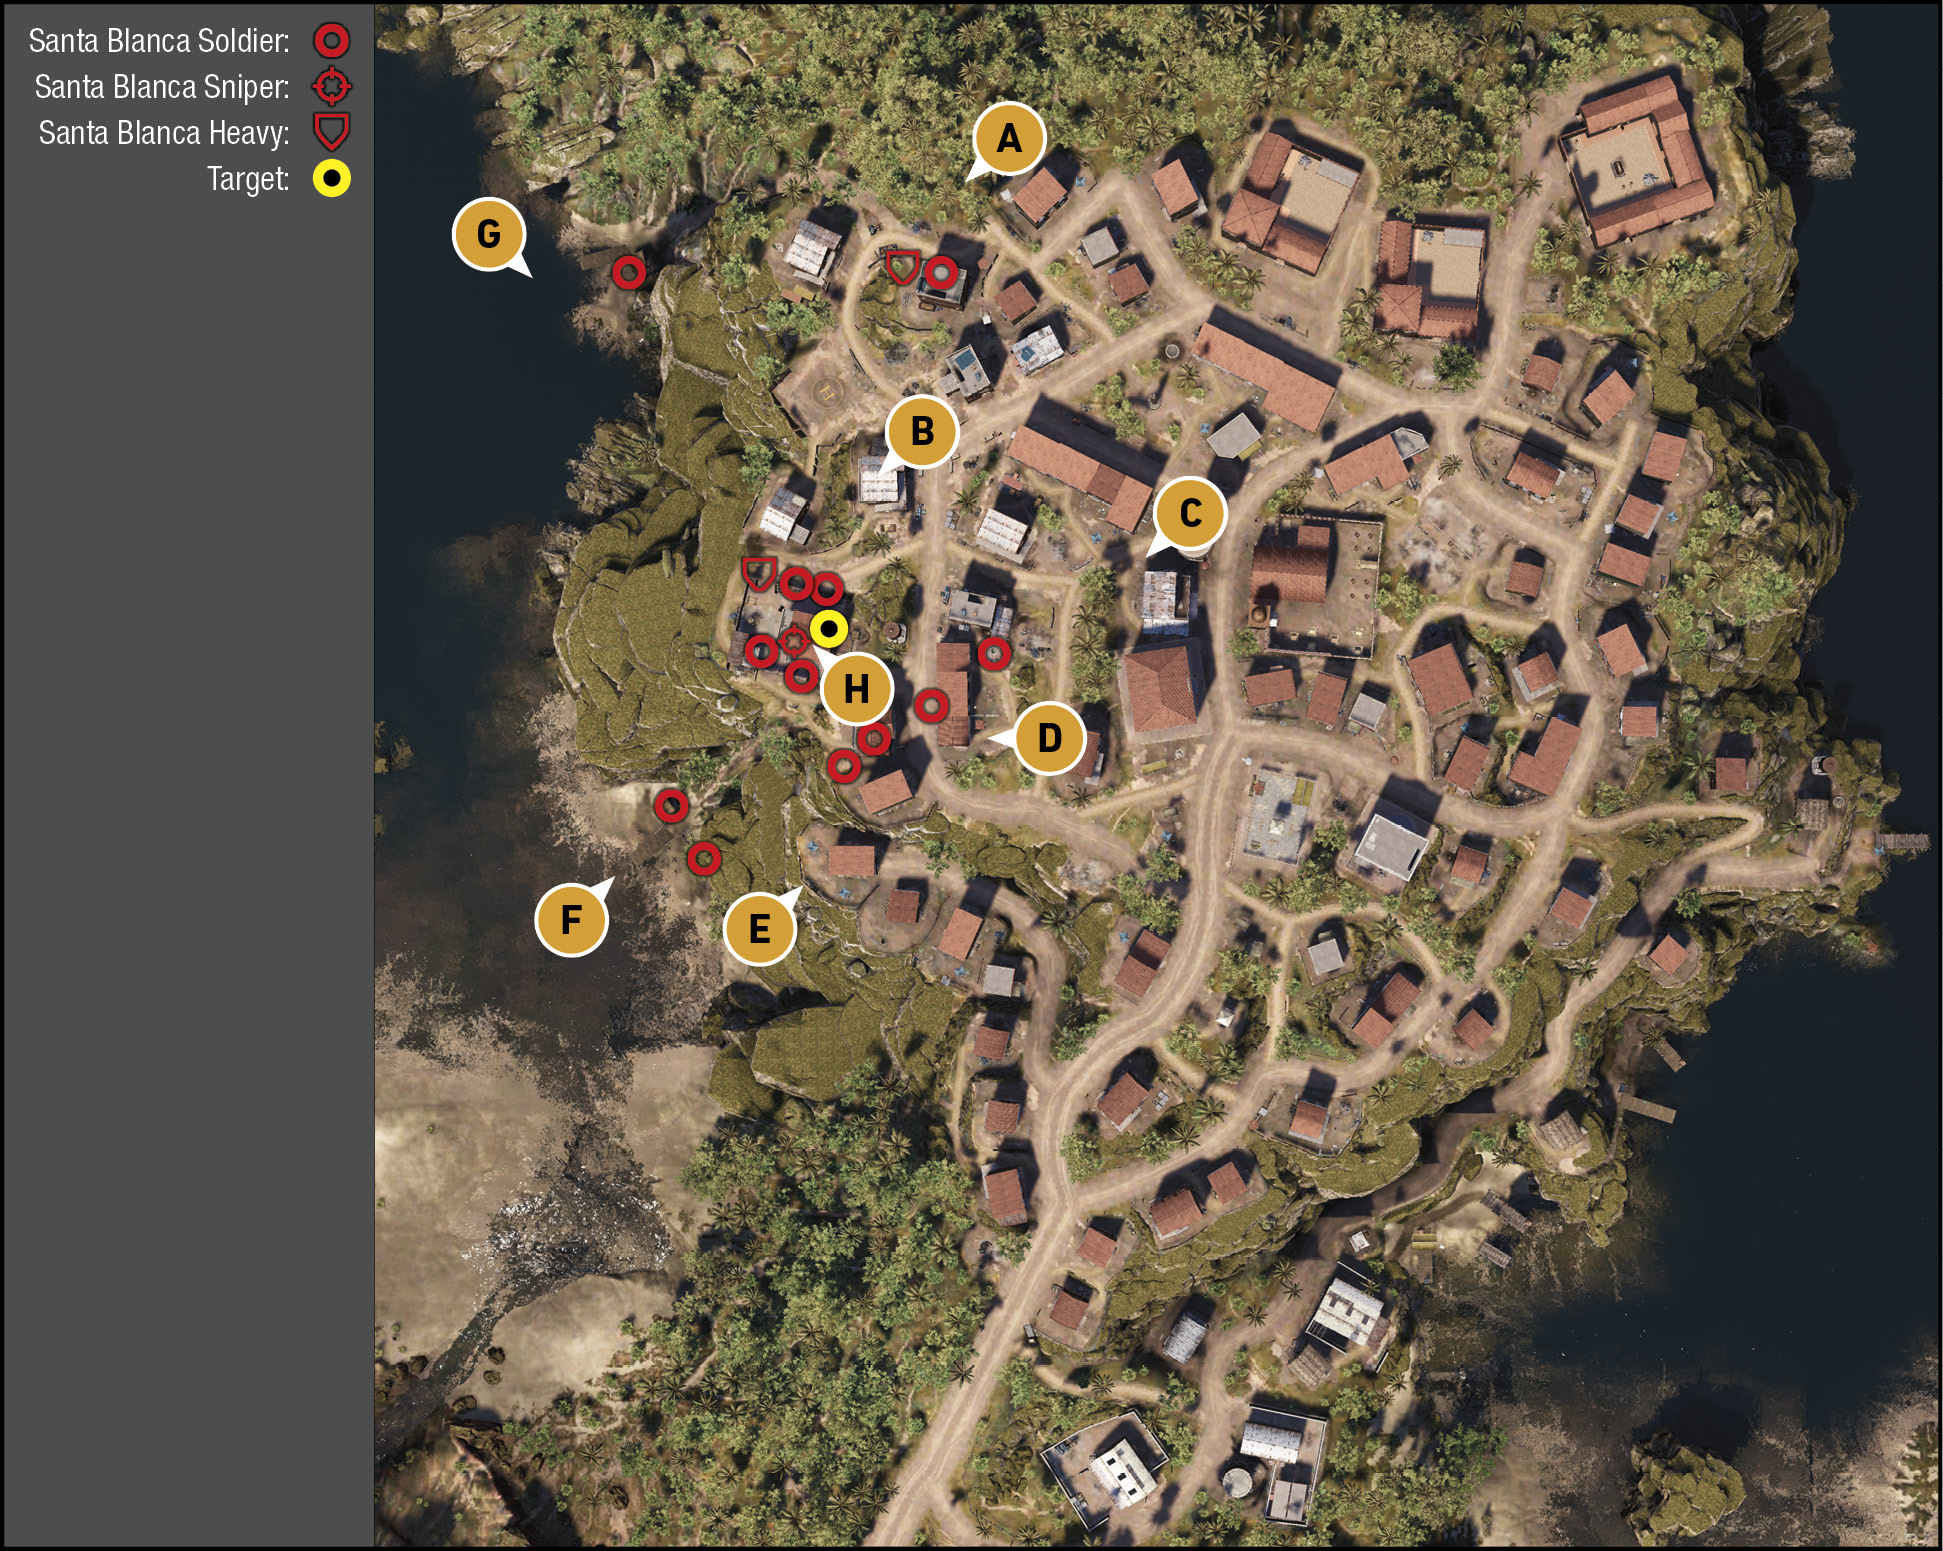
TACMAP
Though Alicia Town is a large settlement to thoroughly tackle, and is atop a rocky peninsula making on-foot infiltration tougher than normal, only the western side of town is marked as the mission area. In fact, the cartel thugs only number around 14, making this a fraught, but not overwhelming, mission. With a good degree of drone recon, and knowledge that the majority of the enemies are close or inside the small compound with the Santa Blanca flag flying, you can make this a competent takedown.
North Jungle
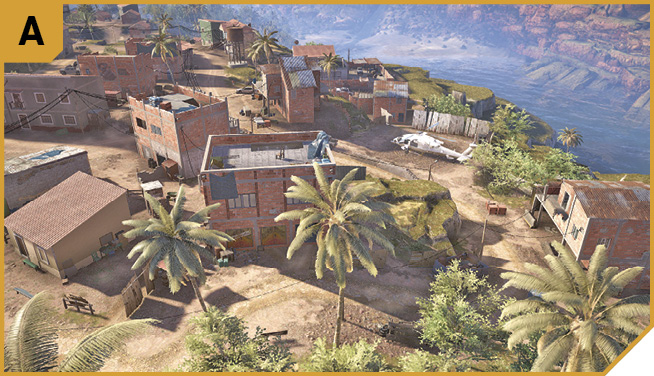
Start a sweep from here if you’re concerned about removing enemies quietly, as you head north to south. The two enemies in the vicinity are worth neutralizing, so any foes that may spot your antics are in front of you, rather than on your periphery. Furthermore, the three-floor building with the roof you can climb to, allows good views of the helipad area, and the windows of the compound itself. It’s actually possible to tag the target at extreme range from here, or provide covering fire and tagging foes around the compound, as well as the target himself if he flees.
Tin Roof Building (Balcony)
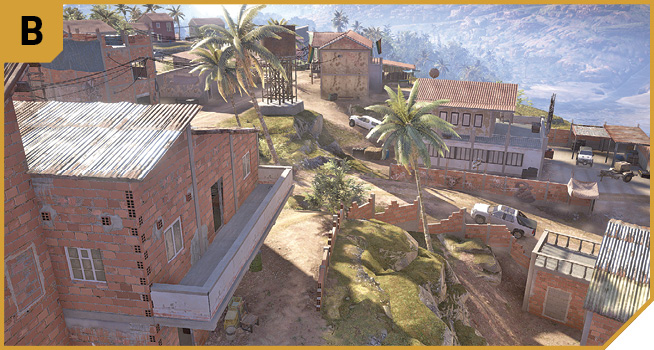
This structure offers perhaps the best views of the compound; especially as you can see the windows to the interior of the structure, and can snipe the target without firing any other shots. You’ll need to stealthily sneak up the outside stairs on the north side of this building to reach the balcony though, so watch for enemies close by as you do so. Or, use this for elevated cover as you rake the compound with gunfire, and stop the escaping target dead in his tracks.
Water Tower (Town Center)
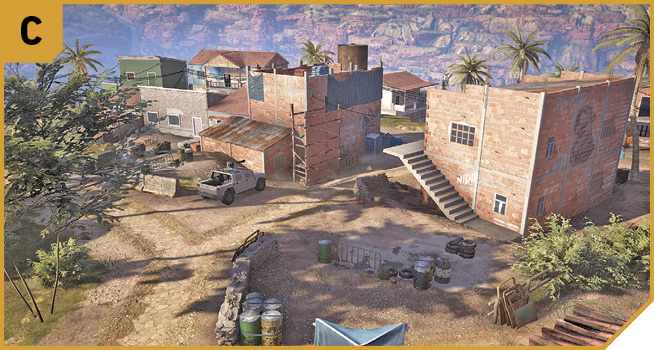
If you’re approaching from the east, don’t expect any problems until you reach the water tower; then head into cover and start street-by-street removal of the foes in the vicinity. Though there are only four nearby (not including those at the compound), they can easily raise the alarm and cause this mission to turn chaotic. It helps if additional Ghosts are pinpointing the cartel members from D and E.
South Dirt Road
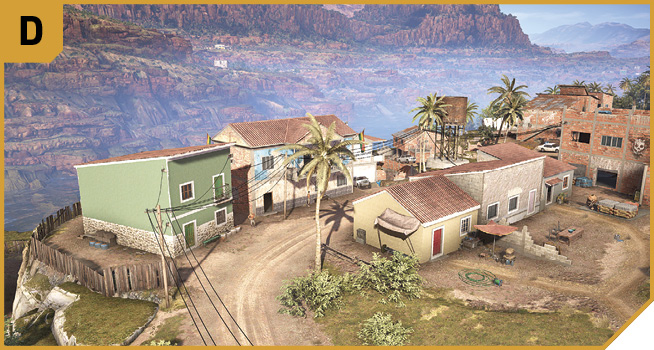
The main road in from the south is fine to use as an infiltration point, and having a Ghost in the general area to apprehend the assistant if they try to leave in a vehicle is also a good idea. Back up Ghosts on foot by looking for the quartet of enemies in the streets just northwest of here, and gradually remove them as threats without raising the alarm. Then move to the blue building with the flag, and use the upper balcony to check the target compound. Or fall back here and use it as a defensive position.
Lower Slopes (South)
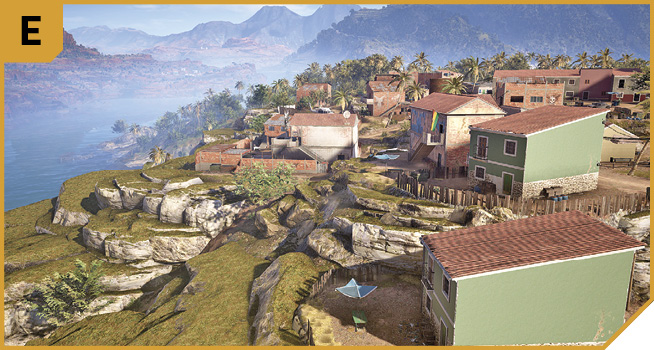
Though it isn’t usually beneficial to give the enemy an advantage in height, the lower flat grassy outcrops and houses dotted around the south part of town can be used to infiltrate to the beach path east of F, allowing you up and into the compound with ease. Concentrate on moving to the green-colored house one building south of the blue one with the flag, and deal with the four foes outside the compound first.
Southeast Shoreline
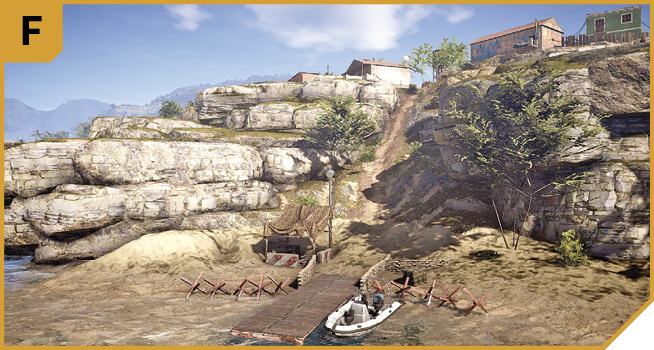
Offering a boat to use as an extraction vehicle, as well as a minigun nest and two foes that aren’t afraid to use it, the shoreline defenses are troublesome if you’re attacking from the water, so don’t. Instead, approach these two foes from E, and execute them both from above. That way, they can’t raise an alarm.
Northeast Shoreline
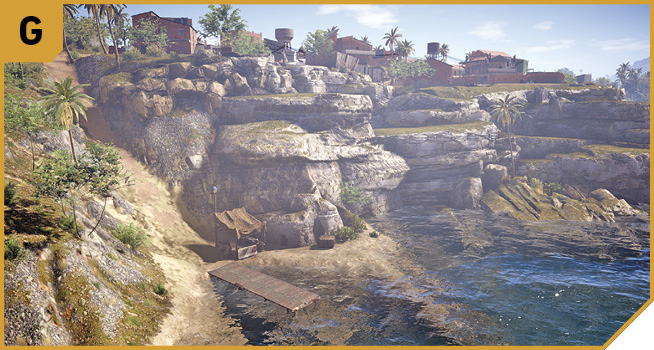
Similarly, the cartel thug at the minigun nest can seriously impede your clandestine progress if he sees you. So have a Ghost break off from A to execute him, while still maintaining some peace and quiet.
Assistant’s Compound
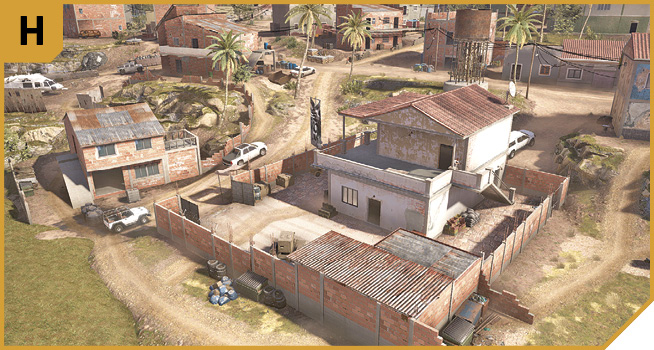
Note the sniper, armored foe, and various thugs guarding the target, who is inside the structure, usually on the ground floor. The outer compound features a gate at the northwest corner, which is heavily guarded and usually where the target flees through. To the southeast is a mesh fence you can climb over if you’re wanting a close-assault kill.
Generally, lobbing in grenades here is feasible, as there are fewer civilians. But a better idea is to tag the target by shooting through the glass windows on the north side of the compound building, or assaulting from E and F, over the window, or from the blue building just east of H.
Alicia Town: Other Tactical Advice
 A sniper’s shot from B during a nighttime sortie is an excellent way to quickly complete this mission. Otherwise, moving in from C to remove foes at A and G, before looping round to D or E and taking care of the street thugs and those on the shoreline defenses at F is a good idea. If you can remain on higher ground east of H, the compound assault should go off without a hitch. Should the target escape, pick a vehicle at the compound, or a vehicle you used to get here; especially a chopper you can land away from the action.
 Completely surround the compound from the north (A), east (C and D), and south (E), and remove the outer enemies first. With only the foes in the compound left, surround the structure, lob in grenades over the brick wall, snipe the armored foes and sharpshooter first, and basically turn the inside of the compound into a bloodbath. Have a Ghost in a vehicle just in case the assistant tries to run.
A more hilarious option involves parachuting onto the compound roof, with the pilot raking the compound (not the area outside, as that has civilians milling about) with gunfire, and a swift removal of the target followed by a vicious compound gun battle from the inside out.