
Tom Clancy's Ghost Recon: Wildlands Guide Welcome to Bolivia San Mateo: El Pozolero
The Prison Village
Objectives
- Locate the warden’s computer
- Hack the warden’s computer
LOCATIONS
- Prison Rosario
REWARDS
- + 500 XP
Brief
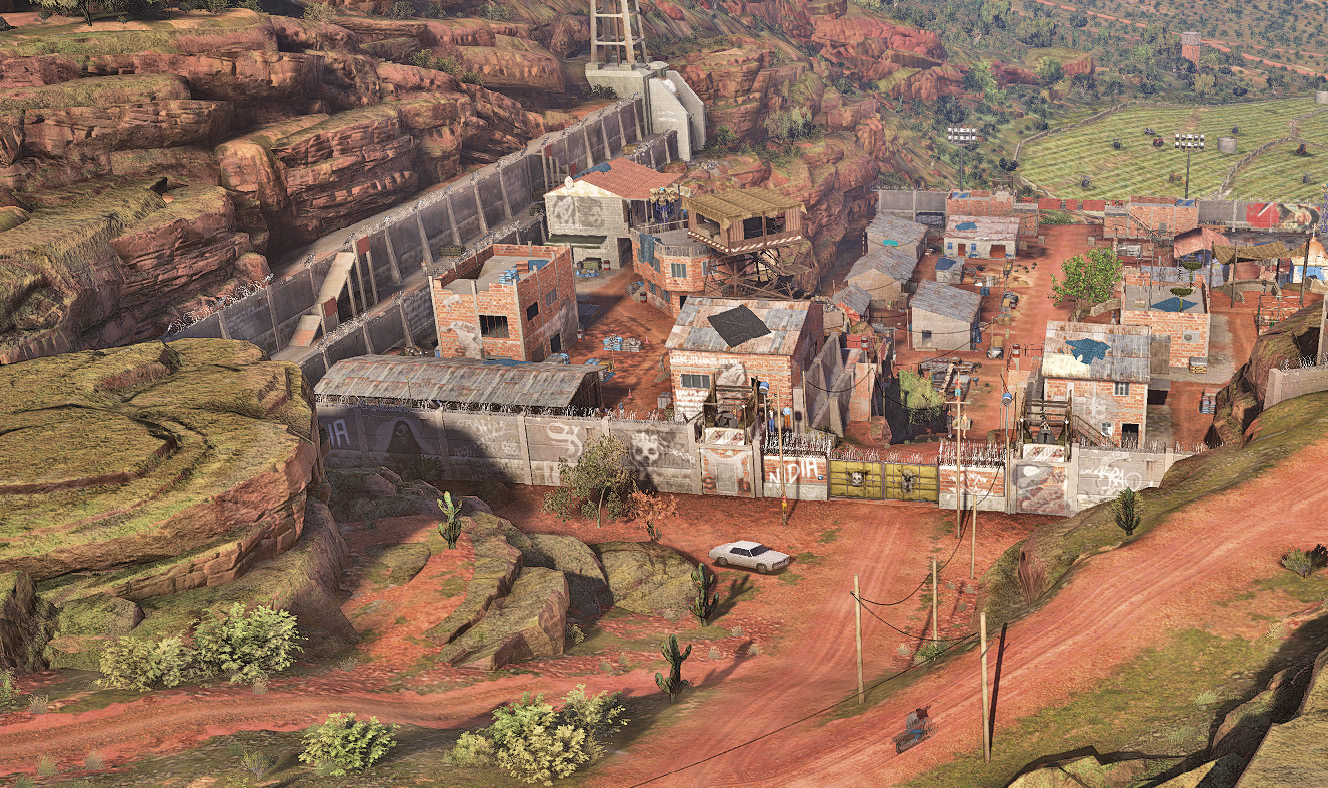
Santa Blanca has turned the entire village of Rosario into a prison camp. The office of the camp warden is likely to contain records of prisoners who have been detained there. Enter the camp, reach the warden’s office, and search it for intel.
Jail Break
Just over half a kilometer west of San Mateo Bravo is a prison village in a fissure-like valley between two cliffs. The place is simultaneously difficult to breach, but easy for snipers to fire into, given the rather unique topography. The place is large, with impressive installation defenses, and around 30 cartel thugs to worry about. You need to find the HQ building where the warden resides (he’s not there at the moment), find the laptop, and hack it. Then extricate yourself after mission completion.
Prison Rosario: Recon
TACMAP
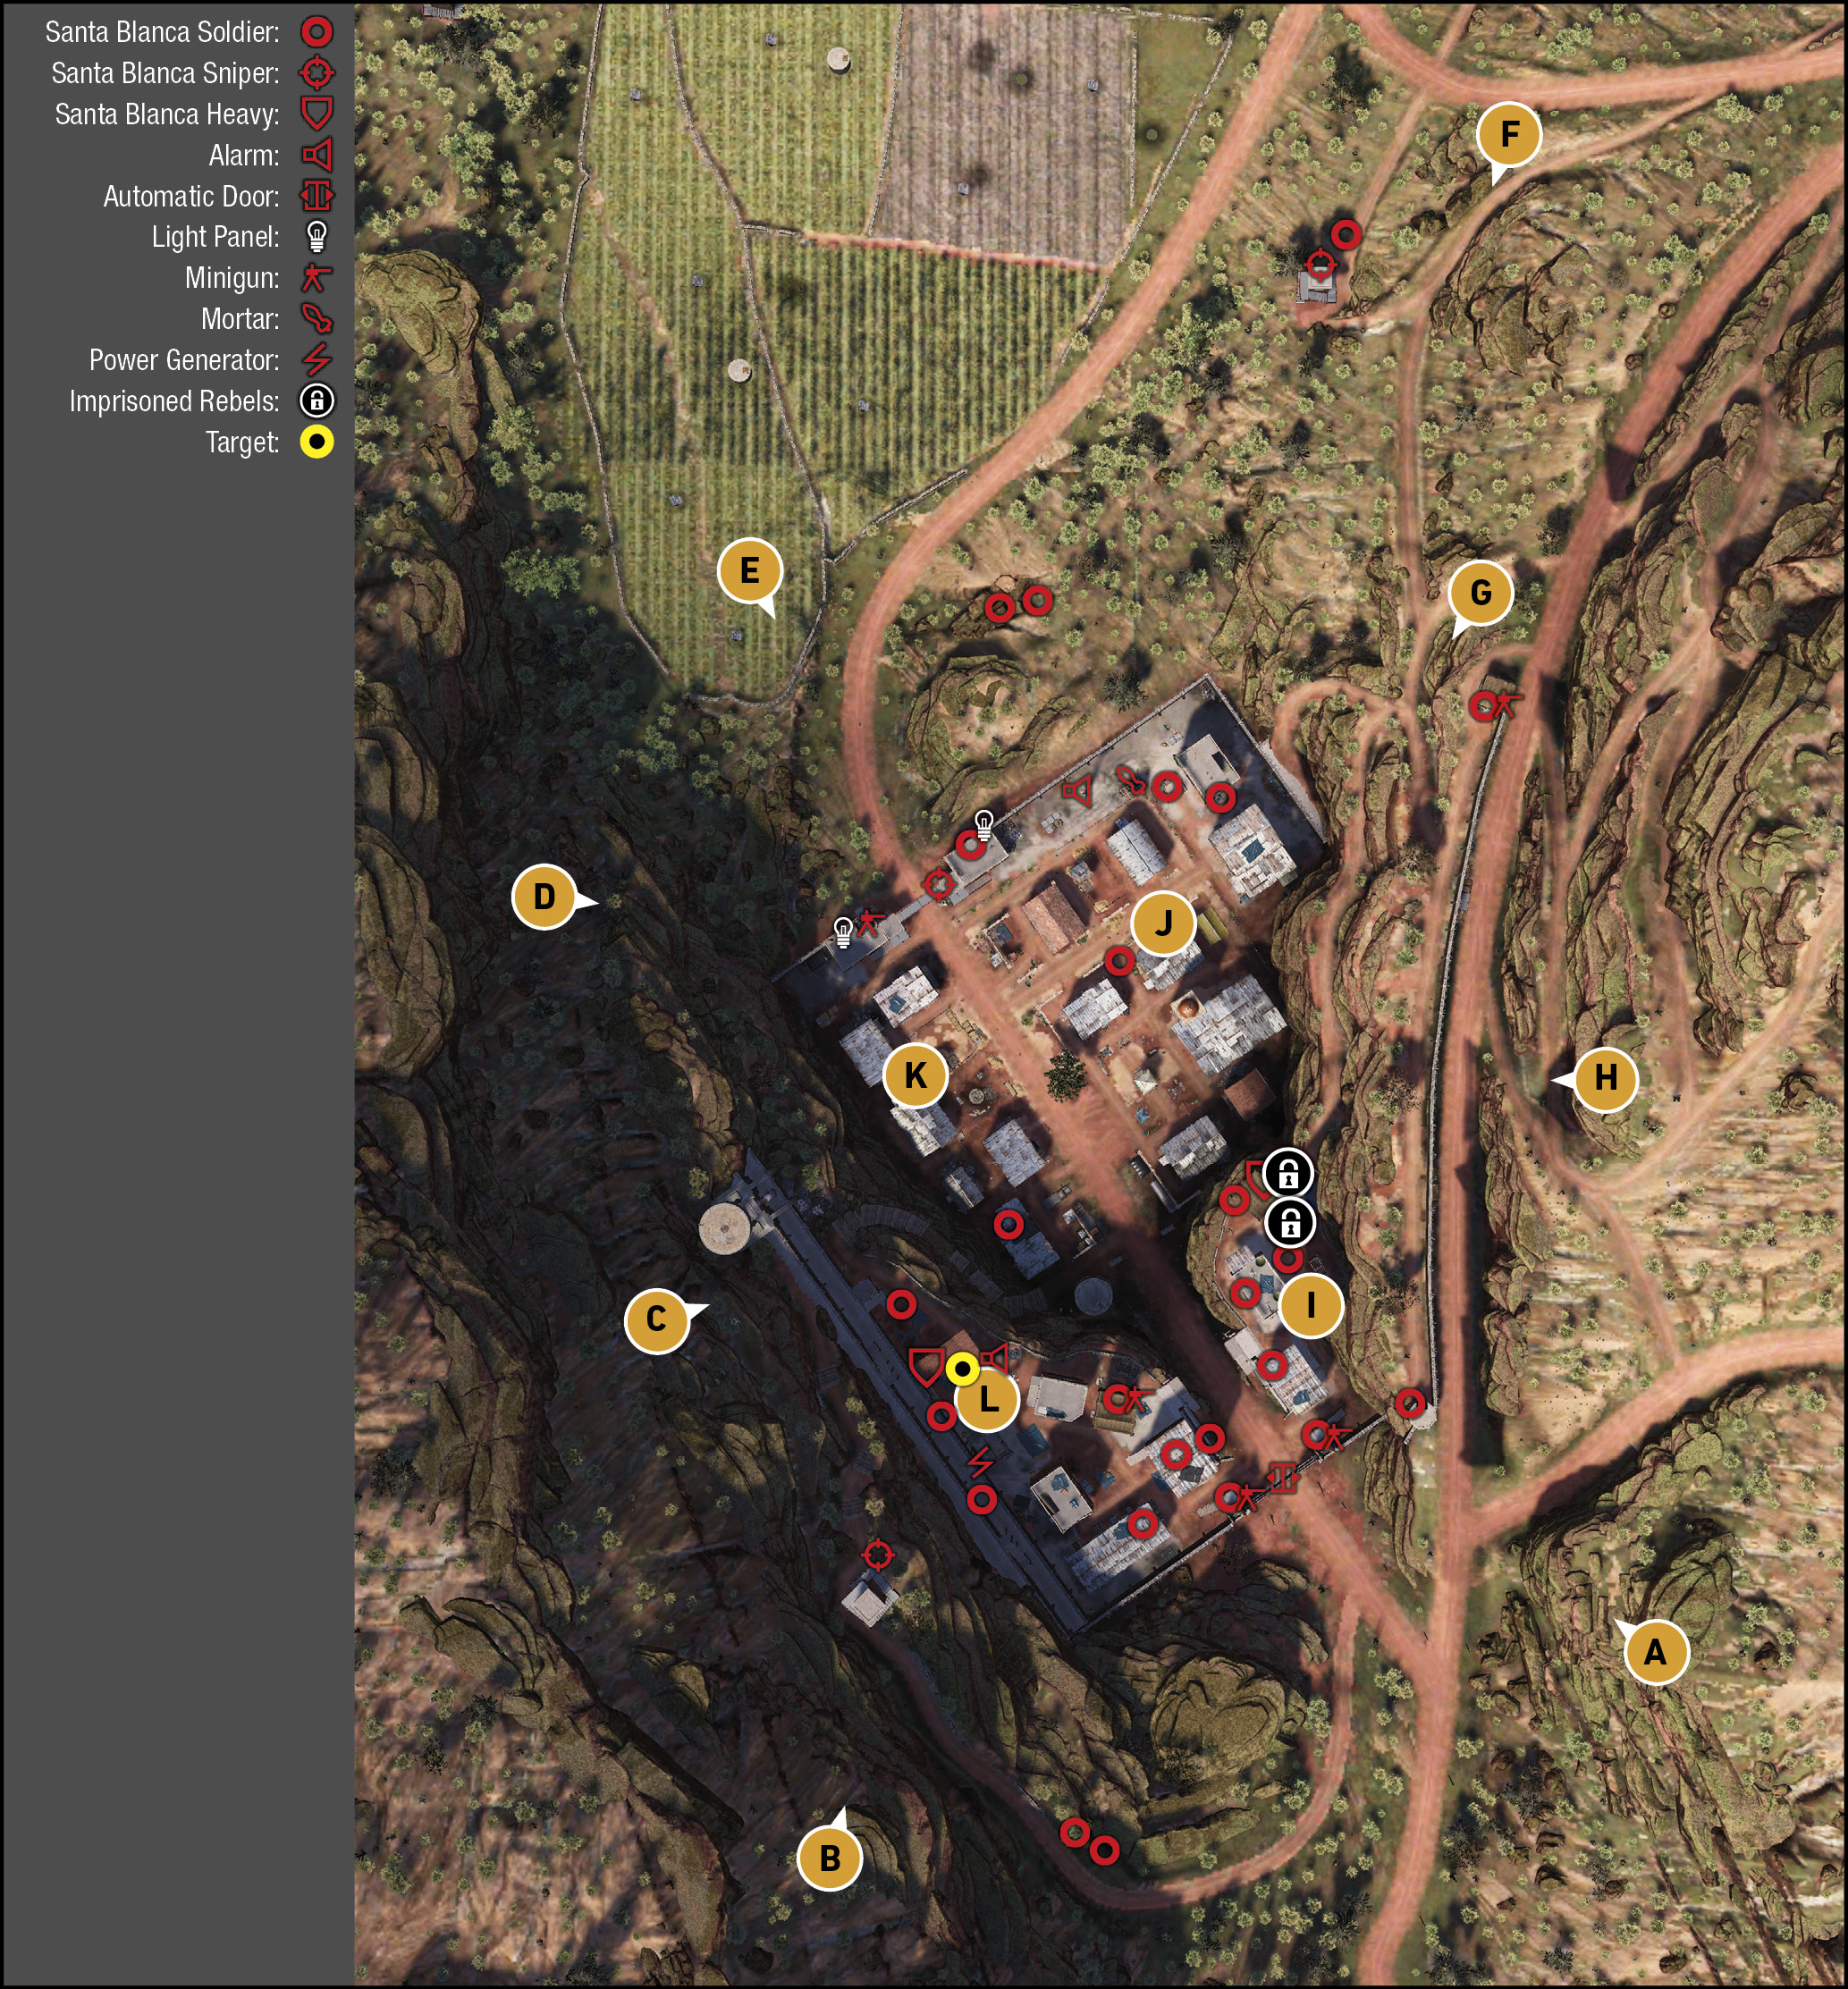
The prison consists of four main sections divided by height. There’s an upper area to the southeast (I) with a comms building and sand bag overlook. To the north (J) is the old village with few foes but a mortar. Bisecting the base is a main road, accessible via the north gate (which has easy access) and the south gate (which requires a cartel-approved vehicle). To the northwest (K) are various shacks and few foes, above which is a minigun nest and the main buildings, including the HQ (L) where the laptop resides. Surrounding this are walls, sniper towers, pillboxes, and cliffs, giving you a variety of options.
Southeast: Cliffs and Main Gate
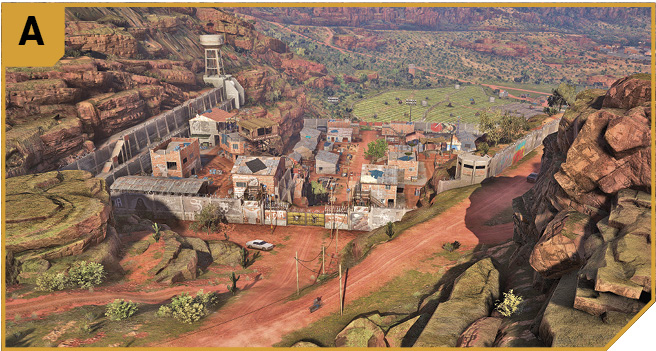
Hike up the rocky bluffs to the southeast of the prison, and you have a commanding view of the area (and a great place to release a recon drone to cover the southern part of the mission area, including the HQ building). You can take out the foes at each side of the main gates (at the minigun nests), though this can be attempted at ground level, too.
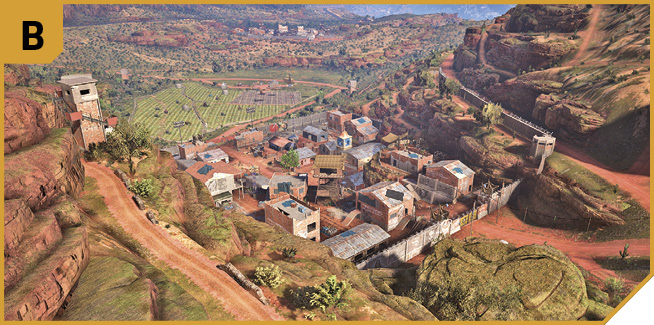
Down at ground level, on the grassy ledge just southeast of the gates, there’s a pill box with a foe inside. Lob a grenade or fire through the slit to silence him (this is best achieved from B using a silenced ranged rifle if stealth is important).
Southwest: Outcrop and Sniper Tower Path
It’s important to beware of two foes patrolling the pathway between the front gates that bends around to the sniper tower on the west cliffs above the base. Avoid or remove them simultaneously, to keep them from raising the alarm.
The outcrops around this area are excellent for recon, especially the area around the target building (L), and the front gates. You can snipe the foe inside the pill box by the east road (near A), but you may need a more head-on position to tag the two minigun nest enemies on either side of the gate.
The gate itself is accessible if you use a cartel-approved vehicle. There’s a car parked in front of the gate that’s suitable, but only use this if you’re throwing caution to the wind, can take the reinforcements (or you’ve shut the base down previously), or want a prolonged firefight.
Alternatively, you can enter the base by removing the sniper at the west tower, dropping down from the pathway to the concrete ledge that runs alongside the HQ building, and cross to the balcony (at the northwest corner of the HQ building) and around to the upper floor of the building where the laptop is located. This can be done with zero kills, and without anyone even noticing you. When the mission concludes, leave via the far south end of the concrete ledge, climbing up and onto the rocks, near the parked car.
Climb farther up the cliffs to the west, above the sniper tower, and you have phenomenal views of the most important buildings in the prison (L), as well as both alarm pole panels. Head up to the top of the tower, and you can even (from 280 meters away) shoot the foe at the mortar, way off at the north end of the prison, enabling you to remove all threats and even cause a slight disturbance away from where your teammates need to go.
West: Water Tower and Cliffs
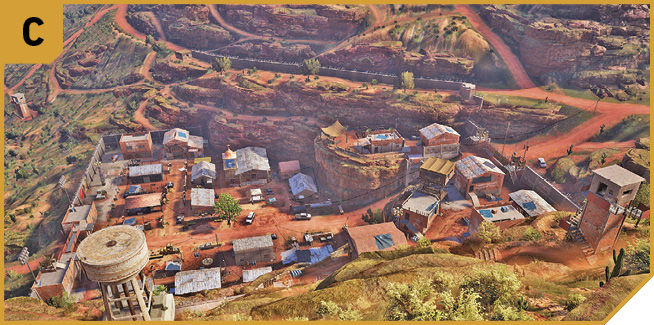
This offers similar views to the area just south of the western sniper tower; head down from the road above (and west of) you and set up camp here. Drop any foes at the north gate near E, and those around J and K, as well as L.
Drop down to the north end of the concrete ledge running along the west perimeter of the prison. Head between the barbed wire, eventually dropping down to the same ground level as the target building. You can continue down to K, or head southeast to L and complete the objective. Obviously, watch for foes, and circumvent the alarms and mortar first.
Northwest: Corner Cliffs
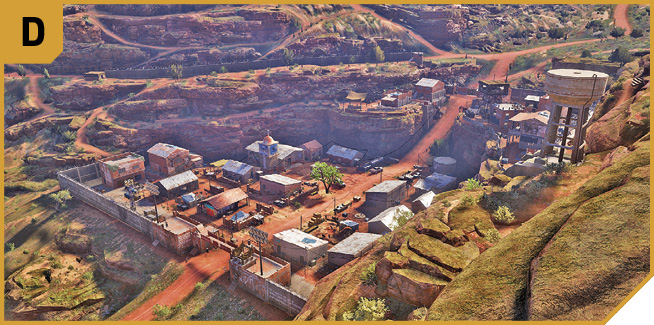
Climb down from the road to the west, or up from Flores Farm to the north, to this sloping cliff face that allows good views of the north end of the prison. Scour the area for enemies to drop (the foes above the north gate, and the west sniper tower enemy, for example), as well as the two light poles and north alarm pole. Though, you need to shoot each individual light panel out, which isn’t recommended; shut the power down at the generator next to the HQ instead, if you’re worried about too much light.
You can also descend and drop down into the western corner of the base, just the other side of the perimeter wall, or move along the rock outcrop to the foundations of the water tower. It’s worth staying as high as possible, so you can see more foes, and aim at them more easily, but you can sneak up to the enemies on the north gate from ground level too, if that’s your bag.
North: North Gate
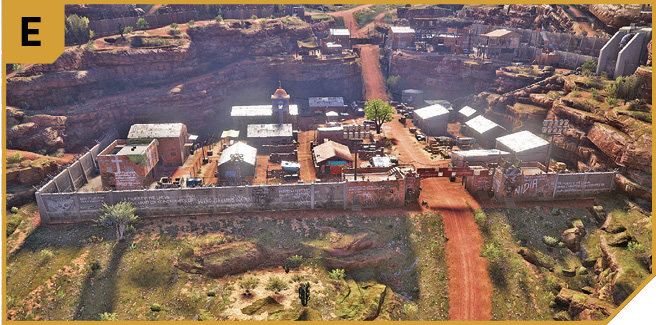
This is more of a bridge than a gate, but it does allow non-cartel vehicles into the camp if you drive in from the north. There are a couple of foes patrolling the area beyond the north perimeter walls, so watch for them, as well as the sniper at F, and the sniper on the gate bridge itself. You can also (just) hit the alarm panel near both light panels in this area, too.
The perimeter wall is too high to breach, and this isn’t a recommended insertion point unless you’re using vehicles, and have bloodshed on your mind.
North: Lone Sniper Tower
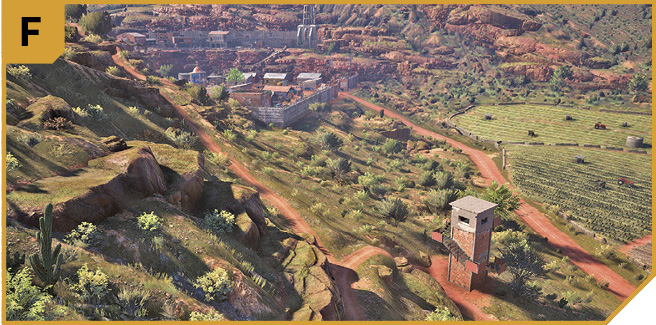
Expect a sniper, and a second infantry foe at this lone sniper tower near the road and paths. These aren’t necessary to defeat unless you’re moving in this part of the outskirts of the base. The tower doesn’t offer enough height, and is too far away to help assist your team, so spend as little time here as possible.
Northeast: Firing Post and Perimeter Wall
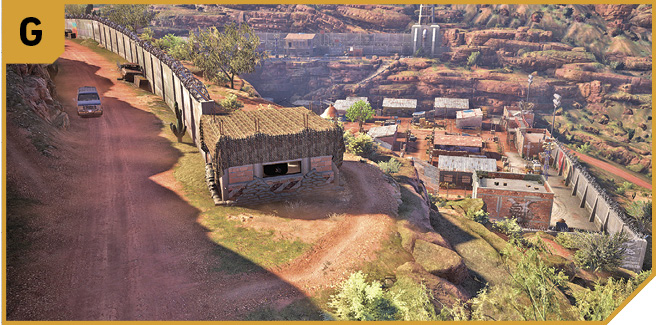
Situated on the main road, you can outfox the minigun operator in this firing post by sneaking under the window slit, and shooting him from the rear entrance (or lob in a grenade if you don’t care about stealth). This structure is at the start of the east perimeter, which allows you to jog (or drive) along the inside of the wall to the pillbox near A (allowing easy takedowns of the foe here). From here, you can drop down into J, or better yet, I, and cause havoc, or distractions.
Don’t forget the views from this perimeter allow you to snipe most of the large threats in this base: the snipers , the foe in the minigun tower, the alarm panels, and the mortar enemy, are all fair game.
East: Road and Cliffs
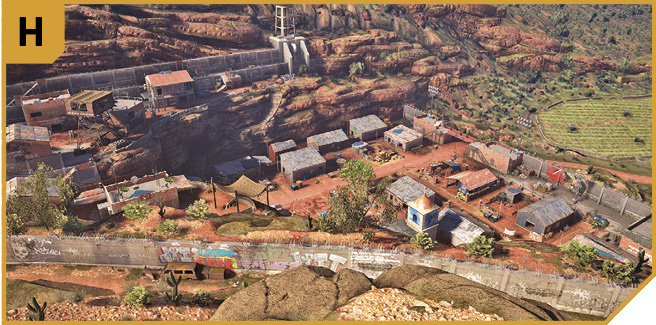
Though the cliffs above the road to the east offer a great view of the prison, you’re a little too far away to offer meaningful sniper help. Instead, locate the graffiti on the exterior concrete wall by the burned-out van. Stand atop the van, and you can cross into the perimeter, and execute long-range plans detailed in “G”.
Interior: Comms Center and Cages
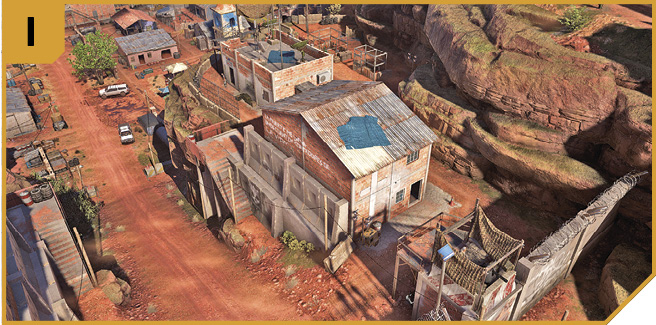
Approach this after entering using a vehicle at A, sneaking in from B or C (difficult, but not impossible), or dropping down from G (recommended). There’s a cluster of foes, three buildings, a sandbag emplacement, and two small cages with rebels to free. You can also reach the minigun operator by the gate (east side) if you want to strangle him to death.
Try to remove all foes and release the rebels if you’re planning to completely obliterate the enemy from this location; this is tactically advantageous as you can use the comms center and sand bags as cover, and fire at foes down at J and K (mainly the north gate enemies) as well as L. It’s relatively secure too; foes can’t really reach you except from the south gate; so lob in projectiles or set traps if you’re here for a while.
Interior: Comms Center and Cages
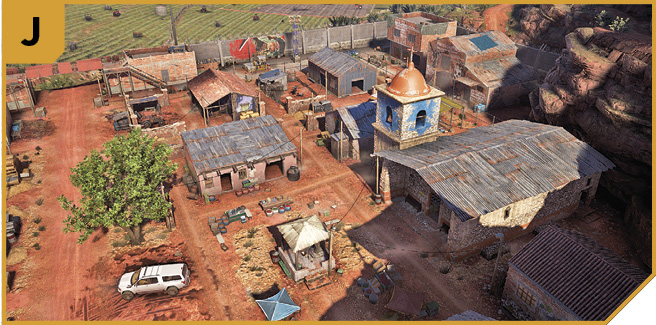
It isn’t particularly helpful to lark around in this area, unless your plan is to coax enemies here with a distraction grenade or flare. There are few foes, and the area is open enough for them to be dropped at range from the previously-discussed locations. Remember to remove the alarm pole panel and mortar foe as a priority. If you’re trying to infiltrate, there’s a gap in the barbed wire in the northeast corner, down the hill from G, allowing you in behind the two buildings adjacent to the mortar. Use this if you favor stealth kills at close range, and you’re here during Co-op. Unfortunately, you can’t get out from inside the prison using the same access point, so find a different way out.
Interior: Coca Sheds
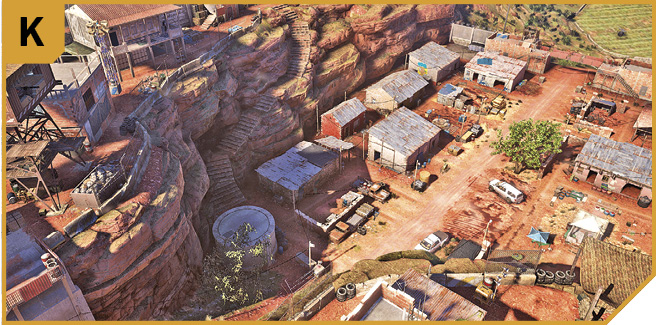
An unnecessary area to scout, unless the battle is going awry and you need a place to hide. It contains six shacks, a few exploding barrels, and very bad positioning if you’re trying to assault the HQ building above you. Head here if you need to hide during an escape, and you’re heading for the north gate.
|
 Target: HQ Building and Minigun Tower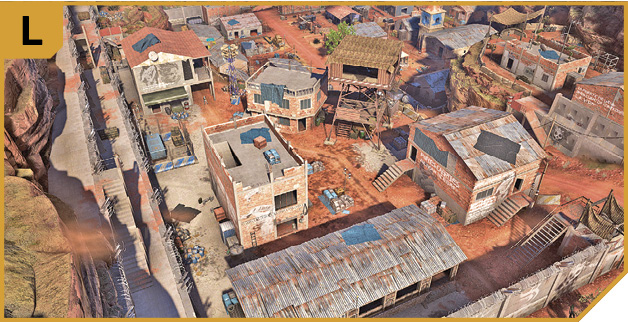

Prison Rosario: Other Tactical Advice
 Infiltrating this base is deceptively easy as long as you take care of the installations that can really affect your team’s chances of victory: the alarms and mortar. Wipe these out as soon as possible, and you only need worry about the foes on the ground, and outside the north perimeter.
For a stealth op with no kills, enter via the concrete ledge at B, over the gap in the barbed wire directly to the HQ balcony, and in to hack the laptop. Sneak out via the south end of the concrete ledge, at about the moment the enemy realizes what’s going on.
For a series of competent takedowns, head to B, C, or D, remove the sniper at the west tower, climb it, and lob a grenade to destroy the generator, or snipe both alarm pole panels as your first plan. Then tag the mortar enemy, and send your team in to I, J, or K while you head down to the HQ building.
Don’t forget you have Rebel Support options to try (Diversion and Guns for Hire can help), as well as rebels you can actually free to help you, at I.
 A classic outflanking maneuver is always a pleasure to attempt with three friends. Have one come in from B, removing the alarm and generator at L, along with the west tower sniper and foes at L. Ghost #2 should head to D and drop enemies at the north gate, and anyone milling about the main lower yard (J and K). Ghost #3 should remove the sniper and foe at F, anyone outside the base in the farm area, then move to G, remove the pillbox foe, and head along the inside of the east perimeter to join Ghost #4, who’s hopped over the graffiti-covered wall at H, and is laying waste to foes at I. Once everyone is dead, complete the mission.
Or, approach in two separate vehicles, one driving in from the north, the other (cartel-approved) vehicle approaching from the south, and cause as much havoc as possible. A more measured Ghost should probably tackle the alarms before this happens, and then complete the objective while the others act as distractions.