
Super Smash Bros. Ultimate Guide Toon Link
Brawler Arsenal
Grounded Attacks
Neutral Attacks
Neutral Attacks
| Move | Damage | Note |
|---|---|---|
|
Neutral attack 1 |
2 |
Hold to auto-combo. |
|
Neutral attack 2 |
2 |
— |
|
Neutral attack 3 |
4 |
Launches away. |
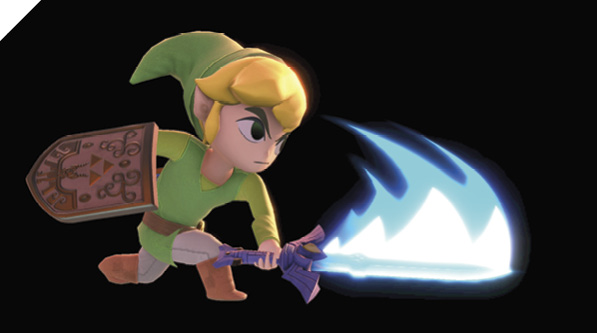
Toon Link delivers a swift three-hit sword-slash combo, beginning with a simple one-two swipe sequence and ending with a forceful thrust that knocks victims back. Neutral attack is one of your primary close-range defensive options. It’s used as an out-of-shield attack and to stuff enemy aggression. The third jab is relatively unsafe if shielded, while the first attack is safe, particularly when used at its max hit range.
At certain percentages, you can use the first two hits of the jab combo as a setup for a grab mix-up. For instance, after hitting with the second neutral attack, hold the control stick down and then immediately, as you’re free to act, press the Grab button to throw out your Hookshot grab. If the enemy is shielding, you earn throw damage.
Dash Attack
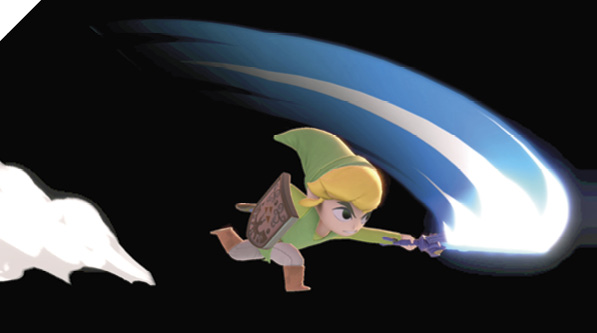
Toon Link pursues his foe with a running overhead slash that sends them diagonally up into the air.
On hit, Toon Link’s dash attack doesn’t lead into a guaranteed combo, but does set you up for a potential dash-in juggle or more Bomb and Boomerang pressure. Dash attack is mainly used to pursue and punish descending enemies.
Defensive Attacks
Tilts
| Move | Damage | Note |
|---|---|---|
|
Side tilt |
9 |
Launches away. |
|
Up tilt |
5 |
Launches directly above. |
|
Down tilt |
7 |
Causes standing hitstun against grounded foes until higher percentages. |
Side Tilt
Toon Link smashes his sword down into the floor. Its wide-angle arc covers the area above his head and his entire front side, knocking back enemies in the vicinity. Side tilt is mainly used to deter and stuff your opponent’s approach. If an opponent is chasing you, stop with a turnaround side tilt to punish them with relative safety.
Up Tilt
Toon Link performs an upward sword-swipe attack above him. The attack arc begins in front and ends behind him. Foes struck by it are popped into the air for potential follow-ups. Up tilt is a relatively safe and quick attack. On hit, you can generally score multiple follow-up up tilts, potentially into an up air attack juggle. You can use it to punish enemy attacks on the ground or as an anti-air, covering your foe’s descent options.
Up tilt should be used to complement your projectile traps. If you can condition the enemy into certain moves, such as dodging and rolling through your projectiles, you can punish with up tilt, leading into higher damage. It’s also one of the best ways to set up a knockout at higher percentages.
Down Tilt
From a kneeling position, Toon Link sweeps at the floor in front of him with his sword, potentially tripping his foes. Like most down tilt sweep attacks, Toon Link’s down tilt is safe on shield if spaced correctly and is good for dealing shield damage while minimizing your risk. You can use it to bait out retaliatory attacks from foes after. For example, if you poke with a max-range down tilt and your opponent commits to an out-of-shield option, you can bait out their attack and punish with your own side or down tilt.
Down tilt doesn’t pop enemies up for a combo or anything guaranteed, but it does knock back at higher percentages and can potentially trip, allowing you to follow up with a tech punish.
Smashes
| Move | Damage | Note |
|---|---|---|
|
14 |
Launches away. |
|
|
Up smash |
13 |
Launches directly above. |
|
Down smash |
12 front, 13 back |
Launches away. Double-sided attack. Rear swipe deals more damage. |
Side Smash
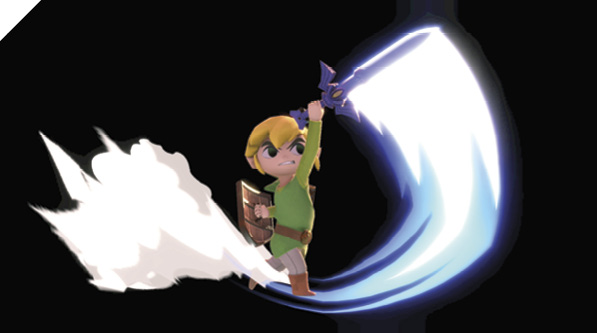
Toon Link leans back and puts his all into a mighty uppercut slash, devastating foes in front of him and launching them away. Side smash is a slow uppercut attack with an impressive hitbox, but is unsafe if shielded. It should only be used to punish ultra-laggy attacks, or if you can predict your opponent’s movement or attack.
Up Smash
Letting out a battle cry, Toon Link performs a powerful slash into the air that blasts enemies it hits high into the sky. Up smash can hit enemies behind you, but it’s largely unsafe to use without heavy advantage. In most cases where you’d use up smash, up tilt is more effective and less risky.
Down Smash
Toon Link crouches down and clears out the area around him with a sweeping slash. Down smash’s rear hitbox makes it decent for punishing ledge rolls and other enemy moves that leave them behind you. It has a reasonably quick start-up, but is easily punishable on shield and on whiff.
Grabs
| Move | Damage | Note |
|---|---|---|
|
1 |
— |
|
|
Front throw |
7 |
Forward throw, high knock-away. |
|
Back throw |
7 |
Backward throw, high knock-away. |
|
Up throw |
7 |
|
|
Down throw |
7 |
Launches foe behind, up and away. |
Grabs
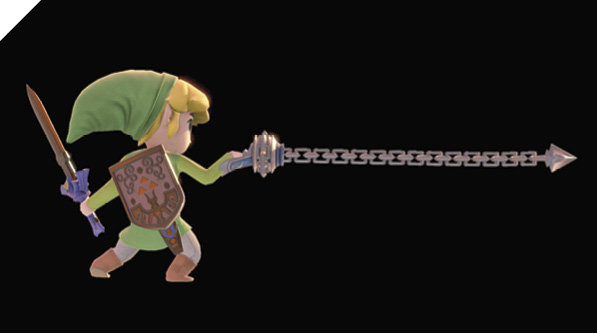
While grounded, Toon Link fires his ranged Hookshot, ensnaring his opponent. In midair, Toon Link’s Hookshot knocks back and damages foes. While airborne and near a ledge, Toon Link’s Hookshot acts as a grappling hook, allowing him to grab on to the ledge.
Up throw can lead into trap and juggle mix-up situations where you can bait and punish air dodges and double jumps with up air attack. Forward and back throws are used to knock out high-percentage enemies near ledges, or to set up your Bomb throw and Boomerang pressure.
Aerial Attacks
Aerials
| Move | Damage | Note |
|---|---|---|
|
10 |
Double-sided attack, low knockback. |
|
|
Forward air attack |
8.5 |
Launches away. Deals more damage with front slash. |
|
Back air attack |
8 |
Low knockback. |
|
Up air attack |
11 |
Launches directly above. Persistent hitbox. |
|
Down air attack |
16 |
Stall-then-fall attack. Persistent hitbox until landing. First half of active window causes meteor smash. |
Neutral Air Attack
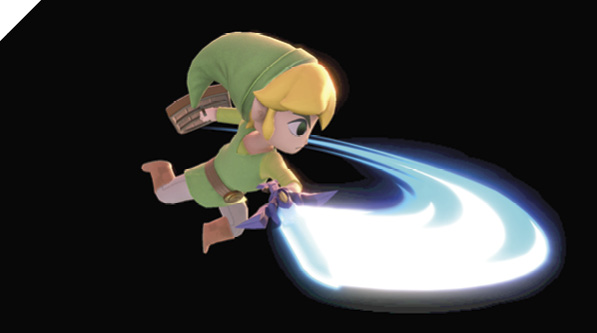
In midair, Toon Link delivers an aerial clear-out attack, swiftly swiping in front, followed by a rear slash. Neutral air attack has very low landing lag and a quick start-up speed. However, it can be unsafe if used at certain altitudes, as it leaves you more vulnerable as you perform the attack high in the air. It’s best used defensively to cover both of your sides, or as an out-of-shield hop attack.
Forward Air Attack
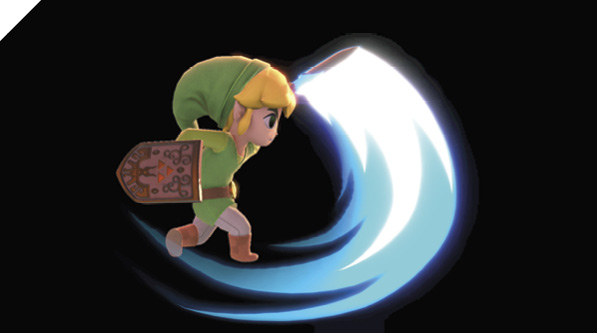
While airborne, Toon Link performs a heavy upward sword swing that knocks away foes in front of him. Although not particularly quick on start-up, forward air attack is your safest air-to-air option since it has little air lag. You can use it to poke at enemy shields as long as you space and time it well (for example, as a short hop into pull-back attack). Its low lag allows you to short-hop forward air and immediately double-jump before you land. However, it has more landing lag than neutral air, so input neutral air attack before landing to avoid this.
Back Air Attack
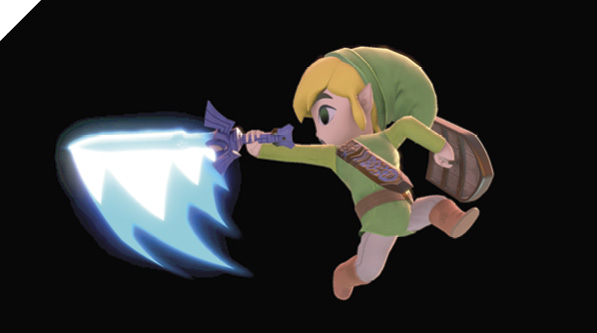
Toon Link spins around in midair and slashes at the area behind him, knocking enemies higher. Back air attack has considerably less landing lag than his other aerial attacks, making it an excellent low-altitude air-to-ground poke against grounded foes. It’s also a superb air-to-air attack with knockout potential and should be used for offstage combos against recovering enemies.
You can combo from deep back air attacks at certain percentages (deep back air into buffered short hop forward air attack, for instance).
Up Air Attack
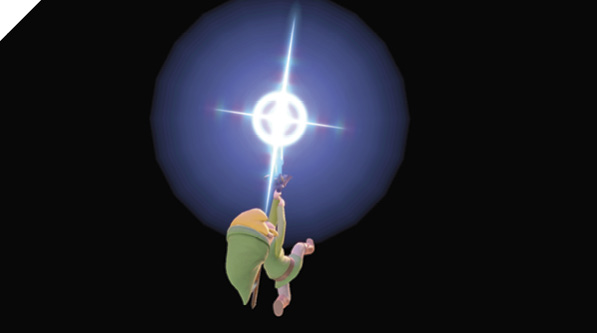
Toon Link performs his unique up thrust attack that launches foes into the air. Since Toon Link has a high jump and double jump, up air is superb for punishing enemy double jumps—it beats out most attacks and stays out long enough to beat air dodges. If you can bait your foe into a double jump during their descent, you can chase them up into the air and catch them with your upward thrust.
Short hop up air attacks can bait out double jumps, forcing your enemy into a disadvantaged landing as their aerial mobility becomes limited, allowing you to punish them with up tilt and other anti-air attacks.
Down Air Attack
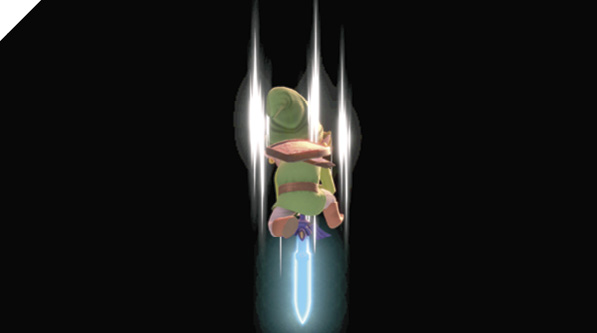
While airborne, Toon Link boosts even higher before plummeting with a sword plunge that meteor smashes enemies below him. Upon landing, Toon Link’s down air attack has a slight “windbox” (a non-damaging hitbox with a pushback effect). However, it’s still a largely unsafe attack to whiff and to have shielded, so reserve its use for specific situations, such as for spiking enemies to their deaths as they’re coming in from offstage.
Unlike the other Links, Toon Link doesn’t bounce off enemies when connecting with down air, but after it hits, you can begin adjusting your trajectory instead of plummeting directly downward.
Special Moves
Special Moves
| Move | Damage | Note |
|---|---|---|
|
Neutral special |
4-12 at max charge |
Charging increases damage and range. |
|
Side special |
8 normal, 9.6 smash-style |
Can be angled up or down with control input. Smash-style input to increase damage and range. |
|
Up special |
Ground 1x9, 3/Airborne: 4, 2x3, 4 |
Air Spin Attack launches Link vertically, with different properties. |
|
Down special |
4.2+(1.5-2.5) |
Generates item. Detonates after four seconds or upon contacting an enemy. |
Neutral Special: Hero’s Bow
Toon Link draws and fires his bow, with the arrow traveling farther and dealing increased damage the longer the bow is drawn. Uncharged Hero’s Bow is useful for poking at enemies from midrange, potentially racking up incremental damage or forcing them to shield, from which you can take advantage with a follow-up melee engagement. With good aim, you can use your arrows to harass offstage foes who are trying to recover.
Toon Link can fire multiple air arrows in a single jump by immediately firing a quick, uncharged one on the way up, then firing another on the way down.
When knocking down an opponent who’s missed their tech get-up input, you can usually get a free arrow shot in on them.
Special-reversing is an important technique to master and makes your Hero’s Bow much more useful, allowing you to reverse your direction at a moment’s notice. For example, while dashing away from an opponent, you can short-hop away, then input neutral special and immediately flick the stick in the opposite direction, firing the arrow backward.
Side Special: Boomerang
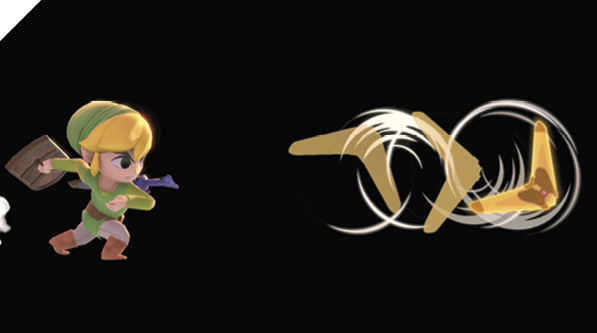
Toon Link chucks a Boomerang that knocks back foes and can potentially hit enemies during its return flight. You can increase the damage and range on your Boomerang throw by performing it with a smash-style flick+Special input. While this has its advantages, it also has a subtle disadvantage in that it takes longer for you to receive and throw another Boomerang. It can also be thrown upward or downward by holding the control stick in the direction you want it to go before Link releases it. You can use this effect to deter and defend against the enemy’s short hops and aerial approaches. Boomerang deals extra damage if it connects immediately after it’s released. However, at this range, it can be punished if shielded.
The Boomerang is one of Toon Link’s most important attacks, and its use should be prioritized when you’re given the space to throw it out. Boomerangs cover large portions of space and remain active for a long time, affording you powerful zone control. For instance, throw out a Boomerang at long range and follow it up, paying attention to your opponent’s reaction. If they dodge, you can go for a punish; or if they jump, you can go for an air-to-air attack. If they shield, you can back up to create more distance for another Boomerang or Bomb attack.
If your opponent avoids the Boomerang’s initial forward flight path, you can use its return flight to set up pressure, such as linking your neutral attacks after the enemy is struck by the Boomerang. This functionality can potentially break an enemy’s combos after they’ve hit you, as the Boomerang is still able to knock the opponent away after you’ve been struck.
Like Hero’s Bow, you can special-reverse it to modify your jump trajectory, although it may be more difficult to execute than a Hero’s Bow reversal.
Up Special: Spin Attack
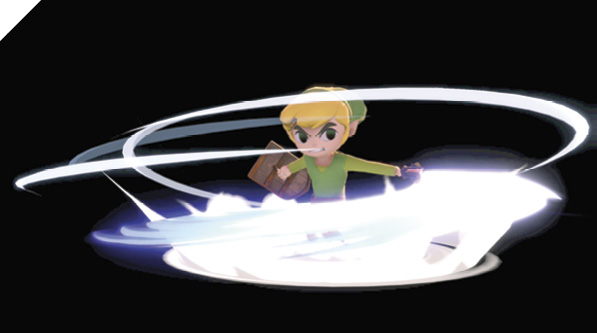
While grounded, Toon Link performs a multi-hit spinning-attack combo sequence that pops his victim into the air for a potential follow-up. While airborne, Toon Link propels himself higher into the air while delivering a spinning-sword combo.
Spin Attack can be used defensively, covering both sides. Its relatively fast start-up speed makes it a decent out-of-shield option, but is unsafe if shielded. Thanks to its hitbox coverage, you can use it to punish ledge rolls and air dodges, but this requires some prediction.
Air Spin Attack is used as a recovery tool that can punish enemies trying to force you offstage. While falling, you can try to bait out their air-to-air and then deliver an attack while recovering back onto a ledge at the same time
Down Special: Bomb
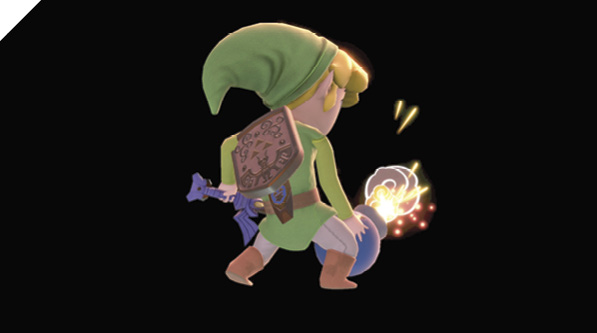
Toon Link pulls out a throwable Bomb that detonates after its five-second fuse timer ends, or if he successfully hits an enemy with it. Bombs also detonate after taking damage, or if they’re ignited by fire-based attacks. They can nullify powerful projectiles as they’re detonated on collision.
Bombs bounce off enemy shields, so if you advance with a dashing Bomb throw, you can potentially retrieve it with an aerial Grab input and immediately throw the Bomb again. This opens up advanced situational attack sequences as long as you’re sharp and can execute the moves fast enough.
Because of its knock-up duration on hit, along with your frame advantage (since the Bomb throw animation is so short), Bombs are the best way to start combos. There’s a plethora of ways to start Bomb combos. A simple one is to pull out a Bomb, jump above an enemy, and throw it downward. As the Bomb knocks the foe up, you can combo with up tilt into up air (depending on enemy damage percentage).
As Bombs are core to Toon Link’s gameplay, learning how to use them in almost every situation is crucial. They can be applied in almost every combat scenario, such as dropping them onto ledge-hanging enemies, throwing them at offstage recovering foes, and even as anti-air against airborne opponents. Simply holding on to a Bomb can have an impact, as it can cause your foes to behave differently since they have to respect and fear your Bomb-throw potential.
There are several advanced techniques you can perform to optimize your Bomb-throwing game, potentially making it the most difficult aspect to master as Toon Link because of the muscle memory and mechanical skill required. For instance, you can pull a Bomb, throw it upward with up+Attack, buffer into a short hop into another immediate Bomb pull, throw that Bomb forward with neutral attack, then catch your descending Bomb to either save or throw for a double Bomb sequence.
Final Smash: Triforce Slash
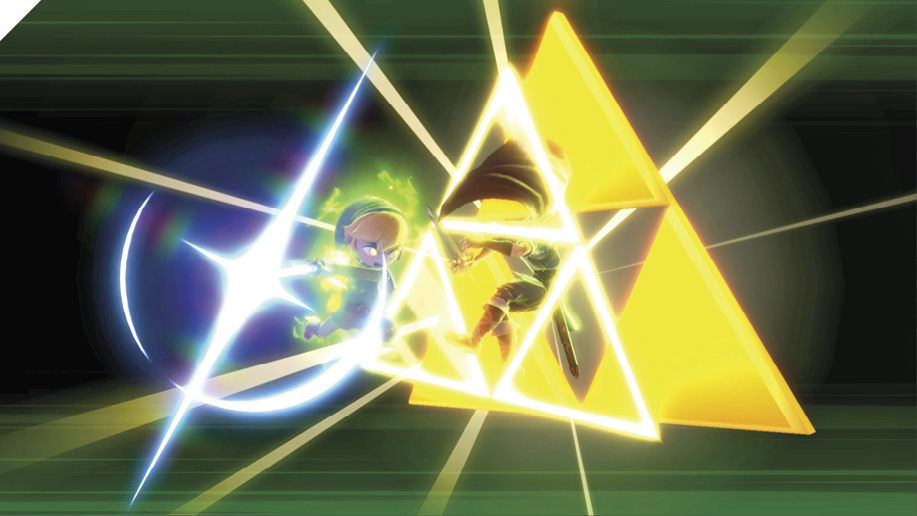
Toon Link charges forward and traps his foes in the Triforce for his Final Smash. Then Toon Link strikes at foes repeatedly and launches them with force. Time the initial attack well—missing that first slash leaves Toon Link hanging.