
Super Smash Bros. Ultimate Guide Palutena
Brawler Arsenal
Grounded Attacks
Neutral Attacks
Neutral Attacks
| Move | Damage | Note |
|---|---|---|
|
Neutral attack 1 |
3 |
— |
|
Neutral attack 2 |
0.6xN, 3.5 |
Launches away. Repeat Attack input to loop. |
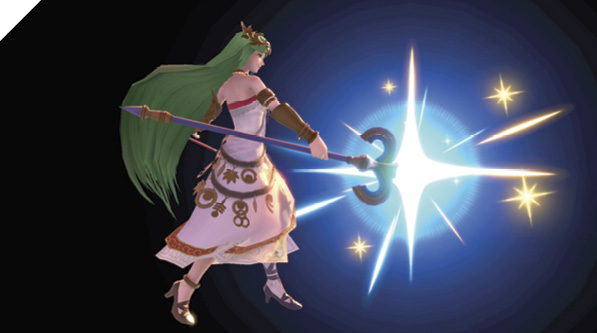
Palutena extends her staff in front of her, activating bursts of light emanating from its orb. She ends the attack with a launching staff swing. Palutena’s neutral attack combo is one of the best in the business for dishing out damage reliably. While the first attack is lackluster in speed and range, the follow-up light-burst attack boasts impressive reach and deals solid damage on anyone hit by it.
Applying her neutral attack effectively can seem unwieldy since you usually whiff the first attack in order to get the light bursts out in front of you. Thanks to its knockback, you can use neutral attack 2 to space and poke, deterring enemies and creating distance.
Neutral attack isn’t a great out-of-shield option, but it’s an alternative to shield-grabbing when you’re out of range to do so.
Dash Attack
| Move | Damage | Note |
|---|---|---|
|
9 |
Launches up and away at a slight angle. Nullifies incoming attacks with “shieldbox.” Early hit deals more damage. |
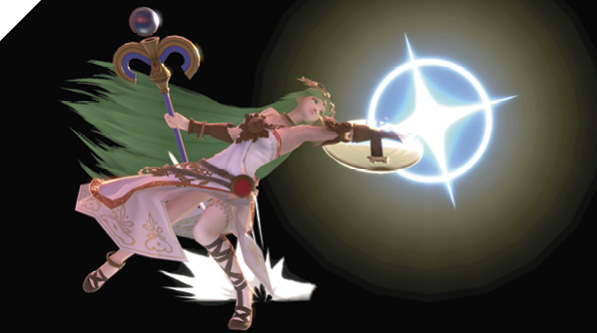
While dashing, Palutena quickly extends her shield in front of her, blowing past most enemy attacks and launching them into the air.
Palutena’s dash attack is one of her best tools in her move set. It hits very quickly, especially for a dash attack, and it has a unique move-decimating property that makes her uncontestable and uninterruptible to most other attacks. On hit, this attack launches the opponent up into the air for potential mix-ups and combos.
Since her dash attack is so effective for catching descending enemies at a distance, you can begin incorporating dashing grab in these situations, as your opponents may be conditioned to air-dodge or shield upon landing. Essentially, any opportunity that allows for a good dash attack is also an opportunity you can go for a grab.
Defensive Attacks
Tilts
| Move | Damage | Note |
|---|---|---|
|
Side tilt |
6, 7 |
Launches away, high knockback. |
|
Up tilt |
1.4x5, 2.5 |
Initial hits pop up into final hit that launches up for potential follow-up. |
|
Down tilt |
8.5 |
Knocks away. |
Side Tilt
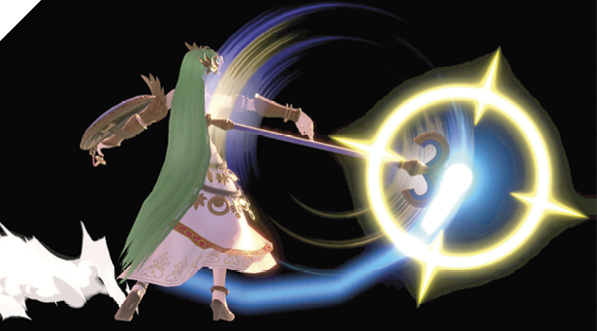
Palutena throws out her staff in front of her, causing two consecutive strikes as it magically rotates in place. Enemies struck by the staff are knocked away.
Palutena’s side tilt is slow and generally difficult to use in the neutral game, but punishes on-the-spot dodges and certain ledge recoveries thanks to its persistent hitbox.
Up Tilt
Palutena levitates her staff into the air above her, spinning it in place and striking foes multiple times before sending them vertically into the air. Up tilt can be used to punish on-the-spot dodges and makes for a decent ledge-guarding tool that can punish ledge jumps and other low-altitude recovery options.
Down Tilt
Palutena leans down and flings her spinning staff low to the ground before her, hurling away nearby enemies.
Palutena’s down tilt is considerably slow to start, but has a sizable active window that can be used to punish rolls and dodges. However, like her other tilt attacks, it’s not an optimal move to use in the neutral game since it leaves her vulnerable.
Smashes
| Move | Damage | Note |
|---|---|---|
|
16 |
Launches away, high knockback. Has wind effect that pushes enemies away. Deals more damage with inner wing. |
|
|
Up smash |
16 |
Launches directly above. Has remarkably tall hitbox. |
|
Down smash |
15 |
Launches up and away, high knockback. Double-sided attack. Has wind effect that pushes enemies away. Deals more damage with inner wing. |
Side Smash
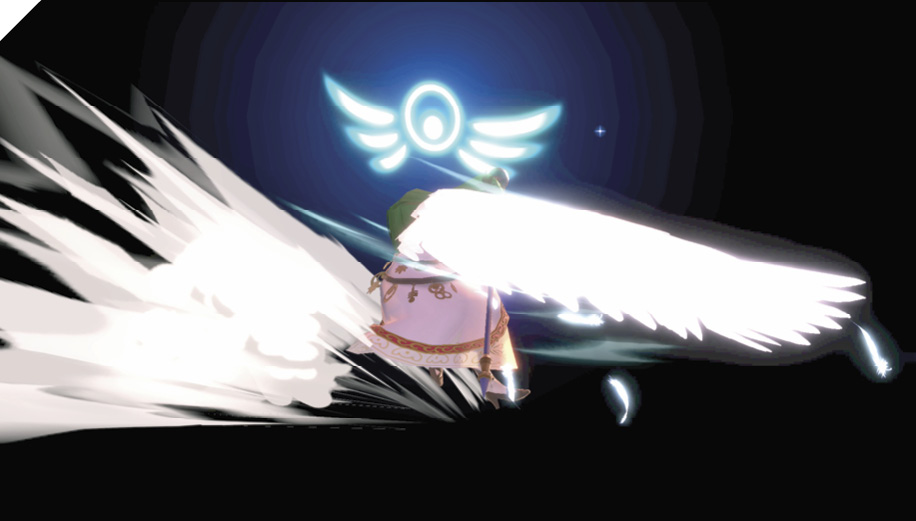
Palutena unleashes a horizontal wing attack. Enemies within range of her wings are knocked away, while those just beyond them are blown back by the wind-force generated. While Palutena’s side smash attacks aren’t great attacks to throw out in the neutral game, they have unique wind effects that shove nearby foes away (without dealing damage). This wind effect’s hitboxes are known as “windboxes,” since they’re separate hitboxes that extend farther than her normal wing hitboxes.
These windboxes are the main reasons to use side smash. With a proper edge-guarding setup and preparation, you can use these highly persistent windboxes to blow recovering enemies out during their ledge-recovery options, forcing them to grab the ledge, or potentially knocking them out if they make a mistake during recovery.
Up Smash
Palutena raises her staff into the air, summoning a massive pillar of light in front of her that extends high into the sky. The beam of light launches foes it contacts. This giant column can be used to hit enemies at jump height, but is also effective for punishing air dodges. Thanks to its long active window, up smash is great for edge-guarding, as it covers most of the possible ledge-recovery options, including hitting enemy fingers just when they try to grab a ledge.
Naturally, up smash can be used to attack foes on higher platforms.
Down Smash
Palutena slams her angel wings downward by her sides, clearing out the area in front and behind. Like her side smash, foes just past her wing attack range are blown back by the gales she produces.
The wind effect of this attack is a bit weaker, pushing opponents back with less force than side smash. The attack on down smash covers both sides, so it can be used to punish rolls or hit enemies landing behind you.
Grabs
| Move | Damage | Note |
|---|---|---|
|
1.3 |
— |
|
|
Front throw |
9 |
Forward throw. |
|
Back throw |
10 |
Backward throw. |
|
Up throw |
8 |
Launches foe up for potential follow-up combo attack. |
|
Down throw |
5 |
Launches up and away for potential follow-up combo attack. |
Grabs
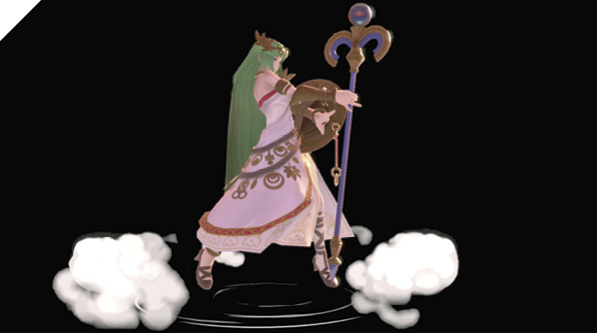
Palutena’s grab reaches farther than most grabs in Super Smash Bros. Ultimate, and isn’t too bad for speed either. It’s not among the fastest, but it’s faster than heavyweight and tether grabs. Its reach extends considerably far in front of her, well beyond the average fighter’s grab range. This makes her grab an excellent complementary attack to her dash attack. Essentially, you can force 50/50 decisions onto your opponent by mixing up your dash attack with your dash grab.
Palutena’s up and down throws lead into the most potential damage. Against foes around 30% damage, up throw into up air attack and down throw into forward air attack are guaranteed combos. Her front and back throws boast high knockback distance, ideal for finishing off opponents near the lateral blast zones.
Aerial Attacks
Aerials
| Move | Damage | Note |
|---|---|---|
|
1.4x6, 5.1 |
First six hits of attack drag enemy around; final hit launches away. Can drag with fast fall to set up mix-up opportunity as foe lands (before final hit of attack). |
|
|
Forward air attack |
10 |
Knocks back. |
|
Back air attack |
14 |
Knocks back. As attack extends, nullifies incoming attacks with Palutena’s “shieldbox.” |
|
Up air attack |
1x5, 5 |
First five hits pop up and drag enemy. Last hit launches directly above. |
|
Down air attack |
11 |
Direct hit causes meteor smash. |
Neutral Air Attack
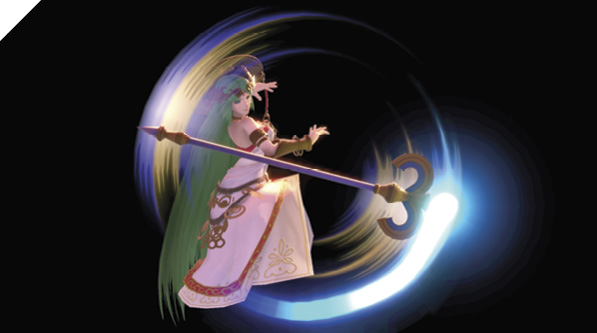
Palutena twirls her staff around her in midair, striking enemies up to six times, with the final hit launching up foes at an angle. Neutral air attack has several applications. In combos, you can start with neutral air attack and follow up with another neutral air attack (or any of her other aerial attacks). However, it has considerable landing lag from a short hop, so it’s not a move that should be thrown out too often in the neutral game.
It can be used to get back onto a stage if you’re coming from beneath. Drop from a ledge, double-jump, and force the enemy to shield your neutral air attack while crossing them up. It makes for a solid edge-guarding attack if you meet airborne opponents far off a ledge with your multi-strike hitboxes, potentially knocking them out.
Forward Air Attack
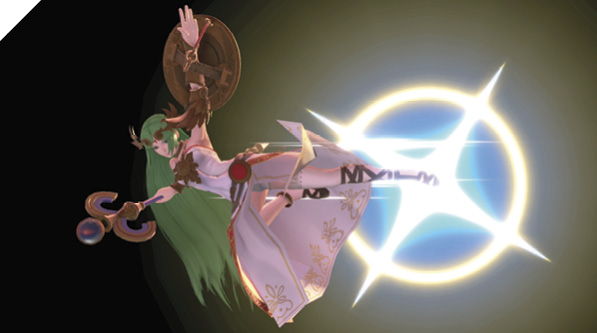
Palutena performs a jumping side kick infused with a light aura, popping up foes hit by its radiance. Forward air attack is an excellent combo-initiator. Off deep forward air, you can follow up with several options. Forward air into dash attack or another forward air are possibilities.
With well-timed low-altitude forward air attacks, you can pressure a strong offense as long as you time the attack accurately (its active window is relatively short). Short hop fast fall forward air is one of your best attack sequences.
Back Air Attack
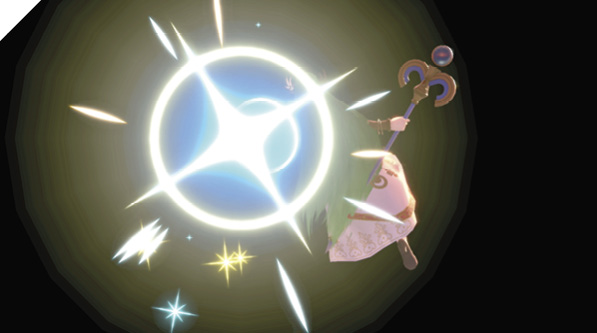
In midair, Palutena uses her shield to bash foes behind her. Like dash attack, Palutena’s back air attack is uninterruptible when colliding with opposing attacks. This is your primary edge-guarding attack, so you should be deliberately standing with your back facing the ledge whenever you force an opponent into ledge-recovery mode. With timing, you can punish most ledge-hanging options with back air. Short-hop in place, and back air is an effective ledge-pressuring tool. Also use this tool when meeting enemies far off a ledge to knock them out in air-to-air combat.
Up Air Attack

Palutena raises her staff into the air, emitting a brilliant aura that ensnares foes with multiple hits before launching them vertically into the sky. This is one of your main killing moves while in the advantage state. While it has considerable end lag, preventing you from using it and an additional aerial attack from a jump, you can use double-jumped up air attacks to alleviate some of this lag.
In certain scenarios, you can use up air to punish enemies guarding an edge by connecting with the tip of your staff from beneath the platform.
Down Air Attack
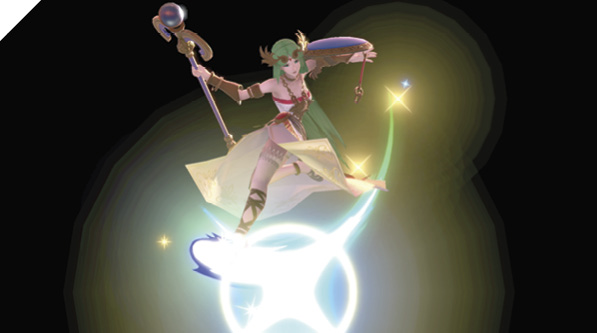
While airborne, Palutena delivers a downward light-imbued kick that spikes foes into the ground. Down air attack is relatively fast, but is active briefly, with only the first frame having a meteor smash effect. Against grounded foes, down air causes an add knockback effect, as it launches the enemy behind you. This sets up potential follow-ups, but it can be punished if shielded.
Special Moves
Special Moves
| Move | Damage | Note |
|---|---|---|
|
Neutral special |
3.5x3 |
Projectile angle is determined by enemy position upon Special button input (their position is “snapshotted”). |
|
Side special |
1.5x5, 5.5 |
Two variants: one performed with control stick flick and one without. Flicking the stick extends explosion hitbox distance. |
|
Up special |
— |
Intangible during Warp effect. |
|
Down special |
Varies |
Counterattack damage is based on damage of parried attack. Can reflect projectiles. |
Neutral Special: Autoreticle
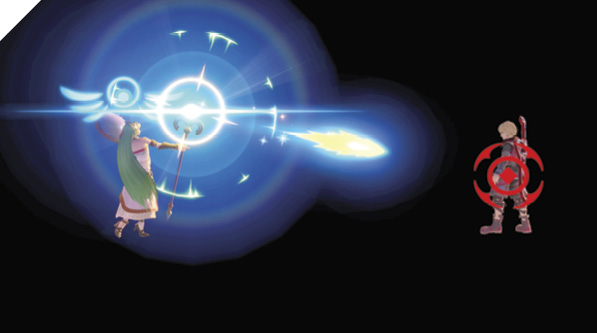
Palutena fires energy blasts directly at a nearby foe. The angle of the energy blasts is determined by the enemy’s current position immediately upon performing the move (as soon as you press neutral special). In other words, if you hit neutral special when a foe begins to fast-fall, your energy blasts fire into the air while the enemy completely avoids them.
While it’s an important part of your toolkit, this projectile-barrage attack should be used sparingly in your neutral game. If you’re predictable with it, you can either be punished or forced to sacrifice space. Use it harass opponents who have limited mobility or have used their double jump pre-emptively. Otherwise, it can be used to force an approach.
Autoreticle synergizes well with Explosive Flame. If you connect with a close Explosive Flame (non-flick version), you can usually combo into Autoreticle. Or from long range, if you can force your opponent to reposition, a follow-up Autoreticle can deter their direct approach.
Side Special: Explosive Flame
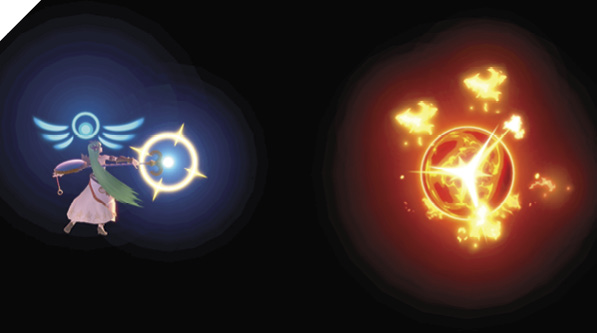
Palutena sets off an expanding flame that explodes a set distance in front of her. Unlike conventional projectiles, Palutena’s Explosive Flame always detonates at its location, even behind foes standing in front of you.
Explosive Flame is your main midrange harassment and zone-control tool. Against foes with limited mobility options, it can be incredibly difficult to deal with due to its large area of effect, forcing enemies to reposition themselves or take shield damage.
Non-flick Explosive Flame (close-range version) can be used as a combo-starter since it launches enemies above you, perfectly setting up a follow-up hop forward air combo at low percentages. Alternatively, you can follow up with Autoreticle.
Up Special: Warp

Palutena teleports in any direction, becoming invulnerable during her brief disappearance window. Warp is a remarkable recovery escape tool. However, its landing lag from the air can make it punishable, especially if your opponent can predict your teleport direction. If you Warp toward the ground from the air at an angle, it causes a sliding effect, followed by considerable landing lag.
You can mitigate this with a ledge-canceling technique. Whenever you land by a ledge and slide off, you’re allowed to immediately act (canceling the sliding landing lag). For instance, if you angle your teleport and aim toward the ledge of a platform, you can immediately double-jump out of the falling-slide animation. Alternatively, you can cancel into another teleport. Essentially, you’re free to act in an airborne state. Learning how to maneuver certain stages with this technique goes a long way, so make sure to practice ledge-canceling and eliminating your Warp recovery on stages like Battlefield!
Down Special: Counter/Reflect Barrier
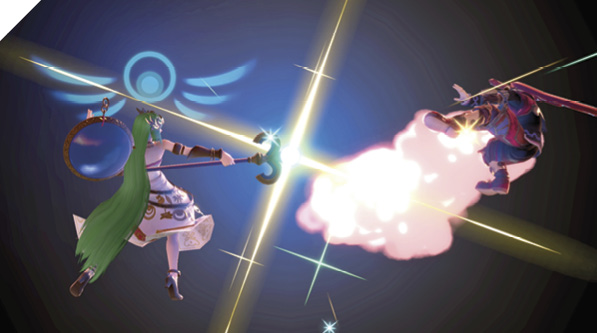
Palutena doubles as a counterattack parry and projectile reflector. On a successful attack parry, she counterattacks with a radiant light blast, dealing damage based on the damage of the enemy’s parried attack.
Thanks to the added reflector property of Palutena’s old Reflect Barrier, Counter can be used in multiple situations. While you generally don’t use down special to parry attacks (since it’s a high-risk maneuver for a moderate reward in damage), being able to reflect projectiles at the same time is a huge boon.
Final Smash: Black Hole Laser
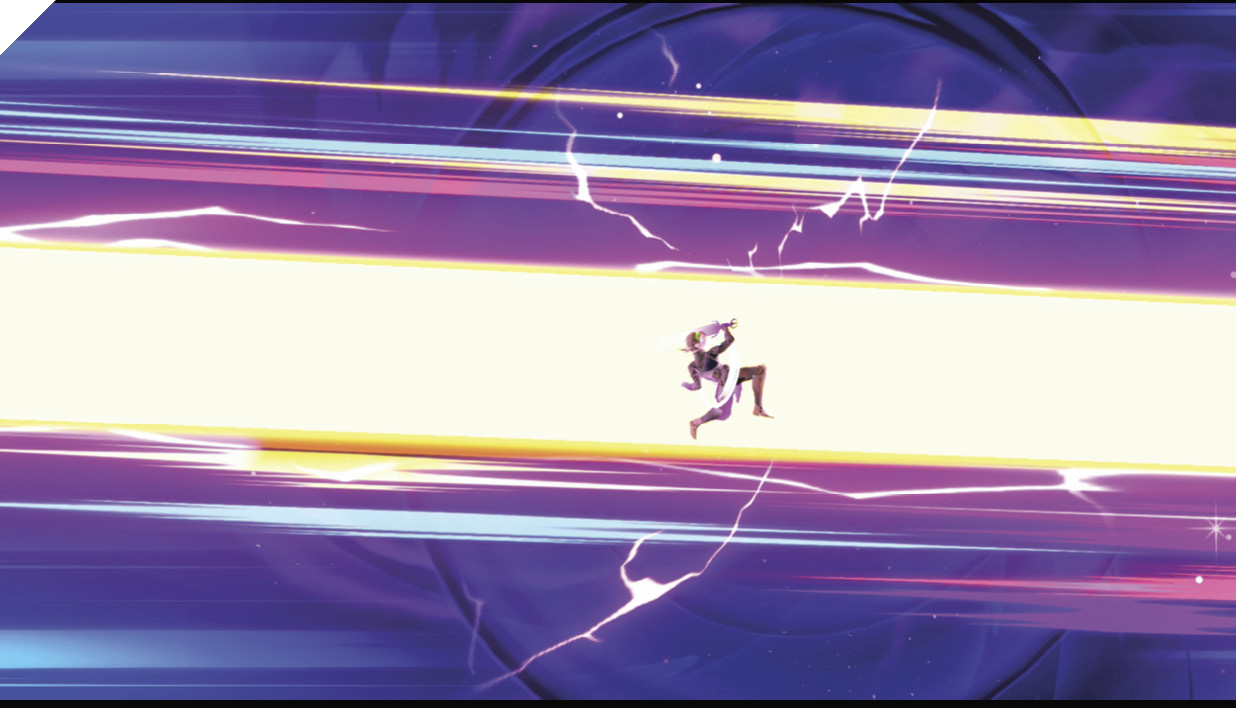
Palutena creates a black hole to draw in her opponents. She follows up with a wide laser beam to damage and launch anyone caught in the attack. The black hole can capture several fighters, and the beam deals more damage to those caught in the black hole.