
Prima Games eGuides
primagames.com Browse Redeem a code Help
Battlefield 3 Premium eGuide
Sign in My Guides

Sign in or create an account

We'll email you a link. No password needed, and if you don't have an account yet, the link makes one.

By creating an account or signing in, you agree to our Terms of Service and Privacy Policy.

Have a password?

Had an account on the old eGuides site, or a code from a printed guide? Help and troubleshooting

Sign in with a password

By signing in, you agree to our Terms of Service and Privacy Policy.

Check your email

A sign-in link is on its way. It works once and expires in 15 minutes. Open it and you're in, with an account if you didn't already have one.

Contents

  • Battlefields
    • Conquest
      • Alborz Mountains
      • Armored Shield
      • Azadi Palace
      • Bandar Desert
      • Caspian Border
      • Damavand Park
      • Death Valley
      • Epicenter
      • Grand Bazaar
      • Gulf of Oman
      • Kharg Island
      • Kiasar Railroad
      • Markaz Monolith
      • Nebandan Flats
      • Noshahr Canals
      • Operation Firestorm
      • Operation Métro
      • Operation Riverside
      • Sabalan Pipeline
      • Seine Crossing
      • Sharqi Peninsula
      • Strike at Karkand
      • Talah Market
      • Tehran Highway
      • Wake Island
    • Conquest 64
      • Alborz Mountains
      • Armored Shield
      • Azadi Palace
      • Bandar Desert
      • Caspian Border
      • Damavand Park
      • Death Valley
      • Epicenter
      • Grand Bazaar
      • Gulf of Oman
      • Kharg Island
      • Kiasar Railroad
      • Markaz Monolith
      • Nebandan Flats
      • Noshahr Canals
      • Operation Firestorm
      • Operation Métro
      • Operation Riverside
      • Sabalan Pipeline
      • Seine Crossing
      • Sharqi Peninsula
      • Strike at Karkand
      • Tehran Highway
      • Wake Island
    • Rush
      • Alborz Mountains
      • Armored Shield
      • Azadi Palace
      • Bandar Desert
      • Caspian Border
      • Damavand Park
      • Death Valley
      • Epicenter
      • Grand Bazaar
      • Gulf of Oman
      • Kharg Island
      • Kiasar Railroad
      • Markaz Monolith
      • Nebandan Flats
      • Noshahr Canals
      • Operation Firestorm
      • Operation Métro
      • Operation Riverside
      • Sabalan Pipeline
      • Seine Crossing
      • Sharqi Peninsula
      • Strike at Karkand
      • Talah Market
      • Tehran Highway
      • Wake Island
    • Squad Rush
      • Alborz Mountains
      • Armored Shield
      • Azadi Palace
      • Bandar Desert
      • Caspian Border
      • Damavand Park
      • Death Valley
      • Epicenter
      • Grand Bazaar
      • Gulf of Oman
      • Kharg Island
      • Kiasar Railroad
      • Markaz Monolith
      • Nebandan Flats
      • Noshahr Canals
      • Operation Firestorm
      • Operation Métro
      • Operation Riverside
      • Sabalan Pipeline
      • Seine Crossing
      • Sharqi Peninsula
      • Strike at Karkand
      • Talah Market
      • Tehran Highway
      • Wake Island
    • Squad Deathmatch
      • Alborz Mountains
      • Armored Shield
      • Azadi Palace
      • Bandar Desert
      • Caspian Border
      • Damavand Park
      • Death Valley
      • Epicenter
      • Grand Bazaar
      • Gulf of Oman
      • Kharg Island
      • Kiasar Railroad
      • Markaz Monolith
      • Nebandan Flats
      • Noshahr Canals
      • Operation Firestorm
      • Operation Métro
      • Operation Riverside
      • Sabalan Pipeline
      • Seine Crossing
      • Sharqi Peninsula
      • Strike at Karkand
      • Talah Market
      • Tehran Highway
      • Wake Island
    • Team Deathmatch
      • Alborz Mountains
      • Armored Shield
      • Azadi Palace
      • Bandar Desert
      • Caspian Border
      • Damavand Park
      • Death Valley
      • Epicenter
      • Grand Bazaar
      • Gulf of Oman
      • Kharg Island
      • Kiasar Railroad
      • Markaz Monolith
      • Nebandan Flats
      • Noshahr Canals
      • Operation Firestorm
      • Operation Métro
      • Operation Riverside
      • Sabalan Pipeline
      • Seine Crossing
      • Sharqi Peninsula
      • Strike at Karkand
      • Talah Market
      • Tehran Highway
      • Wake Island
    • Scavenger
      • Aftermath - Azadi Palace
      • Aftermath - Epicenter
      • Aftermath - Markaz Monolith
      • Aftermath - Talah Market
    • Close Quarters/Gun Master
      • Close Quarters - Donya Fortress
      • Close Quarters - Operation 925
      • Close Quarters - Scrapmetal
      • Close Quarters - Ziba Tower
      • Aftermath - Azadi Palace
      • Aftermath - Epicenter
      • Aftermath - Markaz Monolith
      • Aftermath - Talah Market
    • Capture the Flag
      • Operation Riverside
      • Nebandan Flats
      • Kiasar Railroad
      • Sabalan Pipeline
    • Tank Superiority
      • Alborz Mountains
      • Armored Shield
      • Bandar Desert
      • Death Valley
    • Air Superiority
      • Operation Riverside
      • Nebandan Flats
      • Kiasar Railroad
      • Sabalan Pipeline
  • Essentials
    • Primer
      • What's New in Battlefield 3?
      • What's New in Close Quarters?
      • What's New in Armored Kill?
      • What's New in Aftermath?
      • What's New in End Game?
    • Basics
      • Introduction and Interface
      • Spawn Screen
      • Movement and Fundementals
      • Combat
      • Game Modes
      • Squad Play
      • Multiplayer Tactics
      • Persistance System
      • Battlelog
      • Specilizations
      • Camo Patterns
    • Classes
      • Introduction
      • Assault
      • Engineer
      • Support
      • Recon
    • Weapons
      • Introduction & Accessory Index
      • Assault Rifles
      • Carbines
      • Light Machine Guns
      • Sniper Rifles
      • Personal Defense Weapons (PDWs)
      • Shotguns
      • Pistols
      • Crossbow
    • Vehicles
      • Vehicle Customization
      • Light Vehicles
      • Infantry Fighting Vehicles (IFVs)
      • Mobile AA
      • Main Battle Tanks (MBT)
      • Attack Helicopters
      • Scout Helicopters
      • Transport Helicopters
      • Jets
      • Stationery Anti-Vehicle Weapons
  • Campaign
    • Mission 1: Semper Fidelis
      • Semper Fidelis
    • Mission 2: Operation Swordbreaker
      • Operation Swordbreaker
    • Mission 3: Uprising
      • Uprising
    • Mission 4: Going Hunting
      • Going Hunting
    • Mission 5: Operation Guillotine
      • Operation Guillotine
    • Mission 6: Comrades
      • Comrades
    • Mission 7: Thunder Run
      • Thunder Run
    • Mission 8: Fear No Evil
      • Fear No Evil
    • Mission 9: Night Shift
      • Night Shift
    • Mission 10: Rock and a Hard Place
      • Rock and a Hard Place
    • Mission 11: Kaffarov
      • Kaffarov
    • Mission 12: The Great Destroyer
      • The Great Destroyer
  • Multiplayer
    • Crash Course in Co-operative Play
      • Crash Course in Co-operative Play
    • Co-Op Mission 1: Operation Exodus
      • Operation Exodus
    • Co-Op Mission 2: Fire from the Sky
      • Fire from the Sky
    • Co-Op Mission 3: Exfiltration
      • Exfiltration
    • Co-Op Mission 4: Hit and Run
      • Hit and Run
    • Co-Op Mission 5: Drop 'em Like Liquid
      • Drop 'em Like Liquid
    • Co-Op Mission 6: The Eleventh Hour
      • The Eleventh Hour
  • Compendium
    • Multiplayer Scoring
      • Multiplayer Scoring
    • Assignments
      • Assignments
    • Achievements and Trophies
      • Achievements and Trophies
    • Dog Tags
      • Dog Tags
    • Ranks
      • Ranks
    • Camo Patterns
      • Camo Patterns
    • Ribbons
      • Ribbons
    • Medals
      • Medals

Battlefield 3 Premium Guide › Multiplayer › Crash Course in Co-operative Play

Crash Course in Co-operative Play

The co-op Mode in Battlefield 3 is an interesting hybrid of the smaller maps from the Campaign and a simplified version of the persistent reward system from Multiplayer.

It offers a separate, but parallel, storyline that runs alongside the efforts of Black, Dima, Miller, and Hawkins that provides an alternate take on the fight.

Though there are shared environments from the Campaign, they’re often presented in new or slightly differing ways. And like the Multiplayer experience, enemy fire deals far more damage.

There’s no shrugging off multiple rounds here; if you come under fire, even on the easiest difficulty levels, it’s quite easy to go down. Stick to cover, use teamwork, and above all else, communicate constantly.
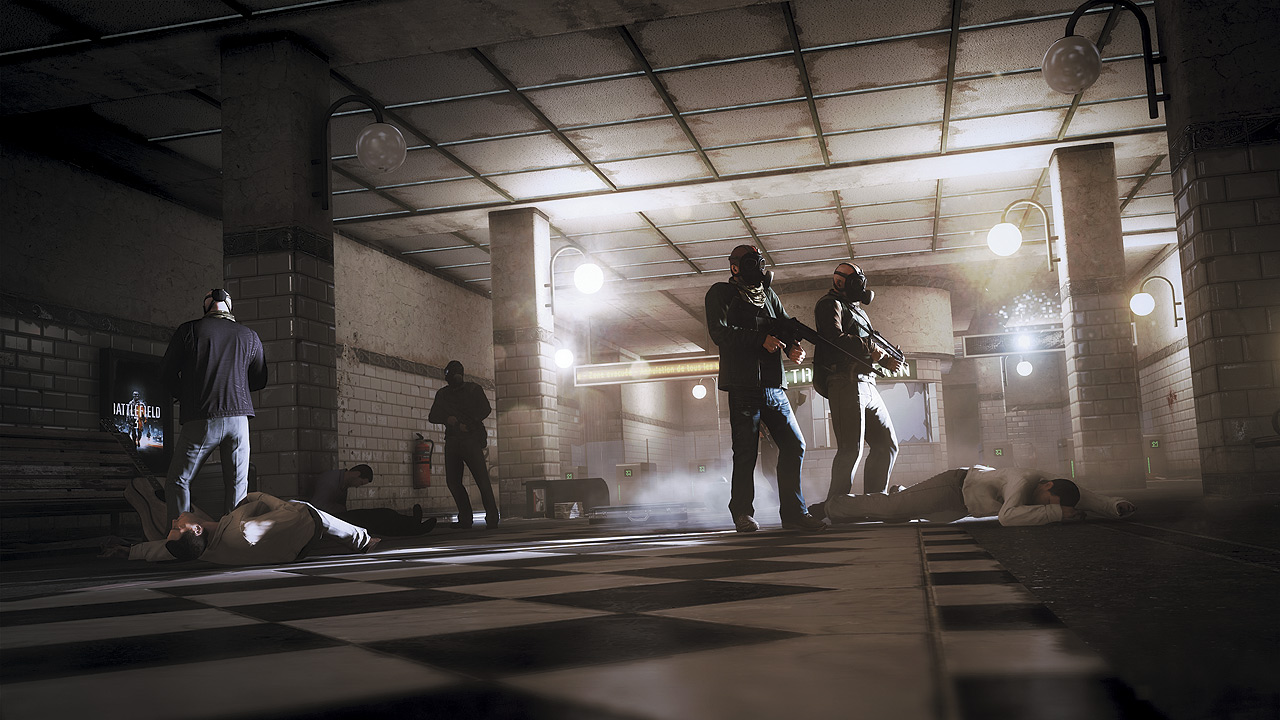
SEMPER FI

Being a good Marine is more than just shouting “Hooah” and gunning down tangos left and right. You have to work as a unit, supporting and covering your fellow squadmates with absolute precision.

Grabbing cover should be the first thing you think about when entering a firefight.

The second should be controlling the kick from any weapon, be it an assault rifle, light machine gun, or machine gun.

Burst fire is key; not only will it keep your view from bucking from the recoil, but it allows for quickly reaction to changes in the combat situation should an enemy take cover or if more of his friends join the fray.

Remember, too, that bullets in Battlefield are modeled just like the real thing.

You need to lead far-off targets while accounting for bullet drop over long distances.

SERVICE HAS IT'S REWARDS

Starting the co-op campaign offers a chance at acquiring several Achievements/Trophies. In addition, it offers the lasting benefit of unlocking new weapons for use in Multiplayer. They are:

These exclusive weapons are a mix between those that are class-specific and others which can be used with any kit. Earning them requires plenty of practice and a firm knowledge of each level.

It is highly recommended that all Achievement/Trophy runs be attempted on Easy.

It’s also a good idea to stick to Easy for your first time playing through co-op so you can learn the layout of the levels: enemy placement, surprise threats, the flow of the missions, and so on.

MAKING THE MOST OF A DIFFICULT SITUATION

Notching up the difficulty has a number of key effects: enemy gunfire does more damage, the aim assist is reduced or completely disabled, and when in Man Down state, you’re given less time to be revived by a teammate.

There’s no significant difference in the number of enemies or the points earned per mission.

Nevertheless, on higher difficulties, enemy aim improves and their AI level increases, making them far more lethal. Patience becomes increasingly important, as does familiarity with the mission at hand.

It’s highly recommended that you and your teammates make an Easy run-through before attempting the tougher stuff.

Tip

The Art Of Bleeding Out
It’s going to happen: you’re going to be surprised by a grenade or a close-quarters enemy and enter the Man Down state. This is not the end, however; you can still fire your sidearm and you’re still mobile enough to crawl towards buddies and capable of firing your sidearm.

Use this to your advantage by crawling over to heavy cover, allowing a co-op partner to assist you without coming under fire himself. There’s nothing worse than going from support to a liability in the middle of an intense battle.

Take the time to settle yourself into a position to get patched up without getting your friends killed.

THE BASICS

Tip

Eyes On
Verbal communication during missions is crucial, but comments like “second tango from the left, your 12 o’clock” isn’t as helpful as simply spotting the target for your teammate.

Spotting works exactly as in multiplayer, with the added benefit of being able to see which player has marked a target thanks to a handy little number next to the orange blip over an enemy’s head.

It only takes a second, and helps identify targets with great efficiency. On harder difficulty levels, this can be the difference between drawing a bead on a target before they can take out your buddy or watching them get gunned down in front of you, necessitating a revive.

Image Name Available For Points Required

MP412 REX Revolver

All Kits

63,000

KH2002 Assault Rifle

Assault Class

126,000

MP7 Machine Gun

All Kits

189,000

M39 EMR Assault Rifle

Recon Class

262,000

93R Pistol

All Kits

315,000

SG553 Assault Rifle

Engineer Class

378,000

G3A3 Assault Rifle

Assault Class

441,000

Keep reading with a free account

The first 3 sections of Battlefield 3 Premium are open to everyone. An account opens the rest of it, and every other guide in the archive. It's free, and there's nothing to buy.

Bought guides on the old Prima Games site? Your account and every guide you own moved here, so there's nothing to buy again. Sign in.

Create a free account Or browse our free guides

PreviousThe Great Destroyer NextOperation Exodus