
Battlefield 3 Premium Guide Battlefields Rush
Noshahr Canals
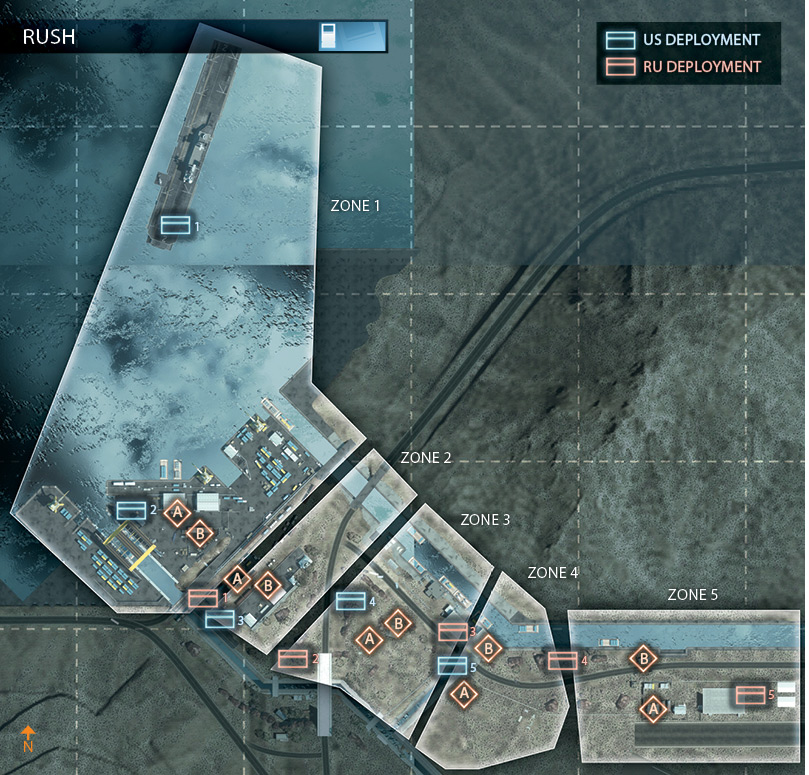
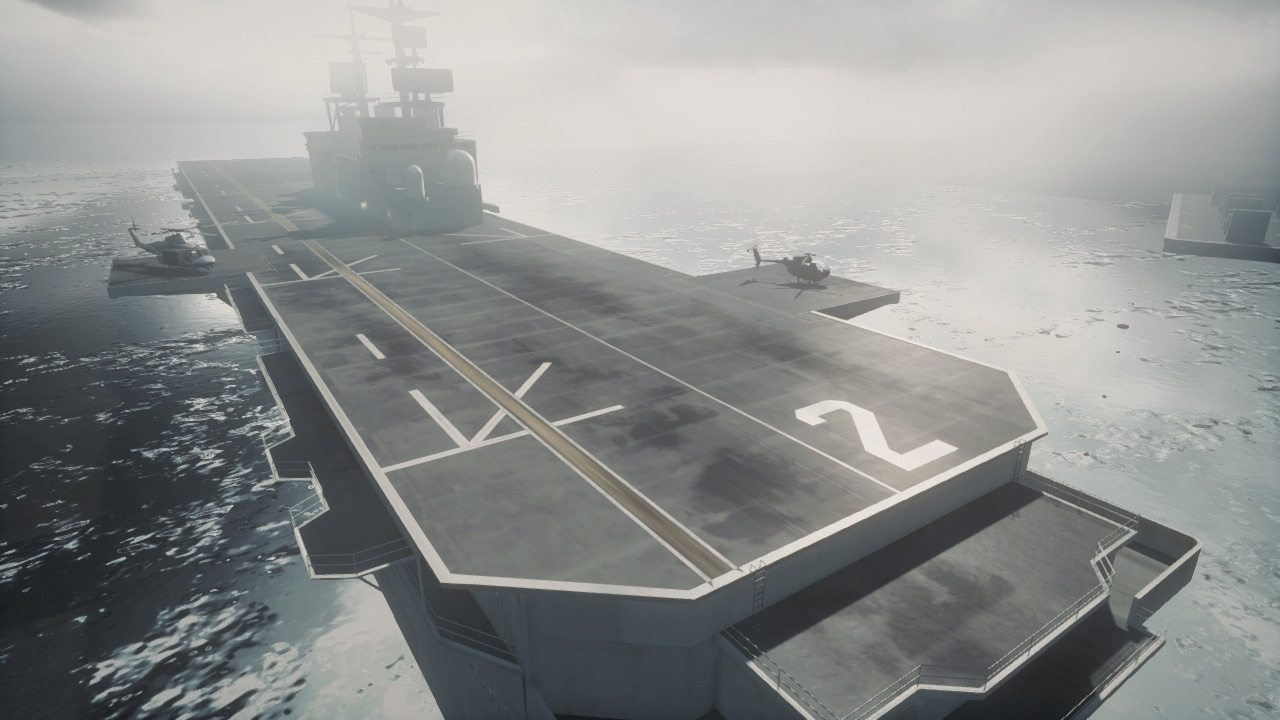
In this epic Rush match, the US team begins on an aircraft carrier to the north. It’s up to the RU team to stop the US amphibious assault, preventing them from gaining a foothold and pushing their way inland.
But the US have a serious advantage when it comes to vehicles. So the RU team must improvise and make the most of the vehicles they have, especially when it comes to countering the US helicopters.
All together, the US must conquer five separate zones, beginning with the Dry Dock. From there the advance stretches from the Train Yard all the way to the airfield on the east side of the map.
Along the way, the US attackers must destroy ten M-COM stations. If each zone is well defended, the RU team has a good chance of halting the US advance. However, the fight for the first zone is critical.
If the RU team can deny the US access to the Dry Dock objective, they force the US to spawn on their carrier. As a result, locking down the first zone is the RU team’s best chance of securing a victory.
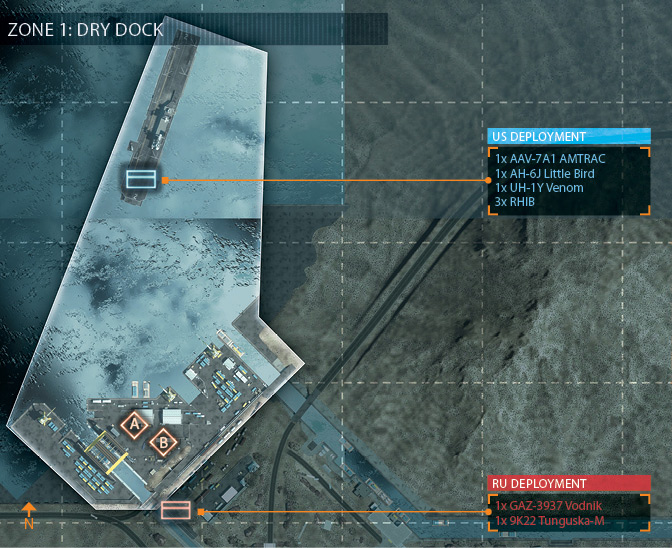
ZONE 1: DRY DOCK
M-COM Station A
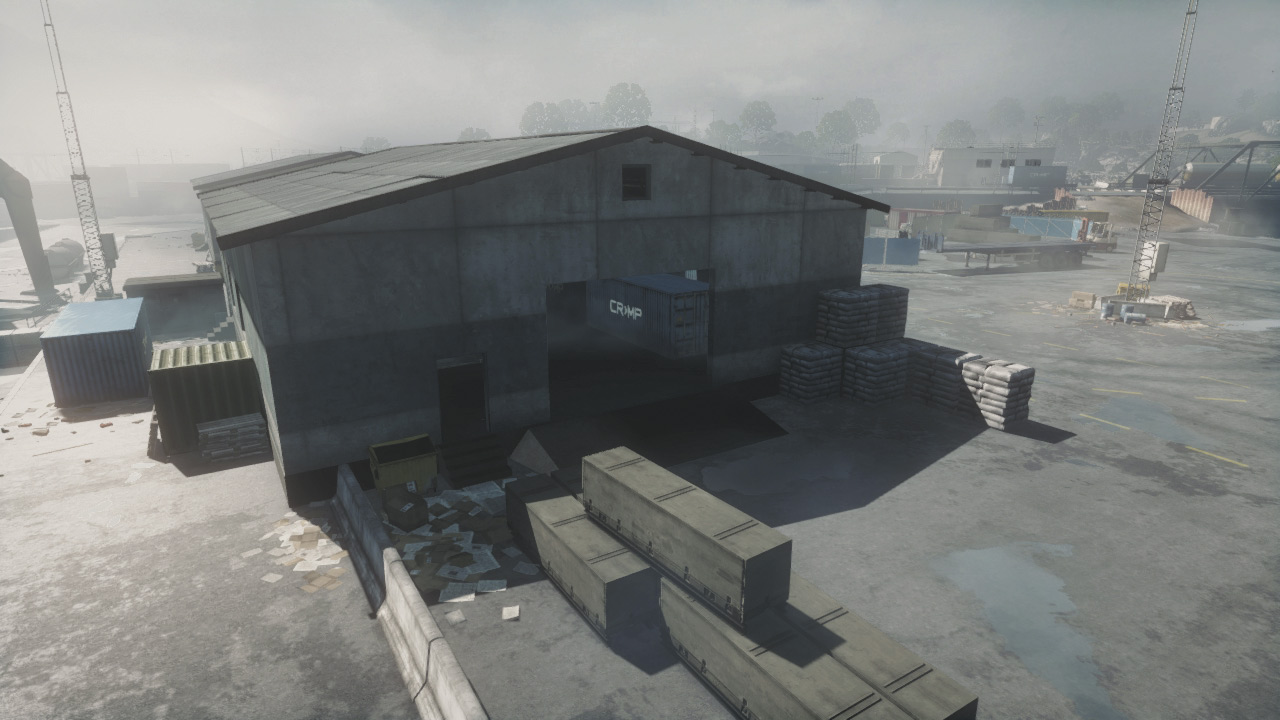
This M-COM Station A is tucked away in the southwest corner of a dark warehouse near the coast. The large warehouse has multiple entry points, but more can be made by blowing holes in the exterior walls.
But no matter how much damage is dealt to this structure, it won’t collapse. Since there’s no way to predict which direction the attackers will enter from, it’s best to defend the objective from within the warehouse.
There are plenty of hiding spots inside, so try to find a location that conceals you and offers a view of the M-COM station.
Regardless of whether you’re attacking or defending, using Tactical Lights and Laser Sights can be effective for blinding opponents in this dark setting.
But they can also give away your position, so be sure you’re the one who pulls the trigger first.
M-COM Station B
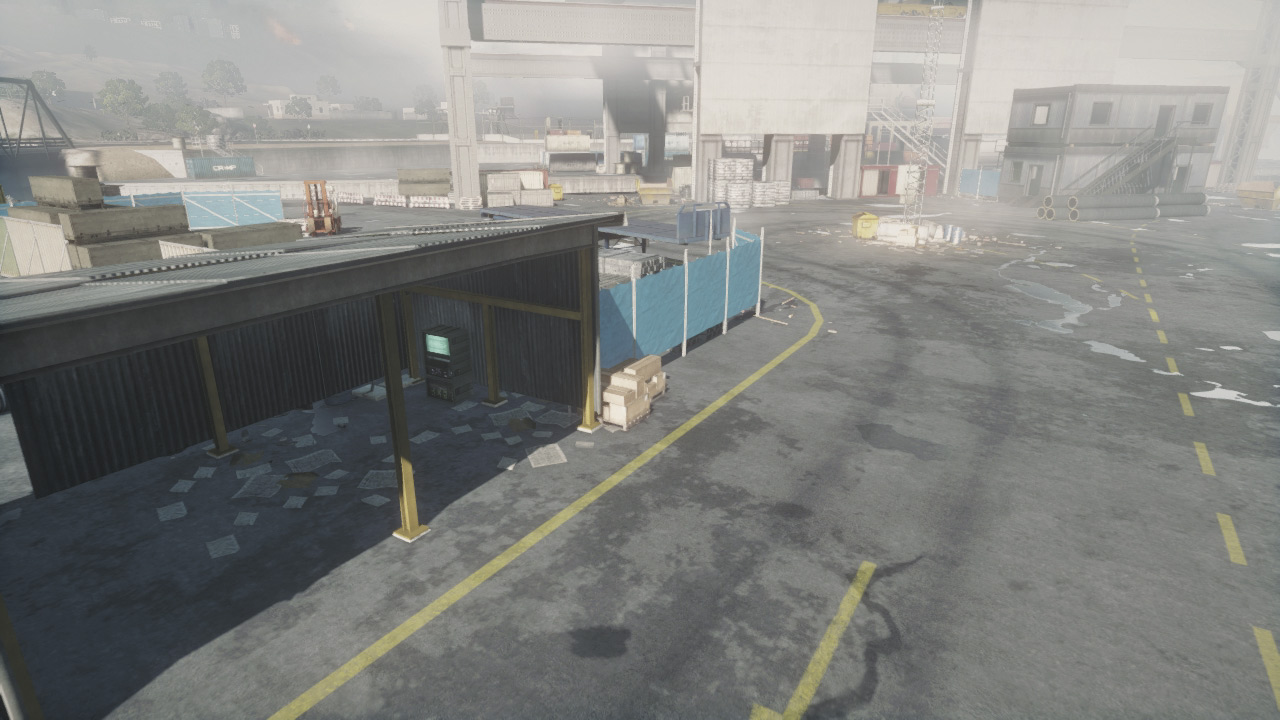
This objective, M-COM Station B, is housed within a steel shelter, just south of the warehouse where M-COM station A is located.
The shelter does little more than protect the objective from rain, with a wide opening to the north and a narrow doorway to the south.
This can be a tricky spot for defenders to watch as the only decent cover point is located to the north—the same direction from which the attackers are advancing.
So if you hide in one of the warehouses to the north while watching M-COM Station B, you’re likely to get a knife in the back.
Instead, try to watch the steel shelter from the east or west and engage the cross traffic as attackers dart out of the warehouse and make a move for the objective.
Parking the Vodnik to the east or west works well; you can gun down attackers with the machine gun turret. To prevent such ambushes, attackers should always deploy smoke when advancing toward the objective and setting the charge.
The AMTRAC can also serves as a mobile shield by protecting infantry as they advance on the objective.
US DEPLOYMENT
Base Assets
| Name | Quantity | Respawn Time |
|---|---|---|
| GAZ-3937 Vodnik | 1 | 15 sec. |
| 9K22 Tunguska-M | 1 | 30 sec. |
As in the Conquest game modes, the US team begins this Rush match on the aircraft carrier to the north. Utilizing a couple of helicopters, an AMTRAC, and a few RHIBs, the US must race toward the shore and establish a foothold near the objectives.
The Little Bird and Venom offer the quickest way to get troops on the ground, so take off with a full load and have your passengers parachute down to the Dry Dock area.
Once on the ground, recon troops should deploy Radio Beacons so their squad doesn’t have to spawn on the carrier. Remember, the AMTRAC is also a spawn point and should be deployed near the Dry Dock, preferably out of view from the RU defenders.
With spawn points at or near the Dry Dock, the US team will have a much easier time applying consistent pressure against each objective.
RU DEPLOYMENT
Base Assets
| Name | Quantity | Respawn Time |
|---|---|---|
| GAZ-3937 Vodnik | 1 | 15 sec. |
| 9K22 Tunguska-M | 1 | 30 sec. |
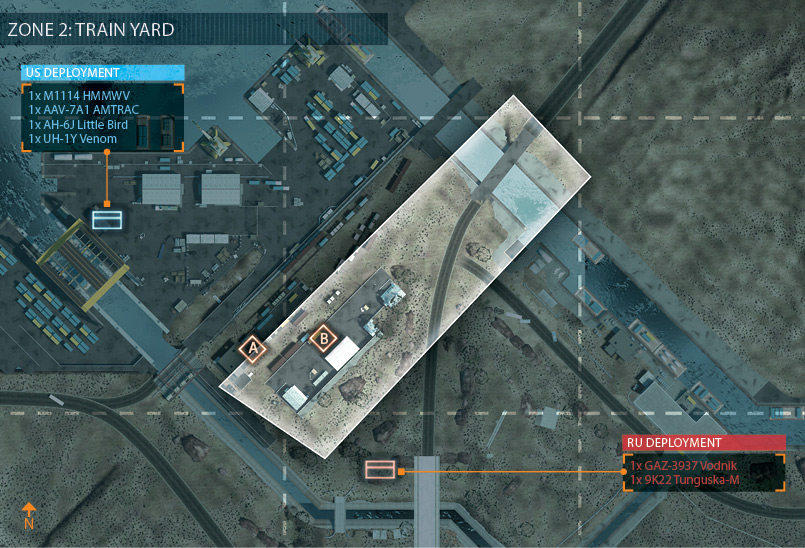
The RU team deploys near the Train Yard, just south of the objectives. Given the US air assets spawned at the carrier, the RU troops need to move out fast if they hope to secure the M-COM stations before the attackers arrive.
The Vodnik is the quickest way to move troops to the Dry Dock area. Consider holding off on spawning into the game until one of your squad members has reached the objectives. This frees up seats in the Vodnik for other teammates.
Initially, the US helicopters pose the biggest threat. So move the Tunguska-M forward to deal with these choppers. Engineers armed with SA-18 IGLA surface-to-air missiles can also put a damper on the US team’s air assault.
Since the deployment area is so far from the objectives, have recon troops deploy Radio Beacons around the Dry Dock area to secure spawn points near the M-COM stations.
ZONE 2: TRAIN YARD
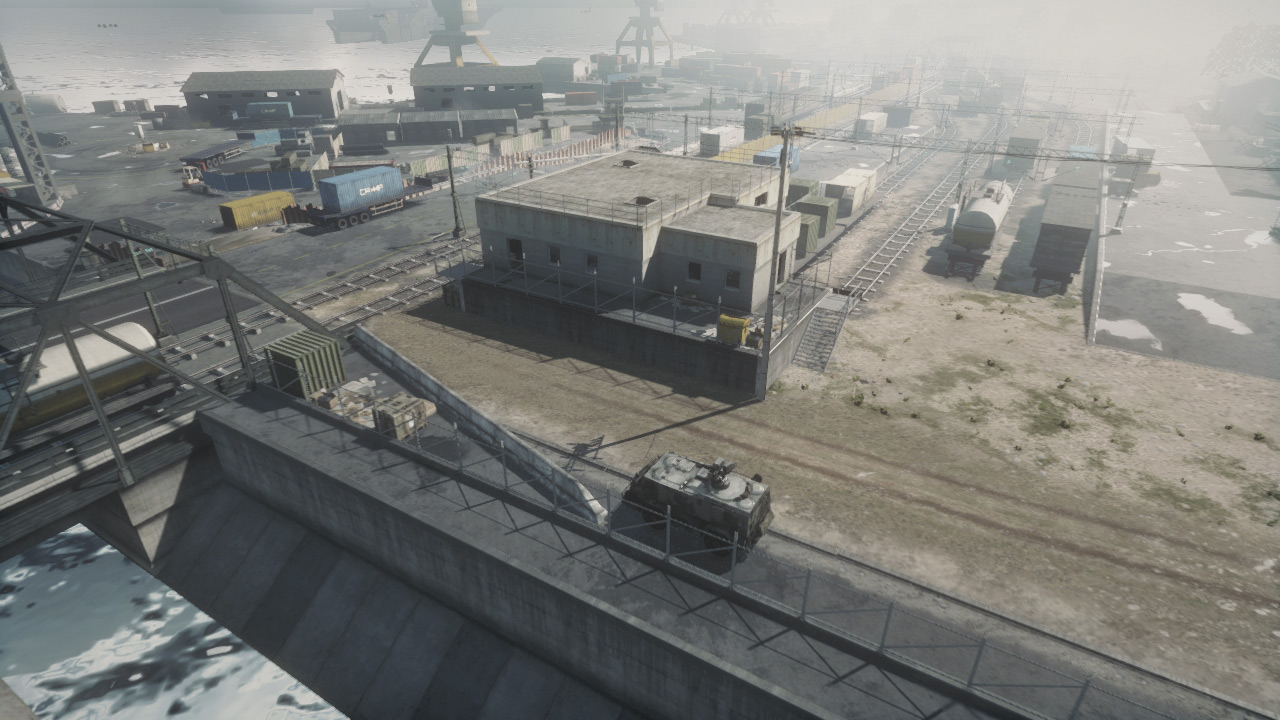
M-COM Station A
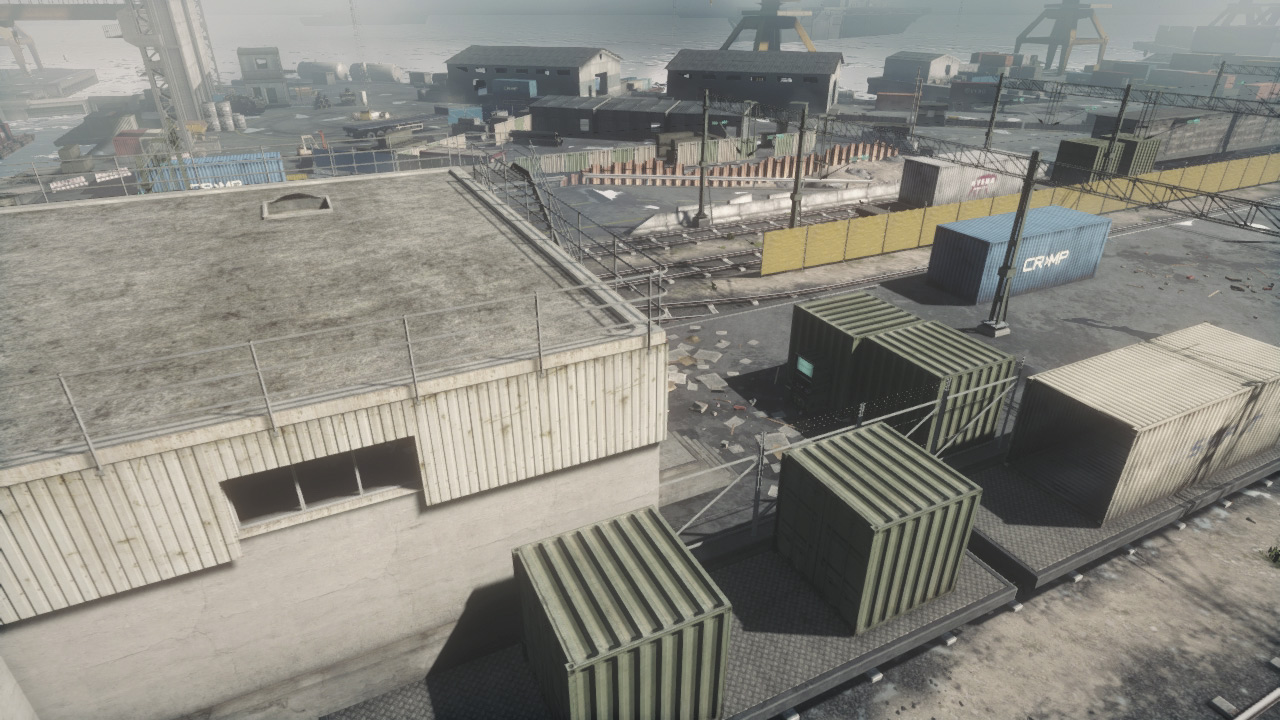
As the northernmost objective, M-COM Station A is likely to be the first to come under attack by the US team. The objective is flanked by a concrete building to the west and a green shipping container to the east.
It’s important for both teams to secure the nearby building, as it serves as the best position from which to defend or attack the M-COM station. Once inside, deploy a Radio Beacon so your squad has a spawn point near the objective.
The rooftop of the building is accessible and offers a sweeping view of the Dry Dock and Train Yard. But avoid standing on the rooftop, as it makes you an easy target for snipers and strafing helicopters.
If you must get on the roof, remain prone to avoid silhouetting yourself. For the US team, even after destroying M-COM Station A, this building serves as a good forward base for launching attacks on M-COM Station B to the south.
M-COM Station B
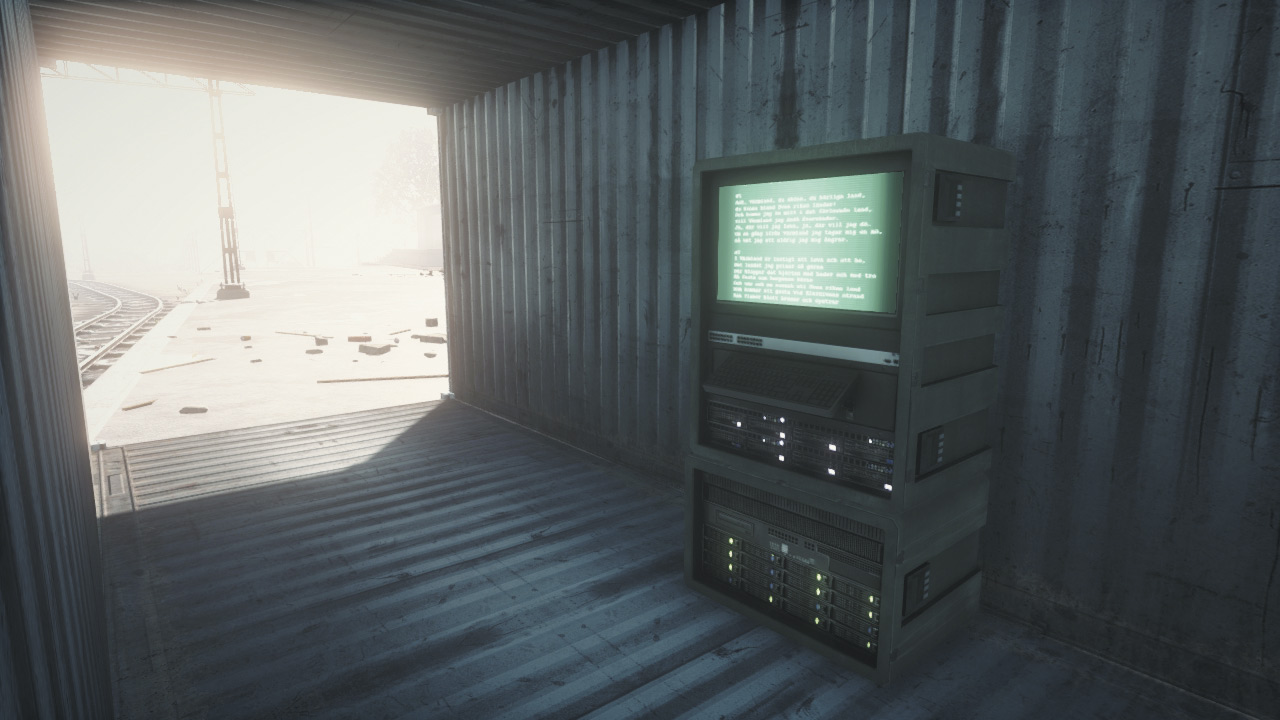
This objective, M-COM Station B, is located inside a light blue shipping container on the Train Yard’s loading platform to the south. Both ends of the container are open, allowing entry from the east or west.
This can be a tricky objective to attack and defend, given the container’s cramped space. Instead of hiding inside the shipping container, the RU defenders should focus on covering the two entry points from long range.
There are plenty of hiding spots in the Train Yard to the east and west where you can watch this container—just make sure nobody can sneak up behind you and steal your dog tags.
Parking the Tunguska-M nearby can also be an effective deterrent. The US team really needs the support of their vehicles and the concealment of smoke to safely reach this M-COM station and plant the charge.
Also, toss a grenade in the shipping container before entering to detonate any booby traps such as C4 or Claymores.
US DEPLOYMENT
Base Assets
| Name | Quantity | Respawn Time |
|---|---|---|
| M1114 HMMWV | 1 | 15 sec. |
| AAV-7A1 AMTRAC | 1 | 60 sec. |
| AH-6J Little Bird | 1 | 90 sec. |
| UH-1Y Venom | 1 | 90 sec. |
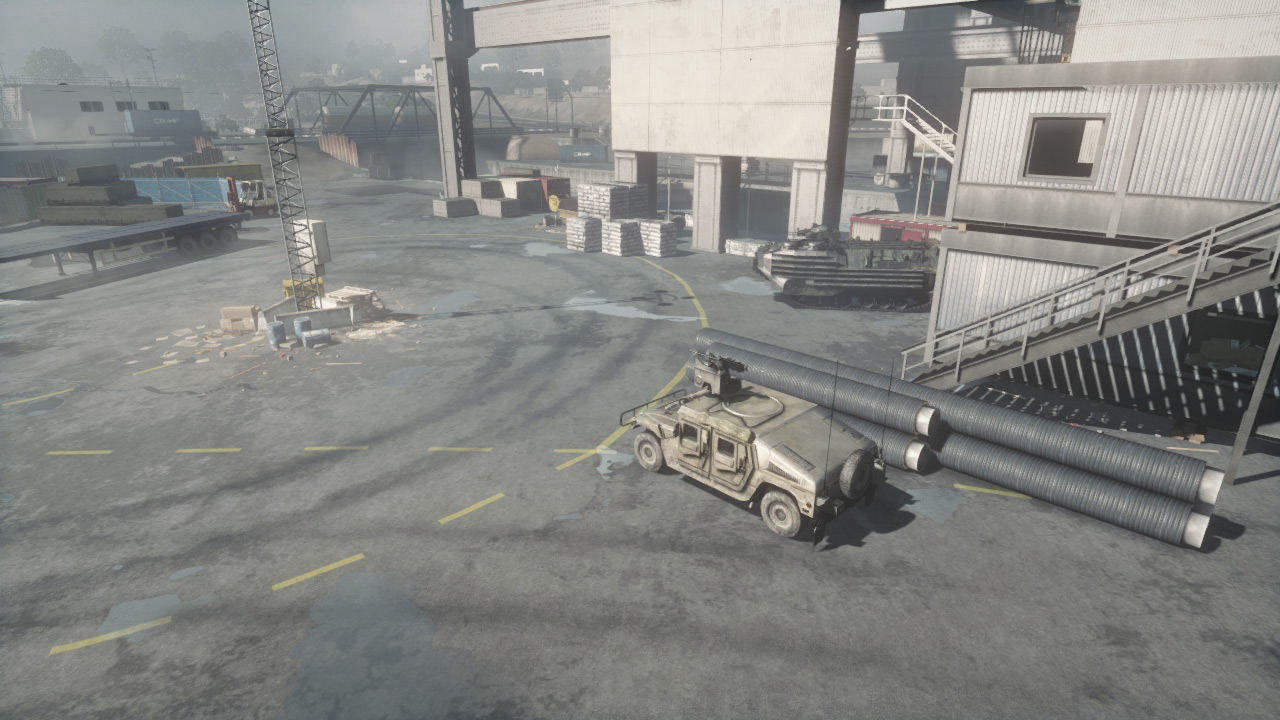
With the first set of M-COM stations destroyed, the US team’s deployment area moves up to the Dry Dock. This is where the US team’s new ground vehicles spawn, including an HMMWV as well as an AMTRAC.
The US team also retains the same air assets from the previous stage that are still spawned at the aircraft carrier. So if you want to fly, spawn directly into the Little Bird or Venom on the carrier’s flight deck. Use the helicopters to harass and distract the RU team while your ground units move in to assault the objectives.
The AMTRAC is very effective here as a mobile spawn point that allows you to deploy freshly spawned players close to the action. However, keep it out of view of defending engineers as well as the RU team’s Tunguska-M.
Likewise, avoid driving the HMMWV directly into the heated action—it won’t last long. Instead, position it to the east or west side of the Train Yard and use its machine gun turret to provide fire support.
RU DEPLOYMENT
Base Assets
| Name | Quantity | Respawn Time |
|---|---|---|
| GAZ-3937 Vodnik | 1 | 15 sec. |
| 9K22 Tunguska-M | 1 | 30 sec. |
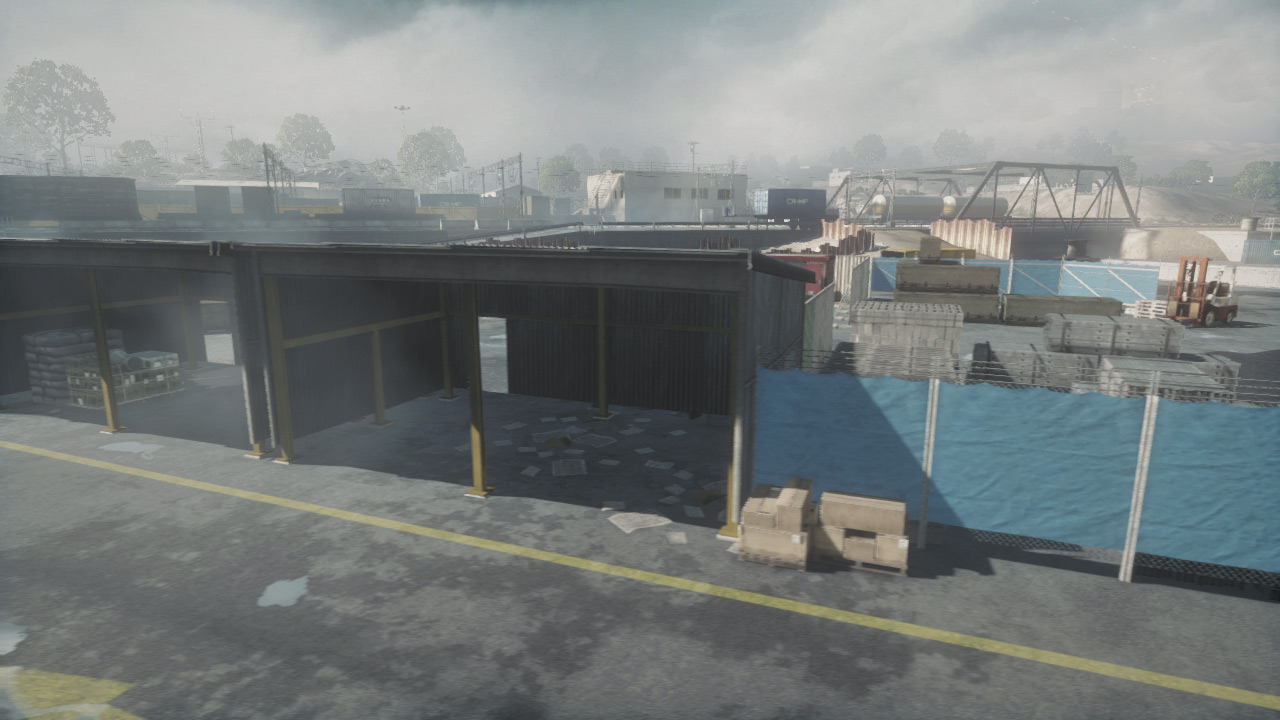
The RU team deploys along a dirt road south of the Train Yard. Following the destruction of the M-COM stations at the Dry Dock, the RU team has a few precious seconds to get into position around the new objectives before the US team can attack.
Use this time wisely to establish a perimeter around the Train Yard. Move the newly spawned Vodnik and Tunguska-M forward to defend the new objectives.
Both vehicles have enough firepower to counter attacks by the US helicopters and ground vehicles. But engineers are necessary to keep both vehicles healthy. And if the vehicles are destroyed, don’t forget to retrieve new ones from their spawn points to the south.
In addition to repairing the vehicles, engineers can also assist them by shooting down the US helicopters with SA-18 IGLA missiles. But don’t let the helicopters distract you too much.
Deploy infantry (and Radio Beacons) near each objective to defend them from US troops infiltrating the Train Yard from the north.
ZONE 3: RUNWAY APPROACH
M-COM Station A
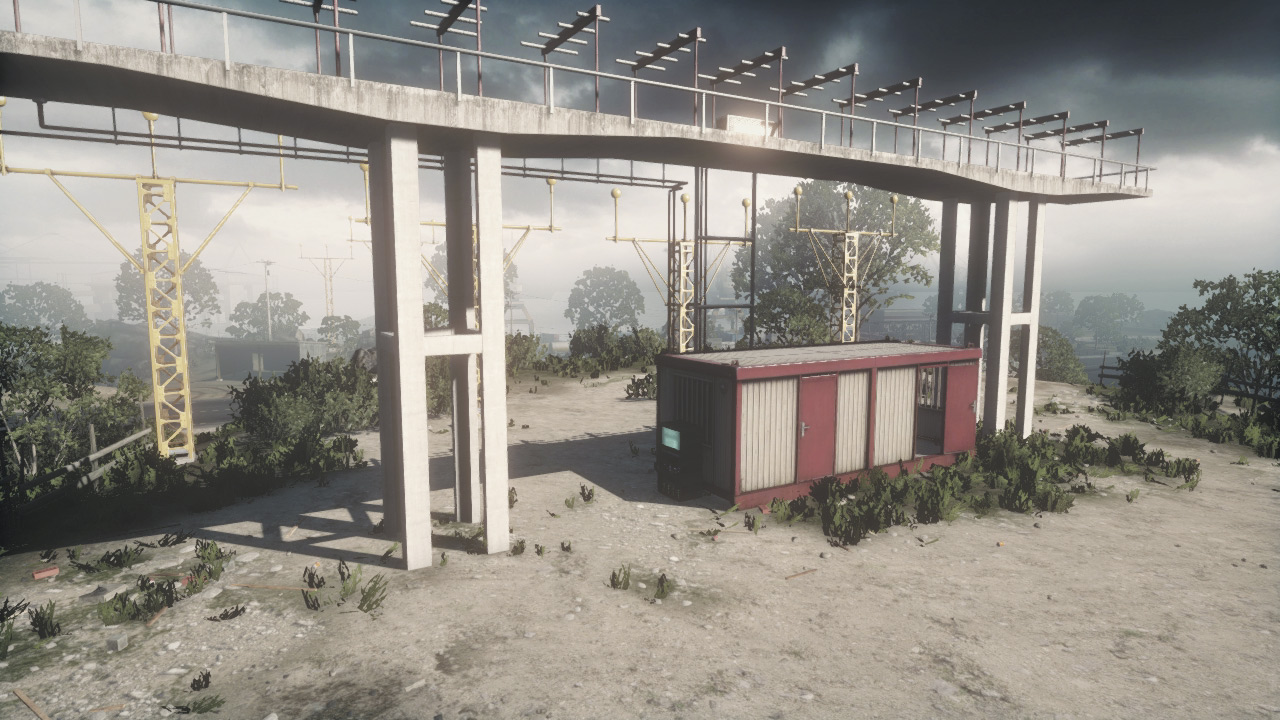
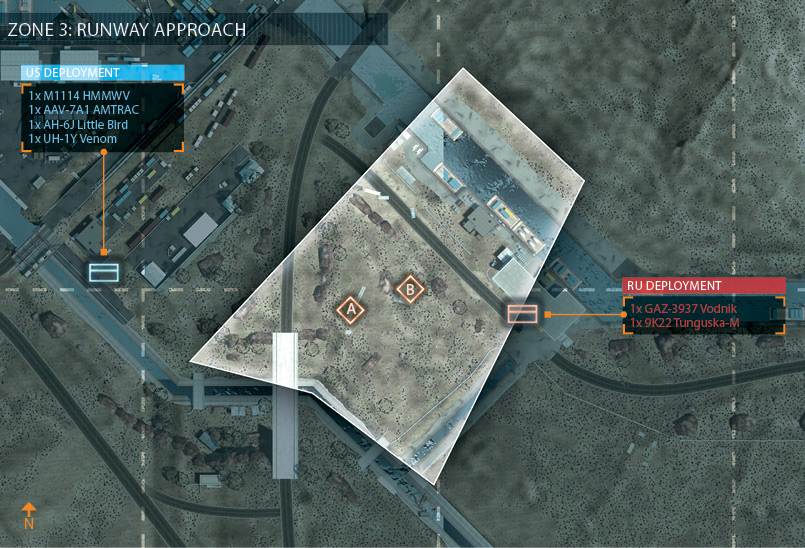
M-COM Station A sits at the crest of the hill, just beneath an array of runway approach lights. With the exception of the small trailer and light towers, there’s very little cover here.
This means it is a particularly challenging objective to approach when the hilltop is well defended. The slopes of the hill are covered in trees and shrubs that provide plenty of concealment for defenders camped around the objective.
Attackers or defenders posted on the large bridge to the southwest have a relatively clear view of the hilltop, making it an ideal cover point for snipers. Defenders should primarily cover the western slope to engage infantry approaching from the Train Yard.
But it’s also important to defend against potential flanking attacks, including US infantry dropping onto the hilltop via parachute.
M-COM Station B
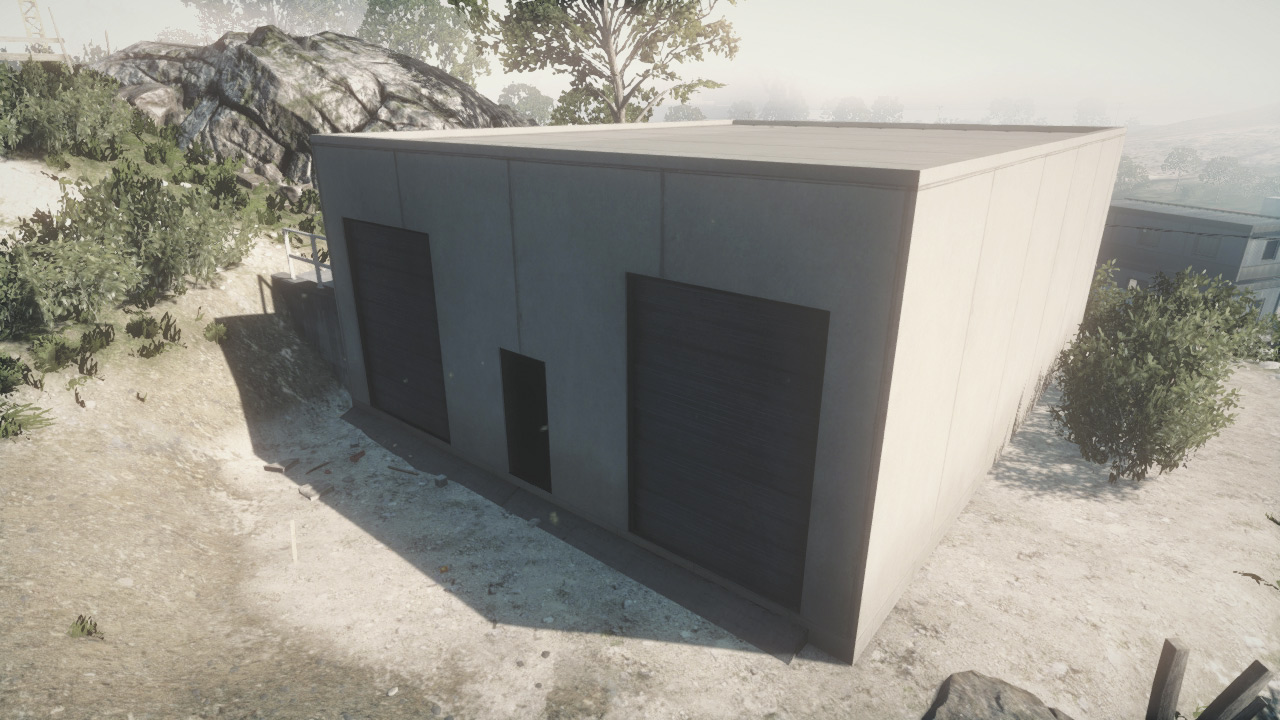
This objective is located in a dark, bunkerlike building on the eastern slope of the hill. Initially the south-facing doorway is the only entrance into this concrete building.
However, each wall of the building can be completely destroyed, allowing attackers to approach the M-COM station from any direction.
So instead of covering the doorway or interior, defenders are better off surrounding the building and locking down the nearby hilltop.
Attackers should come armed with rocket launchers, grenade launchers, or C4 so they can breach the walls of the structure and create doorways of their own. However, if all the walls are destroyed, the M-COM station will not be crushed by falling debris.
Instead, the objective remains standing, exposed in all directions. So don’t blow too many holes in the structure or else you’ll have a difficult time approaching the M-COM station—those walls provide excellent cover when setting or disarming a charge.
US DEPLOYMENT
Base Assets
| Name | Quantity | Respawn Time |
|---|---|---|
| M1114 HMMWV | 1 | 15 sec. |
| AAV-7A1 AMTRAC | 1 | 60 sec. |
| AH-6J Little Bird | 1 | 90 sec. |
| UH-1Y Venom | 1 | 90 sec. |
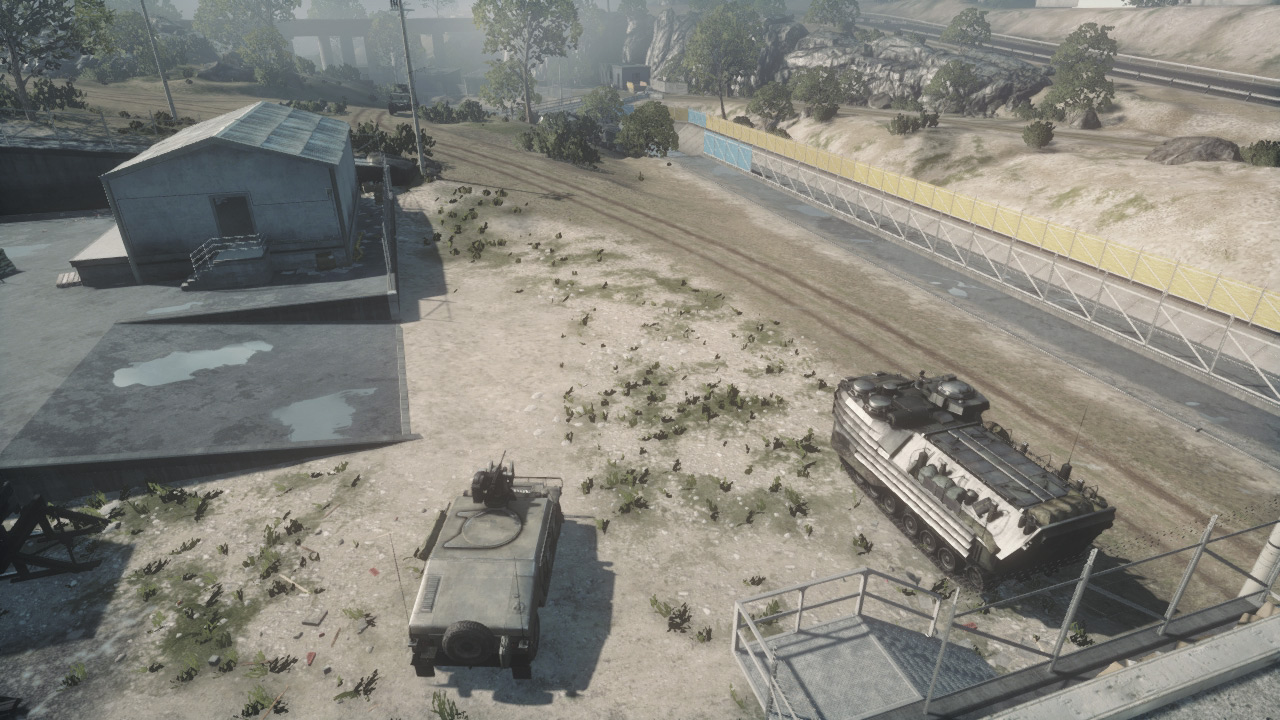
As the battle continues, the US team moves up to the Train Yard in preparation for their assault on the hill to the southeast.
The Train Yard deployment area spawns a HMMWV and an AMTRAC while the aircraft carrier continues to produce the same Little Bird and Venom helicopters.
In this stage, the RU defenders hold the high ground, so look for opportunities to stage flanking attacks instead of charging straight up the hill.
The paved road to the north of the objectives is a good route for the HMMWV and AMTRAC to take; they can hook around the hill and flank the defenders.
Parking the AMTRAC somewhere near the canal is also a good way to provide the team with a forward spawn point. As vehicles and infantry advance, air support is essential. Even if they don’t inflict much damage, the helicopters provide a useful distraction.
RU DEPLOYMENT
Base Assets
| Name | Quantity | Respawn Time |
|---|---|---|
| GAZ-3937 Vodnik | 1 | 15 sec. |
| 9K22 Tunguska-M | 1 | 30 sec. |
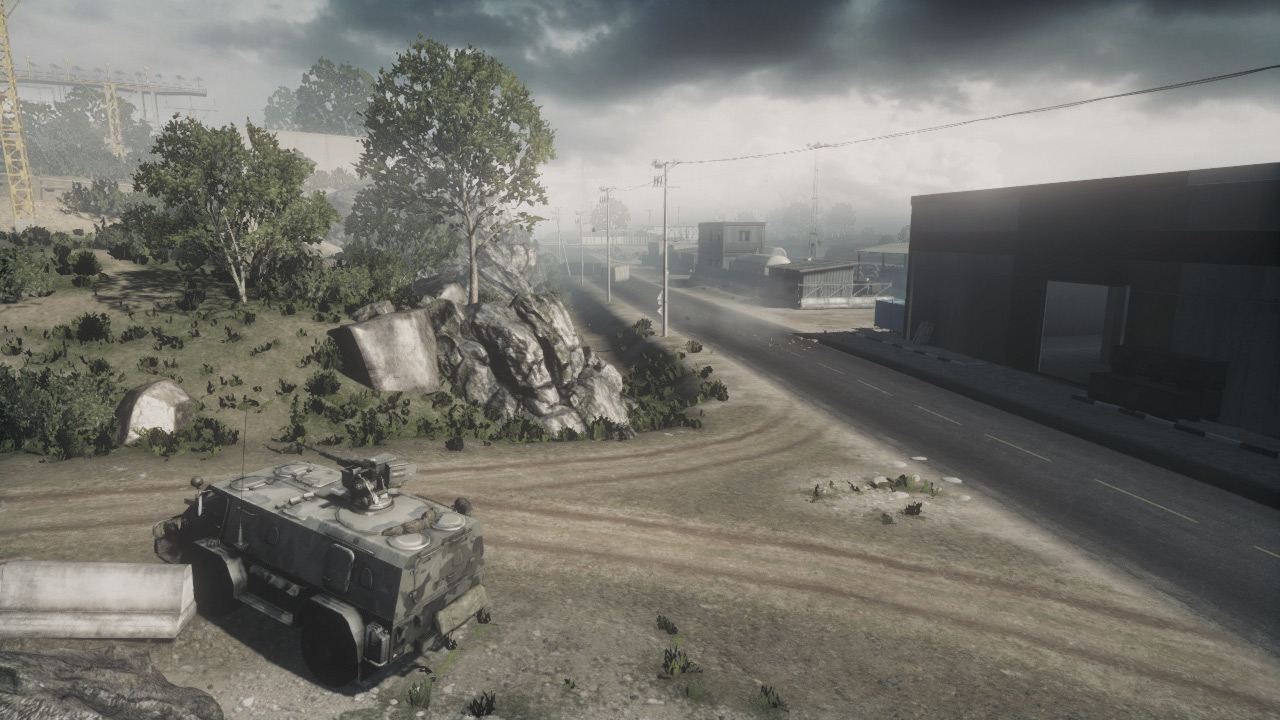
The RU team deploys along the paved road on the north side of the hill, next to the large warehouse. Following the loss of the objectives at the Train Yard, immediately rush toward the new objectives and establish a perimeter.
Rush attacks by the US helicopters are likely, so be prepared to shoot them down. Engineers armed with SA-18 IGLA missile launchers are very effective, as is the Tunguska-M, which is spawned within the warehouse.
If troops bail out of the choppers, immediately spot them and gun them down before they can parachute to the ground.
While engineers and the Tunguska-M focus on the helicopters, the rest of the team should prepare for infantry assaults originating from the Train Yard.
The hill gives the defenders a decent height advantage, so it’s easy for recon troops to snipe approaching infantry.
ZONE 4: AIRFIELD OUTSKIRTS
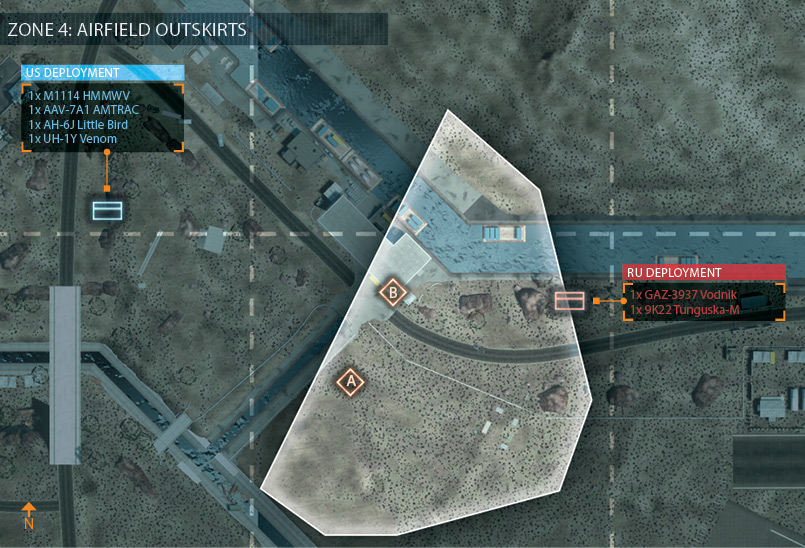
M-COM Station A
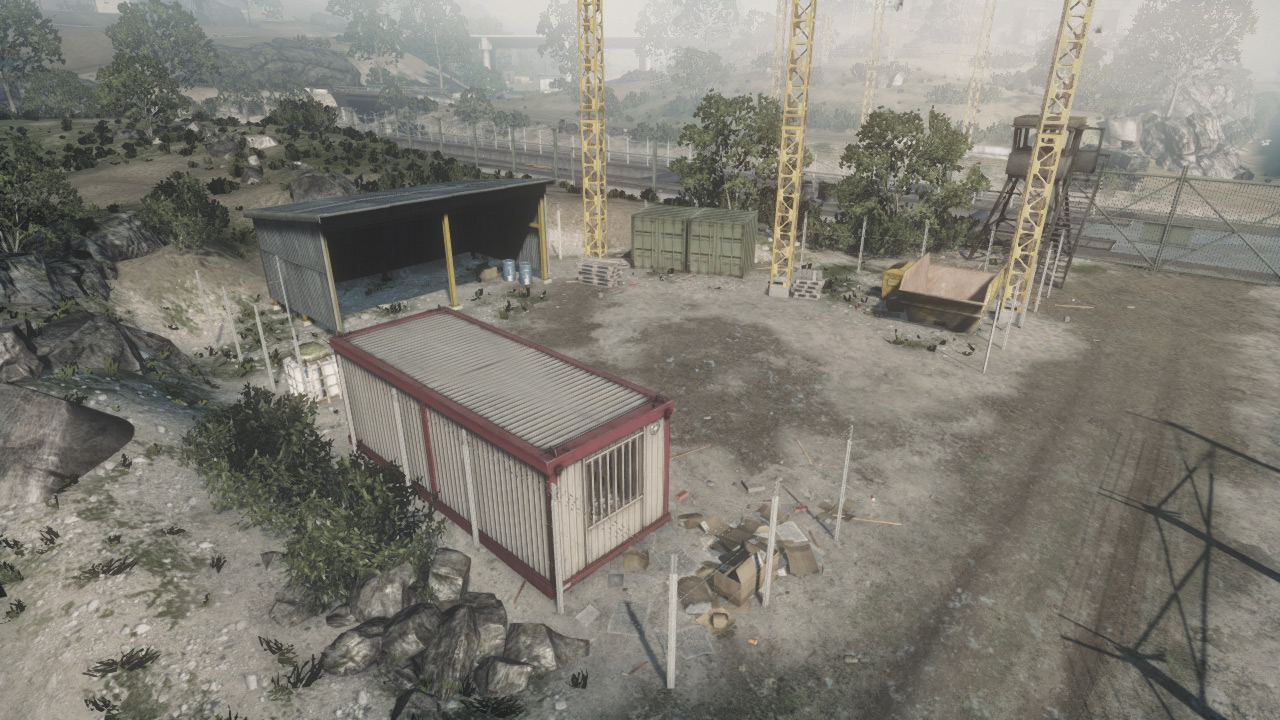
Located in a small red-and-white trailer south of the large warehouse, M-COM station A is relatively vulnerable to attack, despite the fences surrounding it.
Attackers can easily slice through the chain-link fences with their knives or simply knock them over with vehicles like the HMMWV or AMTRAC.
However, entering the trailer itself can be dangerous, especially if the interior is booby-trapped with C4 or Claymores. So always toss a grenade through the doorway before entering to trigger any explosives or kill any defenders hiding inside.
While the walls of the trailer can be destroyed, it’s best to keep them in place to offer cover while planting or disarming the charge. The canal to the northwest serves as a natural barrier.
Therefore most US attackers approach from the road by the warehouse. Parking the Vodnik or Tunguska-M on the road can serve as a deterrent, prompting attackers to swim across the canal.
Defenders should prepare for attacks from either direction as well as watch for enemy troops dropped from helicopters.
M-COM Station B
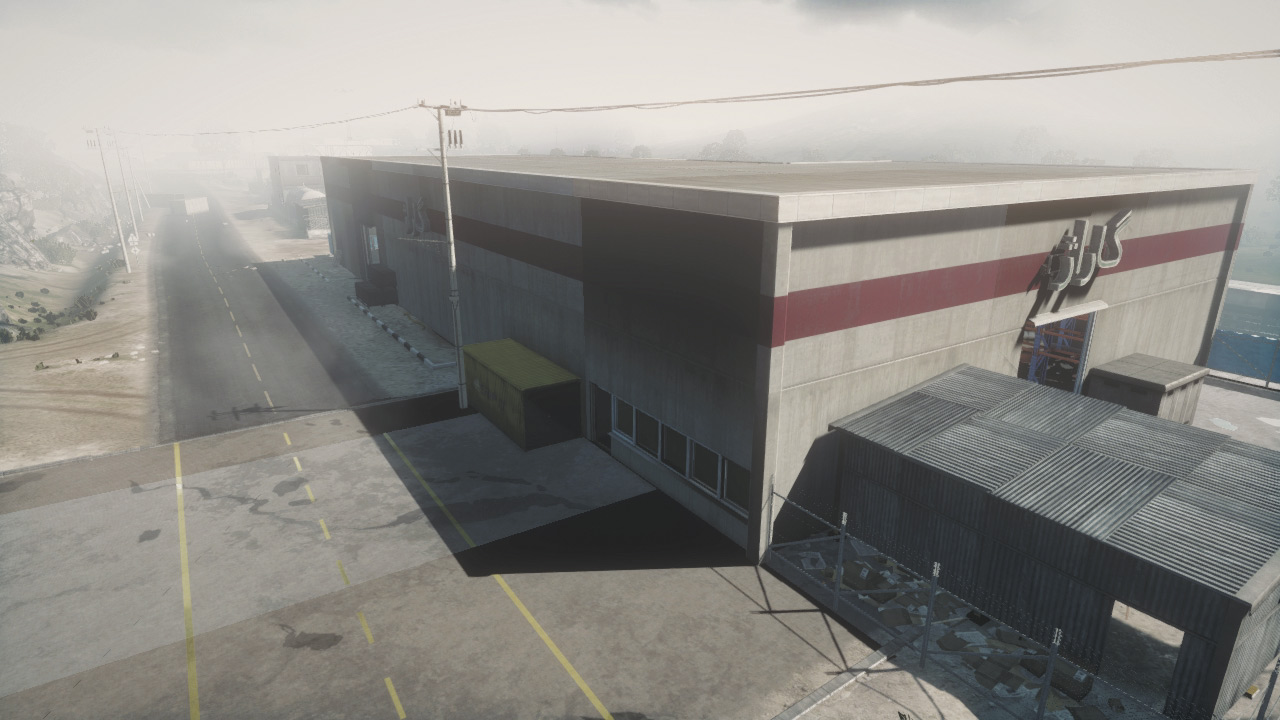
M-COM Station B is located on the ground floor of the large warehouse, situated in an office on the southern corner by the road.
By blasting holes in the warehouses exterior walls, US attackers can easily access the M-COM station without worrying about infiltrating the warehouse.
However, defenders posted inside the warehouse can still cover the objective regardless of which direction the attackers approach from.
If the US team wants a little extra firepower inside the warehouse, they can drive the AMTRAC directly inside via the ramp on the north side adjacent to the canal.
Of course, driving an armored vehicle into a building is never safe, but it may provide enough of a distraction to allow friendly troops enough time to plant the charge.
If the AMTRAC survives, its machine gun turret is awesome for targeting defenders attempting to disarm the charge on the objective.
US DEPLOYMENT
Base Assets
| Name | Quantity | Respawn Time |
|---|---|---|
| M1114 HMMWV | 1 | 15 sec. |
| AAV-7A1 AMTRAC | 1 | 60 sec. |
| AH-6J Little Bird | 1 | 90 sec. |
| UH-1Y Venom | 1 | 90 sec. |
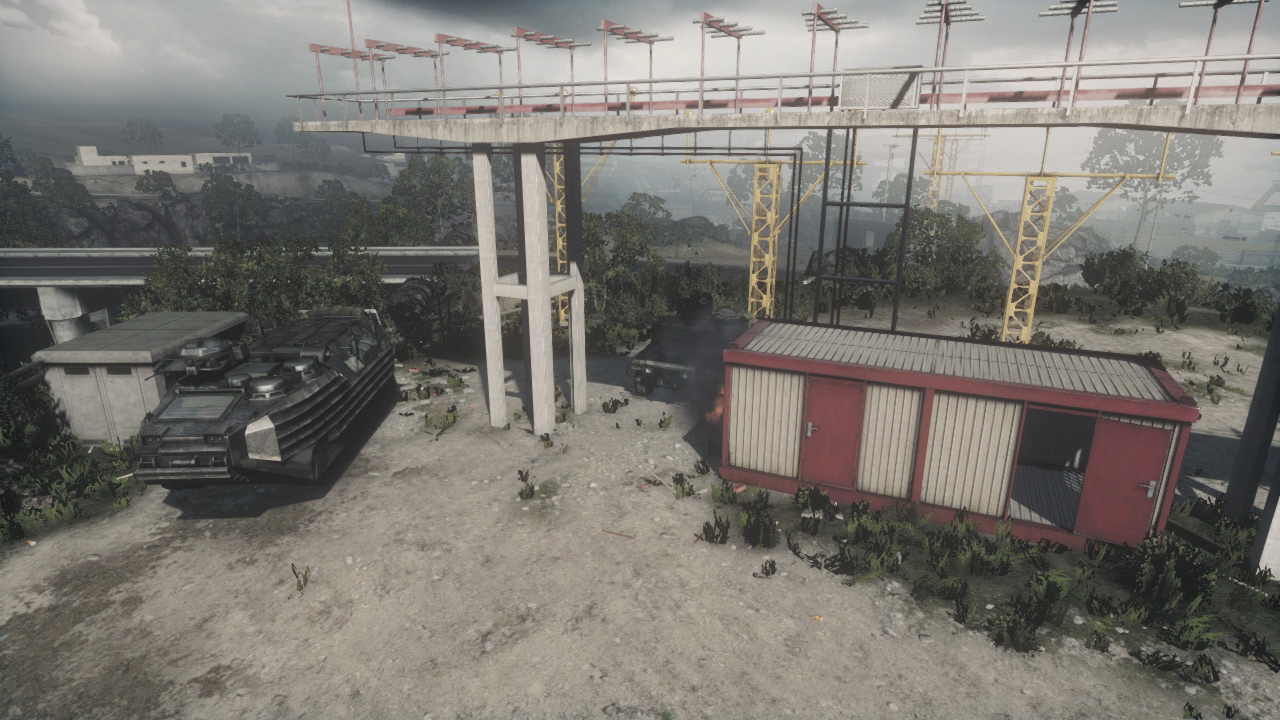
In this stage of the battle, the US team deploys on the hilltop, beneath the runway approach lights. While this location is where the HMMWV and AMTRAC appear, the helicopters are still available back at the aircraft carrier.
So don’t forget to spawn directly into the helicopters to provide air support for the next attack. The hilltop provides a great view of the next objective area to the east. Recon troops posted on the hill can score some long range kills here.
Just make sure the entire team doesn’t hold back and admire the view. While sniper support is welcome, the bulk of the team should make an aggressive push for the objectives.
RU DEPLOYMENT
Base Assets
| Name | Quantity | Respawn Time |
|---|---|---|
| GAZ-3937 Vodnik | 1 | 15 sec. |
| 9K22 Tunguska-M | 1 | 30 sec. |
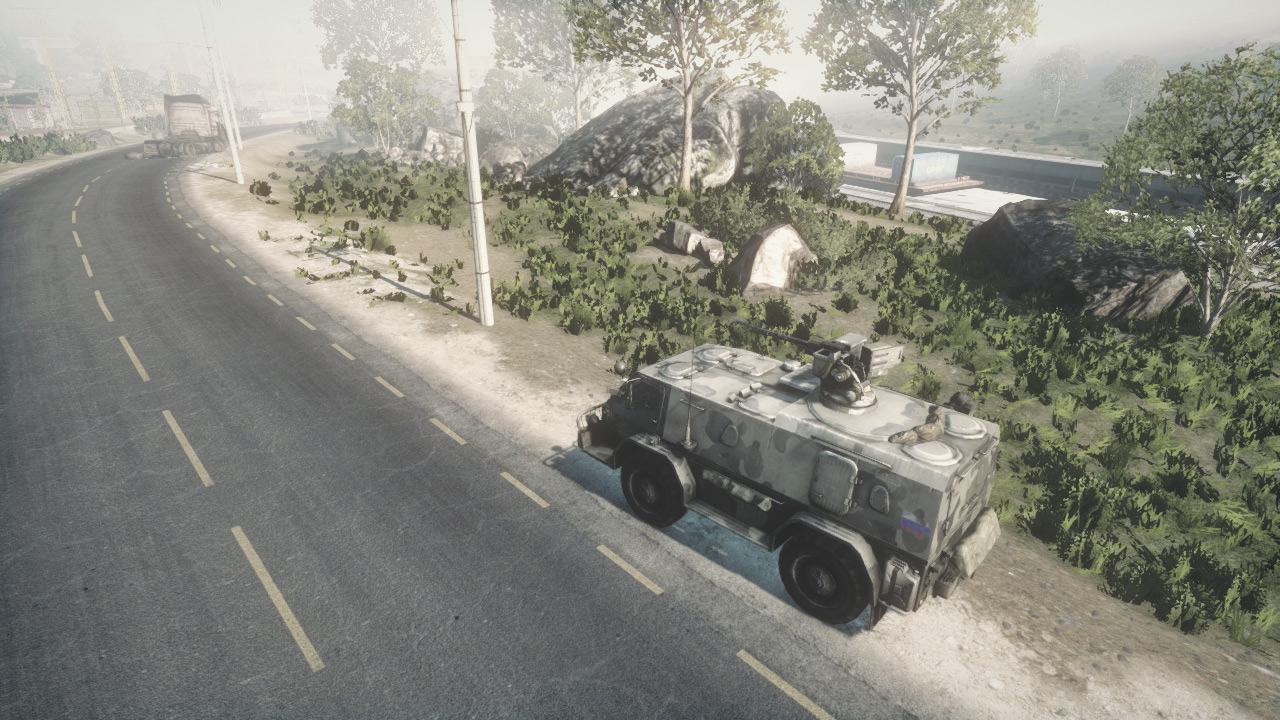
The RU team deploys along the paved road, east of the objectives. Infantry and vehicles spawning here are vulnerable to strafing runs by the US helicopters, so don’t loiter here long.
Spread out among the objectives and consider placing Radio Beacons in the warehouse where M-COM Station B is located. Move the Vodnik to a position along the road between both objectives.
From this vantage point the Vodnik’s machine gun turret can engage infantry and vehicles approaching from the US deployment area to the northwest.
The US helicopters remain a nuisance in this fight, so be prepared to shoot them down with the Tunguska-M as well as IGLA missiles fired by defending engineers.
ZONE 5: AIRFIELD
M-COM Station A
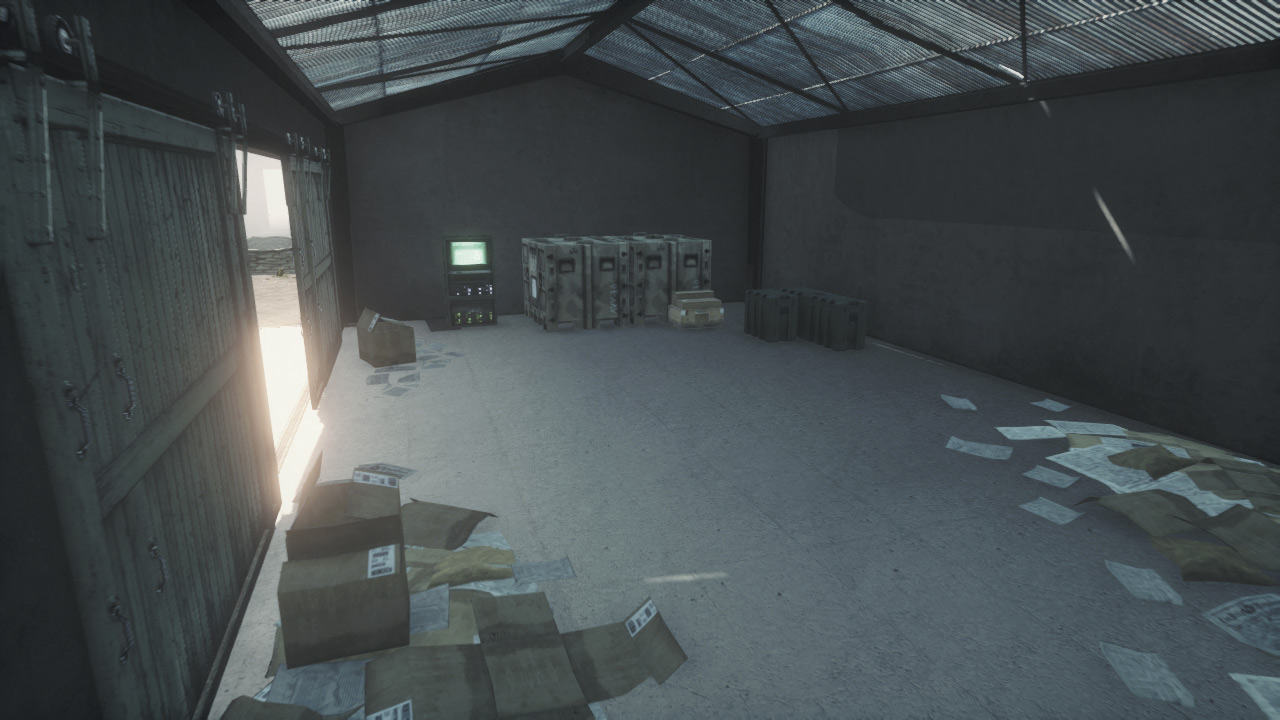
This objective is located in a small concrete structure within the airfield’s perimeter wall. Of the two objectives at the airfield, M-COM Station A is the easiest for the RU team to defend.
Located only a few meters from their deployment area, the RU team has no problem reaching this location throughout this phase of the battle.
Due to the barricades surrounding the structure, the US team can only access this objective by ground from the north or east. Of course, there’s always the possibility of parachuting down from a helicopter.
But such attempts are dangerous given the objective’s close proximity to the RU deployment area. When US troops do manage to get into the airfield, they should blow a hole in the structure’s southern wall to enter.
The north-facing entrance is most likely being watched by defenders, so sneaking in from the back is advised. Since gaining access is so difficult, the US may want to attack this objective first while the defenders are still spread out, covering both M-COM stations.
It’s much tougher to plant a charge here when the entire RU team is defending this location.
M-COM Station B
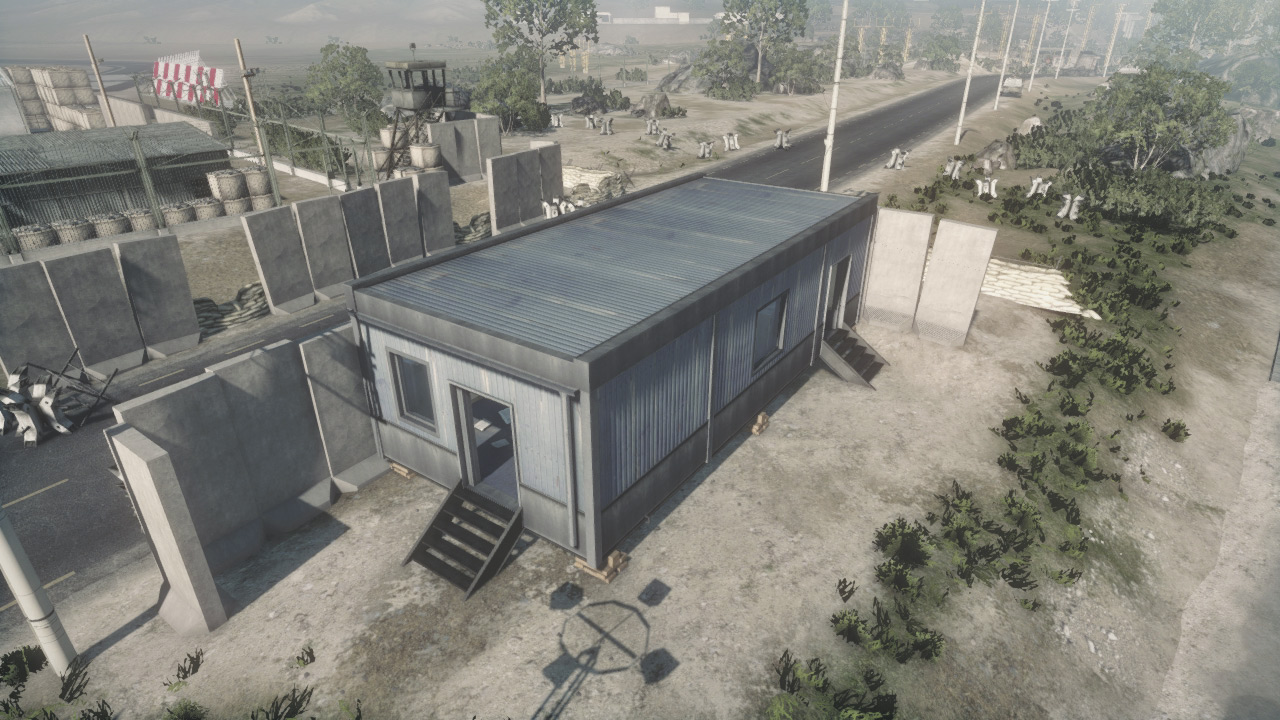
Flanked by a the road to the south and the canal to the north, the location of this M-COM station favors the US attackers. The objective is located in a gray trailer outside the airfield’s perimeter wall.
The concrete slabs on the west and south sides of the trailer partially protect the trailer from heavy attack. However, the north side of the trailer is completely open, giving attackers advancing from the canal easy access.
As a result, the RU defenders must completely envelop this trailer while watching for attacks approaching from the road and canal.
By knocking out the trailer’s east-facing walls, defenders can gain a long sight line into the trailer; Therefore, they can engage anyone who enters and tampers with the M-COM station.
However, there’s very little cover or concealment to the east, so remain prone to avoid giving away your position.
US DEPLOYMENT
Base Assets
| Name | Quantity | Respawn Time |
|---|---|---|
| M1114 HMMWV | 1 | 15 sec. |
| AAV-7A1 AMTRAC | 1 | 60 sec. |
| AH-6J Little Bird | 1 | 90 sec. |
| UH-1Y Venom | 1 | 90 sec. |
| RHIB | 1 | 15 sec. |
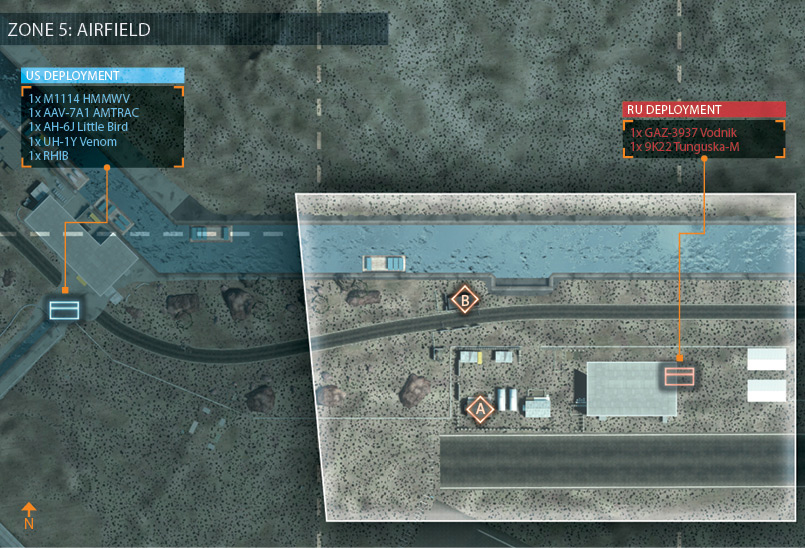
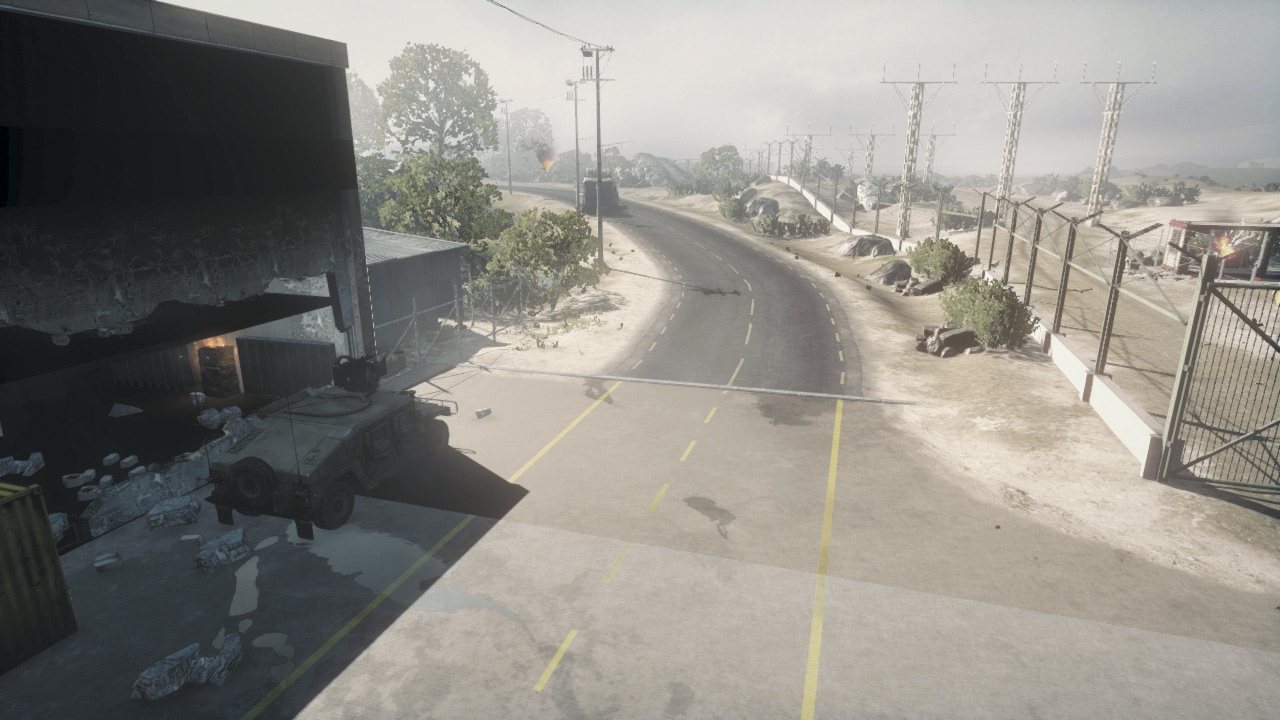
For the final phase of this battle, the US team deploys near the warehouse with nearly the same vehicle assets they’ve had since securing the Dry Dock.
In addition to the HMMWV, AMTRAC, and helicopters, the US team also has access to an RHIB. Use this boat or the AMTRAC to sneak up on M-COM Station B by racing along the canal to the east.
However, the helicopters (spawned back at the aircraft carrier) remain the most valuable assets for the US team. Use them to strafe and harass the defenders while dropping troops behind enemy lines.
This is the quickest way to gain access to the airfield. The road leading into the airfield is most likely defended with mines, so look for other ways in when driving one of the ground vehicles.
Consider crashing through the fence by the runway and attacking M-COM Station A from the south. Radio Beacons placed in and around the airfield are also a great way to apply pressure on the objectives by spawning teammates close to the action.
RU DEPLOYMENT
Base Assets
| Name | Quantity | Respawn Time |
|---|---|---|
| GAZ-3937 Vodnik | 1 | 15 sec. |
| 9K22 Tunguska-M | 1 | 30 sec. |
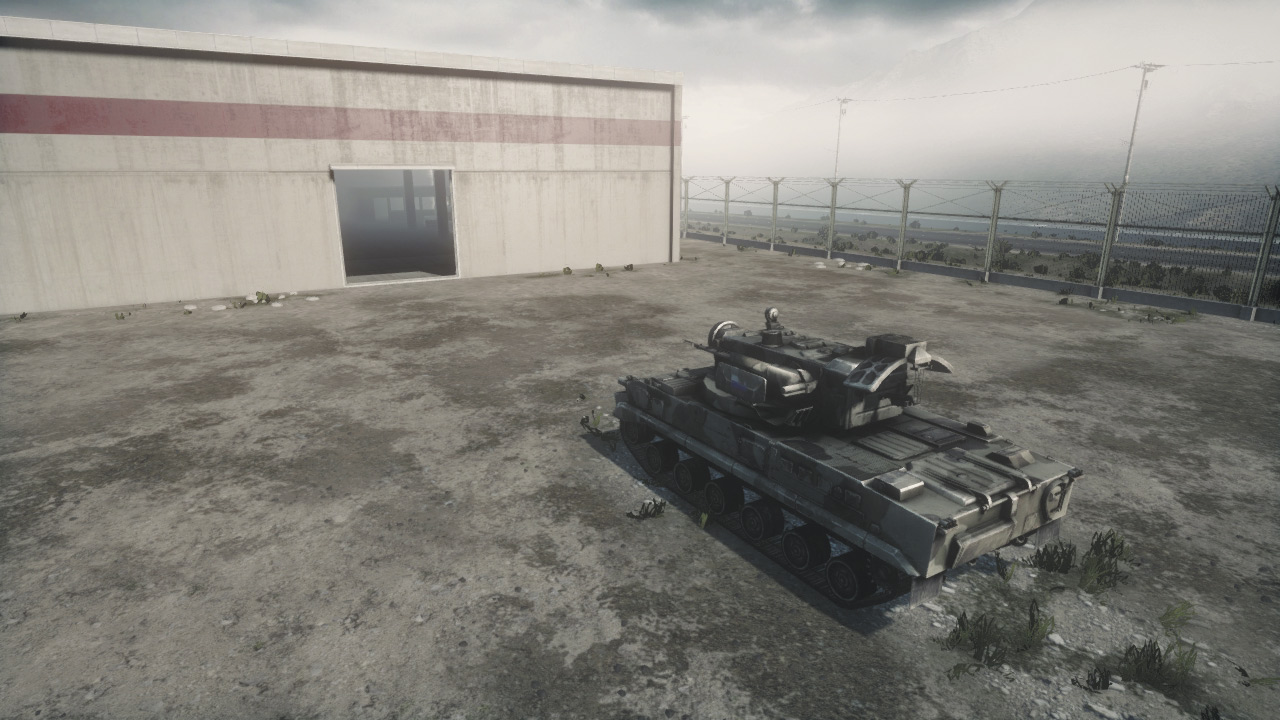
Despite deploying from an airfield, the RU team still has no helicopters or jets to help fend off the US attack. While the Vodnik and Tunguska-M are decent for dealing damage to the US helicopters, it’s largely up to the RU engineers to lock down the objectives.
Engineers deploying here should carry a mix of mines, anti-tank rockets, and surface-to-air missiles in an effort to immobilize and destroy the incoming US vehicles.
While the road is the airfield’s most popular access point, prepare for flanking attacks to originate from the canal to the north and runway to the south.
Also, make periodic sweeps around the airfield’s perimeter to search for US Radio Beacons. Denying the US team spawn points near the objectives is critical if the RU team hopes to hold out here for a victory.