
Battlefield 3 Premium Guide Battlefields Squad Rush
Tehran Highway
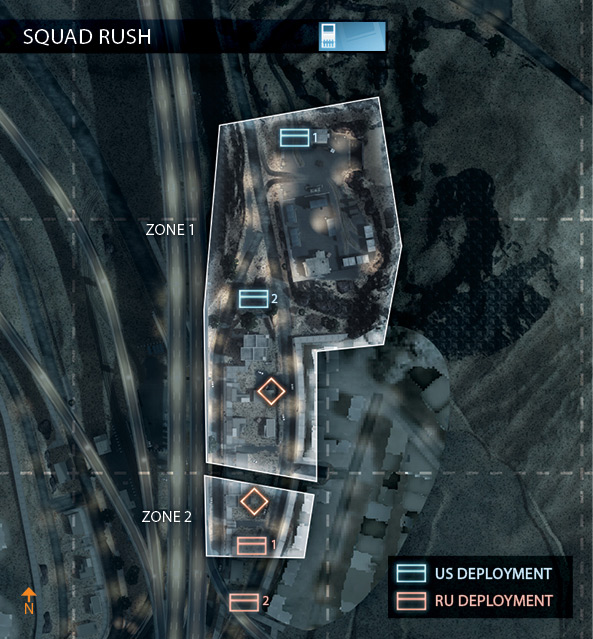
During the Squad Rush match, the action is limited to the small neighborhood on the east side of the map. While long-range combat is a possibility along the street to the east, it’s wisest for the attacking team to avoid this route, as it’s most likely being watched by the defending squad.
Whether attacking or defending, your squad doesn’t need more than one sniper. Most of the action occurs at close quarters among the buildings, alleys, and yards at the center of the map. Assault troops and engineers armed with carbines, shotguns, and submachine guns all fare well in these close-quarters engagements.
Attackers may want to bring along some smoke, too, which is useful for obscuring the objectives while planting charges.
ZONE 1: BACK YARD
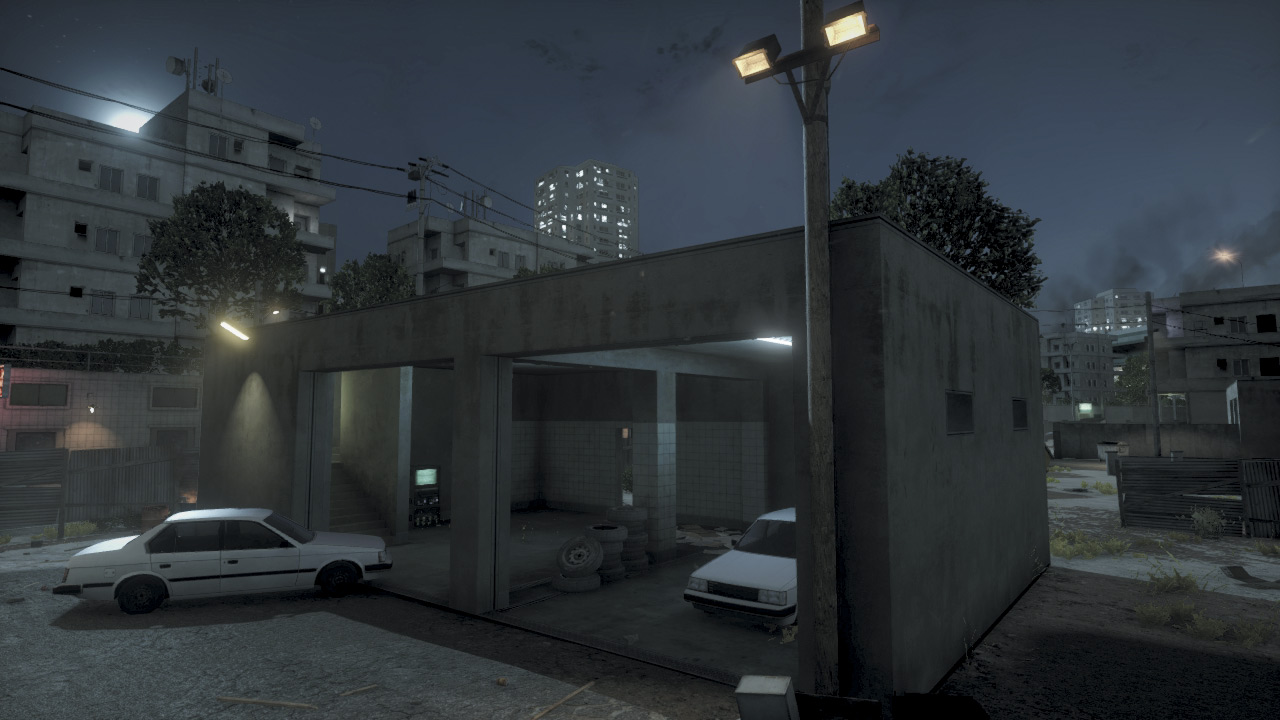
The Back Yard is the site of this skirmish, as the US squad attempts to destroy the M-COM station inside the garage.
Deploying from the depot to the north, the US team should avoid advancing along the street to prevent being spotted and picked off by RU defenders posted near the objective. Instead, cut through the buildings and alleyways on the west side of the street.
When the garage is within view, instead of rushing toward the objective, circle around the south side of the structure to sweep the area for defenders. Always assume defenders are hiding in the garage, so toss grenades inside before approaching the objective.
When defending this position, don’t move too far away from the objective. Establish a perimeter around the garage and always make sure the south side is monitored to prevent sneak attacks from the rear.
The roof of the garage is accessible via the staircase next to the objective. The roof provides a great view of the eastern street as well as the open area on the north side of the garage—this spot can serve attackers as well while defending the charge on the objective.
But if you’re on the roof, remain prone to avoid silhouetting yourself.
ZONE 2: TRADING CO.
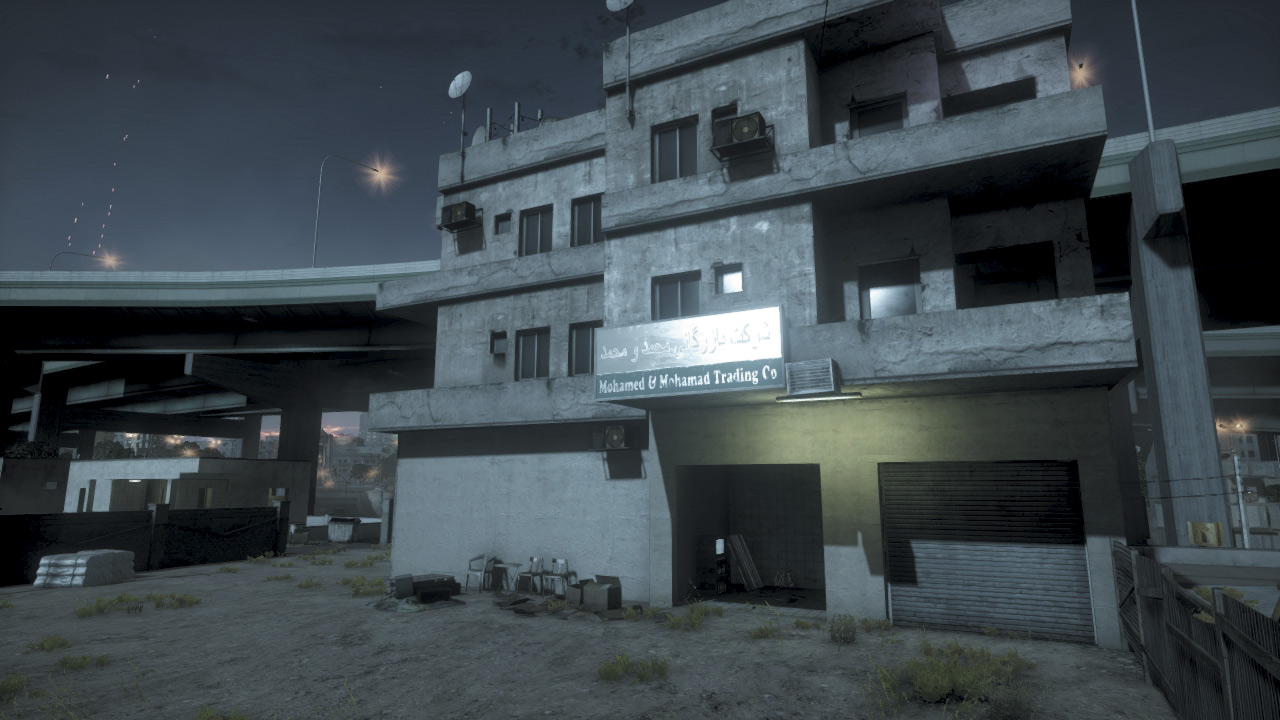
The next objective is in the same neighborhood as the Back Yard on the east side of the highway. This M-COM station is positioned inside a small garage within a commercial structure.
The garage opens onto a wide courtyard and the objective is visible from the street to the east. The RU team can effectively lock down this location simply by covering this small garage from the perimeter of the courtyard.
But cover is very sparse here, so stay low in an effort to conceal your position. It’s a good idea to post at least a couple of squad members around the garage while the rest of the team covers the northern approach.
Once again, attackers should avoid rushing down the street. The buildings and yards to the north offer much more protection, but they also serve as good ambush points for the defenders. So move through this area slowly with your weapon raised.
When you reach the Trading Co. building, circle around the western and southern sides, performing a through sweep of the courtyard before approaching the objective. It may be necessary to kill the entire defending squad before it’s safe to plant a charge on the M-COM station.