
Battlefield 3 Premium Guide Battlefields Squad Deathmatch
Damavand Park
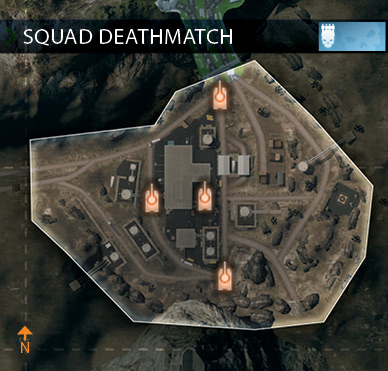
The Factory Valley is the location of this battle, as you and your squad fight for dominance. This sprawling industrial area offers plenty of cover and concealment, particularly around the massive warehouse.
Fights in this area often take place at close to intermediate range, so choose your kit loadout accordingly. For those who prefer putting a bit more distance between themselves and their enemies, the high ground on the east side of the map offers long sight lines that are ideal for recon troops looking for long-range kills.
The IFV spawns in one of four locations surrounding the warehouse. If your squad gets access to one of these IFVs, don’t linger around the map’s core.
You’ll only be a magnet for incoming rockets and C4 attacks. Instead, race to the perimeter of the map where there’s less cover for enemy squads.
Also, make sure you have at least one engineer on your squad to perform repairs. Make the most of your time in the IFV, scoring as many kills as possible to give your squad the lead.