
Battlefield 3 Premium Guide Battlefields Rush
Damavand Park
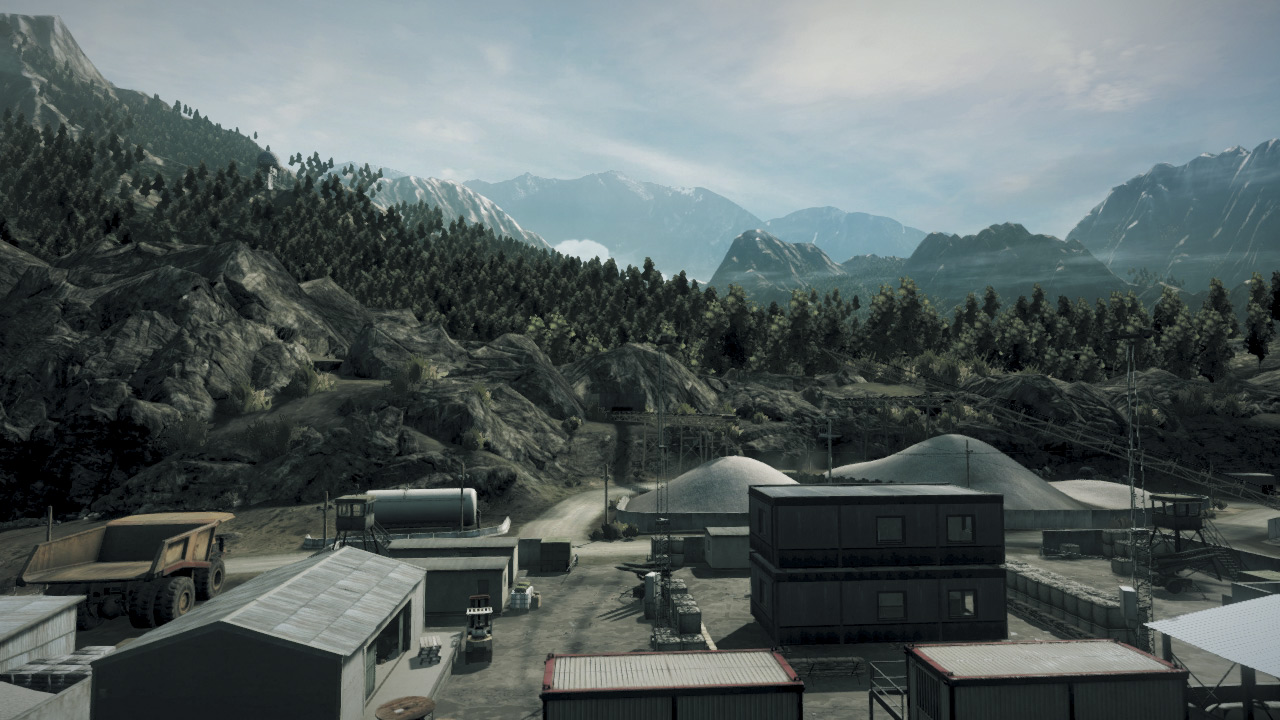
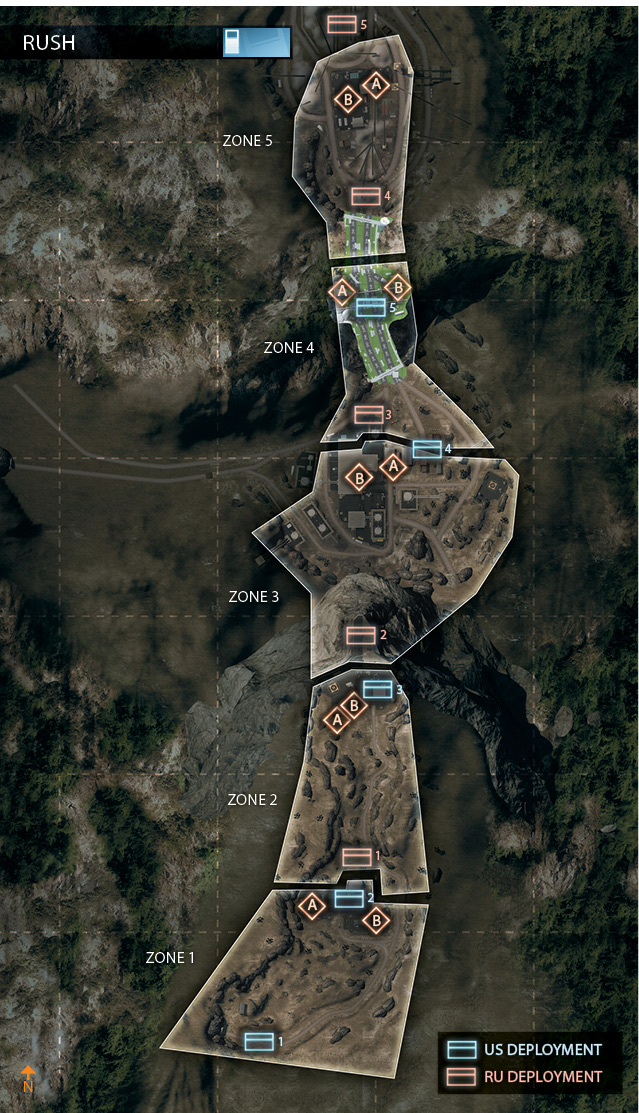
This is a truly epic Rush battle, requiring the US team to take out ten M-COM stations spread across five separate zones. Helicopters play a large role in this battle.
Good chopper pilots can be a complete game changer, so both teams should prepare for ways to counter these aerial threats. While helicopters can support the fight from the air, its still up to infantry to do the dirty work.
US attackers must still manually plant charges on each station, requiring teamwork and constant situational awareness. The RU team doesn’t gain any ground vehicles until the very end, so stopping the US advance early on falls largely to infantry.
The RU team starts by defending two sites on Damavand Peak before being pushed back to the valley floor, where they attempt to hold out at the Factory Valley, Tunnel, and finally the Mining Area.
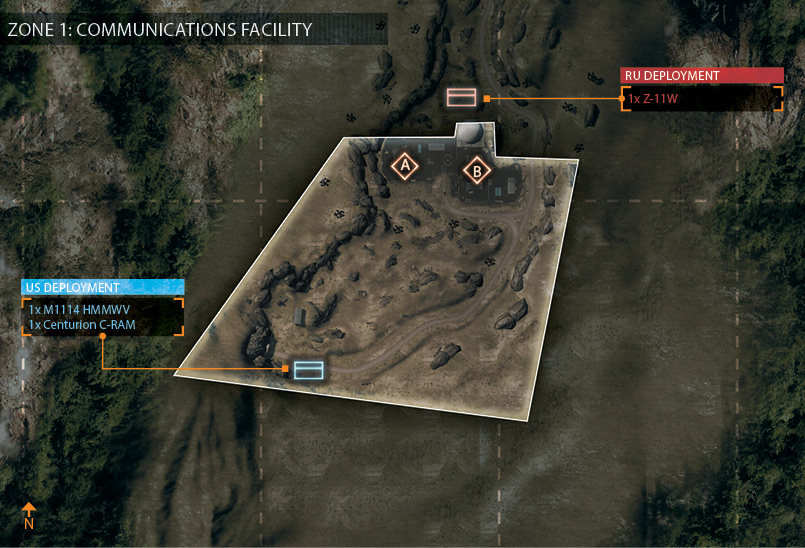
ZONE 1: COMMUNICATIONS FACILITY
M-COM Station A
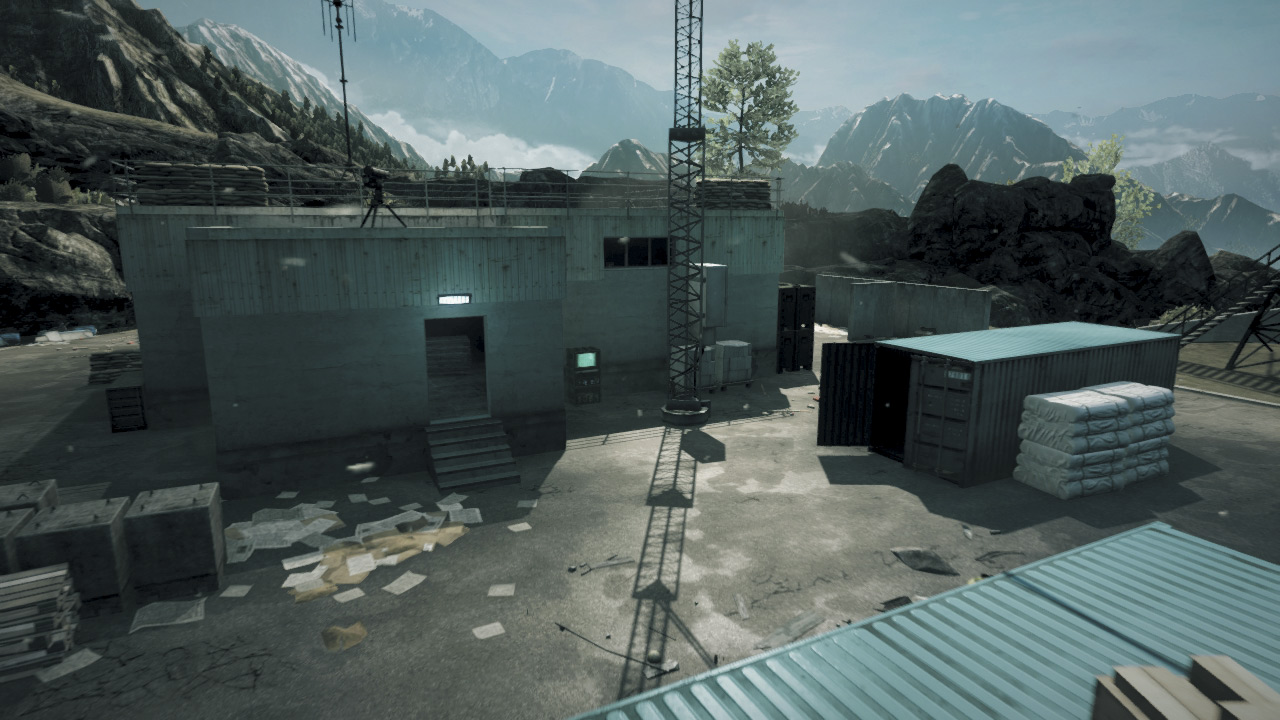
This M-COM Station A is located on the western side of the facility, placed against the exterior wall of a moderately sized building. The area around the M-COM station is well within view of US recon troops posted on the hillside to the south, presenting a threat to RU defenders.
Seek cover in nearby buildings or among the shipping containers. However, the adjacent building blocks the view of snipers, preventing them from hitting anyone standing directly next to the M-COM station.
Of course, new sight lines can be attained by blowing holes through walls with explosive weapons. The facility’s wall directly to the south is one advisable breach point for US attackers approaching this location.
The M-COM station is completely exposed to the north and east, so deploying smoke is highly recommended before attempting to set or disarm a charge here. Both teams can benefit from Radio Beacons planted within the nearby building, as they allow for quicker response.
M-COM Station B
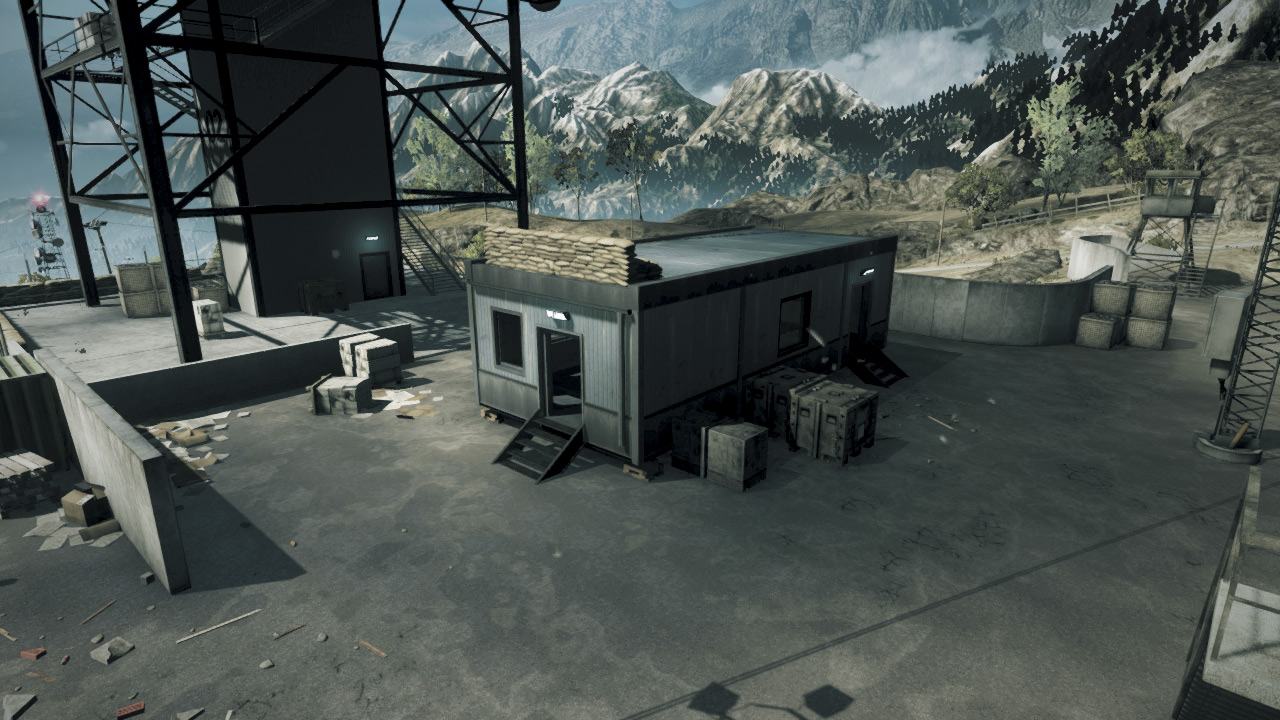
M-COM Station B is located inside the small trailer-like structure directly south of the massive communications tower. The walls of the structure make it difficult for attackers and defenders to cover the M-COM station directly from long range.
Defenders may wish to take out the walls to take out the structure’s northern and western walls, thereby allowing them to better see attackers sneaking into the building.
The attackers can benefit by demolishing the structure’s southern wall to allow recon troops to cover the M-COM station from long range and pick off RU defenders as they attempt to disarm the charge.
Ultimately, destroying the structure’s walls benefits the defenders most, denying the attackers cover as they approach the M-COM station. Still, defenders need to seek suitable cover themselves to avoid getting hit by attacking snipers.
US DEPLOYMENT
Deployment Area Assets
| Name | Quantity | Respawn Time |
|---|---|---|
| M114 HMMWV | 1 | 30 sec. |
| Centurion C-RAM | 1 | — |
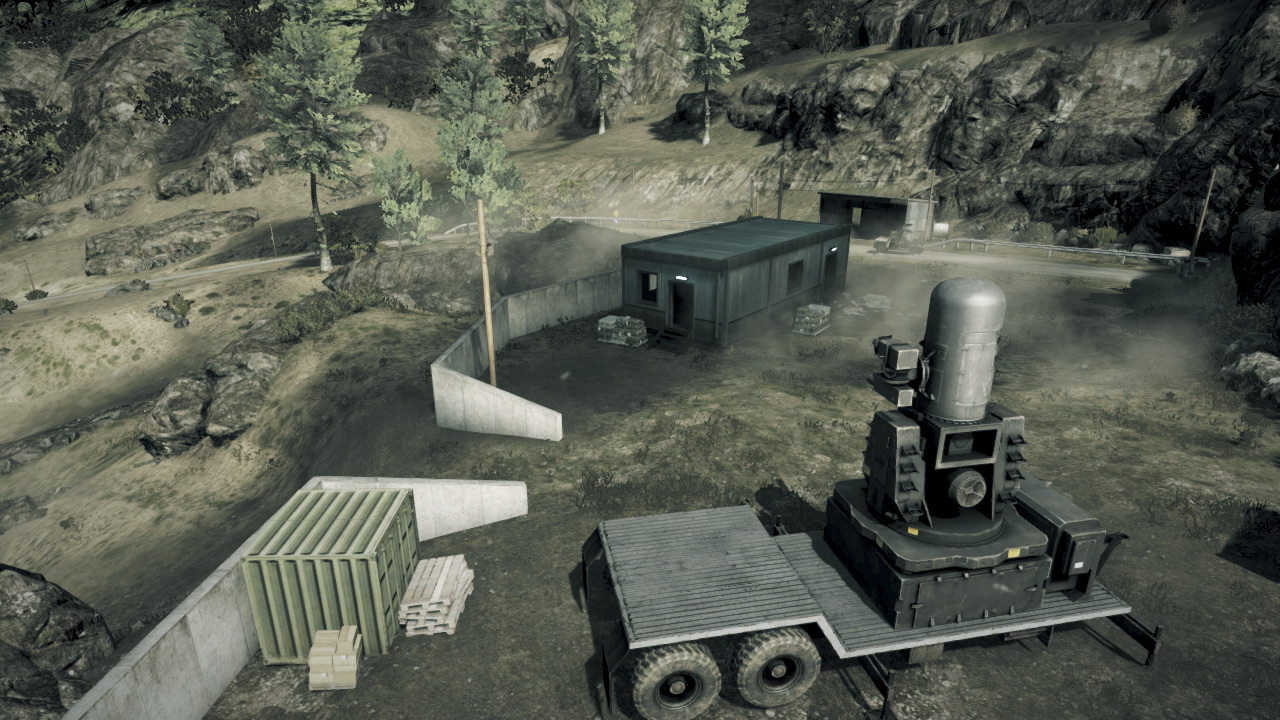
The US team starts on the very southern tip of the map with only a few assets at their disposal. While the HMMWV is great for rushing the Communications Facility to the north, it’s usually much safer to approach on foot.
During the advance on the Communications Facility, make sure the Centurion C-RAM is manned to counter the RU team’s Z-11W. Otherwise a skilled pilot can wreck havoc on your team’s advance.
The engineer’s FIM-92 Stinger is also well suited for countering this serious threat. While moving to the Communications Facility, avoid the dirt road to the east and use the rocks on the north side of the facility for cover.
Planting a Radio Beacon in a covered position can greatly reduce your squad’s commute, allowing you to apply consistent pressure against the M-COM stations below.
The US team attacks downhill, so take advantage of the high ground by posting recon troops along the hillside and fire down on the RU defenders to the north.
RU DEPLOYMENT
Deployment Area Assets
| Name | Quantity | Respawn Time |
|---|---|---|
| Z-11W | 1 | 90 sec. |
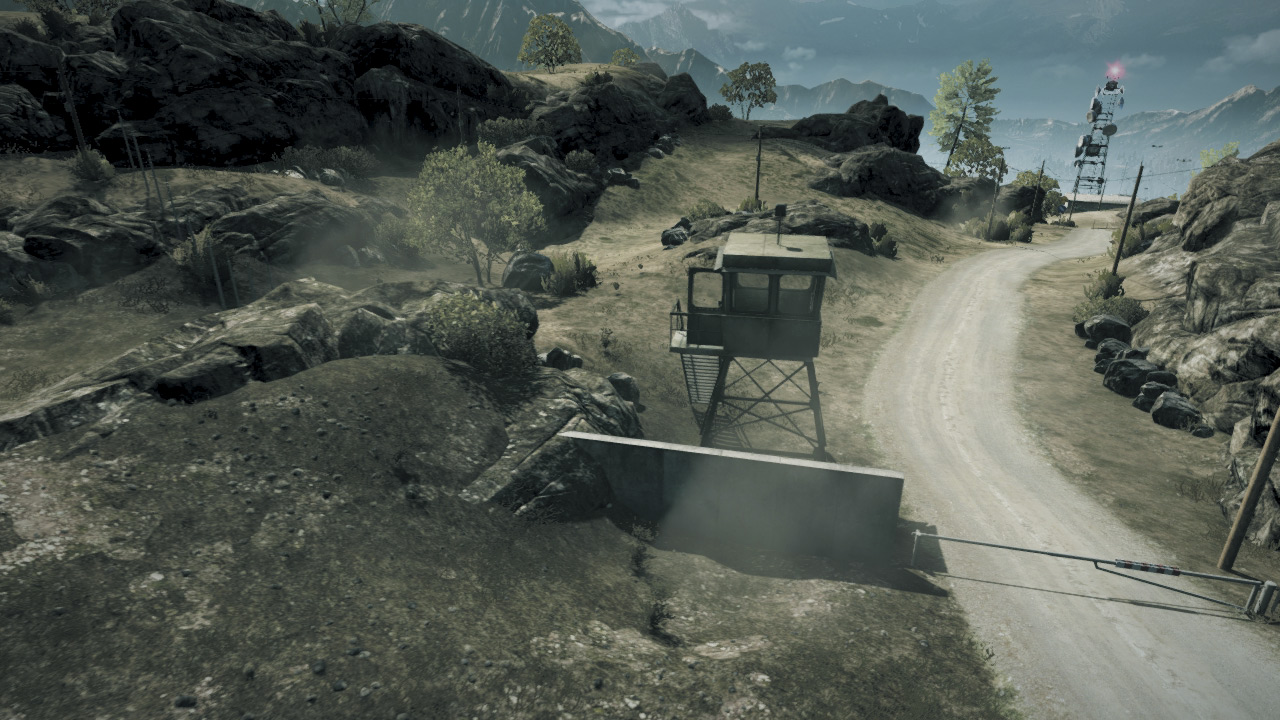
The RU team’s ground forces deploy near a guard tower just north of the Commmunications Facility. It’s a short hike up the hill to reach the M-COM stations to the south.
However, the US troops may rush the facility in their HMMWV, so speed is essential at the start of a match. Sprint up the hill and immediately take up positions around both M-COM stations.
Seek out cover to prevent getting sniped from the hill above the facility. The RU team’s Z-11W helicopter spawns at Peak Facility’s helipad to the north.
While this area is off-limits, you can spawn directly into the helicopter when it’s available. But don’t take the pilot’s seat unless you have some experience.
A skilled pilot is required to strafe the US attackers while avoiding the incoming fire of the Centurion C-RAM located at their deployment area.
ZONE 2: PEAK FACILITY
M-COM Station A
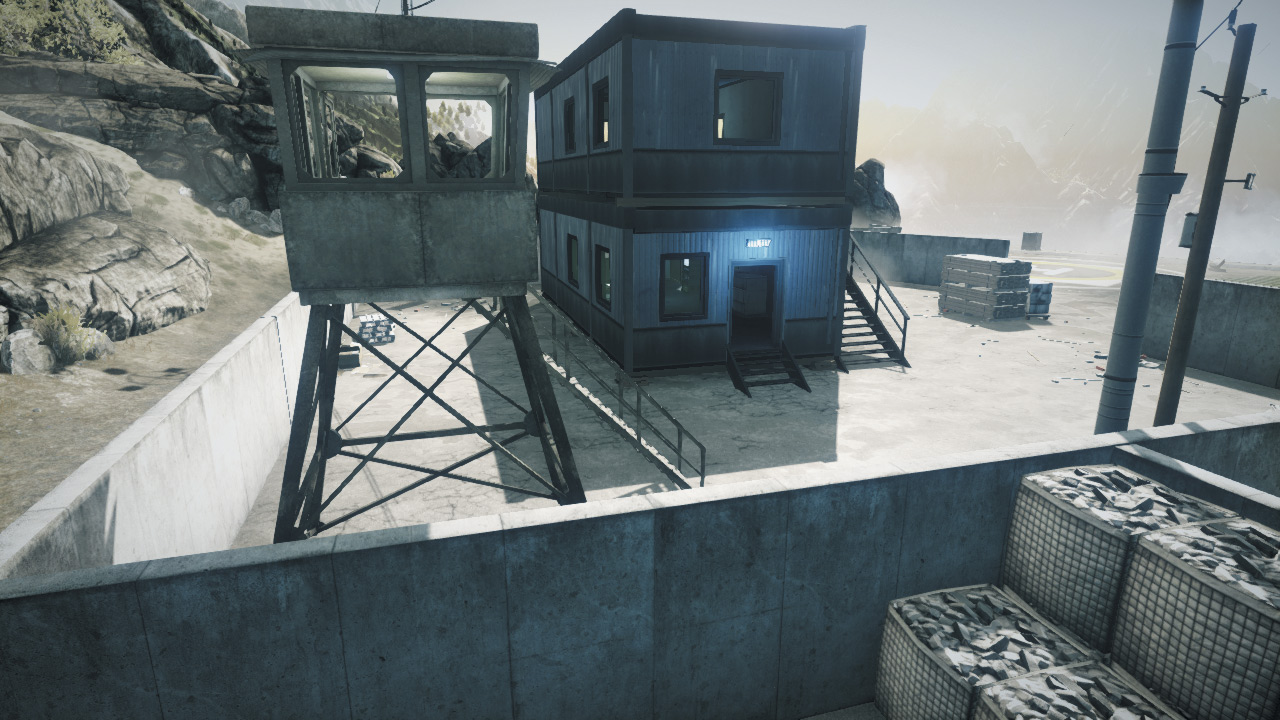
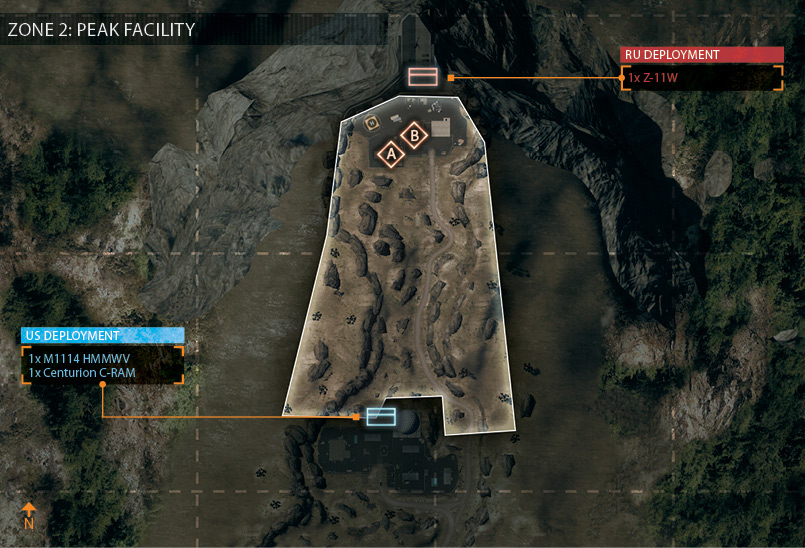
M-COM Station A is located in the southwest corner of the Peak Facility and is likely to be the first objective attacked by the US team due to its close proximity to the southern exterior wall.
The M-COM Station sits on the bottom floor of the small gray two-story structure next to the concrete perimeter wall. Instead of circling around the wall, US troops should simply blast their way through to easily access this M-COM station.
RU defenders should hold to the north and take out the walls on the bottom floor of the structure. This allows them to engage attackers attempting to set a charge. Denying the attackers this cover can go a long way in holding out here.
M-COM Station B
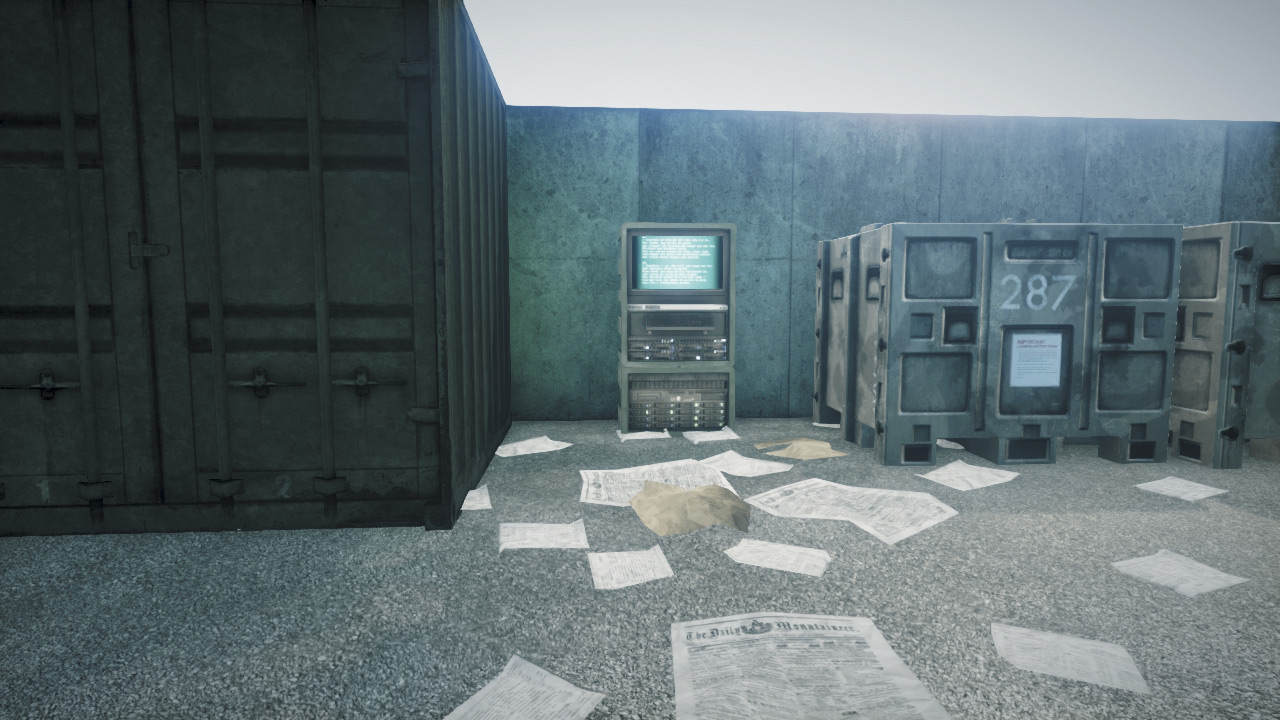
While this M-COM Station B is partially fenced in by concrete walls, these walls can be destroyed with explosive weapons, allowing the US team to stage their attack from practically any direction.
The M-COM station is flanked by two shipping containers that cannot be destroyed, providing excellent cover for troops attempting to set or disarm a charge.
However, anyone standing in front of the M-COM station is completely exposed from the east. So whether you’re attacking or defending, the east side offers the best cover point.
The wall directly behind the M-COM station can also be destroyed for those who wish to cover the station from the west. However, the station must still be armed or disarmed from the east side.
US DEPLOYMENT
Deployment Area Assets
| Name | Quantity | Respawn Time |
|---|---|---|
| M114 HMMWV | 1 | 30 sec. |
| Centurion C-RAM | 1 | — |
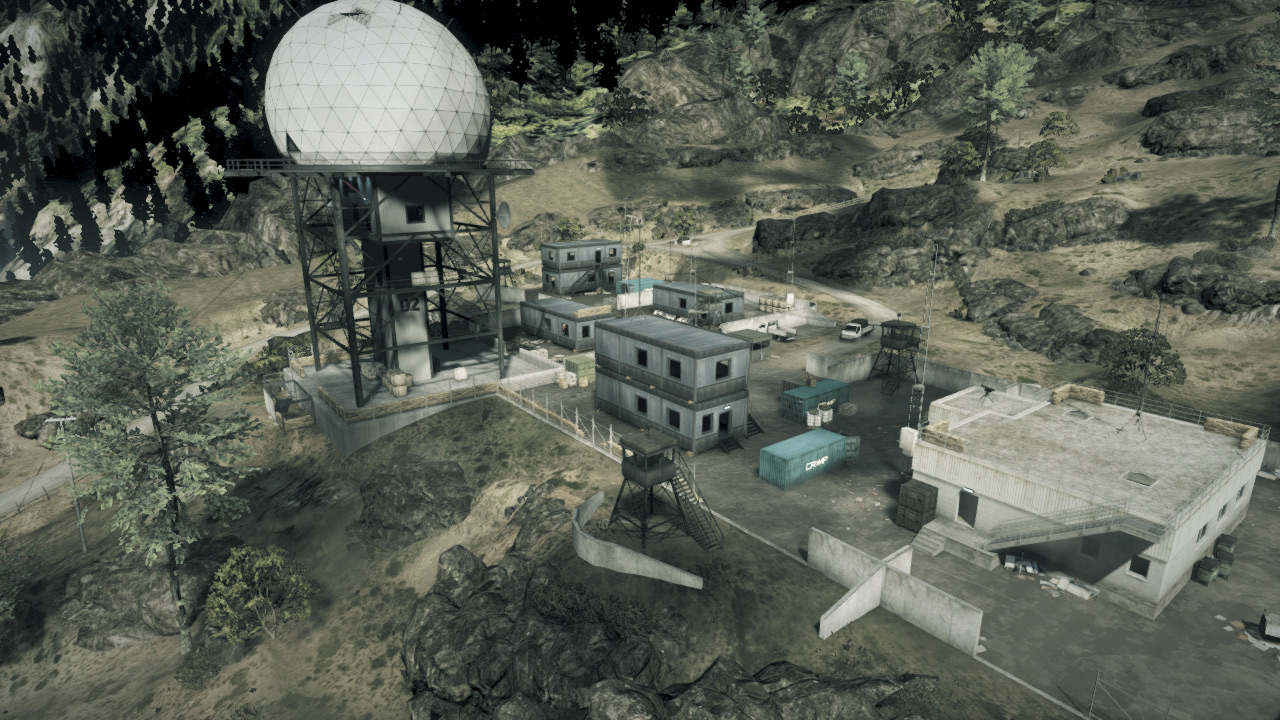
After destroying the first two M-COM stations, the RU team is pushed farther to the north while the US team claims the Communications Facility for their base.
The US team is granted the same assets as before: one HMMWV and a Centurion C-RAM for air defense. The US team still holds the high ground at this location, but it’s still a long hike to the Peak Facility down the slope to the north.
Fortunately there’s plenty of large rocks that US troops can use for cover on the way down. The road to the east offers the quickest access into the Peak Facility, but it’s likely to be mined or booby-trapped.
Still, rushing the Peak Facility along this road in a HMMWV is by far the quickest way to gain a foothold near the M-COM stations. Once in or near the facility, utilize Radio Beacons to allow squad mates to spawn closer to the action.
RU DEPLOYMENT
Deployment Area Assets
| Name | Quantity | Respawn Time |
|---|---|---|
| Z-11W | 1 | 90 sec. |
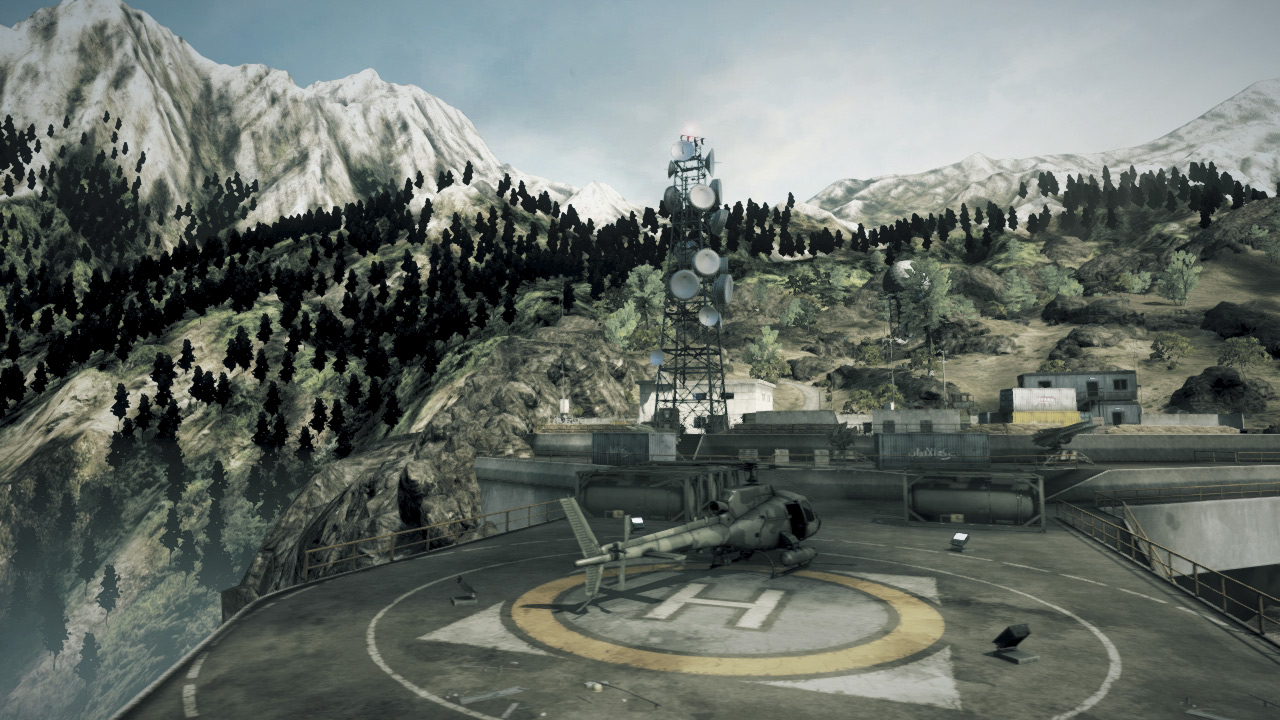
After losing their first base, the RU team is pushed back to the very edge of Damavand Peak, deploying near the helipad perched on the northernmost tip of the mountain.
The M-COM stations are located within the facility to the south, only a few meters away. However, RU defenders should prepare for early rush attacks by the US HMMWV.
If the US team acts quickly, they can gain a foothold in the facility before the RU team has a chance to establish a defensive perimeter. Barring early rush attacks, the RU defenders have a solid chance of holding out here.
US recon troops sniping from the hillside to the south are still a problem here for defenders, so avoid silhouetting yourself in windows or on rooftops. Stay low and focus you attention on the two M-COM stations.
Perform routine security sweeps of the facilities perimeter and destroy any US Radio Beacons placed near the facility. Keep the Z-11W in the air at all times to strafe the advancing US troops.
ZONE 3: FACTORY VALLEY
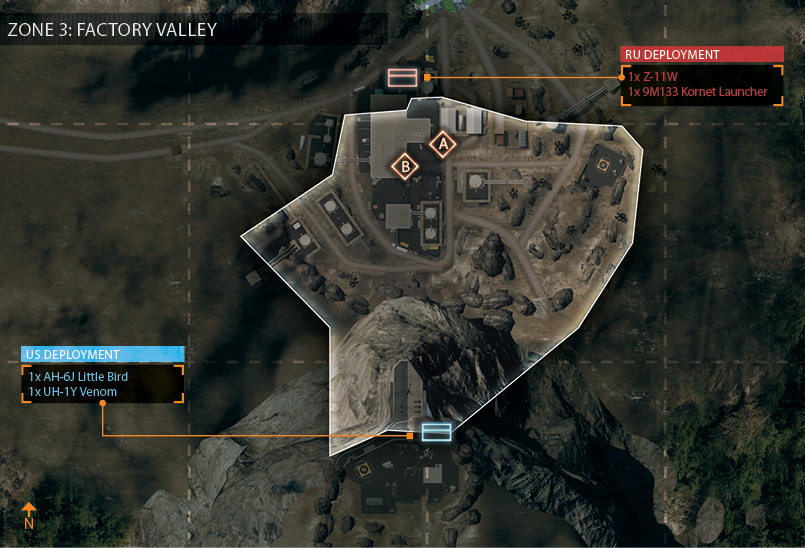
M-COM Station A
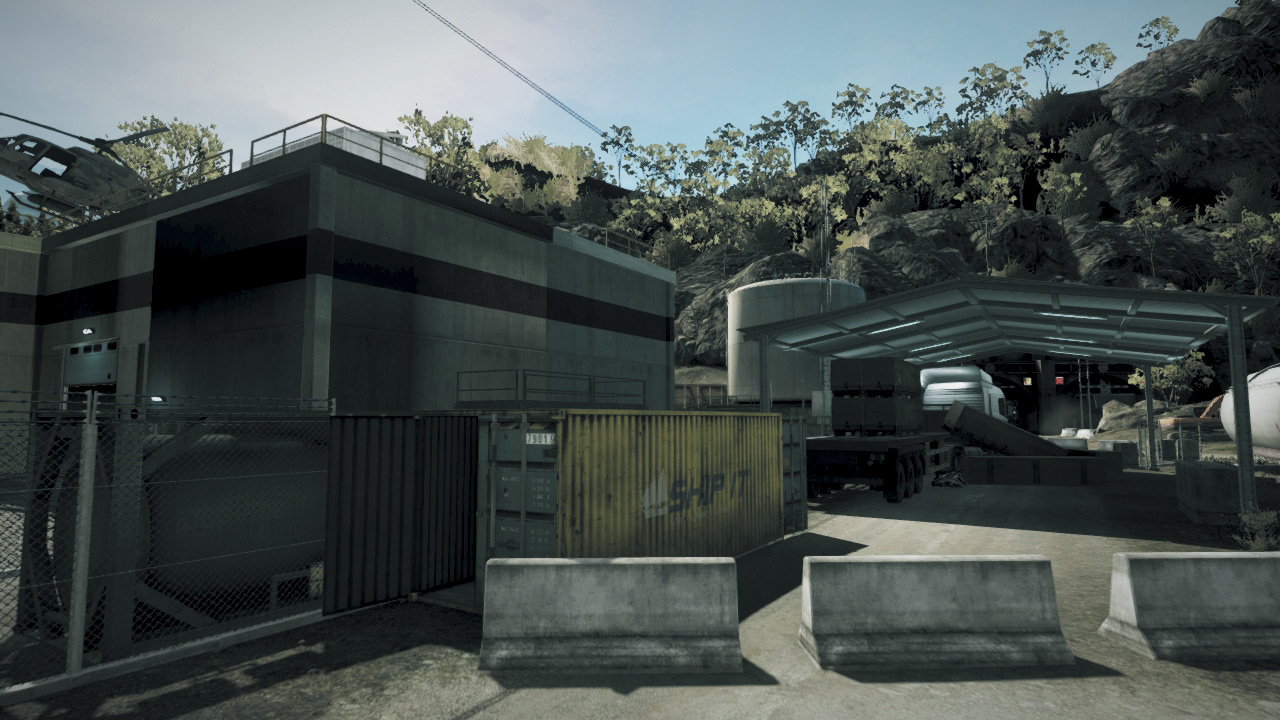
This M-COM Station A is positioned in a yellow shipping container alongside the road outside the large warehouse facility. Both the northern and southern ends of the shipping container are open, allowing access to the M-COM station from either side.
Once inside the cramped shipping container, it’s relatively safe to set or disarm a charge. However, getting inside can be tough, especially if both entrances are watched by the opposing team.
The shipping container is surrounded by multiple elevated positions, offering both attacking and defending recon troops a clear view of anyone entering or exiting. Therefore smoke is essential in concealing advances toward the shipping container’s entrances.
For the US attackers, it’s best to get inside, set the charge, and then exit, covering shipping container from a distance as the defenders rush to disarm the charge.
Loitering inside the shipping container only makes you vulnerable to incoming grenades and close-quarters assaults.
M-COM Station B
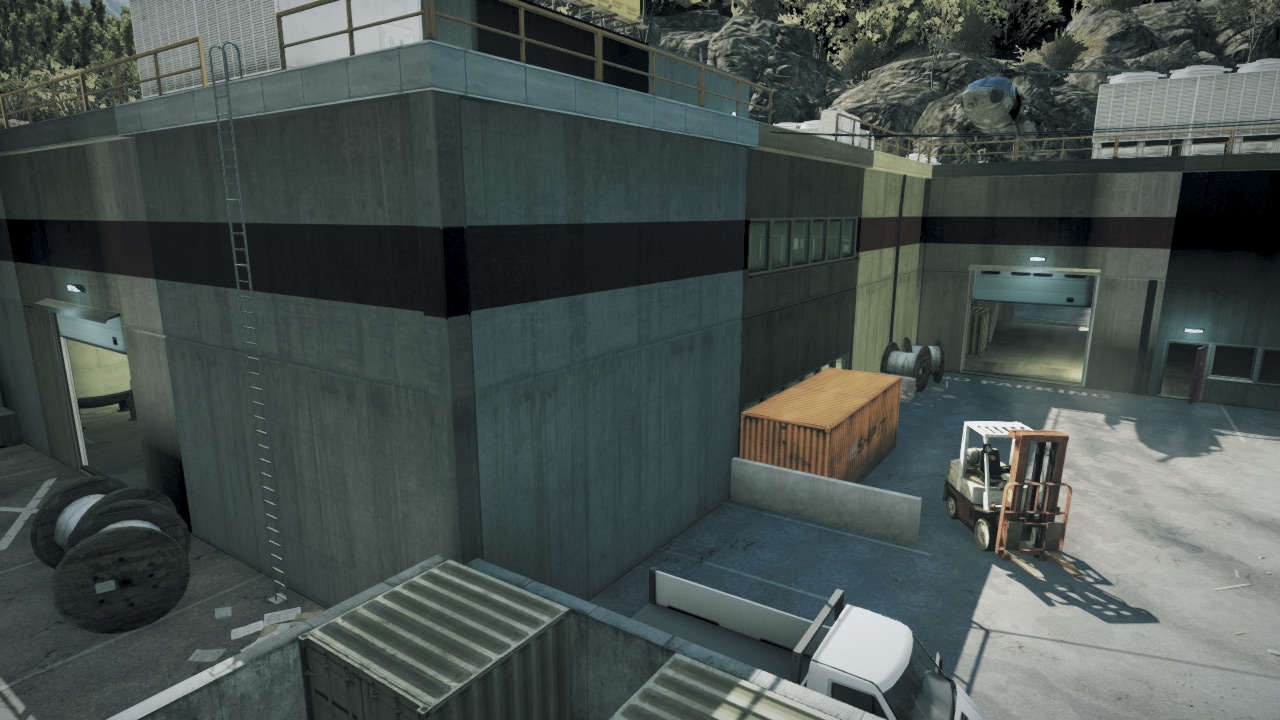
While attacking the shipping container can be challenging, it’s nothing compared to approaching this M-COM Station B located on the ground floor of the large warehouse.
If well defended, the RU team can hold out here indefinitely, stealthily picking off US attackers from the catwalks and other elevated positions.
Attackers must embrace the element of surprise by punching holes through the warehouse’s exterior walls and creating their own entry points.
This helps keep the RU defenders on their toes, constantly guessing where the next infiltration will come from. Both teams can also benefit from Radio Beacons placed in and around the warehouse, which is ideal for maintaining a constant presence in this area. Attacking and defending this location requires a concerted team effort.
Failing to coordinate will most certainly lead to defeat.
US DEPLOYMENT
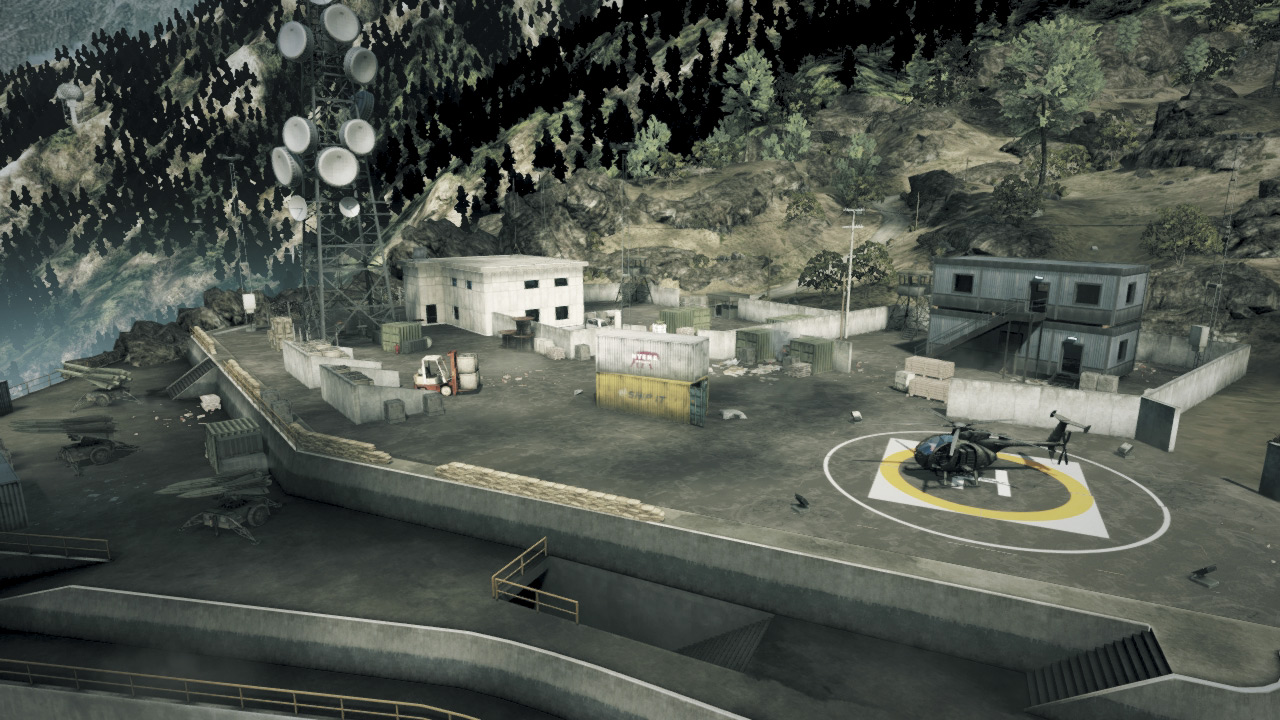
Deployment Area Assets
| Name | Quantity | Respawn Time |
|---|---|---|
| AH-6J Little Bird | 1 | 90 sec. |
| UH-1Y Venom | 1 | 90 sec. |
The fight is long from over after the US team knocks out the latest M-COM stations at the Peak Facility. Next comes one of the most unique and exciting advances in any Rush map:
It requires the US team to drop off the edge of the mountain and secure a foothold in the valley below.
There are a couple of ways to safely reach the valley floor. The most obvious is by helicopter transport. This base now spawns an AH-6J and UH-1Y for the US team.
If you can’t hitch a ride on a chopper, the only other way down is by base jumping off the northern edge of the mountain. This is far less dangerous than it looks, but you must be careful when deploying your parachute.
If you deploy your parachute too early, the RU defenders will have any easy time spotting you, making you vulnerable to incoming fire as you slowly drift to the ground. The key is opening your parachute when you’re only a few meters from the ground.
Not only is this the fastest way down, but you’re also less likely to get shot during the descent. Once safely on the ground, make sure your squad deploys a Radio Beacon in a safe spot to secure a spawn point in the valley.
RU DEPLOYMENT
Deployment Area Assets
| Name | Quantity | Respawn Time |
|---|---|---|
| Z-11W | 1 | 90 sec. |
| 9M133 Kornet Launcher | 1 | 60 sec. |
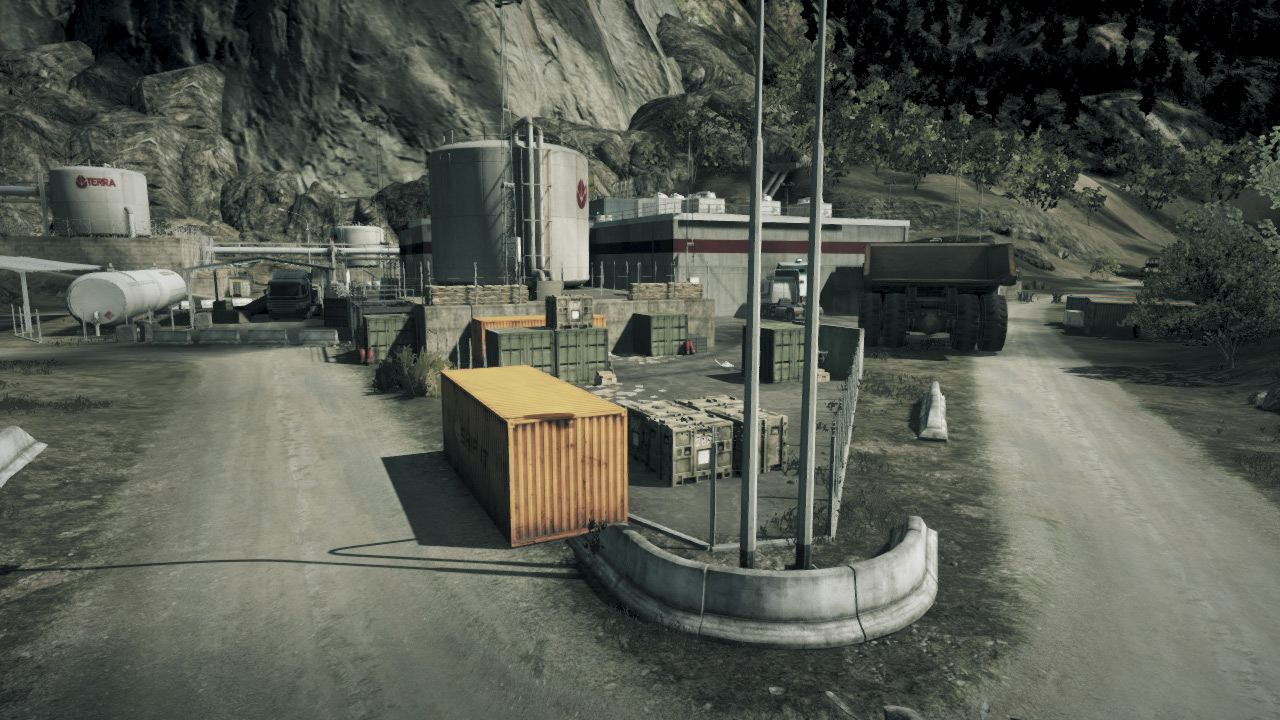
After losing the Peak Facility, the RU team deploys near the South Entrance by the Tunnel.
The M-COM stations are only a few meters south of the deployment area, but the US helicopters give the attackers increased mobility to quickly secure spawn points on the valley floor.
RU engineers armed with SA-18 IGLA launchers are needed to combat the threat posed by the US choppers. But RU troops should also watch for attackers base jumping off Damavand Peak.
Base jumpers are particularly vulnerable if they deploy their parachutes too early. So spot them for your teammates, then open fire.
Hitting a slowly descending opponent with a parachute isn’t easy, but if multiple teammates concentrate their fire on one target, chances are the base jumper won’t survive.
Still, don’t get distracted by shooting down choppers and base jumpers. Sprint to each M-COM station and establish a defensive perimeter ASAP.
ZONE 4: TUNNEL
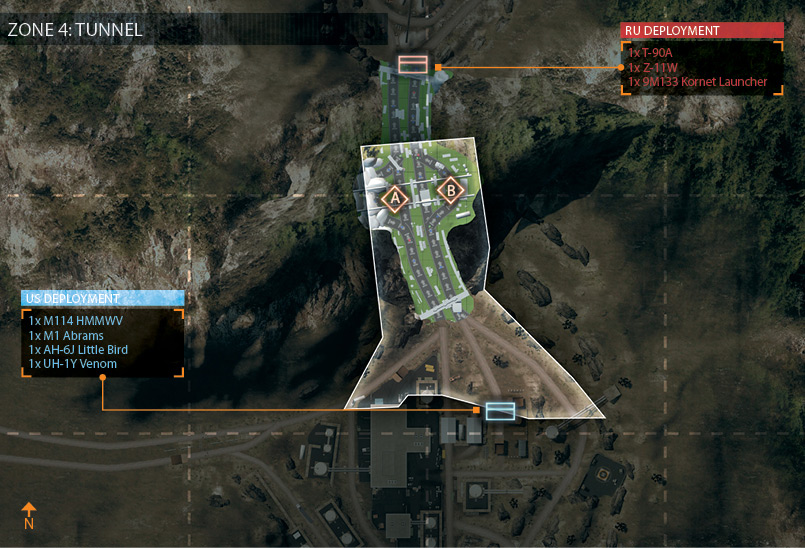
M-COM Station A
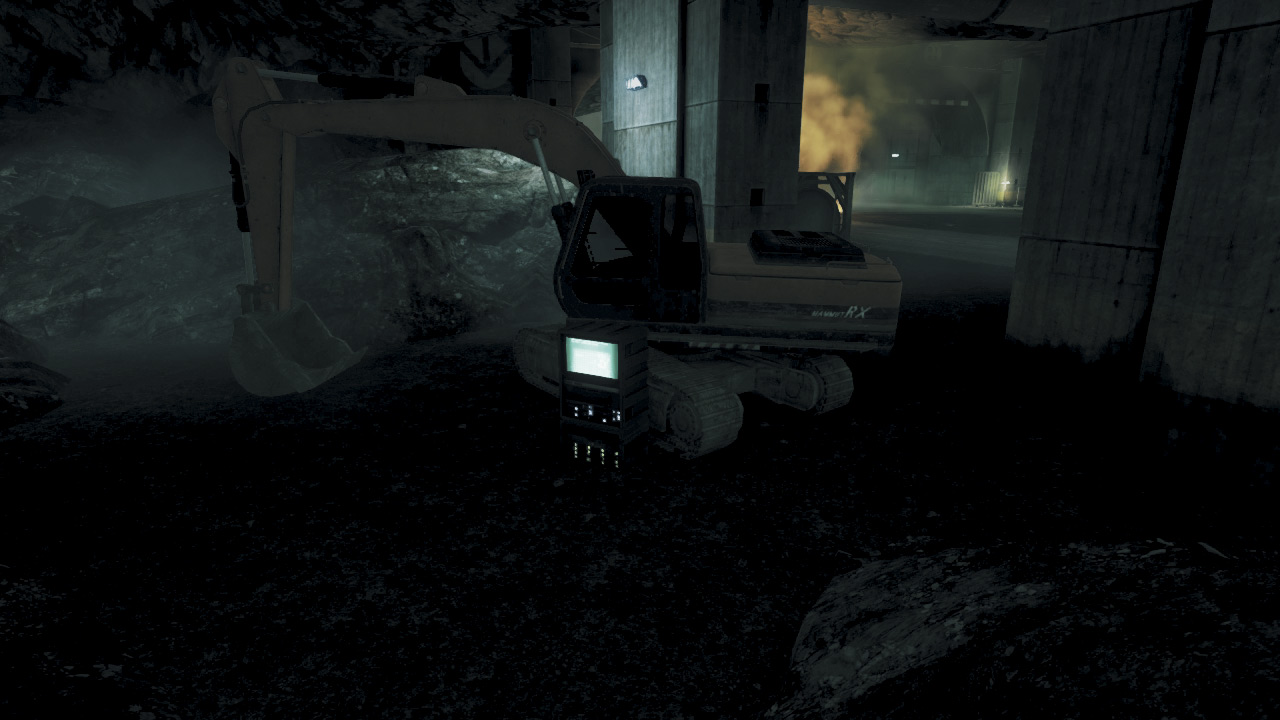
This M-COM Station A is located in a construction zone on the western side of the Tunnel. The objective is surrounded by piles of rock and debris, preventing both attackers and defenders from covering this area from long range.
So prepare for some close-quarters firefights around this objective. Utilize Tactical Lights and Laser Sights to cut through the darkness and blind your opponents.
If you want to avoid giving away your position, equip the IRNV (IR 1x) scope and a Flash Suppressor to spot enemies while remaining undetected. Given the uneven terrain, vehicle attacks on this position aren’t easy.
Infantry are best suited for attacking and defending this M-COM station. RU defenders should cover the narrow passage directly south of the objective. This is a popular avenue of attack and should be locked down by support troops.
M-COM Station B
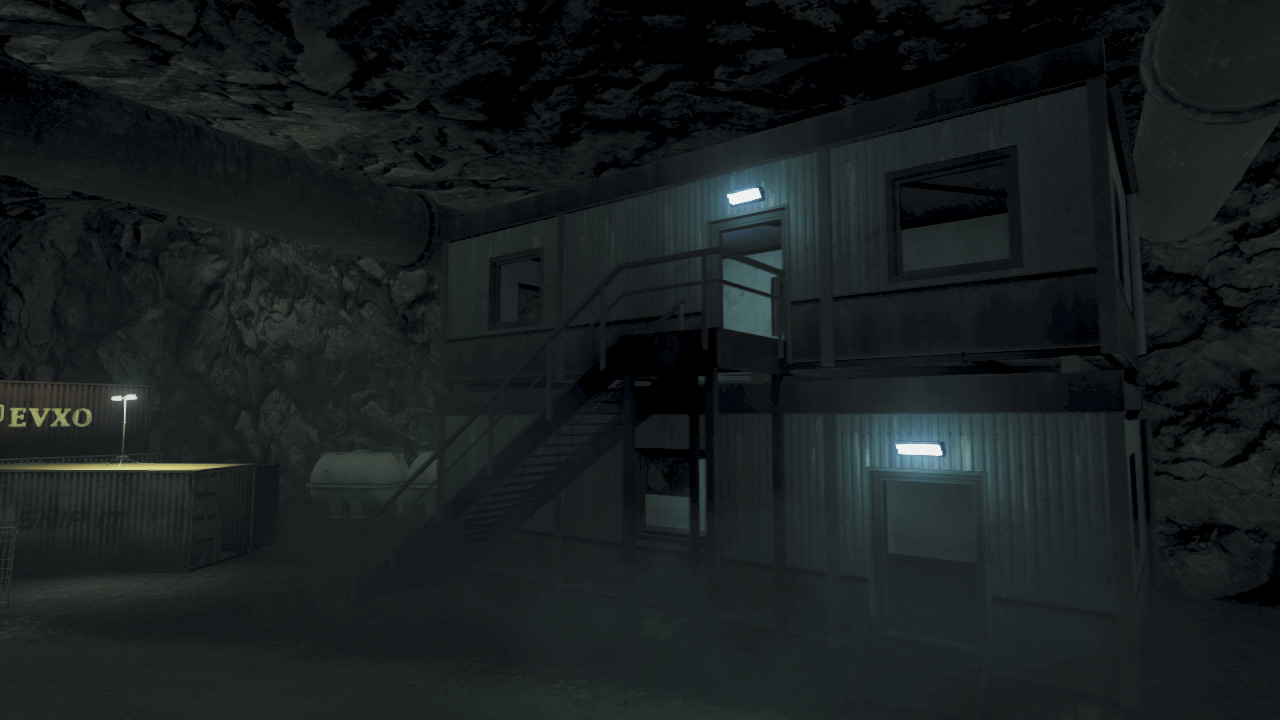
M-COM Station B is located on the opposite side of the Tunnel, in the turn-out area to the east. The construction on this side of the Tunnel is more complete, including a smooth U-shaped road connecting to the main road on the north and south ends.
This makes approaches by vehicles much easier, both for the attackers and the defenders. The M-COM station itself is located on the bottom floor of the small trailer-like structure to the east.
A similar trailer is located across the road to the west and provides a good cover point of the objective. RU defenders should mine the road to the south to prevent US vehicles from getting too close for comfort.
But the bulk of the US attack is likely to come from the narrow passage to the south. This avenue of attack can also be booby-trapped with Claymores and C4. But dedicated defenders covering this passage are necessary, too.
Focusing light machine gun fire down this narrow passage is a great way to score some easy kills.
US DEPLOYMENT
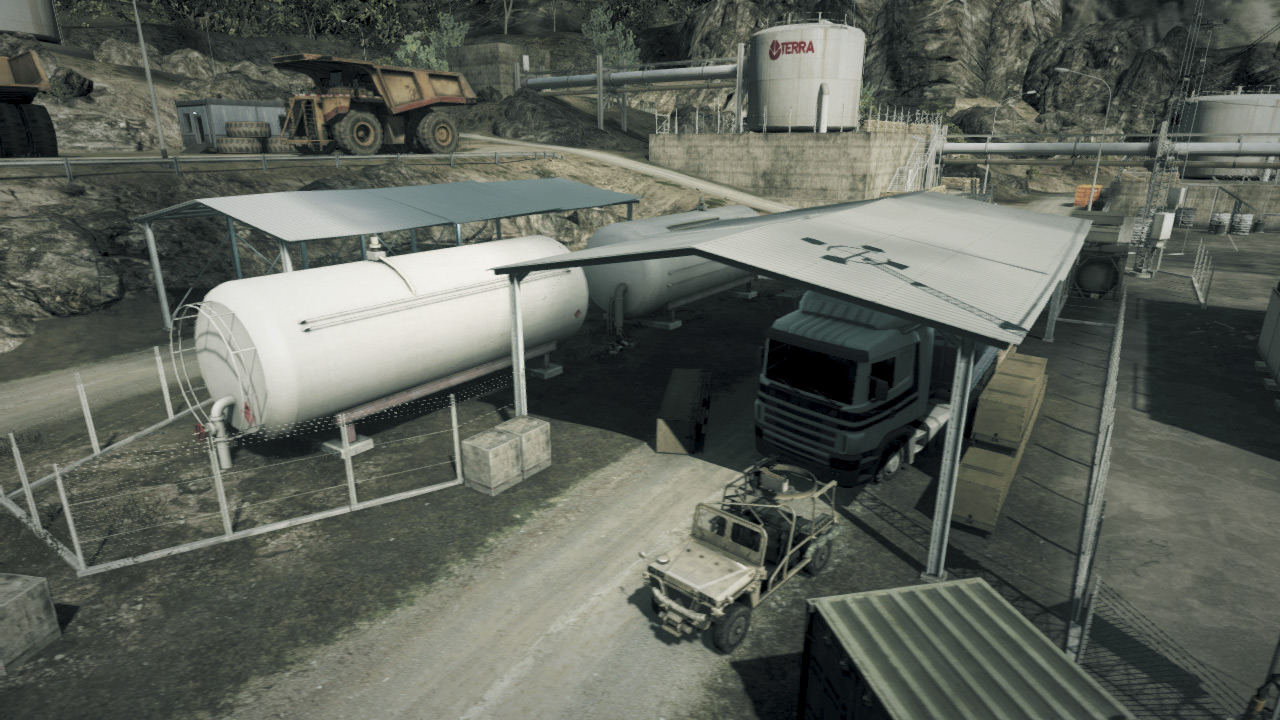
Deployment Area Assets
| Name | Quantity | Respawn Time |
|---|---|---|
| M114 HMMWV | 1 | 30 sec. |
| M1 Abrams | 1 | 60 sec. |
| AH-6J Little Bird | 1 | 90 sec. |
| UH-1Y Venom | 1 | 90 sec. |
Once the US team has secured a presence in the valley, they must press forward into the Tunnel. Fortunately they gain some ground vehicles for this task, while still maintaining their helicopters spawned at the Peak Facility.
Both the HMMWV and M1 Abrams are helpful for attacking the two M-COM Stations nestled deep inside the Tunnel. While the Tunnel entrance directly to the north is the only entry point for vehicles, infantry should utilize the narrow side passages on the east and west.
If the RU team hasn’t defended these passages, these are by far the best way to get inside the Tunnel and plant charges on each M-COM station.
The helicopters aren’t very effective during this stage of the battle, but they can harass RU units spawned near the Tunnel’s North Entrance—taking out their T-90A is very helpful.
RU DEPLOYMENT
Deployment Area Assets
| Name | Quantity | Respawn Time |
|---|---|---|
| T-90A | 1 | 60 sec. |
| Z-11W | 1 | 90 sec. |
| 9M133 Kornet Launcher | 1 | 60 sec. |
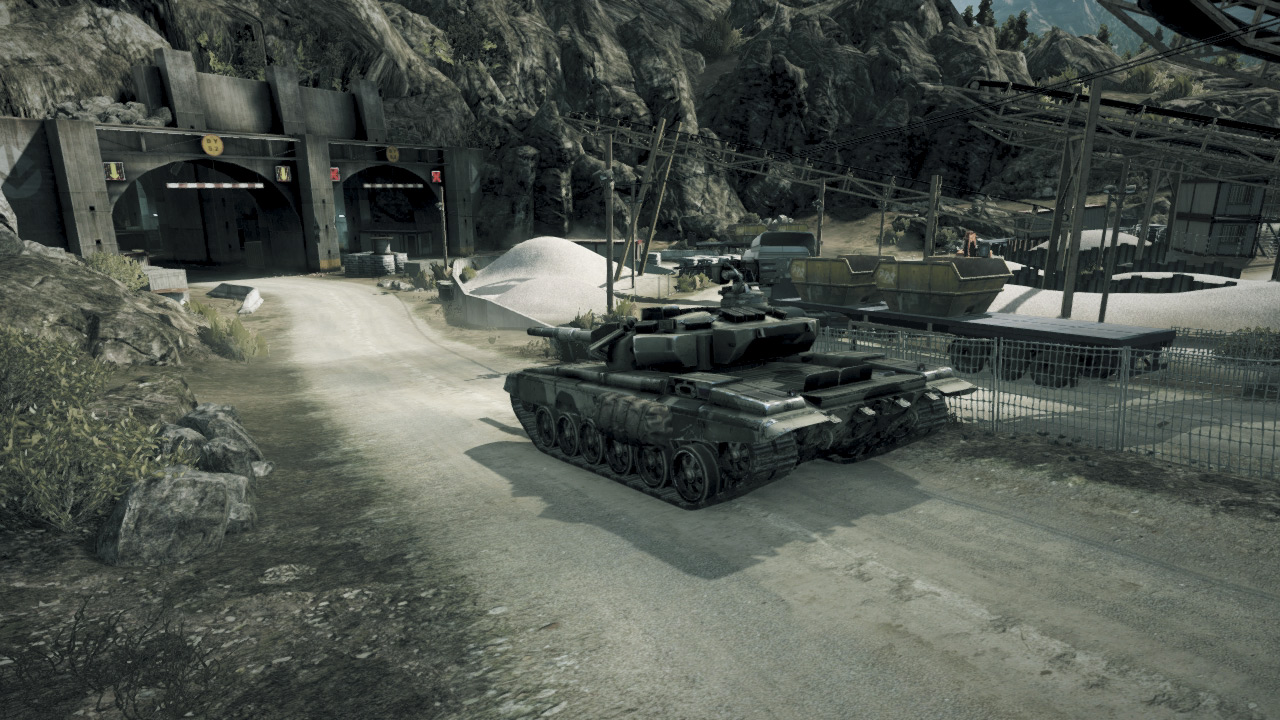
In this zone, the RU team deploys outside the Tunnel, near the North Entrance. But finally, they have some serious firepower in the form of a T-90A.
This tank is crucial for countering the US M1 Abrams, which spawns at the US deployment area at the South Entrance. Park the tank in the Tunnel, facing toward the south, and blast any attackers that move into view.
Placing the tank in the Tunnel protects it from the US choppers, but it will still draw plenty of fire from the US ground forces. However, a dedicated team of engineers can keep the T-90A in the fight.
RU infantry should gather around the two M-COM stations on the east and west sides of the Tunnel. Pay particular attention to the two narrow side passages leading in from the South Entrance.
Support troops training light machine guns down these narrow passages is an effective way to halt US advance.
ZONE 5: MINING AREA
M-COM Station A
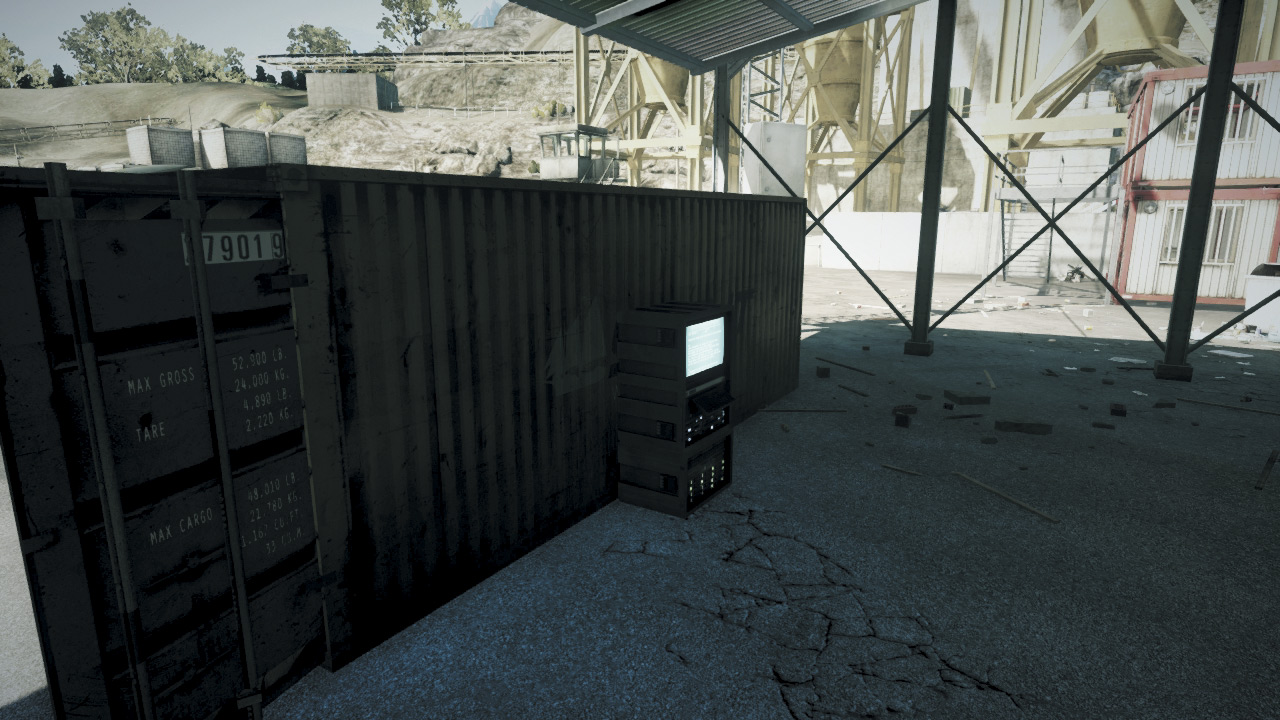
This M-COM Station A is nestled up against a shipping container beneath a large steel equipment shelter on the east side of the Mining Area. The eastern side of the shipping container is open, making it an awesome hiding spot for both attackers and defenders.
Consider placing a Radio Beacon inside the shipping container to maintain a presence next to the M-COM station. Defenders should note that the concrete wall to the south and west can be breached with explosives, thereby opening new avenues of attack for the US team.
The red-and-white trailer to the east serves as a great cover point, regardless of which direction the attackers come from. Drop prone atop the stairs here and pick off anyone tampering with the objective.
M-COM Station B
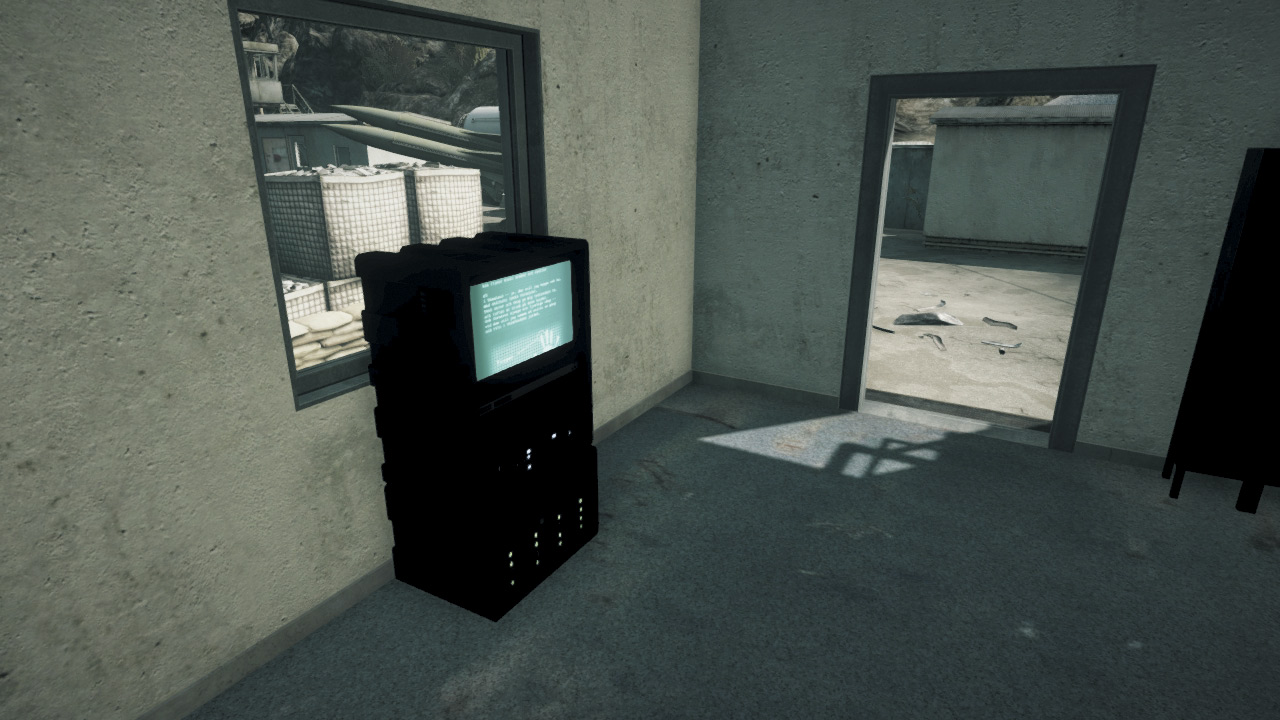
M-COM Station B is on the ground floor of the gray two-story office trailer at the center of the Mining Area. The walls of this structure can be completely destroyed but the structure will remain standing.
Peeling away the walls allows a better view of the objective for defenders. Still, it’s better to simply cover the two entry points on the west and north sides.
Tanks are likely to play a role in the fight for this M-COM station, so engineers on both sides should come prepared with anti-tank weaponry, including mines and C4.
If the M-COM station becomes completely exposed through the destruction of the surrounding walls, be prepared to deploy smoke on the objective prior to setting or disarming the charge.
US DEPLOYMENT
Deployment Area Assets
| Name | Quantity | Respawn Time |
|---|---|---|
| M114 HMMWV | 1 | 30 sec. |
| M1 Abrams | 1 | 60 sec. |
| AH-6J Little Bird | 1 | 90 sec. |
| UH-1Y Venom | 1 | 90 sec. |
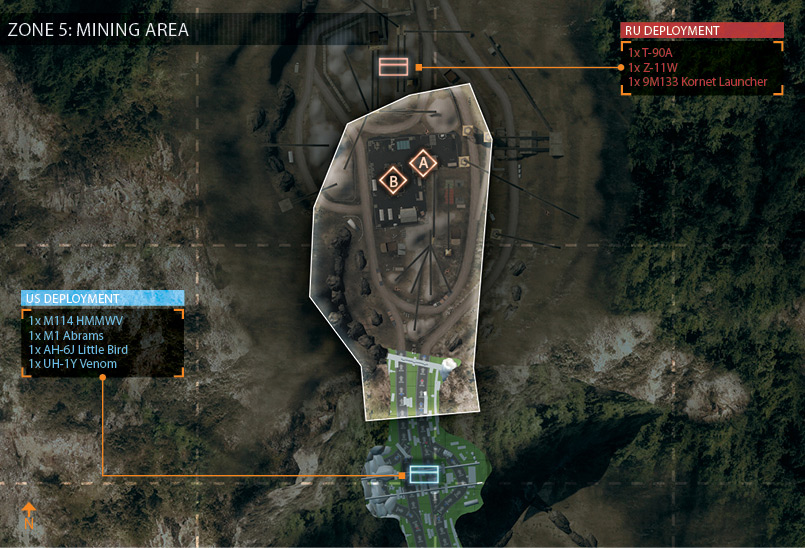
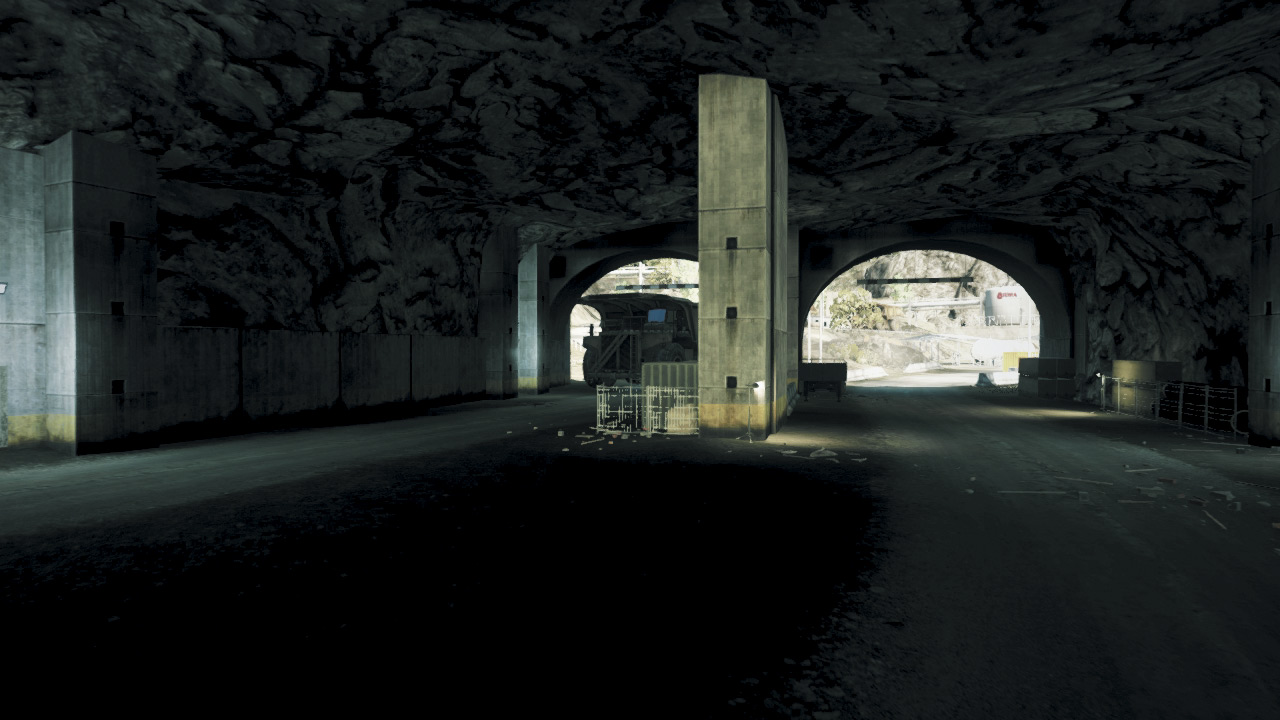
This is the US team’s final deployment area, located inside the Tunnel. The Tunnel’s exit to the north is a deadly choke point that is easily defended by the RU team and their two T-90A tanks.
Therefore, look for other ways to advance on the final M-COM stations. The helicopters offer the best method of moving troops to the north end of the valley.
Once on the ground, Radio Beacons can be deployed near the M-COM stations, allowing teammates spawn close to the action without rushing through the carnage near the Tunnel’s exit.
Beyond transporting troops, the AH-6J plays a pivotal role in attacking the RU team’s tanks by helping the M1 Abrams advance to support assault operations on the M-COM stations.
RU DEPLOYMENT
Deployment Area Assets
| Name | Quantity | Respawn Time |
|---|---|---|
| T-90A | 2 | 60 sec. |
| Z-11W | 1 | 90 sec. |
| 9M133 Kornet Launcher | 2 | 60 sec. |
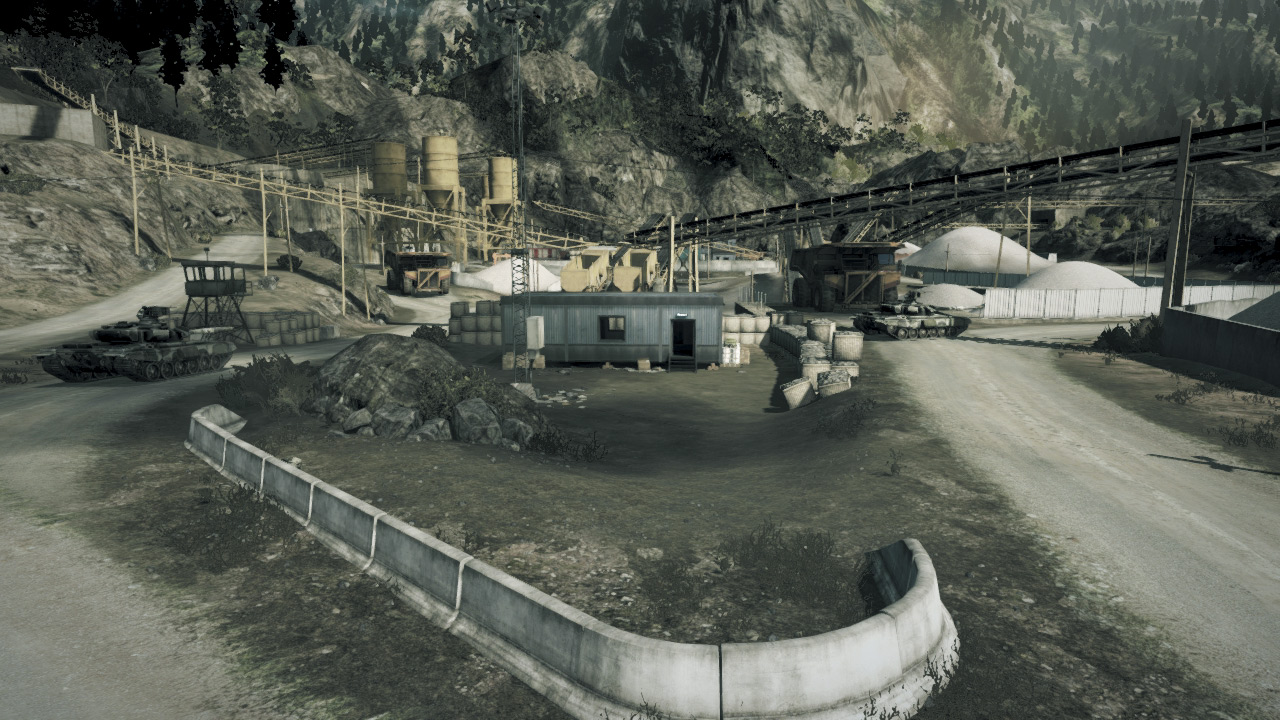
Although this is the final zone for the RU defenders, they have a good chance of holding out here. There’s only one way through the mountain and that’s the Tunnel to the south.
The Tunnel’s exit is a perfect choke point and should be taken advantage of. Deploy the two T-90A tanks so they can cover the exit, picking off US infantry and vehicles that emerge.
The biggest threat comes in the form of an aerial assault staged by the US helicopters. If the RU team isn’t paying close attention, the choppers can drop troops directly onto the M-COM stations.
The best defense against such attacks are engineers armed with SA-18 IGLA missile launchers—just be sure to take out any survivors that manage to bail out. Also, perform periodic sweeps of the area to locate and destroy US Radio Beacons.
If the RU team can force the US team to spawn in the Tunnel, they’ll have a much easier time holding out long enough to achieve a victory.