Prima Games eGuides
primagames.com Browse Redeem a code Help
Battlefield 3 Premium eGuide
Sign in My Guides

Sign in or create an account

We'll email you a link. No password needed, and if you don't have an account yet, the link makes one.

By creating an account or signing in, you agree to our Terms of Service and Privacy Policy.

Have a password?

Had an account on the old eGuides site, or a code from a printed guide? Help and troubleshooting

Sign in with a password

By signing in, you agree to our Terms of Service and Privacy Policy.

Check your email

A sign-in link is on its way. It works once and expires in 15 minutes. Open it and you're in, with an account if you didn't already have one.

Contents

  • Battlefields
    • Conquest
      • Alborz Mountains
      • Armored Shield
      • Azadi Palace
      • Bandar Desert
      • Caspian Border
      • Damavand Park
      • Death Valley
      • Epicenter
      • Grand Bazaar
      • Gulf of Oman
      • Kharg Island
      • Kiasar Railroad
      • Markaz Monolith
      • Nebandan Flats
      • Noshahr Canals
      • Operation Firestorm
      • Operation Métro
      • Operation Riverside
      • Sabalan Pipeline
      • Seine Crossing
      • Sharqi Peninsula
      • Strike at Karkand
      • Talah Market
      • Tehran Highway
      • Wake Island
    • Conquest 64
      • Alborz Mountains
      • Armored Shield
      • Azadi Palace
      • Bandar Desert
      • Caspian Border
      • Damavand Park
      • Death Valley
      • Epicenter
      • Grand Bazaar
      • Gulf of Oman
      • Kharg Island
      • Kiasar Railroad
      • Markaz Monolith
      • Nebandan Flats
      • Noshahr Canals
      • Operation Firestorm
      • Operation Métro
      • Operation Riverside
      • Sabalan Pipeline
      • Seine Crossing
      • Sharqi Peninsula
      • Strike at Karkand
      • Tehran Highway
      • Wake Island
    • Rush
      • Alborz Mountains
      • Armored Shield
      • Azadi Palace
      • Bandar Desert
      • Caspian Border
      • Damavand Park
      • Death Valley
      • Epicenter
      • Grand Bazaar
      • Gulf of Oman
      • Kharg Island
      • Kiasar Railroad
      • Markaz Monolith
      • Nebandan Flats
      • Noshahr Canals
      • Operation Firestorm
      • Operation Métro
      • Operation Riverside
      • Sabalan Pipeline
      • Seine Crossing
      • Sharqi Peninsula
      • Strike at Karkand
      • Talah Market
      • Tehran Highway
      • Wake Island
    • Squad Rush
      • Alborz Mountains
      • Armored Shield
      • Azadi Palace
      • Bandar Desert
      • Caspian Border
      • Damavand Park
      • Death Valley
      • Epicenter
      • Grand Bazaar
      • Gulf of Oman
      • Kharg Island
      • Kiasar Railroad
      • Markaz Monolith
      • Nebandan Flats
      • Noshahr Canals
      • Operation Firestorm
      • Operation Métro
      • Operation Riverside
      • Sabalan Pipeline
      • Seine Crossing
      • Sharqi Peninsula
      • Strike at Karkand
      • Talah Market
      • Tehran Highway
      • Wake Island
    • Squad Deathmatch
      • Alborz Mountains
      • Armored Shield
      • Azadi Palace
      • Bandar Desert
      • Caspian Border
      • Damavand Park
      • Death Valley
      • Epicenter
      • Grand Bazaar
      • Gulf of Oman
      • Kharg Island
      • Kiasar Railroad
      • Markaz Monolith
      • Nebandan Flats
      • Noshahr Canals
      • Operation Firestorm
      • Operation Métro
      • Operation Riverside
      • Sabalan Pipeline
      • Seine Crossing
      • Sharqi Peninsula
      • Strike at Karkand
      • Talah Market
      • Tehran Highway
      • Wake Island
    • Team Deathmatch
      • Alborz Mountains
      • Armored Shield
      • Azadi Palace
      • Bandar Desert
      • Caspian Border
      • Damavand Park
      • Death Valley
      • Epicenter
      • Grand Bazaar
      • Gulf of Oman
      • Kharg Island
      • Kiasar Railroad
      • Markaz Monolith
      • Nebandan Flats
      • Noshahr Canals
      • Operation Firestorm
      • Operation Métro
      • Operation Riverside
      • Sabalan Pipeline
      • Seine Crossing
      • Sharqi Peninsula
      • Strike at Karkand
      • Talah Market
      • Tehran Highway
      • Wake Island
    • Scavenger
      • Aftermath - Azadi Palace
      • Aftermath - Epicenter
      • Aftermath - Markaz Monolith
      • Aftermath - Talah Market
    • Close Quarters/Gun Master
      • Close Quarters - Donya Fortress
      • Close Quarters - Operation 925
      • Close Quarters - Scrapmetal
      • Close Quarters - Ziba Tower
      • Aftermath - Azadi Palace
      • Aftermath - Epicenter
      • Aftermath - Markaz Monolith
      • Aftermath - Talah Market
    • Capture the Flag
      • Operation Riverside
      • Nebandan Flats
      • Kiasar Railroad
      • Sabalan Pipeline
    • Tank Superiority
      • Alborz Mountains
      • Armored Shield
      • Bandar Desert
      • Death Valley
    • Air Superiority
      • Operation Riverside
      • Nebandan Flats
      • Kiasar Railroad
      • Sabalan Pipeline
  • Essentials
    • Primer
      • What's New in Battlefield 3?
      • What's New in Close Quarters?
      • What's New in Armored Kill?
      • What's New in Aftermath?
      • What's New in End Game?
    • Basics
      • Introduction and Interface
      • Spawn Screen
      • Movement and Fundementals
      • Combat
      • Game Modes
      • Squad Play
      • Multiplayer Tactics
      • Persistance System
      • Battlelog
      • Specilizations
      • Camo Patterns
    • Classes
      • Introduction
      • Assault
      • Engineer
      • Support
      • Recon
    • Weapons
      • Introduction & Accessory Index
      • Assault Rifles
      • Carbines
      • Light Machine Guns
      • Sniper Rifles
      • Personal Defense Weapons (PDWs)
      • Shotguns
      • Pistols
      • Crossbow
    • Vehicles
      • Vehicle Customization
      • Light Vehicles
      • Infantry Fighting Vehicles (IFVs)
      • Mobile AA
      • Main Battle Tanks (MBT)
      • Attack Helicopters
      • Scout Helicopters
      • Transport Helicopters
      • Jets
      • Stationery Anti-Vehicle Weapons
  • Campaign
    • Mission 1: Semper Fidelis
      • Semper Fidelis
    • Mission 2: Operation Swordbreaker
      • Operation Swordbreaker
    • Mission 3: Uprising
      • Uprising
    • Mission 4: Going Hunting
      • Going Hunting
    • Mission 5: Operation Guillotine
      • Operation Guillotine
    • Mission 6: Comrades
      • Comrades
    • Mission 7: Thunder Run
      • Thunder Run
    • Mission 8: Fear No Evil
      • Fear No Evil
    • Mission 9: Night Shift
      • Night Shift
    • Mission 10: Rock and a Hard Place
      • Rock and a Hard Place
    • Mission 11: Kaffarov
      • Kaffarov
    • Mission 12: The Great Destroyer
      • The Great Destroyer
  • Multiplayer
    • Crash Course in Co-operative Play
      • Crash Course in Co-operative Play
    • Co-Op Mission 1: Operation Exodus
      • Operation Exodus
    • Co-Op Mission 2: Fire from the Sky
      • Fire from the Sky
    • Co-Op Mission 3: Exfiltration
      • Exfiltration
    • Co-Op Mission 4: Hit and Run
      • Hit and Run
    • Co-Op Mission 5: Drop 'em Like Liquid
      • Drop 'em Like Liquid
    • Co-Op Mission 6: The Eleventh Hour
      • The Eleventh Hour
  • Compendium
    • Multiplayer Scoring
      • Multiplayer Scoring
    • Assignments
      • Assignments
    • Achievements and Trophies
      • Achievements and Trophies
    • Dog Tags
      • Dog Tags
    • Ranks
      • Ranks
    • Camo Patterns
      • Camo Patterns
    • Ribbons
      • Ribbons
    • Medals
      • Medals

Battlefield 3 Premium Guide › Essentials › Vehicles

Infantry Fighting Vehicles (IFVs)

The Infantry Fighting Vehicles are the most versatile vehicles in the game; they are sometimes referred to as light tanks.They lack the heavy armor of tanks, but still have a lot of firepower. Their main weapon is an auto-cannon, that fires high-explosive rounds in quick succession as long as you hold down the fire button. But the auto-cannon can only fire six rounds before a new rack must be loaded, resulting in a brief interruption. The IFVs also have a machine gun turret—the driver controls the auto-cannon while the gunner controls the machine gun. The four passenger seats are equipped with port- and starboard-mounted machine guns, making it ideal for hauling around your entire squad.

[ IFV Service Stars ]

You earn a service star for every 90,000 points you score with the IFVs. 100 IFV service stars are available.

IFV Unlock Progression

Image Name Loadout Slot Points Description
IR Smoke Gadget 800 Smoke grenades enhanced with metal filaments that when launched remove laser designation, spoof incoming guided missiles, and prevent enemies from revealing your position to teammates.
ATGM Launcher Weapon 2,300 Wire-guided anti-tank missile launchers are mounted on the turret.
Belt Speed Upgrade 4,700 An enhanced mechanism decreases the minimum time between firing bursts with your main weapon.
Coaxial LMG Weapon 8,300 A light machine gun mounted coaxially to your main weapon.
Thermal Optics Gadget 13,100 A secondary weapon sight with thermal optics that highlights soldiers and vehicles for efficient target identification.
Proximity Scan Upgrade 19,200 External sensors detect and reveal enemy units on your minimap.
Zoom Optics Gadget 26,900 A secondary weapon sight with up to 3x magnification.
Maintenance Upgrade 36,000 Preventative maintenance procedures improve your vehicle’s recovery from damage.
APFSDS-T Shell Weapon 47,000 Armor-piercing fin-stabilized discarding sabot (with tracer) ammo that deals more direct damage but has no explosive element.
Thermal Camo Upgrade 60,000 Antireflective coating on your vehicle increases enemy locking and tracking difficulty, and decreases the time you are revealed to the enemy when spotted.
Guided Missile Weapon 74,000 Laser-guided anti-tank missile launchers are mounted on the turret; they lock on to and track enemy land vehicles and can acquire laser-designated targets even if they are out of line of sight.
Reactive Armor Upgrade 90,000 Reactive armor panels and/or slats absorb the impact from anti-tank weapons, protecting you from damage but becoming destroyed in the process.

LAV-25

Nationality : US

Description : The LAV-25 is an eight-wheeled amphibious Infantry Fighting Vehicle (IFV) used by the United States Marine Corps.

Vehicle Performance

Speed
Armor
Firepower

Vehicle Occupancy

Seat Position Weapon
1 Driver 25mm Chain Gun
2 Gunner HMG .50
3 Passenger Machine Gun
4 Passenger Machine Gun
5 Passenger Machine Gun
6 Passenger Machine Gun

Field Notes

Sporting thick armor and bristling with weapons, the LAV-25 is the ideal troop transport for the US team. While the vehicle is very effective against enemy infantry, it is vulnerable to attacks by tanks, helicopters, and jets. So if such threats are in the area, consider dropping off your passengers as soon as possible.

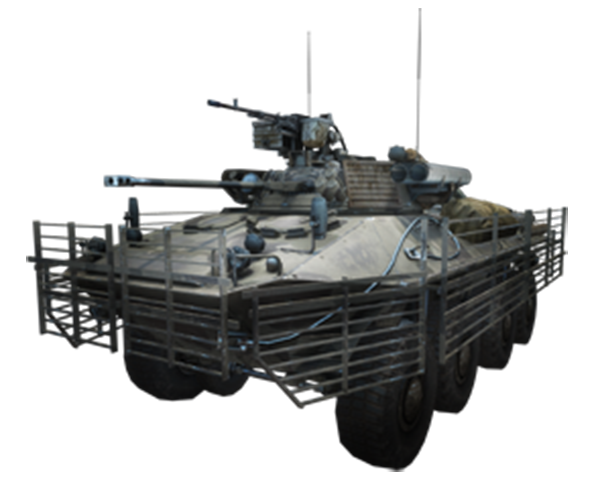
BMP-2M

Nationality : RU

Description : The BMP-2M is a second-generation, amphibious infantry fighting vehicle introduced in the 1980s in the Soviet Union.

Vehicle Performance

Speed
Armor
Firepower

Vehicle Occupancy

Seat Position Weapon
1 Driver 30mm Auto-Cannon
2 Gunner 12.7mm Machine Gun
3 Passenger Machine Gun
4 Passenger Machine Gun
5 Passenger Machine Gun
6 Passenger Machine Gun

Field Notes

The Russian BMP-2M has a sleek, low profile when compared to its boxy American counterpart. This makes it a little easier to conceal the vehicle behind low hills and other pieces of cover. Hold back from the front lines and pepper enemy infantry (and helicopters) with the vehicle’s auto-cannon and machine gun.

AAV-7A1 AMTRAC

Nationality : US

Description : The AAV-7A1 is the current amphibious troop transport of the United States Marine Corps.

Vehicle Performance

Speed
Armor
Firepower

Vehicle Occupancy

Seat Position Weapon
1 Driver None
2 Gunner 7.62mm Machine Gun
3 Passenger None
4 Passenger None
5 Passenger None
6 Passenger None

Field Notes

Technically the AMTRAC is not an IFV, so it does not benefit from the unlocks associated with the vehicle class. However, it performs just like an IFV, as it’s capable of carrying six players. It also serves as a mobile spawn point for the US team. Park this vehicle anywhere, and as long as seats are available, any teammate can spawn directly into the AMTRAC.

BTR-90

Nationality : RU

Description : The BTR-90 is the Russian Army’s next-generation armored personnel carrier. Presented publicly for the first time in 1994, the BTR-90 is larger and more powerful than its predecessors.

Vehicle Performance

Speed
Armor
Firepower

Vehicle Occupancy

Seat Position Weapon
1 Driver 30mm Cannon
2 Gunner 12.7mm Machine Gun
3 Passenger Machine Gun
4 Passenger Machine Gun
5 Passenger Machine Gun
6 Passenger Machine Gun

Field Notes

The BTR-90 is a Russian Infantry Fighting Vehicle (IFV) sporting a powerful 30mm cannon as well as a turret-mounted heavy machine gun. The cannon can fire six high-explosive rounds in quick succession. But after six rounds are fired, there is a brief pause while a new rack of ammo is loaded.

Make an effort to fully reload the cannon after each use. This can be done manually by pressing the reload button or simply by emptying the current magazine. The BTR-90 benefits from the same upgrades, weapons, and gadgets as the other IFVs, so don’t forget to customize the vehicle’s loadout prior to spawning into the game.

[ IFV Tactics ]

  • Never charge into a group of enemy infantry. IFVs are well armored, but they can’t withstand more than two or three rocket hits, not to mention mines.Instead, hold back and engage infantry from a safe distance, where they can’t sneak up behind you. The auto-cannon and machine gun turrets on these vehicles are devastating against infantry.
  • All the IFVs are amphibious and can travel across deep bodies water. Use this to your advantage by staging attacks from unpredictable directions. This is a great way to take enemies by surprise. But these vehicles move very slow while in the water, so watch out for helicopters and jets overhead. When engaging an IFV, try to maneuver so you can score a side or rear hit, where the vehicle’s armor is thinnest. Likewise, when driving one of these vehicles, be mindful of these weak spots and try to keep the vehicle’s front armor facing the enemy at all times.
  • Be careful when transporting your entire squad in an IFV. A hit from a helicopter or jet’s Guided Missile could send your whole squad back to the respawn screen.
  • Like jets and helicopters, IFVs can fire a Guided Missile capable of locking on to targets designated with the recon kit’s SOFLAM. So once you’ve unlocked this weapon, keep your IFV back from the action and wait for enemy vehicles to be painted with a laser. A red diamond icon appears on the HUD when an enemy target has been designated.
  • Completely different tactics apply when driving the AMTRAC. This slow troop transport only has a light machine gun for defense, making it vulnerable against tanks and other heavy vehicles. When using this vehicle as a forward spawn point, park it in a relatively safe location that’s still close to the action. This is very effective when attacking M-COM stations during Rush matches because the attacking team can maintain a presence close to the objectives.

Tank Destroyers

The new tank destroyers are essentially infantry fighting vehicles (IFVs) fitted with large tank cannons. Although faster and more maneuverable than tanks, the tank destroyers lack the thick armor of their bigger, badder counterparts. As a result, it’s important to keep a defensive mind-set when driving one of these vehicles, particularly when facing off against enemy tanks—always keep the tank destroyer’s thick front armor facing your target. In addition to dishing out some serious anti-tank firepower, tank destroyers can also serve as troop transport. Like the IFVs, the passenger positions in tank destroyers are equipped with machine gun ports, ideal for defending the vehicle’s flanks from enemy infantry.. In many battles, tank destroyers offer the safest method of moving teammates to the front lines. So don’t drive away from your base until you’ve filled as many seats as possible—hitching a ride in one of these armored vehicles is always preferable to hiking across a dangerous battlefield.

Tank Destroyer Service Stars

You earn a service star for every 40,000 points you score with a tank destroyer; 100 tank destroyer service stars are available.

Tank Destroyer Unlock Progression

Image Name Loadout Slot Points Description
IR Smoke Gadget 400 Smoke grenades enhanced with metal filaments that when launched remove laser-designation, spoof incoming guided missiles, and prevent enemies from revealing your position to teammates.
Coaxial LMG Weapon 800 A light machine gun mounted coaxially to your main weapon.
Autoloader Upgrade 1,600 An enhanced mechanism decreases the minimum time between firing rounds in your main weapon.
Zoom Optics Gadget 3,000 A secondary weapon sight with up to 3x magnification.
Maintenance Upgrade 6,000 Preventative maintenance procedures improve your vehicle’s recovery from damage.
Proximity Scan Upgrade 10,000 External sensors detect and reveal enemy units on your minimap.
Guided Shell Weapon 16,000 A Smart Target-Activated Fire and Forget shell that can lock on to and track enemy land vehicles and can acquire laser-designated targets even if they are out of line-of-sight.
Thermal Optics Gadget 22,000 A secondary weapon sight with thermal optics that highlights soldiers and vehicles for efficient target identification.
Thermal Camo Upgrade 28,000 Anti-reflective coating on your vehicle increases enemy locking and tracking difficulty and decreases the time you are revealed to the enemy after being spotted.
Canister Shell Weapon 34,000 A tank shell encasing thousands of tungsten balls fired though the cannon muzzle like a shotgun.
Reactive Armor Upgrade 40,000 Reactive armor panels and/or slats absorb the impact from anti-tank weapons, protecting you from damage but being destroyed in the process.

M1128

Nationality : US

Description : The M1128 is an eight-wheeled tank destroyer used by the USA and Canada.

Vehicle Performance

Speed
Armor
Firepower

Vehicle Occupancy

Seat Position Weapon
1 Driver 105mm Cannon
2 Passenger Machine Gun
3 Passenger Machine Gun
4 Passenger Machine Gun
5 Passenger Machine Gun

Field Notes

With the exception of its large 105mm cannon, the M1128 looks and performs similarly to the LAV-25. This is a relatively fast and maneuverable eight-wheeled vehicle capable of repelling all small-arms fire. However, the M1128 is vulnerable to attacks by tanks, helicopters, and jets. So be ready to drop off your passengers if you come under heavy attack.

SPRUT-SD

Russian light and highly mobile tank destroyer based on the BMD-3 chassis.

Nationality : RU

Description :

Vehicle Performance

Speed
Armor
Firepower

Vehicle Occupancy

Seat Position Weapon
1 Driver 125mm Cannon
2 Passenger Machine Gun
3 Passenger Machine Gun
4 Passenger Machine Gun
5 Passenger Machine Gun

Field Notes

The Russian SPRUT-SD has a sleek low profile when compared to its boxy American counterpart. This makes it a little easier to conceal the vehicle behind low hills and other pieces of cover. But the SPRUT-SD is most effective when on the move. Use its speed and large passenger capacity to transport troops to the front lines or flank slower tanks.

[ Tank Destroyer Tactics ]

  • Never charge into a group of enemy infantry. Tank destroyers are well-armored, but they can’t withstand more than two or three rocket hits, not to mention mines. Instead, hold back and engage infantry from a safe distance, where they can’t sneak up behind you. HE ammunition, unlocked by completing the Explosive Danger assignment, is most effective against infantry. The coaxial LMG also gives the driver better protection against infantry.
  • Unlike their IFV counterparts, tank destroyers are not amphibious, so avoid driving these heavy vehicles into deep bodies of water.
  • When engaging a tank destroyer, try to maneuver so you can score a side or rear hit, where the vehicle’s armor is thinnest. Likewise, when driving one of these vehicles, be mindful of these weak spots and try to keep the vehicle’s front armor facing the enemy at all times.
  • Be careful when transporting your entire squad in a tank destroyer. A hit from a helicopter or jet’s guided missile could send your whole squad back to the respawn screen.
  • Complete the Wired Attack assignment as quickly as possible to gain access to the TOW missile upgrade. This works just like the ATGM Launcher upgrade found on the IFVs. While waiting for the main gun to reload, fire a missile at your target to keep up the offensive pressure. The added firepower can make all the difference when caught in a dangerous duel with an enemy tank.
  • The fire extinguisher is a worthwhile upgrade and it’s relatively easy to unlock. As an engineer, just complete 20 repairs on friendly vehicles to complete the Need Repair assignment to unlock this upgrade. Once equipped, the fire extinguisher can be used to put out a fire if your vehicle becomes disabled. This allows you to maintain speed and maneuverability, allowing you to reach a safer location before conducting repairs.

Keep reading with a free account

The first 3 sections of Battlefield 3 Premium are open to everyone. An account opens the rest of it, and every other guide in the archive. It's free, and there's nothing to buy.

Bought guides on the old Prima Games site? Your account and every guide you own moved here, so there's nothing to buy again. Sign in.

Create a free account Or browse our free guides

PreviousLight Vehicles NextMobile AA