
Battlefield 3 Premium Guide Battlefields Conquest
Tehran Highway
The battle for Iran’s capital city is a complicated and bloody affair, often involving attacking forces overextending into enemy-held territory to achieve an important objective.
This engagement along one of Tehran’s major highways is no exception as the two armies vie for control over major access routes crossing the metropolitan area.
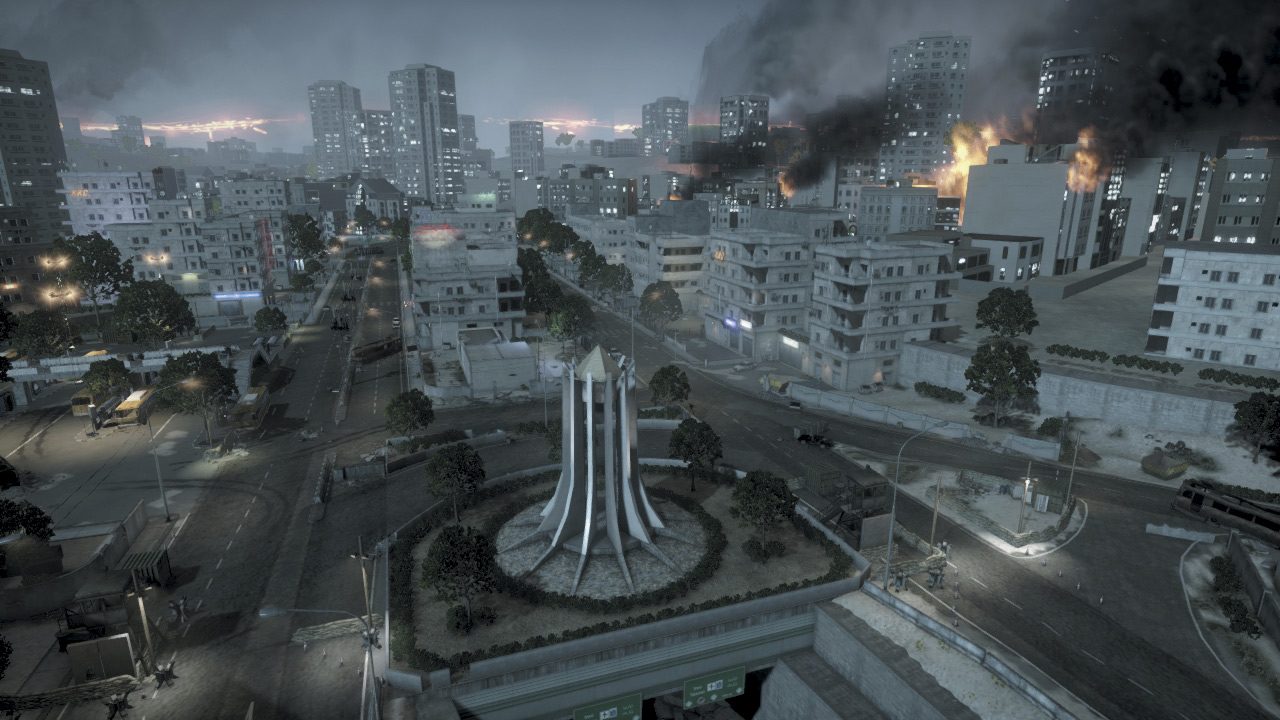
USMC forces are using the cover of darkness to make a push from the hills to attack the outskirts of the city. Farther ahead lies a disruptive MLRS site situated past the downtown area.
The Russian forces are well prepared and have set up defensive positions along the main entrance points to the Capital. The ensuing clash will likely involve fierce, close-range street fighting where no position is safe from counterattack.
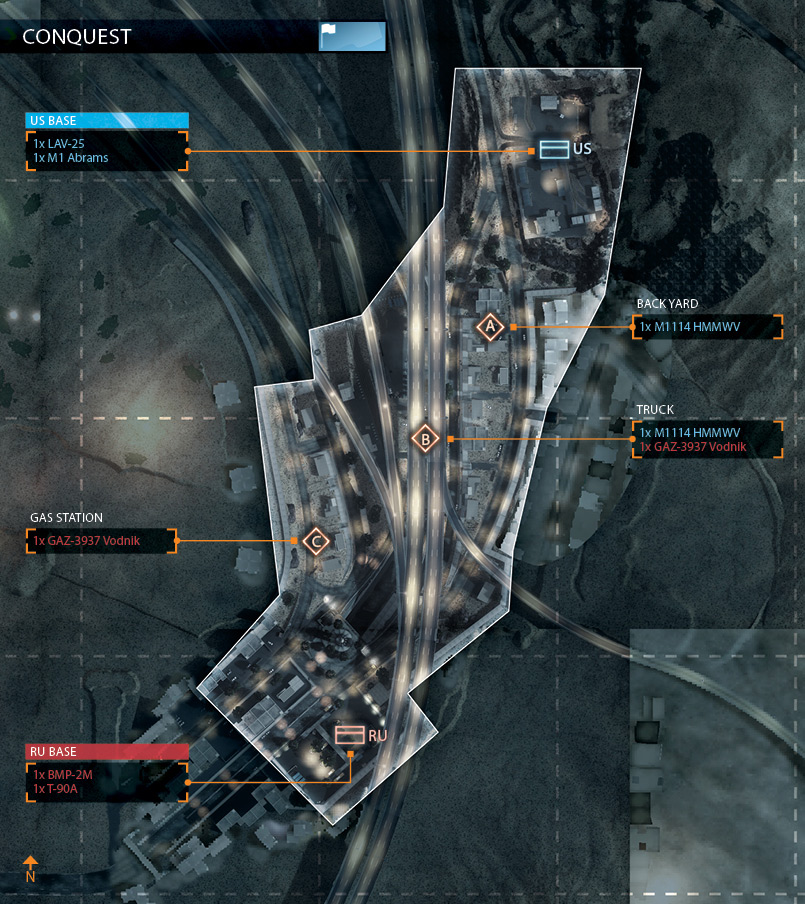
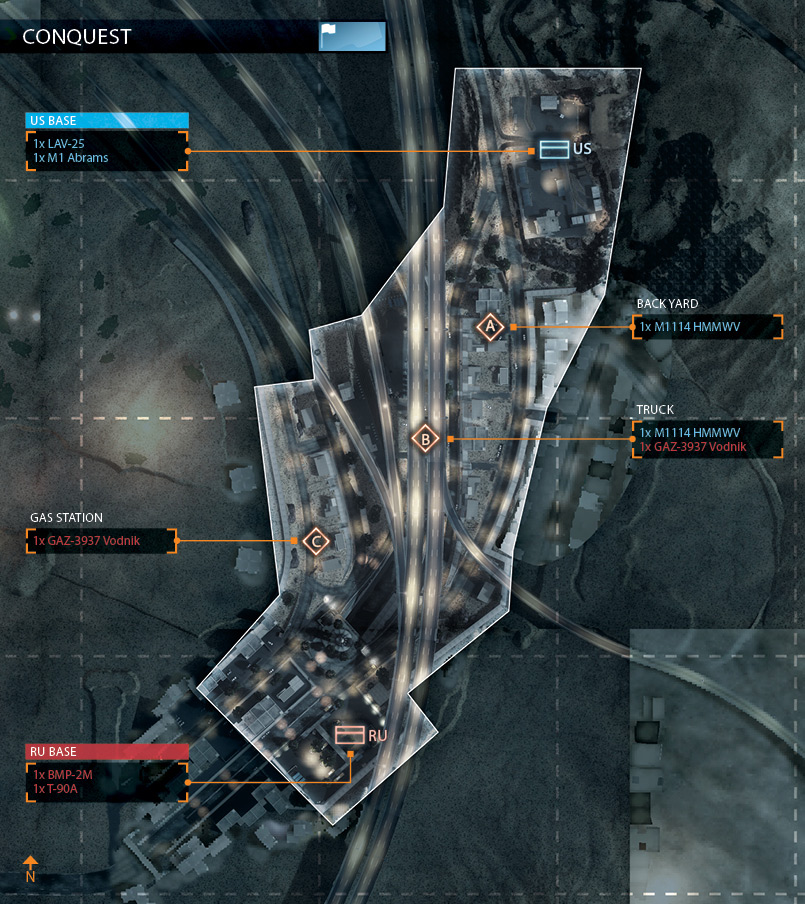
In this conquest battle, there are only three control points up for grabs, which makes defensive efforts around captured flags essential to securing a victory. Each team most hold at least two flags to initiate the drain on the opposing team’s ticket counts.
So instead of spreading your team thin, capture two flags and hold on to them. Deploying from the north, the US team should capture the Back Yard (A) and Truck (B). Meanwhile, the RU team should focus on holding the Gas Station (C) and Truck (B).
Expect heavy fighting around the Truck (B) control point in the center of the map. If capturing or holding this flag becomes too costly, consider holding the two perimeter control points instead. Since the battle takes place at night, this is a very dark map.
Vehicles equipped with the Thermal Optics upgrade have a huge advantage here, as this makes it easy to spot the heat signatures of enemy vehicles and troops. The IRNV (IR 1x) scope is also helpful for cutting through the darkness without giving away your position.
US BASE
Base Assets
| Name | Quantity | Respawn Time |
|---|---|---|
| LAV-25 | 1 | 30 sec. |
| M1 Abrams | 1 | 60 sec. |
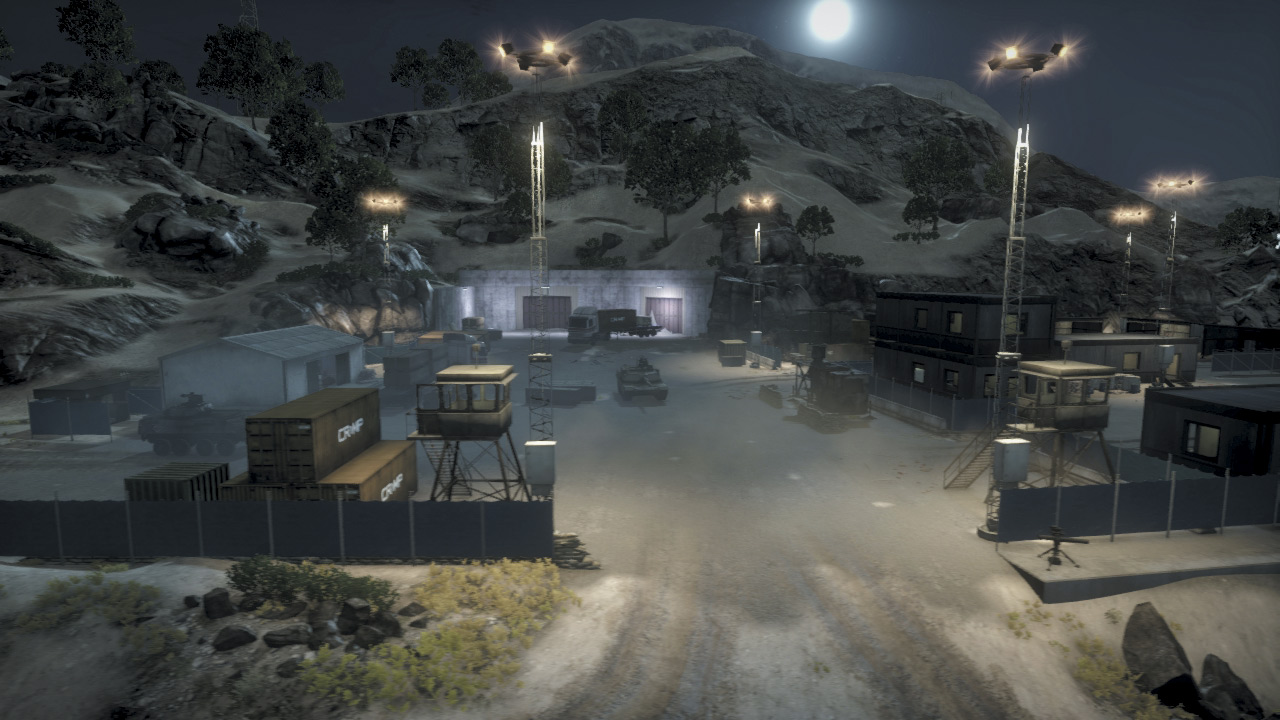
The US team deploys from the base on the north side of the map, on the outskirts of the city. Although they’re not the fastest vehicles, the M1 Abrams and LAV-25 spawned here are essential for securing the nearby Back Yard (A) and the more distant Truck (B) control points to the south.
So as soon as the match begins, load the LAV-25 with troops and make a beeline for the Truck (B). The RU team may attempt the same maneuver, arriving in their BMP-2M, so be prepared for a fight while capturing the flag.
The M1 Abrams and infantry spawned at the US Base have no problem reaching and securing the Back Yard (A) before the RU team can reach it.
Leave at least one squad behind to watch the Back Yard (A) and move the rest of the team (including the M1 Abrams) toward the Truck (B) in an attempt to reinforce the LAV-25.
If the M1 tank and LAV-25 are destroyed, don’t forget to spawn back at the US Base to bring fresh vehicles to the front lines. Keeping the LAV-25 and M1 in the fight gives your team a huge advantage, especially if the RU team fails to bring their heavy hitters forward.
RU BASE
Base Assets
| Name | Quantity | Respawn Time |
|---|---|---|
| BMP-2M | 1 | 30 sec. |
| T-90A | 1 | 60 sec. |
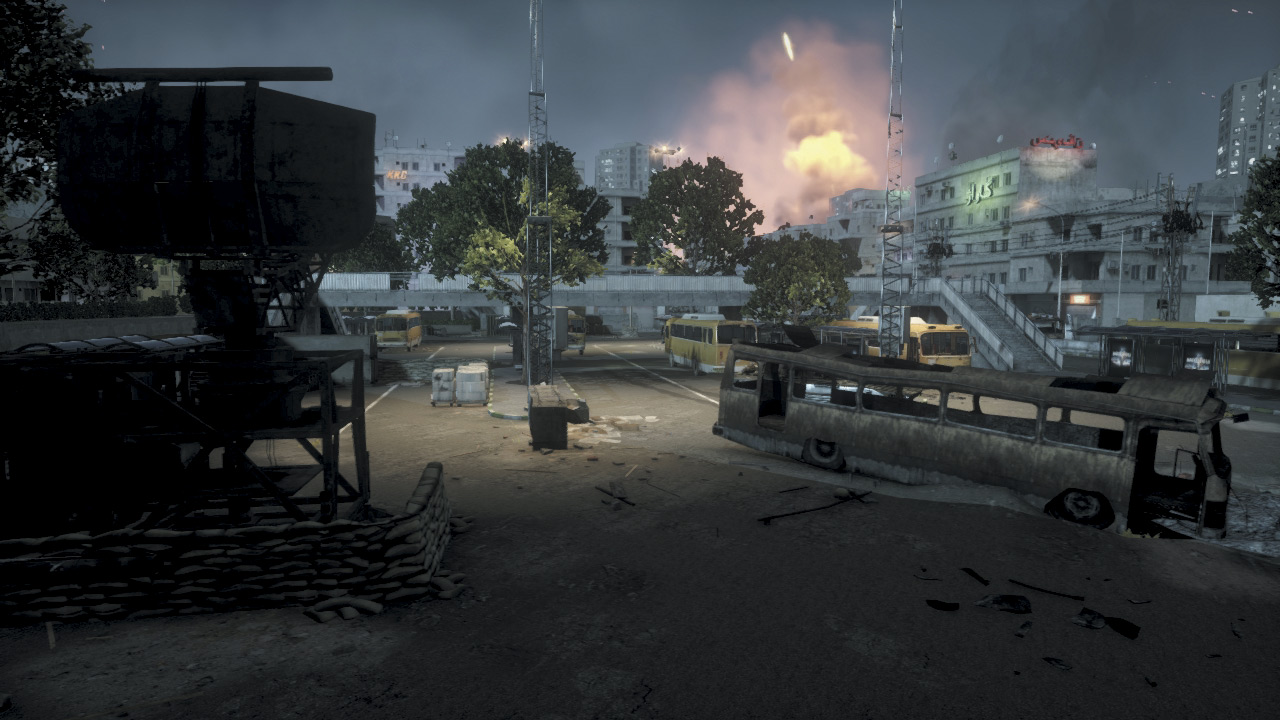
The bus depot on the south side of the map serves as the RU Base. The opening moments of the match are critical, with all three flags up for grabs. The BMP-2M and T-90A are your best chances for securing at least two of these flags.
Quickly load the BMP-2M with infantry and race toward the Truck (B) control point in the center of the map. Troops deployed to the Truck (B) are likely to encounter the first resistance, so come prepared for a fight.
Meanwhile, use infantry and the T-90A to secure the Gas Station (C) just north of the RU Base. But once the flag is captured, get the T-90A to the Truck (B) to help hold the control point from inevitable attacks by the US team.
If the RU team can hold on to the Gas Station (C) and Truck (B), there is no need to advance on the Back Yard (A). Simply consolidate your forces around the two southern control points and don’t forget to reinforce them with fresh vehicles spawned at the RU Base.
The BMP-2M and T-90A provide a lot of firepower, so don’t leave them sitting on the sidelines.
A: BACK YARD
Control Point Assets
| US Control | RU Control | Respawn Time |
|---|---|---|
| M1114 HMMWV (1) | — | 20 sec. |
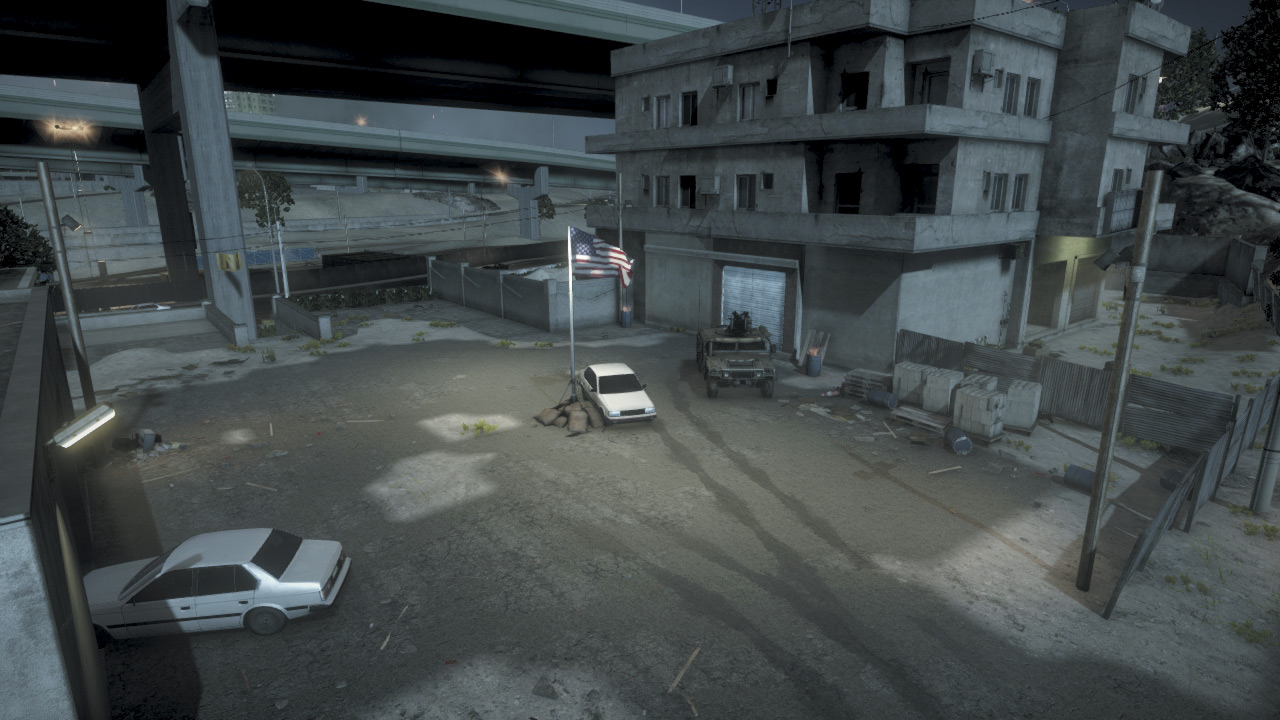
The Back Yard (A) control point is closest to the US Base, making it relatively easy for the US team to capture early on during the match. However, with only three control points on the map, the US team should never take this flag for granted.
Once it’s captured, at least one full-time squad should hold here and defend. A HMMWV is spawned here when the Back Yard is controlled by the US.
Instead of using this vehicle to transport troops, consider using its machine gun turret to defend the road to the east—this is the most popular route for approaching vehicles.
The road to the west is only accessible via a set of steps, which makes it the preferred approach by infantry attacking from the Truck (B).
While the flagpole sits in the middle of an open area much like a parking lot, the flag has a large capture radius that allows it to be captured or contested from pieces of cover along the perimeter.
So take cover behind the crates to the northeast or inside the garage to the south while attempting to capture the flag.
B: TRUCK
Control Point Assets
| US Control | RU Control | Respawn Time |
|---|---|---|
| M1114 HMMWV (1) | GAZ-3937 Vodnik (1) | 20 sec. |
As the central control point, the Truck (B) sees a lot of action throughout the course of the battle. Both teams should use the IFVs spawned at their bases to rush to this flag early during the match in an attempt to secure it.
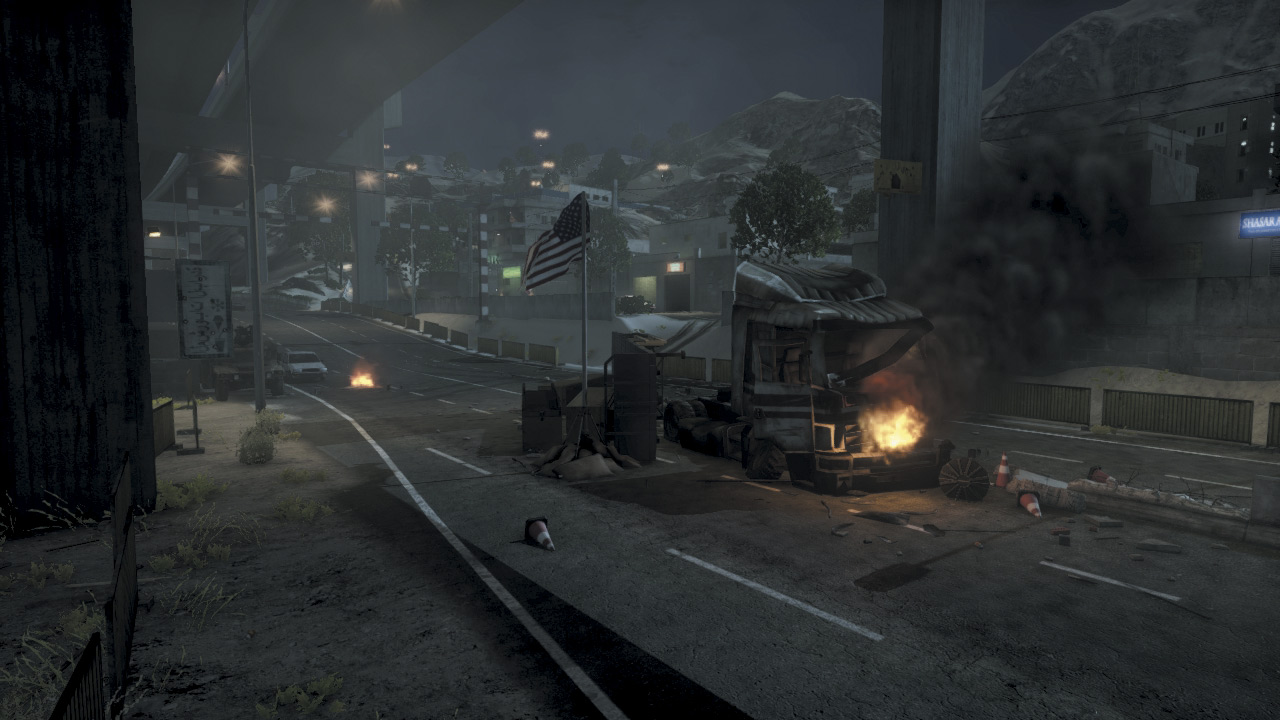
The flag is located on a road next to the flaming wreckage of a truck and overturned flatbed trailer. The truck, trailer, and spilled cargo all provide excellent cover for infantry within the flag’s capture radius.
But given the likelihood of vehicle traffic here, hiding near the flag isn’t the safest defensive position. Almost all vehicles utilize the north/south approach of the road, while infantry are likely to filter in from the east and west, attacking from the Back Yard (A) and Gas Station (C).
So instead of constantly spinning in circles, consider defending this flag from a distance. Elevated positions are available along both sides of the street to the east and west.
The footbridge to the south provides an even better view of the control point . Vehicles defending here are best parked on the north or south sides of the flag, where they’re less likely to be flanked by infantry approaching from the surrounding control points.
Both the US and RU teams gain a light vehicle here, so put the machine gun turrets to use by targeting enemy infantry moving along the perimeter.
C: GAS STATION
Control Point Assets
| US Control | RU Control | Respawn Time |
|---|---|---|
| — | GAZ-3937 Vodnik (1) | 20 sec. |
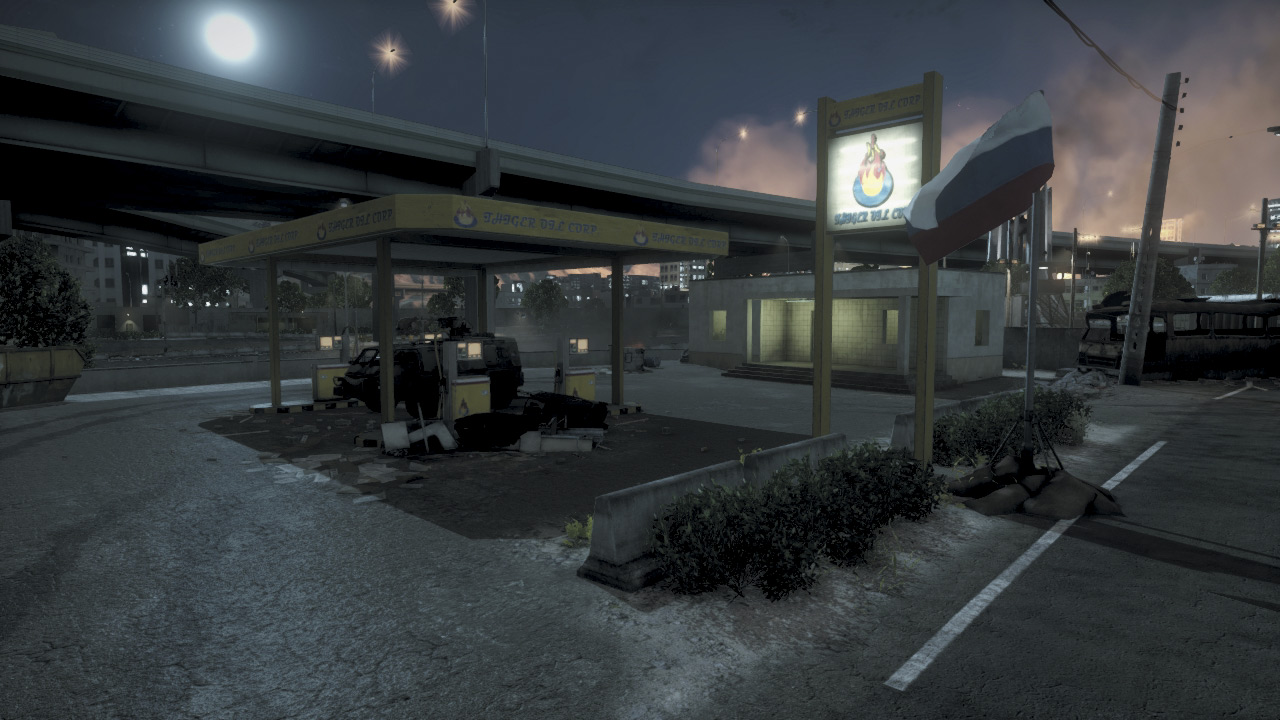
Located only a few meters north of the RU Base, the Gas Station (C) sits firmly within the RU team’s zone of control. But in this chaotic fight, anything can happen.
So after the RU team captures this flag early during the round, they should leave at least one squad behind to defend it. The Gas Station (C) is easily accessible by traveling along the road on the map’s western edge—this is the only route vehicles can take to reach the flag.
However, infantry attacks often come from the eastern steps, usually by infantry approaching from the Truck (B). Therefore, defenders here must prepare for attacks from both sides.
The machine gun turret on the Vodnik, spawned here for the RU team, is great for covering both approaches. Consider parking it on the western road to deter vehicle attacks, or park it on the road to the east to counter infantry attacks.
When capturing or contesting the flag here, stay far away from the explosive gas pumps. Instead, seek cover in or near the service station to the south. The interior of this small building offers a good view of the flag, making it a great defensive cover point.