
Battlefield 3 Premium Guide Essentials Primer
What's New in Close Quarters?
Battlefield 3: Close Quarters is a themed expansion pack bringing the team play of Battlefield 3 to tight indoor environments. The frantic close-quarters infantry combat is amplified by unprecedented high-definition destruction, new ways to play, more weapons, and added persistence. Here’s a quick summary of the new features:
- Four new maps: The tight level design and many opportunities for vertical gameplay mean your team will need to bring their A game if they want to stay alive in this highly competitive theater of war.
- New game modes: The new Conquest Domination and Gun Master game modes are tailored specifically for the new maps in Close Quarters, guaranteeing you a host of new and memorable Battlefield moments.
- HD destruction: The new high-definition destruction in Close Quarters allows you to riddle the environment with bullets, reducing entire locales to ruin. Everything from furniture to plaster can be shot to pieces, and players can see the result of the mayhem as rubble and broken pieces pile up on the floor.
- New weapons: By completing ten new assignments, you can unlock new weapons such as assault rifles, carbines, light machine guns, and sniper rifles. The rapid-firing M5K PDW and the devastating SPAS-12 shotgun are also available, perfect for those point-blank encounters.
- Expanded persistence: In addition to the new assignments, Close Quarters adds five new achievements and trophies and a variety of unique dog tags you can equip to display your accomplishments.
There are four game modes available on each of the new Close Quarter maps, offering plenty of variety for all. Most of the game modes are familiar classics, but the addition of Gun Master and the new Conquest Domination variant ramps up the intensity for those who prefer nonstop action. Due to the compact size of the new environments, Rush and Squad Rush are not available on the Close Quarters maps.
Conquest Domination
Max players: 16
Conquest Domination is a variant of the classic Battlefield game mode and is fine-tuned for the smaller-scale maps featured in Close Quarters. The core fundamentals work the same as classic Conquest as your team tries to dominate the area of operations by capturing control points and holding them. Simply stand next to a flagpole at a control point to raise your team’s flag—the more teammates there are in the flag’s capture radius, the faster the flag is raised.
The time it takes to convert a flag in Conquest Domination has been reduced, meaning you won’t have to wait long to raise your team’s flag. However, the capture radius of each flag is very small, requiring you (and your teammates) to stand very close to the flagpole during the capture phase, leaving you vulnerable to ambushes and booby traps. Once captured, flags cannot be used as spawn points. When spawning into the game, a random spawn point is chosen near a friend. It’s far more preferable to join a squad and spawn on one of your squadmates.
As in classic Conquest matches, both teams have a limited number of reinforcements known as tickets. The ticket count for both teams appears just above the minimap—the team who runs out of tickets first loses the match. You can drain the enemy ticket count by holding more than half of the control points on the map. Since there are just three control points on each map, you need only hold two flags to initiate a ticket drain. So capture two flags early on and stay put, forcing the enemy to attack your defended positions. Leaving a flag undefended guarantees a prompt capture by the opposing team.
Assigning each squad on your team a flag is a good way to ensure all control points are covered. Throughout the duration of the match, each squad focuses on attacking and defending their assigned flag. Without a solid gameplan or any defensive efforts, these matches become a whack-a-mole-like footrace as each player runs from one enemy-held flag to the next.
Gun Master
Max players: 16
Gun Master is completely new to Battlefield 3, requiring you, your teammates, and opponents to progress through 17 levels of weapons. At each level you’re assigned a single firearm and a knife. You must score two kills with the assigned firearm before progressing to the next level, where you’re assigned a new weapon. Knife kills do not count toward the two-kill total, but they result in demoting your victim. So if an opponent is progressing too quickly, kill them with a knife to knock them back one kill.
Every player begins at Level 1, equipped with an MP443 pistol and a knife. But as the match progresses and some players score more kills than others, the dynamic of each engagement differs, often giving players with one particular weapon a significant advantage over their opponents. For example, the first player to reach Level 4 gains a PP-19 fully automatic PDW. This gives them a leg up on the competition still running around with pistols. But higher-level weapons aren’t always better. The PNG-90 sniper rifle, equipped at Level 15, is one of the most difficult weapons to master given the cramped spaces of each map. At Level 17 you’re equipped with only a knife and must score a single kill to win the match.
During Gun Master matches, players are divided into two teams. While you can utilize teamwork to hunt down opponents, all spawning is random, often placing you in a remote area of the map. You cannot spawn on teammates. So take some time moving in the direction of your teammates, appearing as green ID tags on the HUD. While it’s possible to succeed on your own, if you come across a group of players working together, you’ll have a tough time surviving the engagement. You’re better off moving around the map with one or two buddies. Before rushing into a Gun Master match, review the weapons equipped at each level. Adjust your tactics at each acquired level to take advantage of the assigned weapon’s strengths.
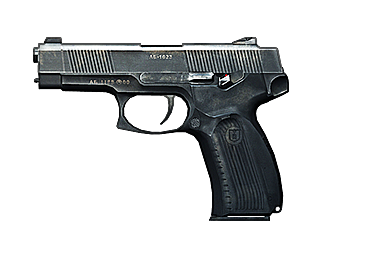
Level 1: MP443
- Ammo: 9 x 19 mm Parabellum
- Magazine Capacity: 18
- Fire Mode: Single shot
- Rate of Fire: Semi-auto
- Range: Short
- Optic Attachment: None
- Primary Attachment: None
- Secondary Attachment: None
Chambered in 9 mm, the MP443 lacks stopping power. So be prepared to rapidly fire multiple rounds at your opponents to produce lethal results. Fortunately, the pistol sports a generous 18-round magazine, allowing you to fire continuously with minimal reloads. The MP443 is also surprisingly accurate when firing from the hip at close range. But for any targets beyond 15 meters, always aim through the weapon’s iron sights. Get your two kills with this weapon as quickly as possible, because you’ll be outclassed once your opponents progress to the 93R and PDWs.
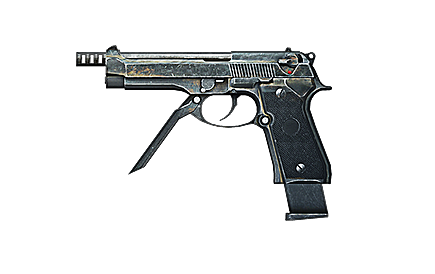
Level 2: 93R
- Ammo: 9 x 19 mm Parabellum
- Magazine Capacity: 20
- Fire Mode: Three-round burst
- Rate of Fire: 900 rpm
- Range: Short
- Optic Attachment: None
- Primary Attachment: None
- Secondary Attachment: None
This is a variant of the M9 pistol modified to fire a three-round burst. The high rate of fire gives the 93R a significant advantage over the MP443, particularly when engaging opponents at close range. However, at intermediate to long range, the pistol is difficult to keep on target due to muzzle climb. Consider aiming low, allowing the recoil to rake bullets across your target vertically as you fire. But the 93R is best deployed at close range, where its rate of fire greatly outperforms the MP443 and .44 Magnum. Just be sure to reload often. The 93R’s 20-round magazine empties fast.
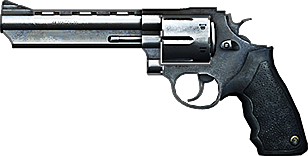
Level 3: .44 Magnum
- Ammo: .44 Magnum
- Magazine Capacity: 6
- Fire Mode: Single-shot
- Rate of Fire: Semi-auto
- Range: Short
- Optic Attachment: None
- Primary Attachment: None
- Secondary Attachment: None
Compared to the MP443 and 93R, the .44 Magnum is a high-powered precision weapon capable of taking down opponents with one or two hits. Think of it as a handheld sniper rifle. But to novice shooters, scoring hits with the .44 Magnum can be a frustrating experience. First off, never fire this gun from the hip. Always aim through the iron sights, even when engaging opponents at close range. Due to the revolver’s low rate of fire and limited six-round cylinder, take careful aim and make each shot count. For best results, aim for center mass, hitting your target in the torso with two quick shots. If you’re feeling lucky, aim for the opponent’s head for an instant kill. Target enemies at intermediate to long range and avoid firefights at close range where the .44 Magnum’s low rate of fire and reload speed becomes a serious liability.
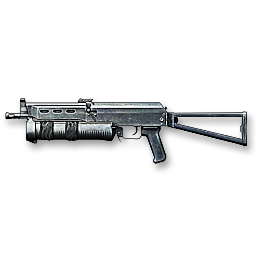
Level 4: PP-19
- Ammo: 9 x 18 mm Makarov
- Magazine Capacity: 55
- Fire Mode: Automatic
- Rate of Fire: 900 rpm
- Range: Short
- Optic Attachment: None
- Primary Attachment: None
- Secondary Attachment: Suppressor
Sporting a massive 55-round magazine and a blistering rate of fire, the PP-19 gives any shooter a serious advantage over opponents stuck with the first three pistols. This PP-19 is also equipped with a suppressor, significantly reducing muzzle climb. But the suppressor also reduces the weapon’s range and accuracy when firing from the hip. So always use the weapon’s iron sights when engaging opponents beyond 15 to 20 meters. At close range, feel free to fire from the hip while holding down the trigger. The PP-19’s suppressor also eliminates muzzle flash, making it easy to stay hidden from opponents, particularly if camping near a choke point.
Level 5: P90
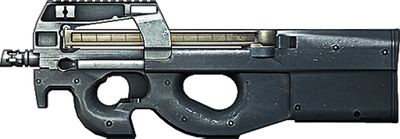
- Ammo: 5.7 x 28 mm
- Magazine Capacity: 50
- Fire Mode: Automatic
- Rate of Fire: 900 rpm
- Range: Short
- Optic Attachment: Reflex (RDS)
- Primary Attachment: None
- Secondary Attachment: None
The P90 functions similar to the PP-19, equipped with a large 50-round magazine. But this PDR is equipped with a Reflex (RDS) sight, making it easier to engage enemies at close and intermediate ranges. Even while firing prolonged automatic bursts, the P90 exhibits minimal recoil. So don’t be afraid to lay down a generous burst of automatic fire to bring down each opponent. Chances are your opponent will drop long before you run out of ammo. Despite the addition of the Reflex (RDS) sight, this is still a close-quarter weapon, so avoid wide-open spaces where opponents with long-range rifles can gain the upper hand. Instead, try to ambush opponents in small rooms and cramped corridors.
Level 6: SPAS-12
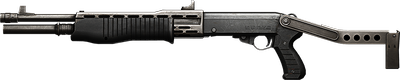
- Ammo: 12 gauge
- Magazine Capacity: 5
- Fire Mode: Single-shot
- Rate of Fire: Pump-action
- Range: Short
- Optic Attachment: None
- Primary Attachment: None
- Secondary Attachment: None
The SPAS-12 has a lot in common with the 870MCS. Both are extremely lethal pump-action shotguns capable of dropping opponents with a single hit. However, the damage of the SPAS-12 drops off significantly over range, making it most effective during point-blank engagements. The SPAS-12 must be reloaded one shell at a time. To avoid lengthy reload times, make a habit of reloading the weapon after each shot. Also, stick to areas of the map where you can ensure close-range encounters. Stairways, corridors, and doorways are great places to ambush your opponents, practically guaranteeing you a one-shot kill.
Level 7: MK3A1
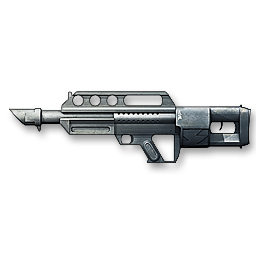
- Ammo: 12 gauge
- Magazine Capacity: 6
- Fire Mode: Automatic
- Rate of Fire: 255 rpm
- Range: Short
- Optic Attachment: None
- Primary Attachment: None
- Secondary Attachment: 12G Frag
Also known affectionately as the Jackhammer, this fully automatic shotgun’s bark is often worse than its bite. Loaded with 12G frag rounds, the MK3A1 is great for suppression but lacks the stopping power to put down opponents quickly. Don’t be surprised if you have to unload an entire magazine of frag rounds into an opponent before they fall. The weapon is extremely loud, too, leaving little mystery to the shooter’s whereabouts. Like any shotgun, this bad boy is best deployed at close range while holding down the trigger. But the shotgun’s box magazine holds only eight rounds, so make each shot count. You don’t want to get caught reloading during a close-quarter duel.
Level 8: ACW-R
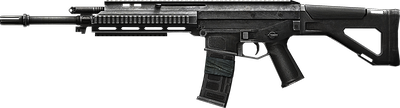
- Ammo: 5.56 x 45 mm NATO
- Magazine Capacity: 30
- Fire Mode: Automatic
- Rate of Fire: 850 rpm
- Range: Long
- Optic Attachment: Reflex (RDS)
- Primary Attachment: None
- Secondary Attachment: Laser sight
Graduating to the ACW-R assault rifle finally gives you some long-range capability. Consider stalking opponents in wide-open spaces or channeling fire down long corridors. The Reflex (RDS) optical sight allows for quick and easy target acquisition at any range. But in close quarters, you’re sometimes better off firing from the hip, taking advantage of the improved accuracy offered by the laser sight attachment. However, when engaging enemies at intermediate to long range, consider switching the laser sight off. It merely gives away your position and provides no accuracy bonus while aiming through the Reflex (RDS) optical sight.
Level 9: MTAR-21
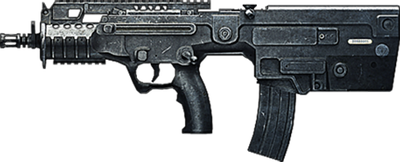
- Ammo: 5.56 x 45 mm NATO
- Magazine Capacity: 30
- Fire Mode: Automatic
- Rate of Fire: 900 rpm
- Range: Long
- Optic Attachment: Holographic (HOLO)
- Primary Attachment: Foregrip
- Secondary Attachment: Laser sight
The bullpup configuration of the MTAR-21 carbine makes it ideal for close-quarter engagements. Combining the maneuverability of a PDW with the stopping power of an assault rifle, the MTAR-21 is one of the most balanced weapons in this game mode. The Holographic (HOLO) optical sight is great for engaging targets at any range. The combination of the foregrip and laser sight attachments also makes this a particularly accurate weapon when fired from the hip.
Level 10: AUG A3
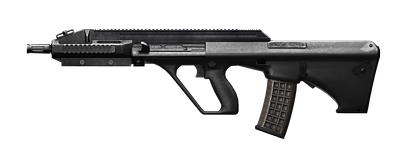
- Ammo: 5.56 x 45 mm NATO
- Magazine Capacity: 30
- Fire Mode: Automatic
- Rate of Fire: 700 rpm
- Range: Long
- Optic Attachment: Reflex (RDS)
- Primary Attachment: Foregrip
- Secondary Attachment: Laser sight
Like the MTAR-21, the AUG A3 benefits from a bullpup design, making it ideal for maneuvering in tight spaces. The weapon comes equipped with a laser sight, ideal for shooting from the hip at nearby enemies. But when engaging opponents beyond 15 meters, always aim and engage your target while peering through the Reflex (RDS) optical sight. Like most weapons, the AUG A3 is much more accurate and stable while aiming through the attached sight. This helps offset recoil, allowing you to keep the weapon on target, even during automatic bursts.
Level 11: SCAR-L
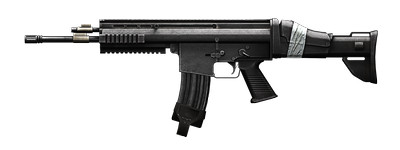
- Ammo: 5.56 x 45 mm NATO
- Magazine Capacity: 30
- Fire Mode: Automatic
- Rate of Fire: 620 rpm
- Range: Long
- Optic Attachment: Holographic (HOLO)
- Primary Attachment: Foregrip
- Secondary Attachment: Laser sight
The SCAR-L performs similarly to the MTAR-21 and AUG A3, so don’t expect a major change in tactics while issued this weapon. This is a hard-hitting carbine capable of accurately neutralizing opponents at short and intermediate ranges. While the carbine exhibits significant recoil when fired in long automatic bursts, the foregrip attachment helps improve stability, particularly when firing from the hip. But limit yourself to short bursts when engaging targets beyond 20 meters and aim through the Holographic (HOLO) optical sight for improved accuracy.
Level 12: LSAT
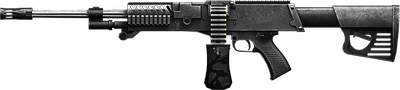
- Ammo: 5.56 x 45 mm NATO
- Magazine Capacity: 100
- Fire Mode: Automatic
- Rate of Fire: 650 rpm
- Range: Medium
- Optic Attachment: M145 (3.4x)
- Primary Attachment: Foregrip
- Secondary Attachment: Laser sight
This cumbersome belt-fed light machine gun can be difficult to maneuver in close quarters, so stay close to teammates and consider providing suppressive fire. The LSAT has a large 100-round box magazine, allowing for prolonged automatic bursts, ideal for pinning opponents while your teammates flank. It takes approximately six seconds to fully load a fresh magazine in this weapon, so make sure you find a safe location before reloading. The scope and laser sight attachments give the LSAT both intermediate and short-range capability. Keep the laser sight on while moving around corners and through other tight spaces. The accuracy bonus the laser sight affords helps offset the weapon’s wild recoil when firing from the hip.
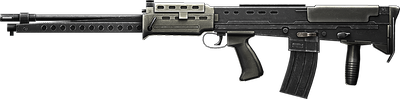
Level 13: L86A2
- Ammo: 5.56 x 45 mm NATO
- Magazine Capacity: 45
- Fire Mode: Automatic
- Rate of Fire: 750 rpm
- Range: Medium
- Optic Attachment: ACOG (4x)
- Primary Attachment: Foregrip
- Secondary Attachment: Heavy barrel
The L86A2 is a light machine gun that functions similar to an assault rifle. The bullpup configuration makes it relatively maneuverable, and the box magazine is much faster to reload than its bigger belt-fed cousins. This makes it much easier to operate in tight quarters than the LSAT. But the weapon still exhibits rather harsh recoil, so go easy on the trigger and aim through the scope to increase stability and accuracy. The foregrip attachment helps decrease muzzle drift, making it relatively accurate when shooting from the hip at nearby opponents. But the heavy barrel attachment makes the weapon most accurate when aimed through the scope.
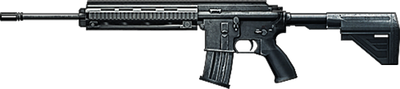
Level 14: M417
Ammo: 7.62 x 51 mm NATO
- Magazine Capacity: 20
- Fire Mode: Single-shot
- Rate of Fire: Semi-auto
- Range: Very long
- Optic Attachment: ACOG (4x)
- Primary Attachment: Foregrip
- Secondary Attachment: Flash suppressor
Don’t confuse this weapon with the M416 assault rifle. Although they have similar names and design characteristics, the M417 is a semiautomatic rifle, firing one round per trigger pull. The loss of automatic functionality calls for a change-up in tactics. Instead of engaging opponents at close range, leverage the rifle’s accuracy and stopping power by sticking to open areas or long corridors. The M417 has impressive stopping power, usually dropping opponents with only two or three shots. The flash suppressor muzzle attachment is also a nice addition, helping you remain hidden.
Level 15: JNG-90

- Ammo: 7.62 x 51 mm NATO
- Magazine Capacity: 10
- Fire Mode: Single-shot
- Rate of Fire: Bolt-action
- Range: Very Long
- Optic Attachment: ACOG (4x)
- Primary Attachment: Straight pull bolt
- Secondary Attachment: Laser sight
The JNG-90 is a slow-firing bolt-action sniper rifle with amazing stopping power. But finding a place to accurately deploy this weapon can be tricky. Instead of racing around the map looking for victims, find a relatively safe place and wait for opponents to come to you. Scout out elevated sniper perches or simply take aim down a long, high-traffic corridor. Always aim through the scope before firing and try to score a headshot if possible. The straight pull bolt attachment allows you to chamber a new round while still peering through the scope. But if your target survives the first hit, be ready to move. If you stand still while trying to chamber a new round, you probably won’t live long enough to fire a second bullet.
Level 16: M320 LVG

- Ammo: 40mm LVG
- Magazine Capacity: 1
- Fire Mode: Single-shot
- Rate of Fire: N/A
- Range: Short
- Optic Attachment: None
- Primary Attachment: None
- Secondary Attachment: None
Unlike traditional high-explosive rounds that explode upon impact, this M320 grenade launcher fires fuse-delayed LVG rounds that detonate approximately 3 to 4 seconds after being fired. This allows you to bounce grenades off of surfaces or around corners, ideal for engaging enemies without exposing yourself to incoming fire. On the downside, the fuse delay gives opponents plenty of time to run away before the grenade detonates. Focus your fire on small rooms and choke points where opponents have a tough time maneuvering. Fortunately, you need only one kill with this weapon to advance to the final level.
Level 17: Knife
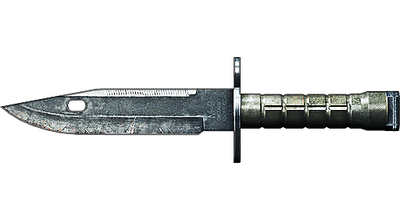
Now comes the final challenge: hunting down armed opponents while armed with only a knife. Don’t stay in one spot and wait for enemies to come to you. Instead, actively hunt down your opponents to win the match. Sprint through the map and search for prey, preferably while their back is turned to you. If possible, stalk enemies equipped with the slow-firing JNG-90 or M320 LVG. Even if they see you, they’ll have a hard time engaging you at close range. And remember, it takes one knife strike to kill an opponent from behind. But it will take at least two swipes to kill an enemy from the front. So be prepared to follow up with a second strike if the second doesn’t do the job. Most importantly, stay on the move and watch your back. If you get stabbed, you’ll drop down a level. Or if you’re stabbed by an enemy who is also at Level 17, the match will end with a loss for your team.
Squad Deathmatch
Max Players: 16
In this mode, there are four four-player squads, each representing a different team: A, B, C, and D. The team that scores 50 kills first wins—the score is listed on the left side of the screen above the minimap. Unlike the Squad Deathmatch modes found in Battlefield 3 or Back to Karkand, there are no IFV vehicles available on these maps. But given the small layout of each map, there is never a dull moment. This is a very fast-paced game mode best played with good squadmates you can rely on to watch your back. Use squad spawning to stay together and stay alive!
Team Deathmatch
Max Players: 16
Team Deathmatch is a no-holds-barred infantry-only battle in a confined area. The two teams struggle to score the most kills to win the match. Each kill is counted, so take down your enemies to increase your team’s score, represented by the numbers and status bars above the minimap. It’s your choice whether to stick with your team or to go on a solo hunt. But be warned, the tempo is high and enemies can pop up from behind almost any corner. Monitor the scoring status bars to see how the fight is going, and make tactical adjustments as necessary. For example, if both teams are close to scoring the points necessary for a win, play it safe to avoid giving the enemy team the kills they need.