
Battlefield 3 Premium Guide Battlefields Conquest 64
Noshahr Canals
At the start of the match, the US team is isolated on their aircraft carrier to the north. With only one transport helicopter, the rest of the team must rely on amphibious vehicles to reach the shore.
Given the shortage of vehicles on the carrier, some teammates may wish to hold in the spawn screen until a control point has been captured—it beats twiddling your thumbs on the carrier waiting for a vehicle to spawn.
Meanwhile, the RU team starts out at an airbase to the south, relying primarily on ground vehicles to reach the control points. With five control points up for grabs, each team must hold at least three flags to bleed the opposing team’s ticket count.
The US team should focus their efforts around the Container Area (A), Dry Dock (B), and Canal (D). The RU team is best served by capturing and defending the Train Yard (C), Canal (D), and Storm Drain (E).
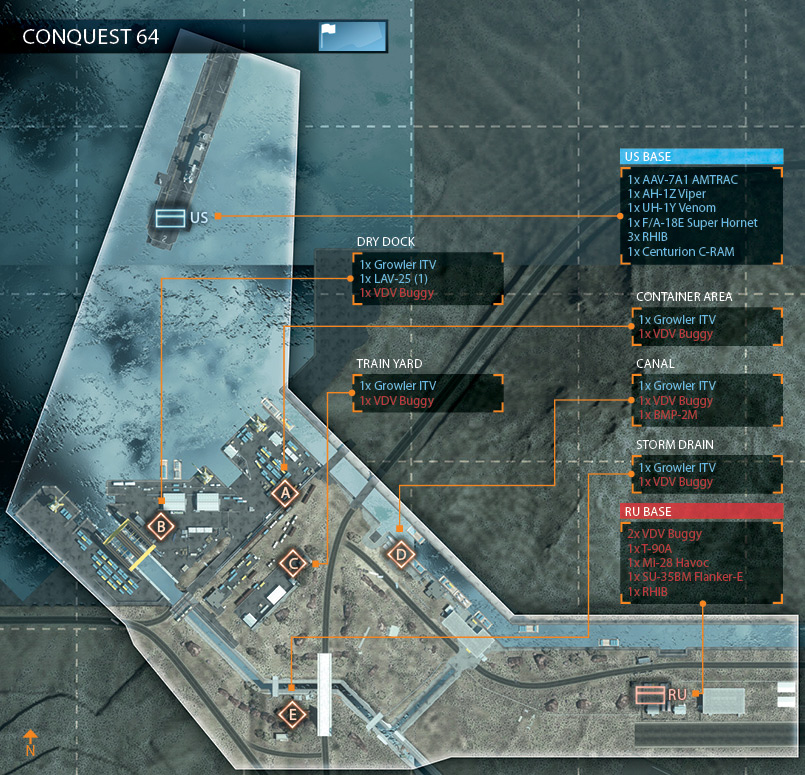
However, if the RU team can capture all the control points, they can deny the US team a spawn point on the land, forcing them to spawn on their aircraft carrier.
In a full 64-player match, it’s possible for either team to capture and defend all five flags. So look for opportunities to contain the opposing team within their base, then lay siege for the rest of the match as the enemy ticket count dwindles away.
US BASE
Base Assets
| Name | Quantity | Respawn Time |
|---|---|---|
| AAV-7A1 AMTRAC | 1 | 30 sec. |
| AH-1Z Viper | 1 | 90 sec. |
| UH-1Y Venom | 1 | 90 sec. |
| F/A-18E Super Hornet | 1 | 40 sec. |
| RHIB | 3 | 5 sec. |
| Centurion C-RAM | 1 | — |
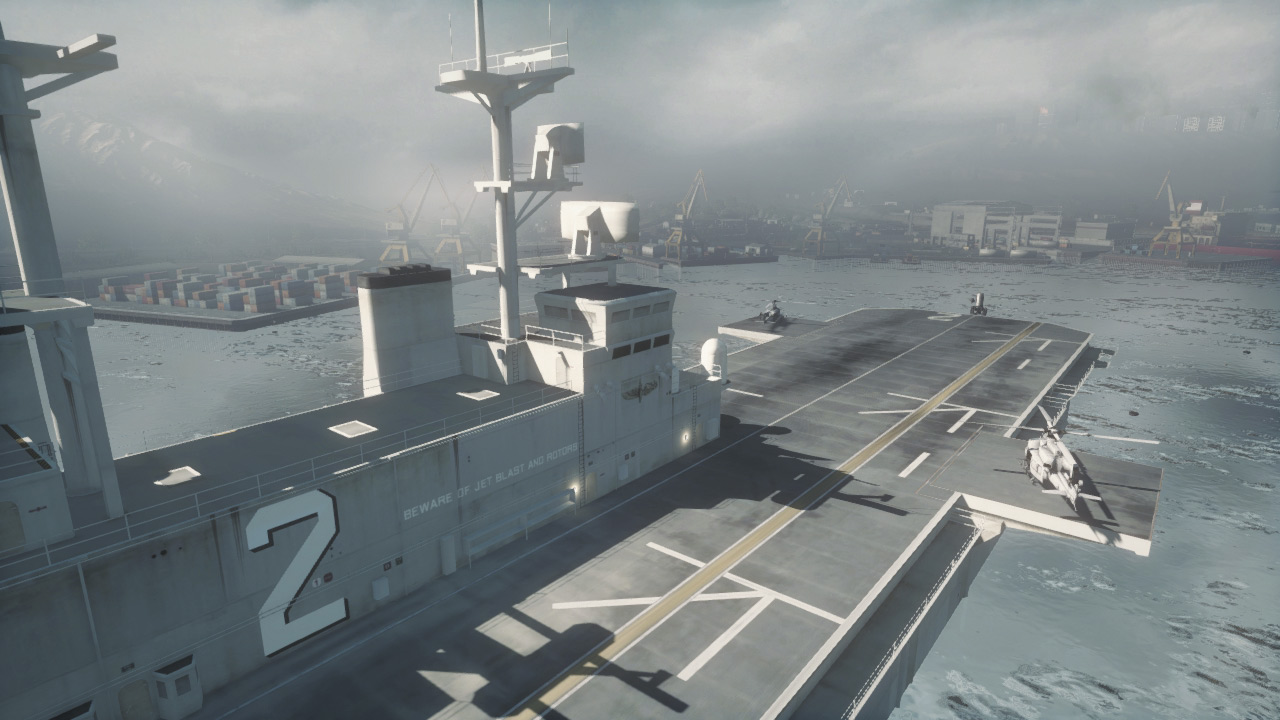
Once again, the aircraft carrier off the coast serves as the base for the US team, requiring them to launch a successful amphibious assault on the dock facility to the south.
With no presence on shore, the early moments of the match are critical as US troops attempt to secure a foothold on land. The UH-1Y offers the quickest way to get troops to the control points.
So if you’re piloting this helicopter, don’t take off until it’s fully loaded—your passengers can jump out of the chopper and secure control points by parachuting down to the ground.
US troops spawning belowdecks in the carrier can utilize the slower AMTRAC and RHIBs to make amphibious landing near the Dry Dock (B).
The F/A-18E should be deployed primarily as a fighter, so arm it with heat-seeking missiles and use it to counter the RU team’s SU-35BM and Havoc attack chopper.
Maintaining air superiority over the carrier is critical during the opening moments of the match as your teammates struggle to push ashore.
So when piloting this jet, constantly patrol the area between the carrier and Dry Dock (B) until teammates have secured a flag.
RU BASE
Base Assets
| Name | Quantity | Respawn Time |
|---|---|---|
| VDV Buggy | 2 | R15 sec. |
| T-90A | 1 | 30 sec. |
| Mi-28 Havoc | 1 | 90 sec. |
| SU-35BM Flanker-E | 1 | 40 sec. |
| RHIB | 1 | 5 sec. |
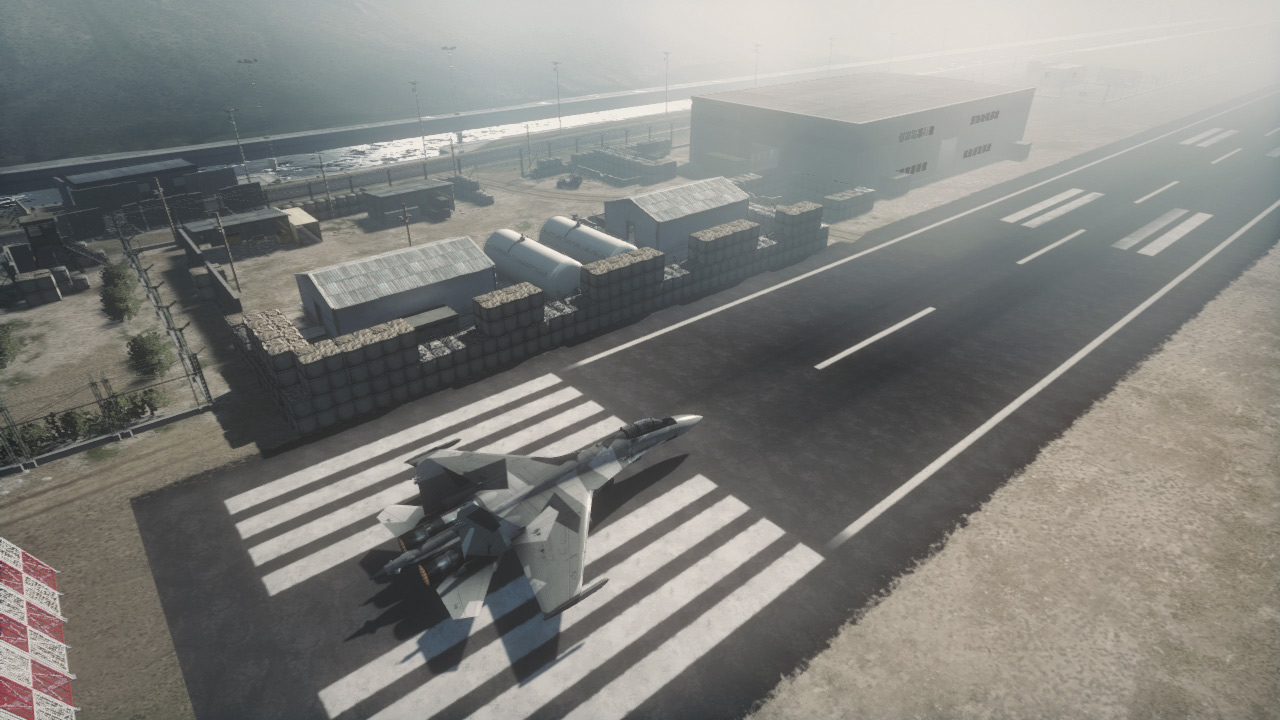
The RU team deploys from the airfield in the southeast corner of the map. The VDV Buggies that spawn here provide the best way for the RU team to capture the nearby flags at the Train Yard (C) and Storm Drain (E).
The RHIB, spawned in the canal to the north is well positioned to raid the Canal (C) control point to the west. However, don’t take off until you have some passengers in your vehicle.
This is a very large map and the RU team has few vehicles. So it’s important to transport as many troops to the center of the map as quickly as possible. Bailing out of a Mi-28 or SU-35BM to capture more distant control points isn’t a bad idea either.
When playing with a full complement of 64 players, some teammates may wish to avoid spawning into the game until a control point has been captured.
At that point they can spawn and enter the game closer to the action. Otherwise spawning at the RU Base after all the vehicles have left could lead to a very long hike.
The RU Base supplies the only tank on the map in the form of the T-90A. So even once the action has shifted to the middle of the map, don’t forget to bring this tank up to the front lines so it can lay waste to the lighter US vehicles.
A: CONTAINER AREA
Control Point Assets
| US Control | RU Control | Respawn Time |
|---|---|---|
| Growler ITV (1) | VDV Buggy (1) | 15 sec. |
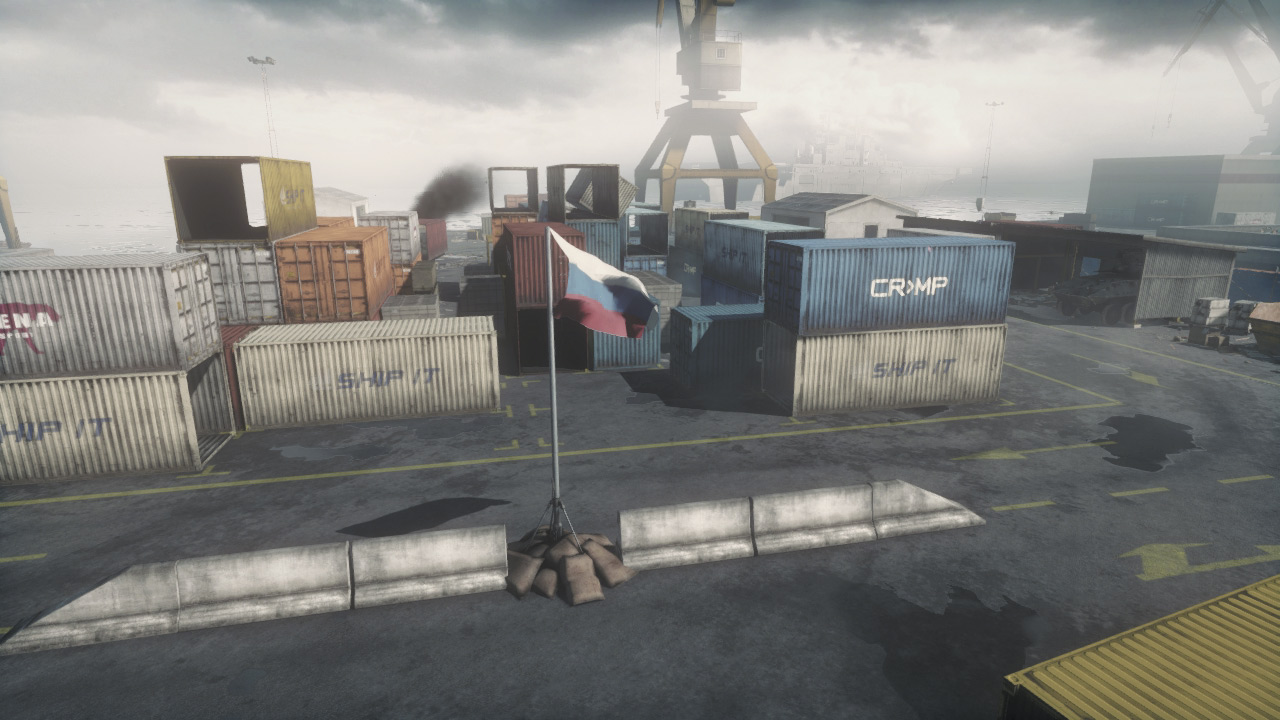
This flag (A) is positioned along a narrow roadway flanked by dozens of shipping containers to the north and elevated train tracks to the south. Both infantry and vehicles can capture this flag.
However, infantry have a slight advantage here since they can convert and contest the flag by hiding in the nearby shipping containers.
The elevated railway tracks provide an excellent overwatch position, allowing well-concealed defenders to pick off enemies approaching or gathering near the flag.
Mines and C4 are the best defense against vehicle attacks. Scatter mines along the road to the east and west of the flag to prevent captures by enemy vehicles.
The Container Area spawns vehicles for both teams: a Growler ITV for the US team and a VDV Buggy for the RU team. Use these fast-moving vehicles to launch high-speed raids on the nearby control points like the Dry Dock (B) and the Train Yard (C).
But in your haste to move on, don’t forget to leave some teammates behind to secure this flag.
B: DRY DOCK
Control Point Assets
| US Control | RU Control | Respawn Time |
|---|---|---|
| Growler ITV (1) | VDV Buggy (1) | 15 sec. |
| LAV-25 (1) | — | 30 sec. |
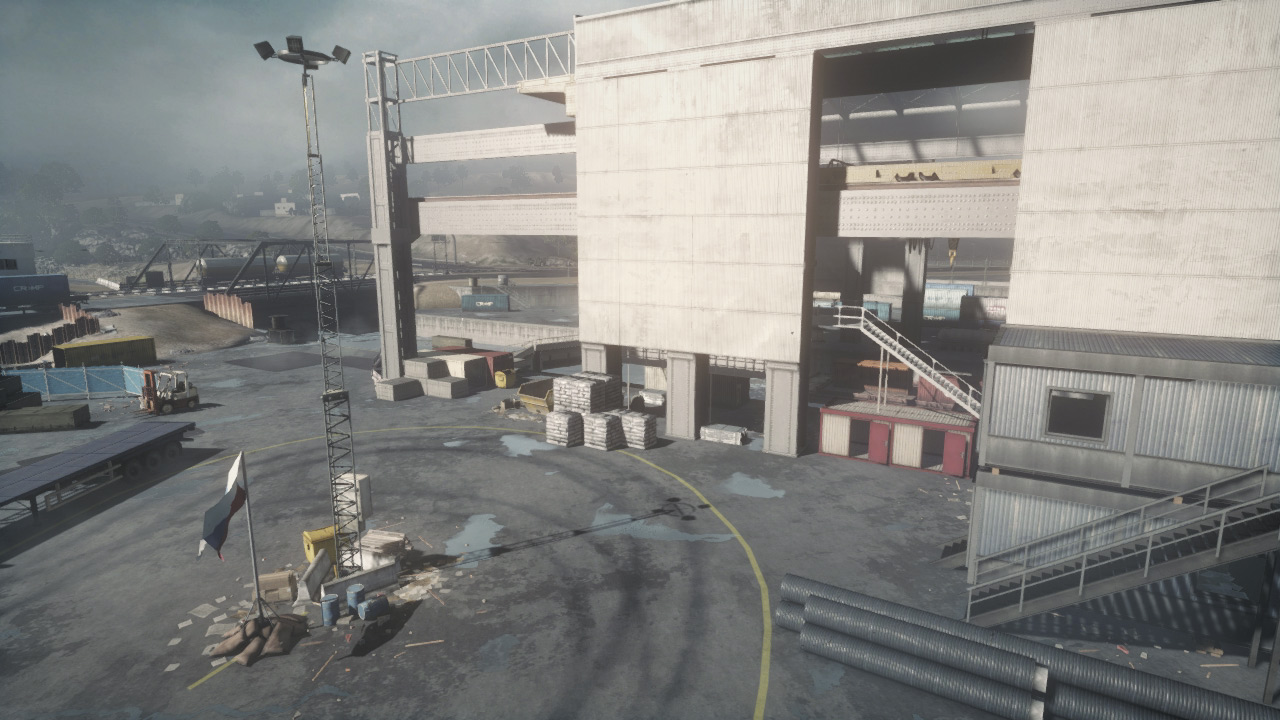
Given the Dry Dock’s (B) proximity to the US Base, it is likely to be the first flag captured by the US team. However, once the US team has gained a foothold here, they must defend it to prevent the RU team from taking it away.
And this is a flag well worth defending because it supplies the US team with their only LAV-25 as well as a Growler ITV. (The RU team gains a VDV Buggy when they hold this flag.)
The area surrounding the flag is extremely open with several long-range cover points surrounding it. As a result, armored vehicles are the safest option when attempting to capture or contest this flag.
Passive defenses like mines and Claymores are less effective here given the flag’s multiple approaches and wide capture radius. So defenders should hide in the nearby buildings and fend off attackers from long range.
The warehouse to the north and the massive Dry Dock facility to the west provide excellent views of the flag. Jets and helicopters are also very effective here due to the lack of cover around the flag.
Make frequent passes over this control point and strafe enemy units gathered around the flag.
C: TRAIN YARD
Control Point Assets
| US Control | RU Control | Respawn Time |
|---|---|---|
| Growler ITV (1) | VDV Buggy (1) | 15 sec. |
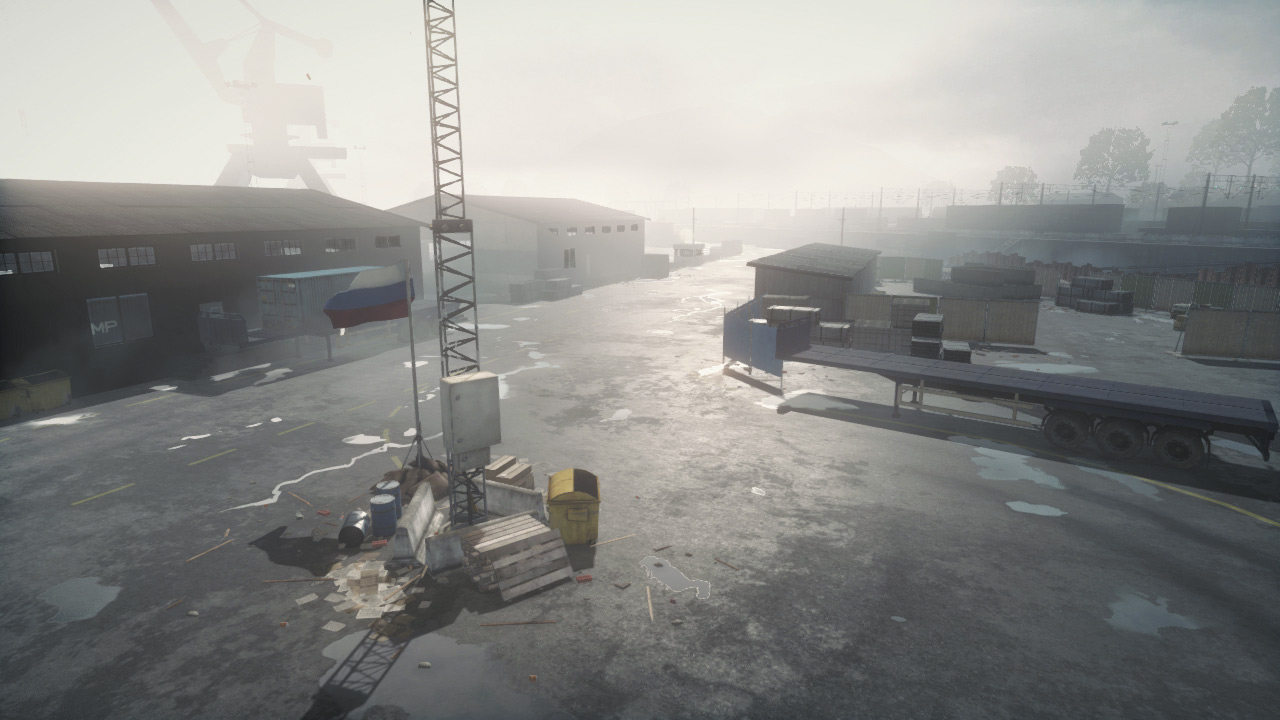
Because it is located near the center of the map, both teams have a good chance of capturing this Train Yard (C) flag at the start of the match, with a slight edge given to the RU team.
When playing as the RU team, rush this location with a VDV Buggy or the Havoc to take control of it before the US team can. The Train Yard provides an extra vehicle to each team: a Growler ITV to the US team and a VDV Buggy to the RU team.
Although they lack armor and firepower, these fast-moving vehicles are great for getting around the map quickly and for staging raids on the surrounding control points.
Defenders have plenty of hiding spots from which to contest flag captures at the Train Yard. So attackers should carefully sweep the nearby sheds and shipping containers before approaching the flag.
Close-quarters encounters are likely so begin any assault by tossing grenades into potential hiding spots. Given the numerous hiding spots near the flag, avoid attacking this location in vehicles.
You’re better off moving in on foot where you have the opportunity to maneuver and counter potential ambushes.
D: CANAL
Control Point Assets
| US Control | RU Control | Respawn Time |
|---|---|---|
| Growler ITV (1) | VDV Buggy (1) | 15 sec. |
| — | BMP-2M (1) | 30 sec. |
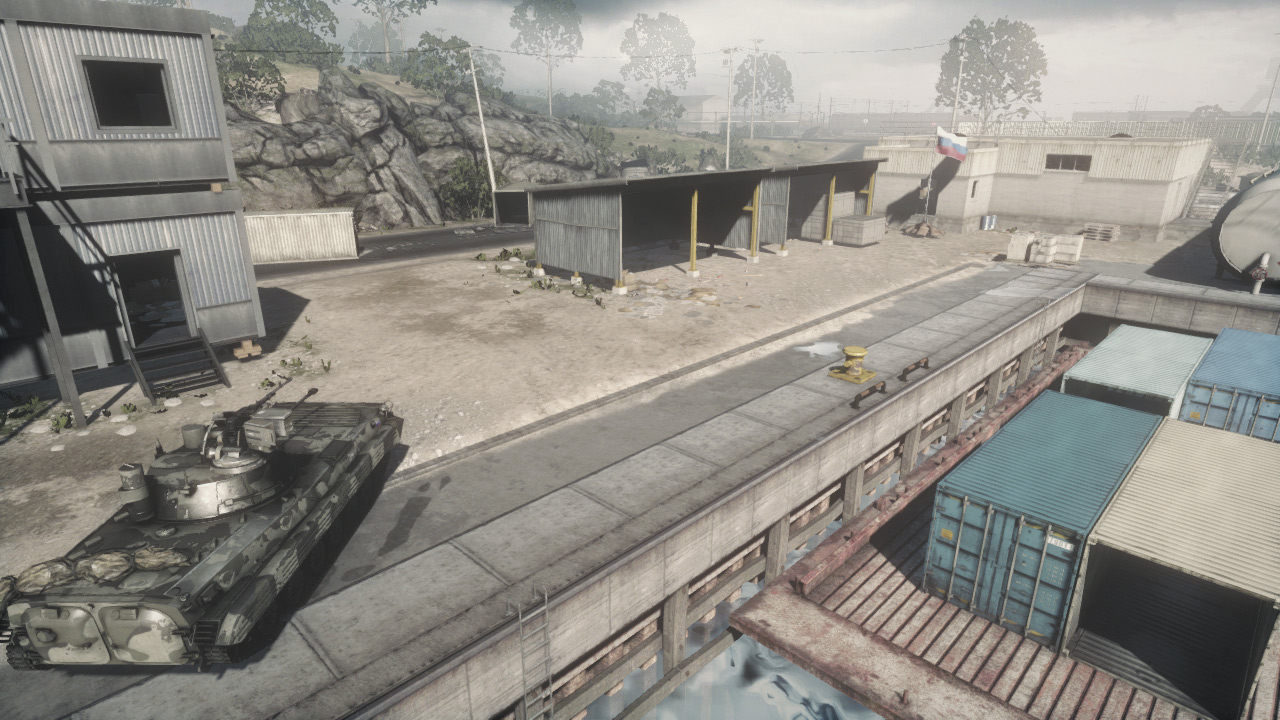
This Canal (D) flag is located on the western bank of the northern canal, not far from the RU Base. As a result, the RU team has the best chance of capturing this control point early on.
But that doesn’t mean they’ll be able to hold onto it. The canal itself makes this control point vulnerable to US amphibious attacks by RHIBs, the LAV-25, or AMTRAC.
While the road to the west is the most common avenue of attack, defenders should be prepared for assaults from the canal. The flag is located near a small concrete building.
This structure is a great place to hide while capturing or contesting the flag. Vehicle access is rather cramped here, making it tough to maneuver. So use vehicles to provide fire support from a distance while infantry move in to capture.
The RU team should make an effort to hold on to this control point because it spawns the only BMP-2M as well as an extra VDV Buggy—the US team only gets a Growler ITV.
Use the BMP-2M and T-90A (spawned at the RU Base) to gang up on US vehicles. Both vehicles function best around the Dry Dock (B), where there’s plenty of room to maneuver.
E: STORM DRAIN
Control Point Assets
| US Control | RU Control | Respawn Time |
|---|---|---|
| Growler ITV (1) | VDV Buggy (1) | 15 sec. |
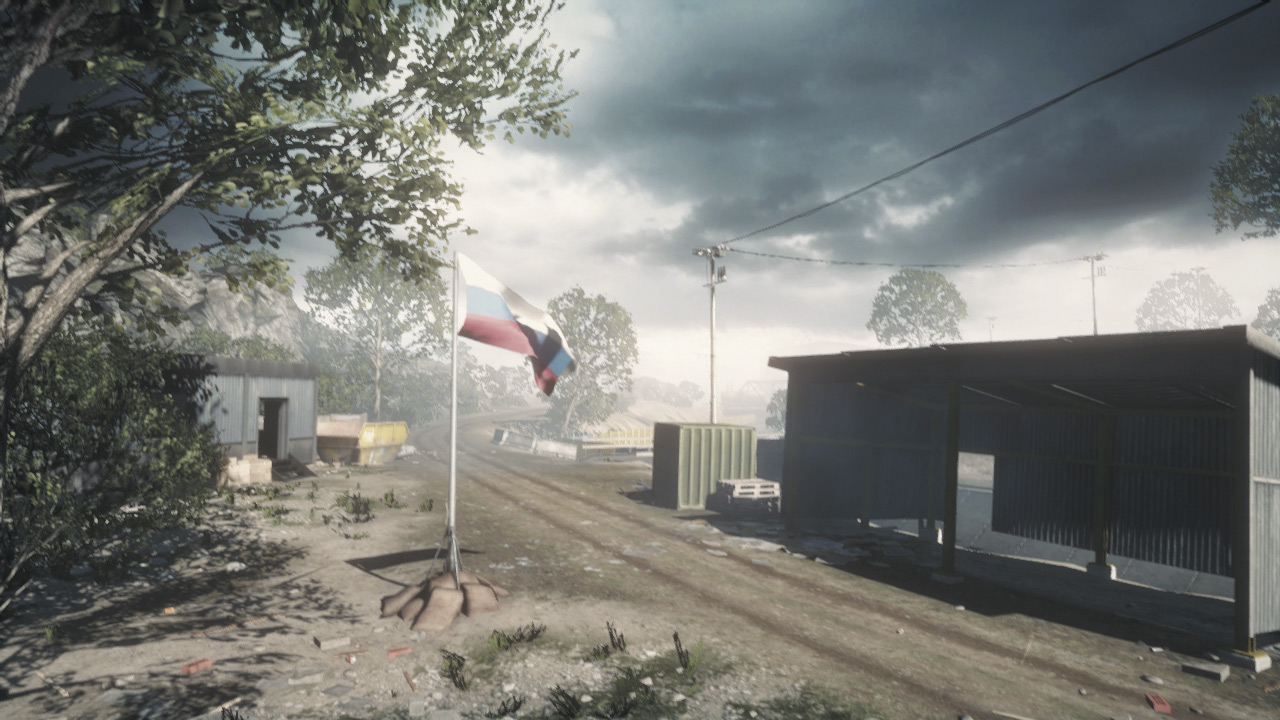
The Storm Drain control point (E) is located on the southern edge of the map, flanked by a rocky cliff to the south and a narrow drainage canal to the north.
Unlike the northern Canal, this nearby canal is narrow, best suited for RHIBs. US troops spawning back at their carrier can stage amphibious assaults on this flag by entering the canal south of the Dry Dock (B) and following it all the way to this control point.
However, the dirt road is the most common avenue of attack. When defending here, place mines on the road to prevent vehicle attacks and take up overwatch positions on the tall bridge to the east.
The small buildings and sheds surrounding the flagpole also provide good hiding spots for anyone capturing or contesting this control point. The Storm Drain’s remote location makes it one of the least contested control points on the map.
However, don’t leave this flag undefended, particularly during tight matches. Just one squad of dedicated defenders should have no problem locking down this location.