
Assassin's Creed Origins Guide Side Quests Siwa Side Quests
Family Reunion
Prerequisite: Complete Main Quest: The Oasis
Suggested Level: 2
Reward: 750 XP
Find and Rescue Teremun and the Farmers
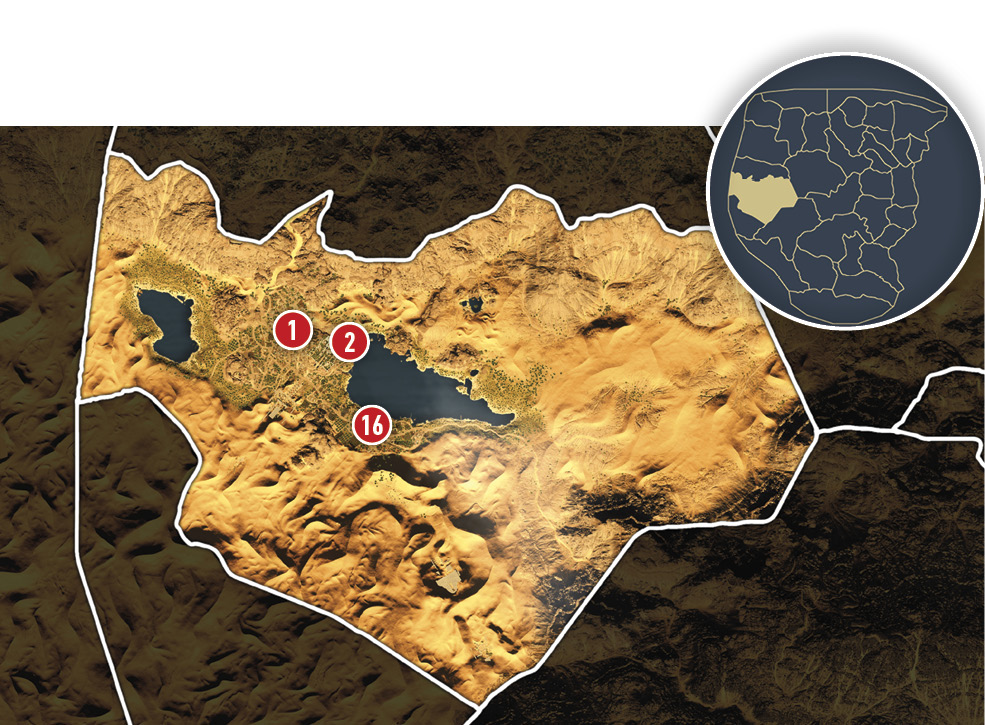
This quest is started by accepting it from Hepzefa’s quest options (1). Teremun, and a group of local farmers have been arrested for protesting onerous tax increases. His wife asks you to free him along with all the other farmers.
Select the job in the Quests menu. A marker (2) appears to the northeast, near the lake. Mount a ride and head to that area. When close, switch to Senu and fly over the temple. Press the Free Aim button to enter first-person view and to acquire targeting guidance. The yellow line indicates the direction of your target. When it becomes a circle, it directs you to your target. When you are far off from the target, an arrow will appear in a quarter yellow circle. Move in that direction. The closer you get to the target, the smaller the circle becomes until you have zeroed in on the target and it becomes marked.

Temple of Amun
Prerequisite: Approach the Temple
SUGGESTED LEVEL: 5
LOCATION REWARD: 150 XP
LOCATION OBJECTIVE: Loot three treasures
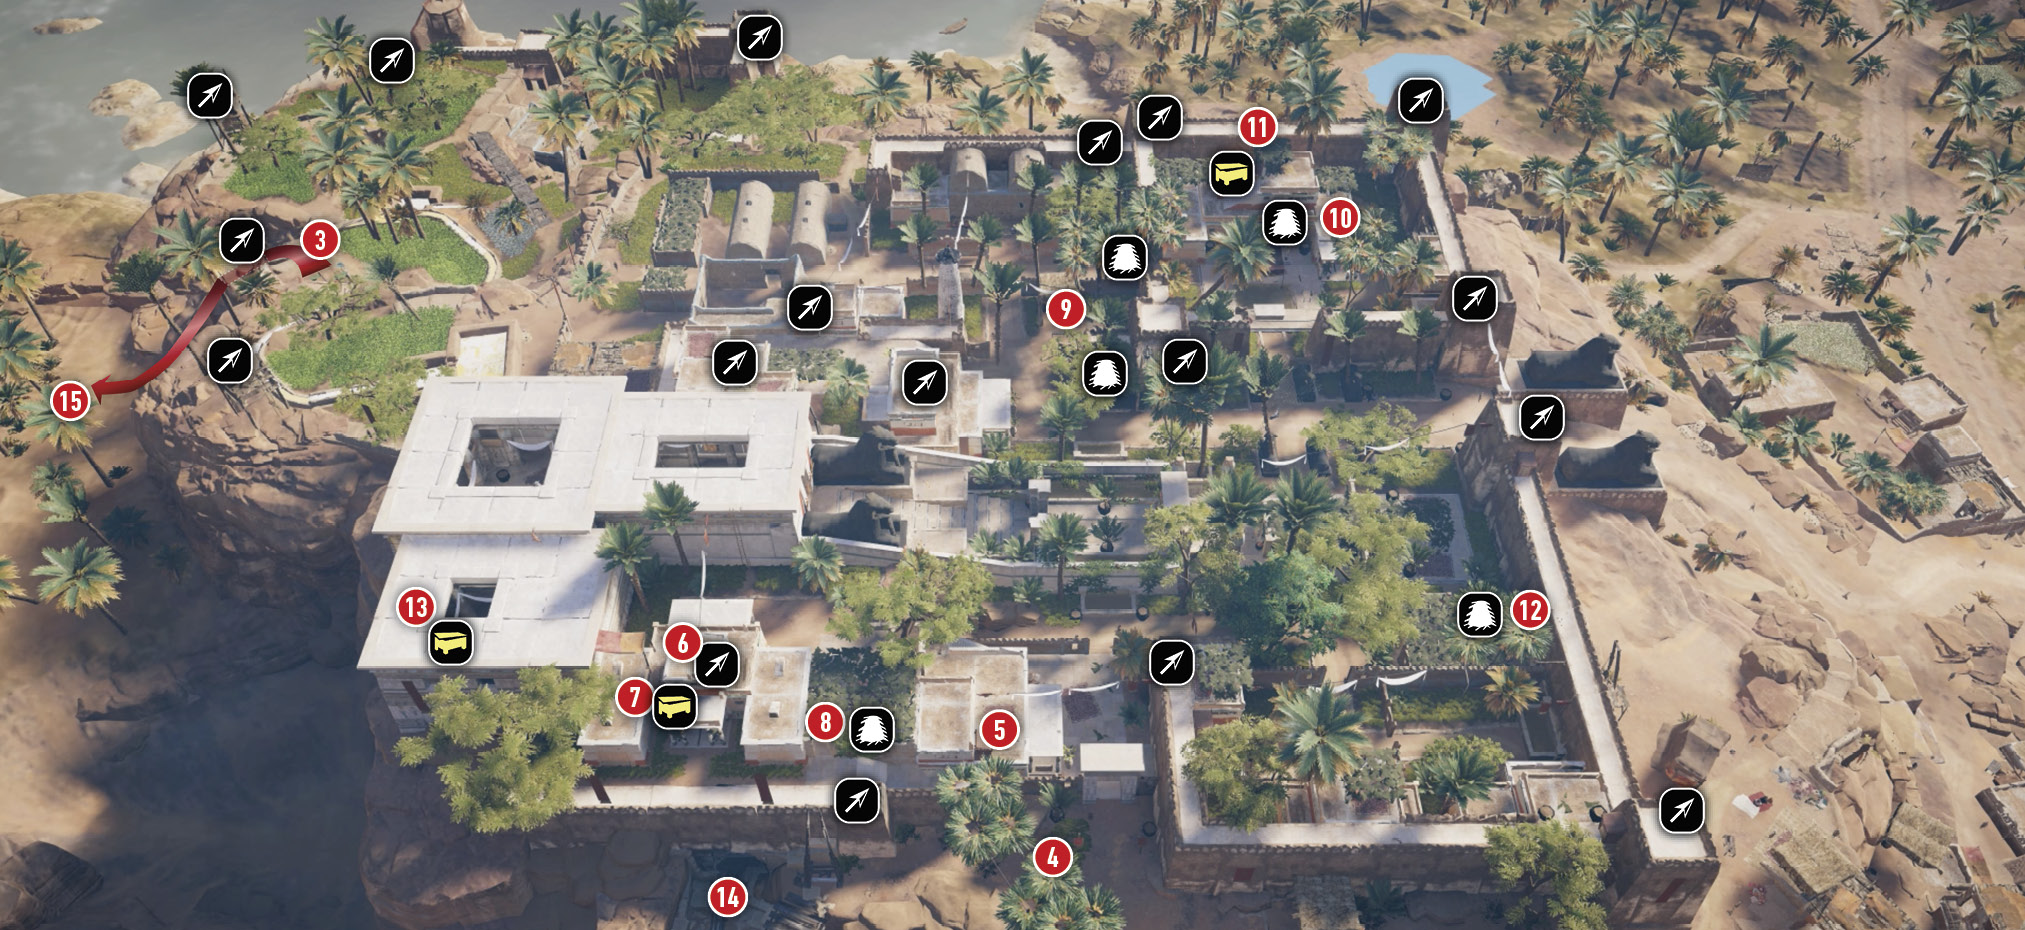
When scanning for soldiers from above, always look for guards at fort entries as well as doorways into buildings. After finding the stationary guards, start looking closely at the pathways for patrolling guards. After Senu locates and marks Teremun (3) and every soldier in the Temple of Amun, find the best point of entry.
Use the tall grass (4) along the northwest side to slump down and whistle for the Level 4 entry guard to join you. You can perform a stealthy takedown on him if he is one level above yours; otherwise, put an arrow in his head. Enter the temple and climb to the top of the structure on the immediate left.
Notice the small booth (5) on the balcony. You can dash inside to hide and remain in stealth if no one sees you enter. There are a few of these at the temple. Use them if you get into trouble and find yourself retreating.
Continue heading north up and over the rooftop, across the vine-covered pergola, and up to a high rooftop (6), where you will find an arrow supply. Look for all the soldiers that enter your range from this rooftop and take them down with arrows. Replenish lost arrows and move into the interior of the same building.
Loot Treasures 1 of 3
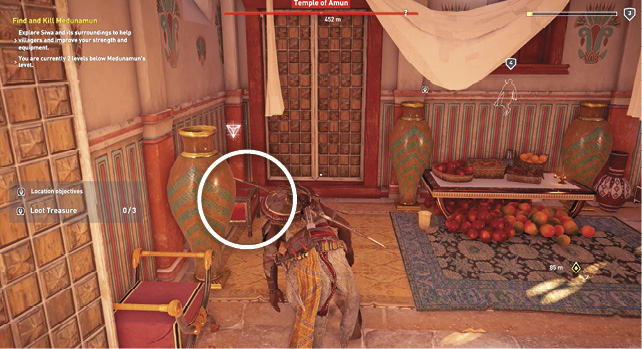
Loot the treasure chest (7) on the floor. This is the first of three treasures needed to complete the Temple of Amun activity. If it’s a weapon or shield greater than one you carry, equip it.
Three Captive Priests: Prisoners in the Temple
Head back south along the outer wall walkway. Look under the pergola you crossed earlier to find one (8) of five captive priests for the Side Quest: Prisoners in the Temple. You can select that quest and have Senu hone in on the remaining four captives to mark them on the map.
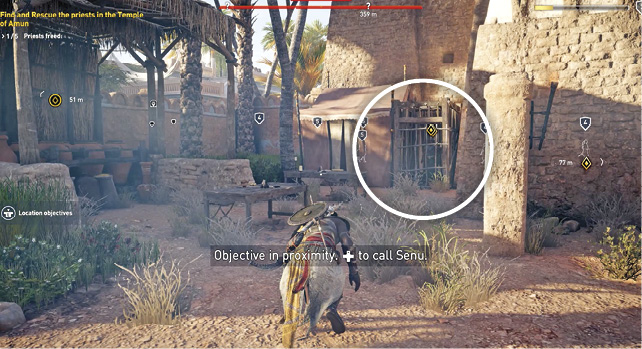
Use the rooftops and tall grass to travel south to the two imprisoned priests locked inside a wooden cage (9). Defeat any soldiers in the area, then open the cage to free them.
Get to high ground and continue using the many arrow perches marked on the map to take out the soldiers below. Head to the building in the east. Defeat the guards before you enter, then free the fourth priest (10).
Loot Treasures 2 of 3
Head upstairs in the same building to find the second treasure(11). It’s in a red chest near the open balcony doorway.
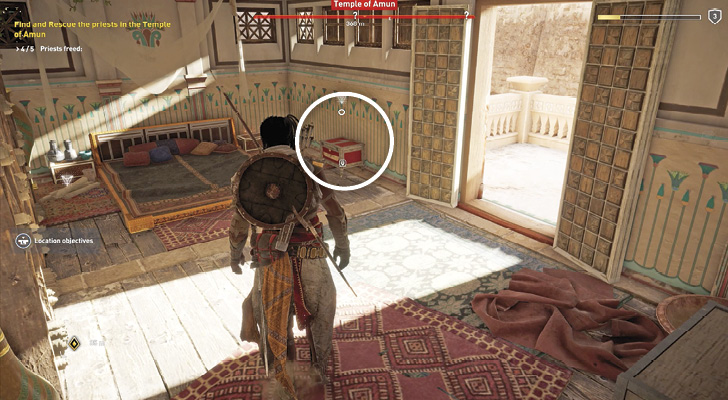
The Last Captive Priest: Prisoners in the Temple
Traverse the top of the fortress wall or stay mostly in the tall grass as you head west, stealthily killing any soldiers that remain. Reach the last priest prisoner (12) under a pergola in the fort’s southwest corner. This completes Side Quest: Prisoners in the Temple, earning you 500 XP!
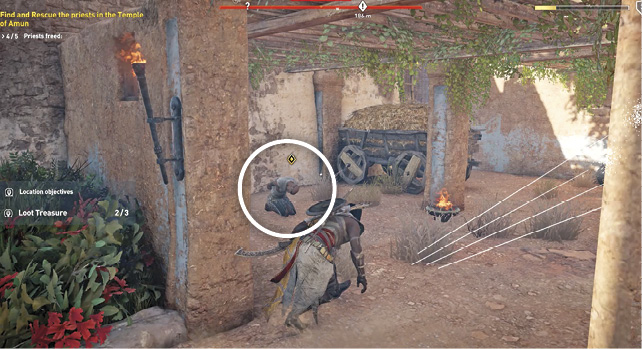
Loot Treasures 3 of 3
Use the rooftops and fortress walls with arrow supplies to continue clearing the fort of soldiers, keeping Medunamun alive (until you want to begin The False Oracle quest). This is critical if you want to get the last treasure(13), which is in the temple’s side room on an altar. Medunamun is often located in the temple, so you can either drop in through the rooftop skylight or enter through the tunnel (14), which may have guards if you have not defeated them already.
Teremun and the Farmers
Head to the fort’s northwestern branch. Use the same tactics to clear the enemies from this area. You find Teremun and the farmers together in a single cage (3).
Bring Teremun’s Body to His Farm
Unfortunately, it’s too late for Teremun, who died in captivity. Retrieve his body from the cage. Carry him east until you reach a ravine that leads west out of the fort. Once out of the fort, whistle for your mount (15). Lay the body on the animal’s back. Now mount your ride and take Teremun home (16).
Once at his farm, follow the marker to a man standing in the burning cinders. This used to be a farmhouse. Dismount and carry Teremun to the man. He explains that Teremun’s entire family perished and instructs you to lay the body with the rest of his family.
Lay Teremun to Rest with His Family
Carry Teremun a few meters south, where you will find the rest of his family in a tent. Drop him next to them to complete the quest.