
Assassin's Creed Origins Guide Side Quests Faiyum Oasis Side Quests
Sobek’s Tears
Prerequisite: Discover Faiyum Oasis
Suggested Level: 29
Reward: 3,000 XP
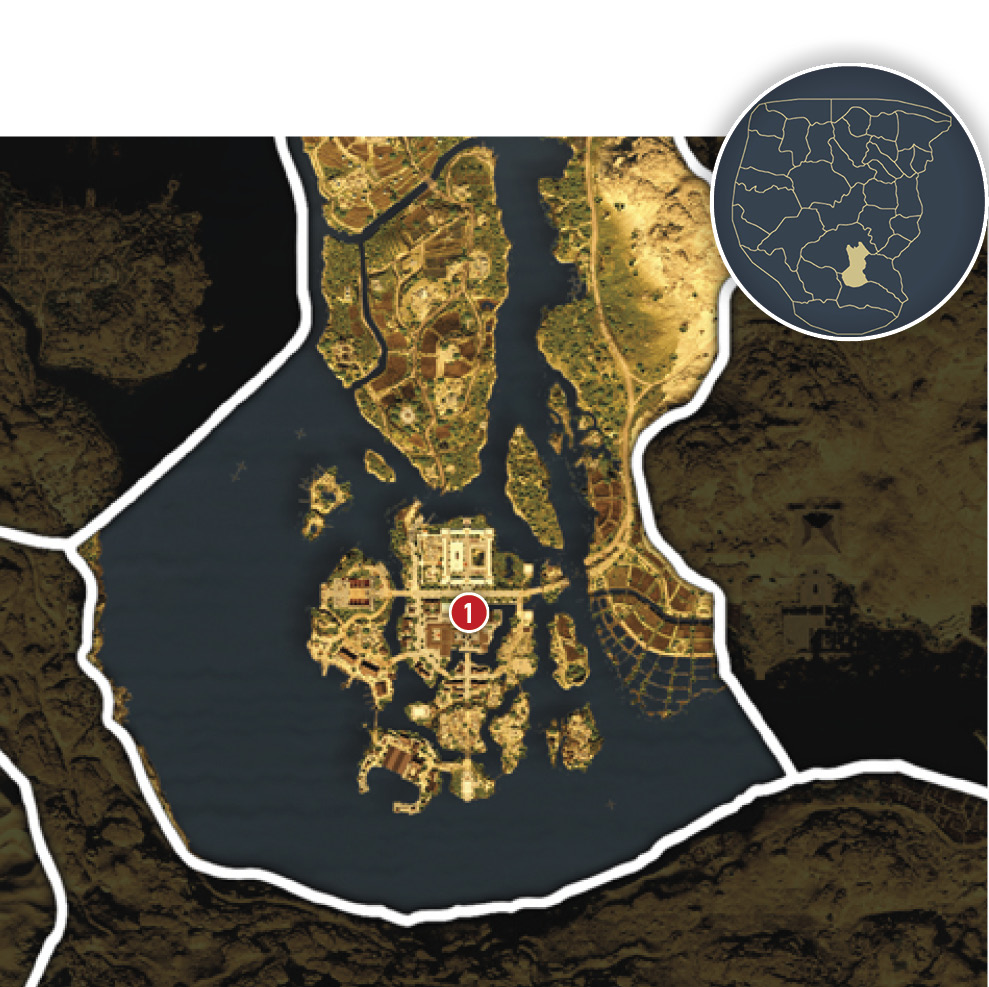
Speak to the Guardian
Krokodilopolis
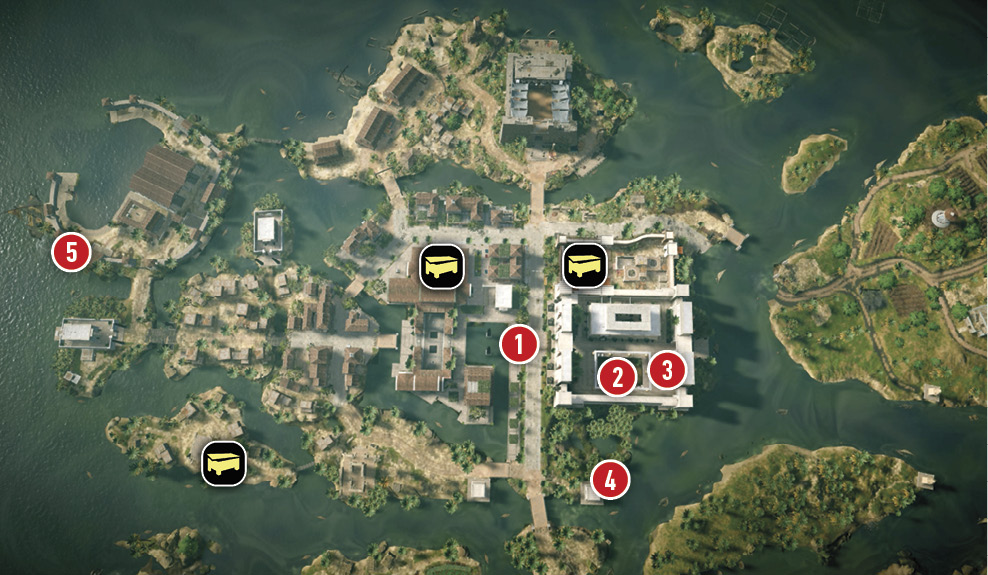
Talk to the guardian (1) on the Temple of Sobek steps.

Investigate the Sacred Pool in the Temple of Sobek
Head north from the steps into the temple and approach the pool (2) where the albino crocodile Petsuchos is located. Use Animus Pulse to locate the clues around the pool area. Do not attack Petsuchos.
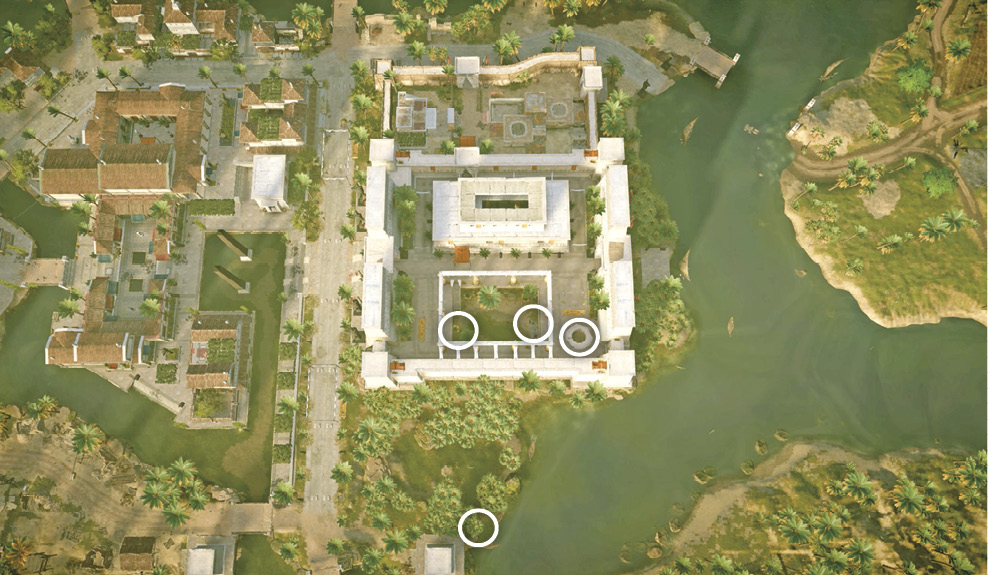
Investigate the blood on the staircase, the foul-smelling liquid next to the blood on the stairs, and the carcass. The last clue can be seen in a drain through an impassible grate. You must find another way around.
Follow the blood from the stairs out of the pool and into a nearby well (3). Jump into the well and follow the tunnel to the last clue. The final clue is a discarded priest robe covered in blood. Follow the blood trail outside the tunnel.
Find the Injured Person
Use Senu to find the injured person (4) on the east shoreline. Have your warrior bow ready to take out the crocodile near the body. Interact with the body to read the Ptolemy soldier’s note. You’re now looking for Melina the Hibiscus at the southern docks.


Assassinate Melina the Hibiscus
Neorion Naval Arsenal
Prerequisite: Approach the blockade
Suggested Level: 30
Location Reward: 900 XP
Location Objectives: Kill one captain and one commander, loot two treasures
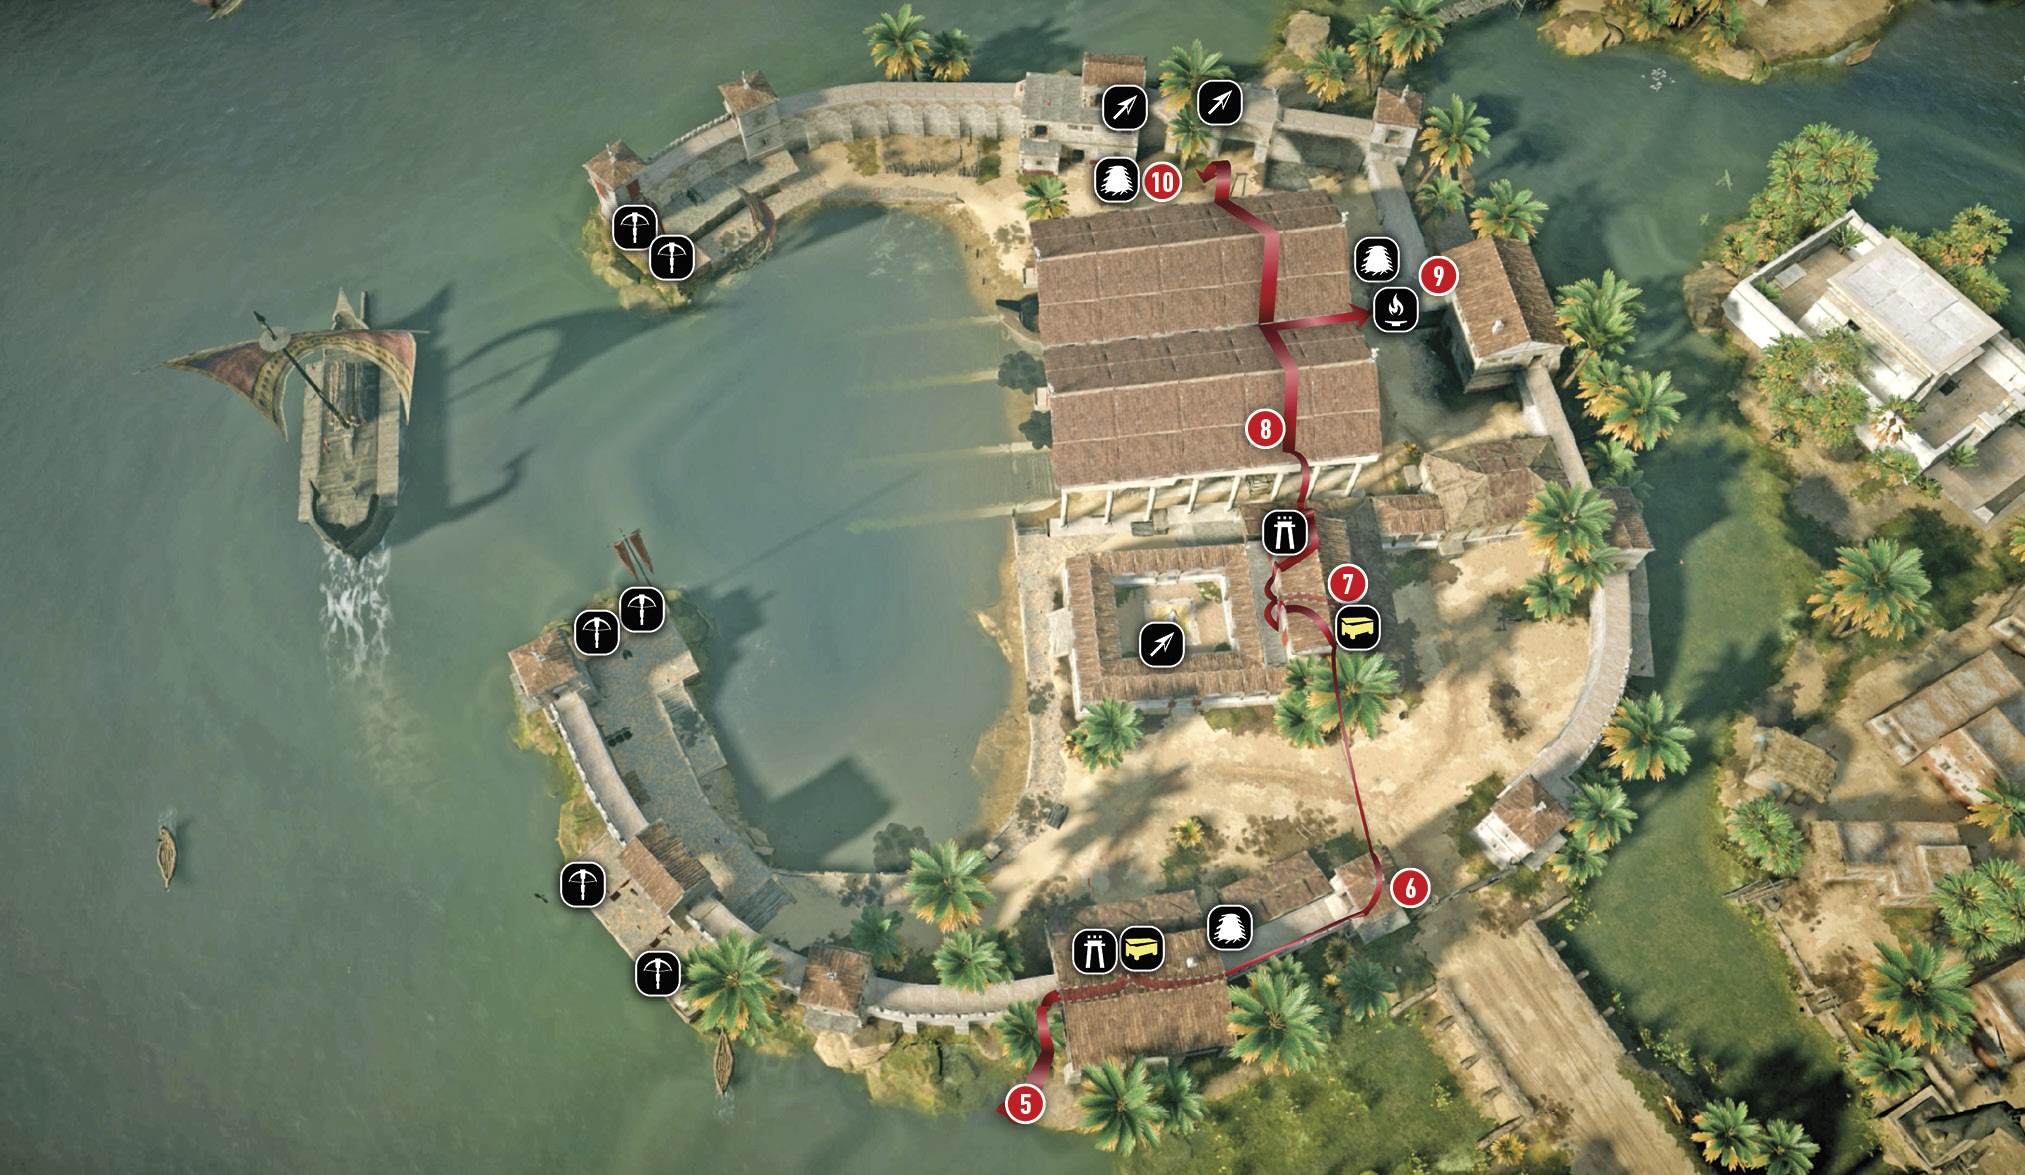
Take a boat near the dead body and paddle it to the Neorion Naval Arsenal (5). Send Senu up to locate Melina the Hibiscus. Your target is usually on the base’s west end, but she moves around. You can usually take her out by performing a drop assassination from a rooftop. You get the Letter from Sehetep from her, which points to Sehetep as the one paying her to poison Petsuchos.

Start by docking your boat on the base’s southeast side (5) to remain hidden from the two brute guards at the mouth of the docking bay. Scale the wall and enter the first guardhouse, where you can collect the treasure from the chest on the left wall. There’s a hiding booth next to the chest in case a soldier’s patrol takes him up the stairs and into this room while you are there.
Continue out of the house, following the wall walk to the gate guardhouse (6). There’s a soldier on the balcony outside the fort. Kill him from behind or leave him alive and get to the rooftop of the same guardhouse.
Walk across the rope stretching from this guardhouse to the rooftop of the (Level 31) commander’s quarters (7). The commander is often sitting at the desk with the second treasure and with his back to the balcony doorway. Enter in a crouch and assassinate him. Take the treasure and leave. Get back on rooftop.

Return to the commander’s rooftop and use the beam on the west end to jump to the boathouse rooftop (8). From here, jump off the beam sticking out on the northeast end and get to the brazier (9) to set a trap. If you don’t need to worry about the alarm, then track down the captain that patrols the west end (10). Drop-assassinate him using the rope suspended from the boathouse to the west guardhouse. Use the haystacks to lure him to you if a rooftop drop is not an option. Melina also starts her patrol from the west end. If you have not taken her out already, use arrows or a drop assassination.
Speak to the Guardian
Use the Viewpoint at the temple to get back to the guardian (1). Speak to him.