
Assassin's Creed Origins Guide Side Quests Saqqara Nome Side Quests
Secrets of the First Pyramids [ULC]
Prerequisite: Discover Saqqara Nome
Suggested Level: 23
Reward: 4,000 XP
Exclusive for Deluxe and Gold editions of Assassin’s Creed Origins.
Find Merkes the Scholar
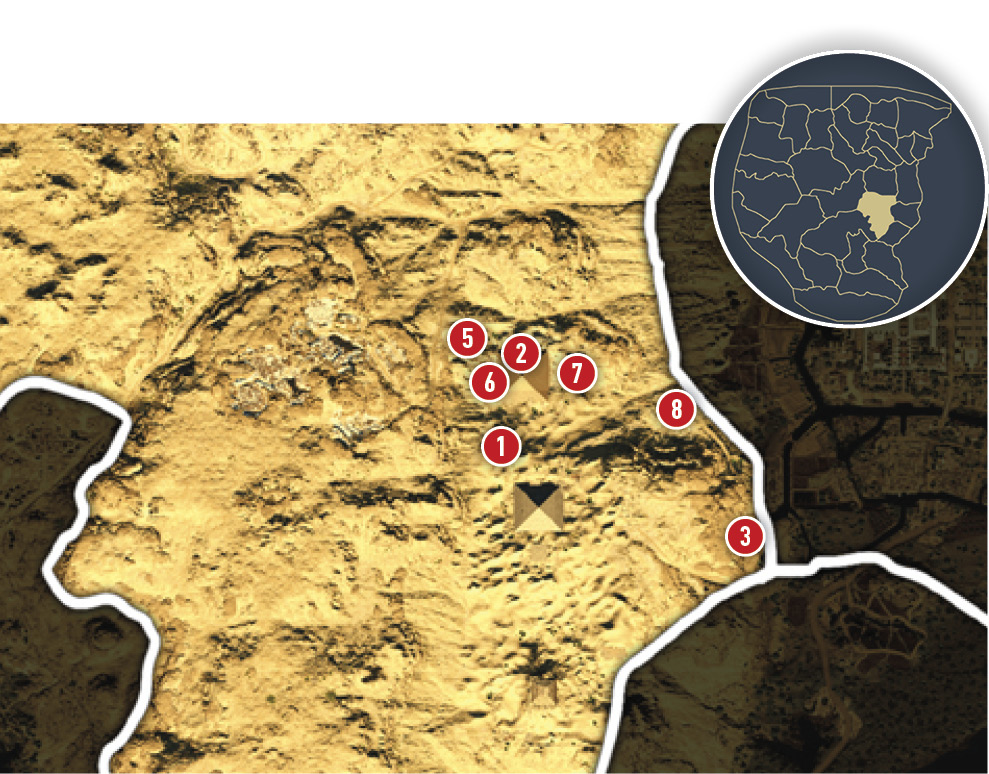
When you explore the area around the Bent Pyramid in Saqqara, you happen upon a man (1) being chased by bandits on camelback.
Find Merkes the Scholar
Give chase and shoot the pursuers with arrows with a strong warrior bow.
Speak to Merkes
Bayek meets a scholar named Merkes and agrees to help him.
Reach and Explore the Sites to Retrieve the Artifacts
Merkes has one of the three artifacts he needs for his research. The other two are in the Tomb of Sneferu (2) and in Hugros Hideout (3). Send Senu up to pinpoint these locations.
Tomb of Sneferu
Climb the northernmost pyramid to enter through the open tunnel on the north side. Light a torch and follow the tunnel. At the bottom of the first sloping tunnel is a very small shaft that you must crouch to walk through.
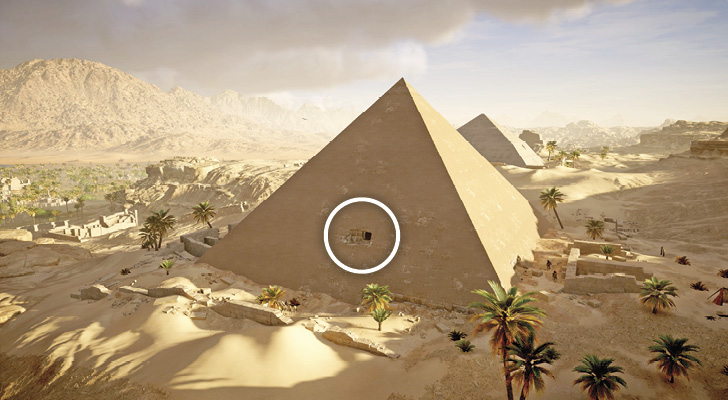
This opens into a room with a burnable lamp. To the right of the lamp is a “pass-through crack.”
Slide down the slope in the next tunnel and cross the bridge over the pool of water. At the end of the tunnel is a deep shaft. Jump to the opposite wall and climb down to the floor. Slide under the wall through the open slot in the blocks at the bottom of this shaft. This places you in the chamber with a weighted platform challenge.
The First Balance Platform Chamber
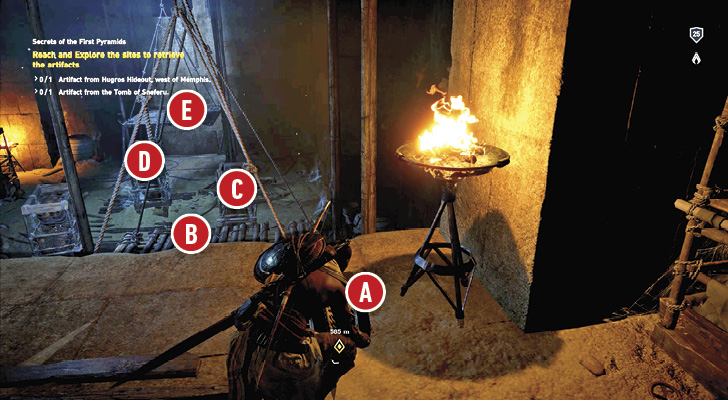
The first balance platform chamber has a simple solution. As you enter the chamber, pick up the weight (A) to the right and walk onto the first moving platform (B) near the weight you picked up. This drops the platform to the ground. Now push the large shelf (C) along the rails onto the same platform. This provides enough counterweight for you to jump from the next shelf (D) on the floor to the second platform (E). Now it won’t lower from your own weight and you can enter the next chamber (F) above the raised platform.
The Second Balance Platform Chamber
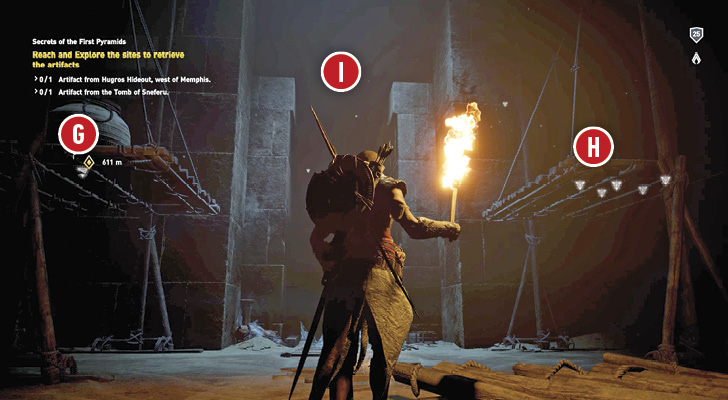
Smash the vase in the corner that’s keeping you from entering the second balance platform chamber. In the first chamber, you see two counterbalancing platforms—one on the left (G) with a vase on it and one on the right (H) with five weights on it. There’s a high room (I) accessed through the upper platform in the back of the room. The puzzle in the chamber to your right leads to the artifact you need.
Break the vase (G) with an arrow. Climb atop the large, wood-framed vase in the left corner to jump to the platform (G) that held the vase. Continue to jump from the platform to the high ledge in the back of the room. There is a treasure in the right corner. Do not confuse this chamber with the next, because it’s very similar.
The Third Balance Platform Chamber
Enter the final balance platform chamber. On the right is a balance platform (J) with two weights on it. In front of that is a wood scaffold (K) used as a jumping platform to access the second balance platform (L) in the room. This platform is raised and when you jump on it now, it lowers and does not allow you to reach the room above (M).
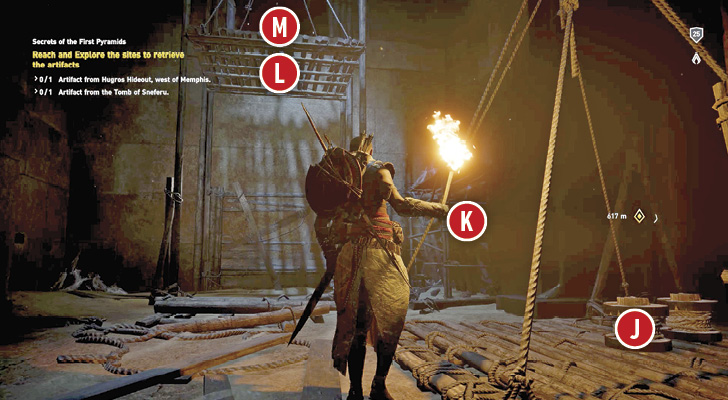
Simply take two weights off the balance platform (H) in the previous chamber and place them on platform (J) with the other weights. Now it is heavy enough to stay down as you jump from the corner scaffold (K) to the balance platform (L); then jump to reach the high ledge that leads to the final chamber (M).
Artifact and Ancient Tablet Chamber
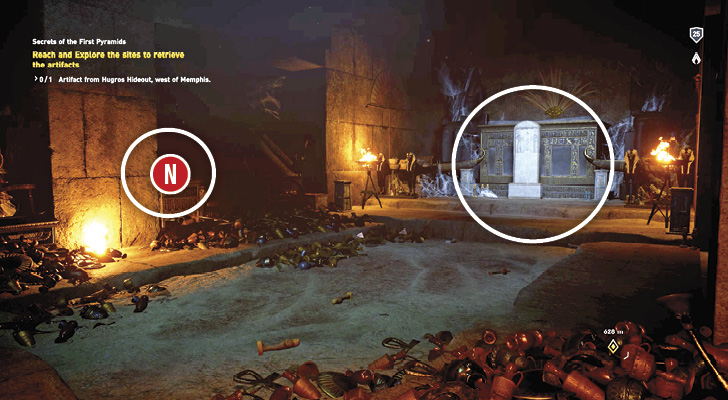
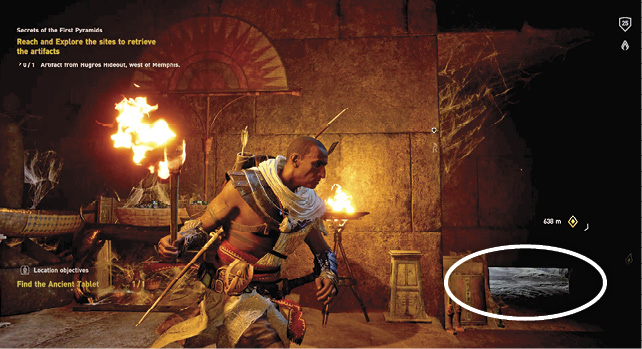
As you enter, there are four chests on the room’s left side. The fourth one (N) is the artifact you need. Make sure you interact with the ancient tablet in the back of the chamber to complete the location objective and earn an Ability Point.
Exiting the Tomb
In the ancient tablet room, use the slide-under open block near the left wall for a quick way out of the tomb. You’ll slide down a ramp, swim underwater through a long tunnel, and climb out of a tall shaft to reach the outside on the pyramid’s west side.
HUGROS Hideout
Prerequisite: Approach the hideout
Suggested Level: 23
Location Reward: 400 XP
Location Objectives: Kill one captain, loot one treasure
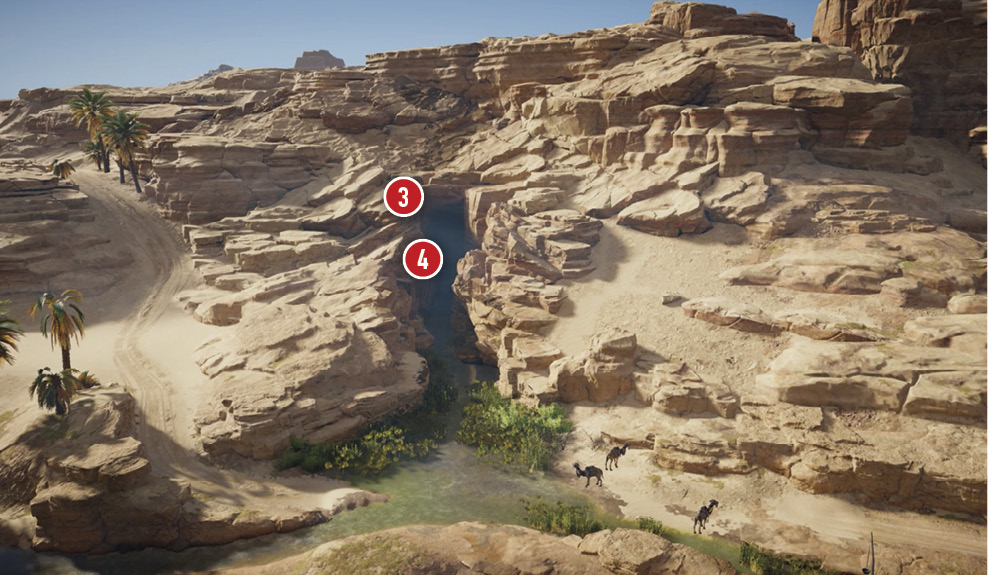
The Hugros Hideout (3) is inside a very large cave. It’s best to approach from the mountaintop above the cave opening. Once inside, use Senu to mark enemies through the rock to make it easier to find them. Stand above the entrance and shoot the patrolling bandit near the water below; then drop to the lower ledge (4).
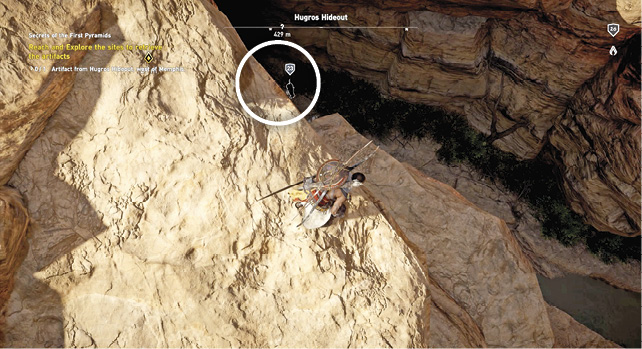
Shoot the bandit on the ledges to the left, deeper in the cave. He stands near an arrow supply.
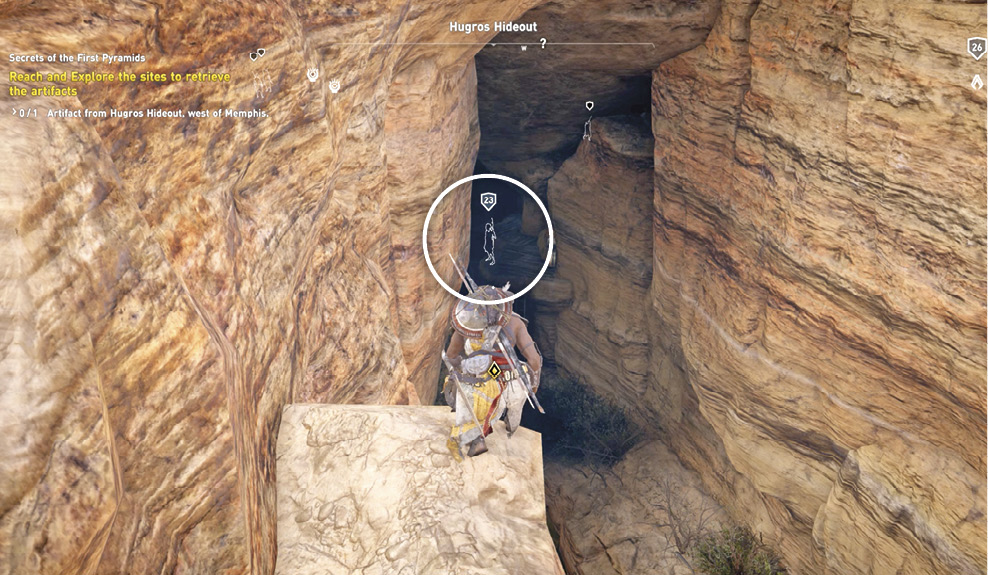
Now get to his ledge and move across the short bridge back to the right side. Along this bridge you can pivot to your left and shoot a bandit standing on the next ledge. After the bridge, hide in the grass to the right of the next cave opening; a couple bandits are gathered deeper in the cave.
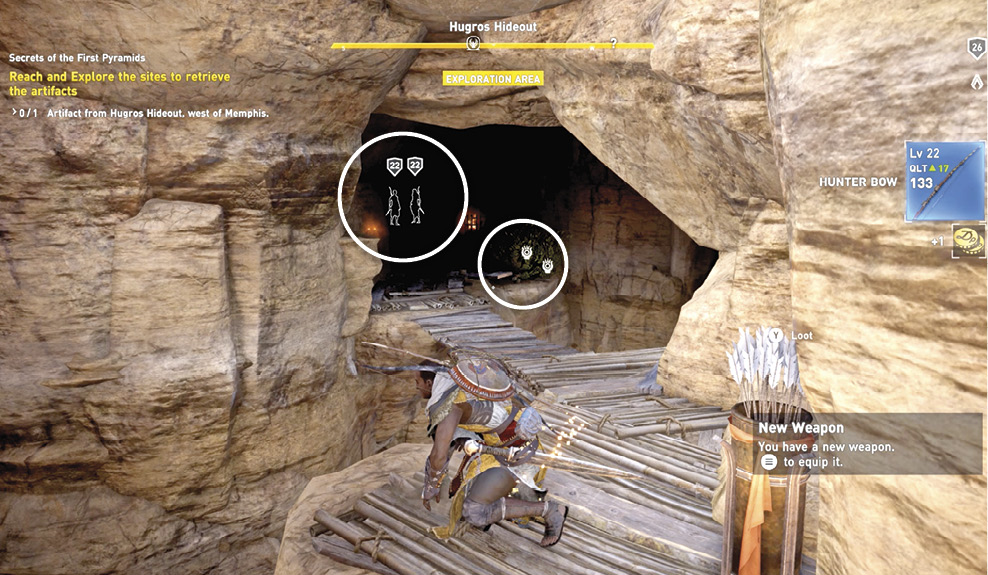
Get their attention by shooting a vase near them. If two bandits investigate your location, assassinate one and either take the other out with a weapon or dive into the water below to avoid detection.
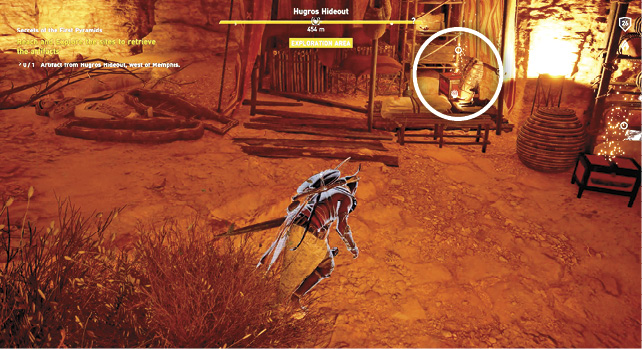
If you dive into the water, you find a nook with loot and discover a lot of tall grass that allows you to move around undetected. You can head back to shore through the tall grass and reach the treasure chests near the tents, one of which contains the artifact.
Speak to Merkes
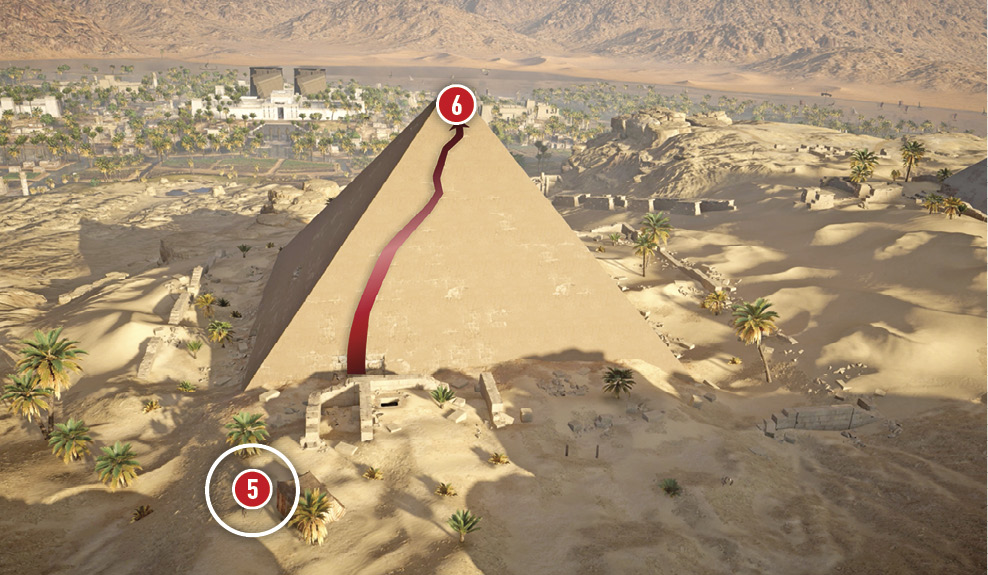
Finish off the captain in the cave to complete the location objective and then return to Merkes (5), who is now at the northwest edge of the Sneferu’s pyramid. There’s one part missing and it’s at the top of Sneferu’s pyramid.
Reach the Top of the Tomb of Sneferu
Climb the west side of Sneferu’s pyramid. At the top, you spot the third artifact in the capstone (6). Bayek places the three artifacts in the empty slots to complete the diagram. It points you to a vault in the ruins to the east.
Speak to Merkes about the Diagram
Merkes (7) has moved to the pyramid’s east side, so while on top, shimmy around to the east side and slide down the pyramid. Talk to Merkes.
Escort Merkes to the Temple Ruins
Merkes mounts the nearby camel. Take the one next to him and escort him east to the ruins (8). You dismount and walk into the ruins to the vault entrance (9) covered in sand.
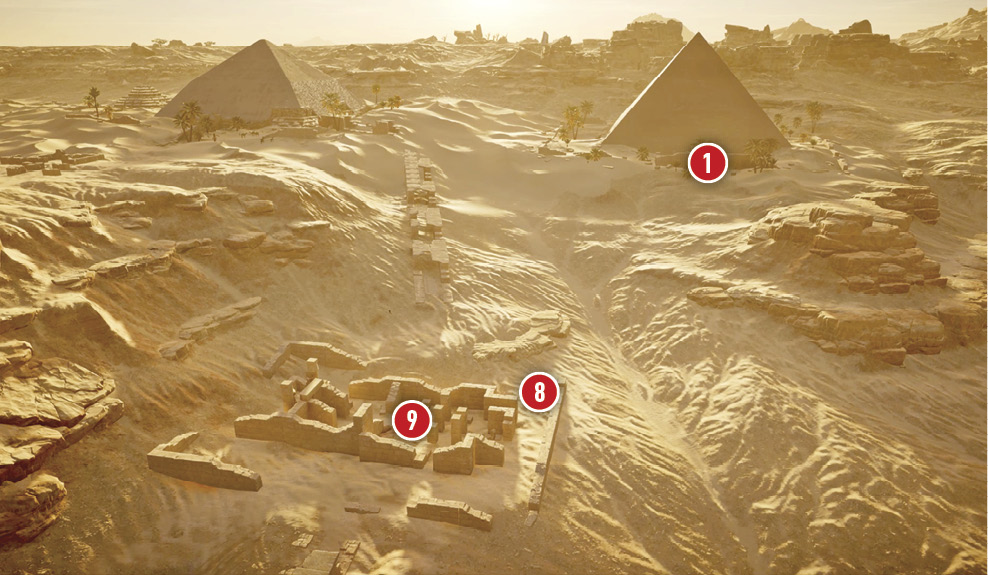
Bayek uncovers the vault entrance. Shoot the wooden barricade from the entrance.
Escort Merkes into the Vault
Drop into the vault, light a torch, and follow the tunnel until you cross some cobras. Shoot the cobras and continue down a ladder into the final chamber, where you discover a treasure with a rare weapon inside and a model pyramid in the middle of the room.
Speak to Merkes
Talk to Merkes to complete the quest.