
Assassin's Creed Origins Guide Main Quests Faiyum
The Crocodile’s Scales
Prerequisite: Complete Main Quest: Aya
Suggested Level: 25
REWARDS: NA
Unlocks: Main Quest: The Crocodile’s Jaws; Side Quests: Fires of Dionysias; The Sickness; Demons in the Desert
Details: Bayek travels to Faiyum to hunt his next target, the member of the Order of the Ancients known as the Crocodile.
Travel to Faiyum
Faiyum: Soknopaiou Nesos
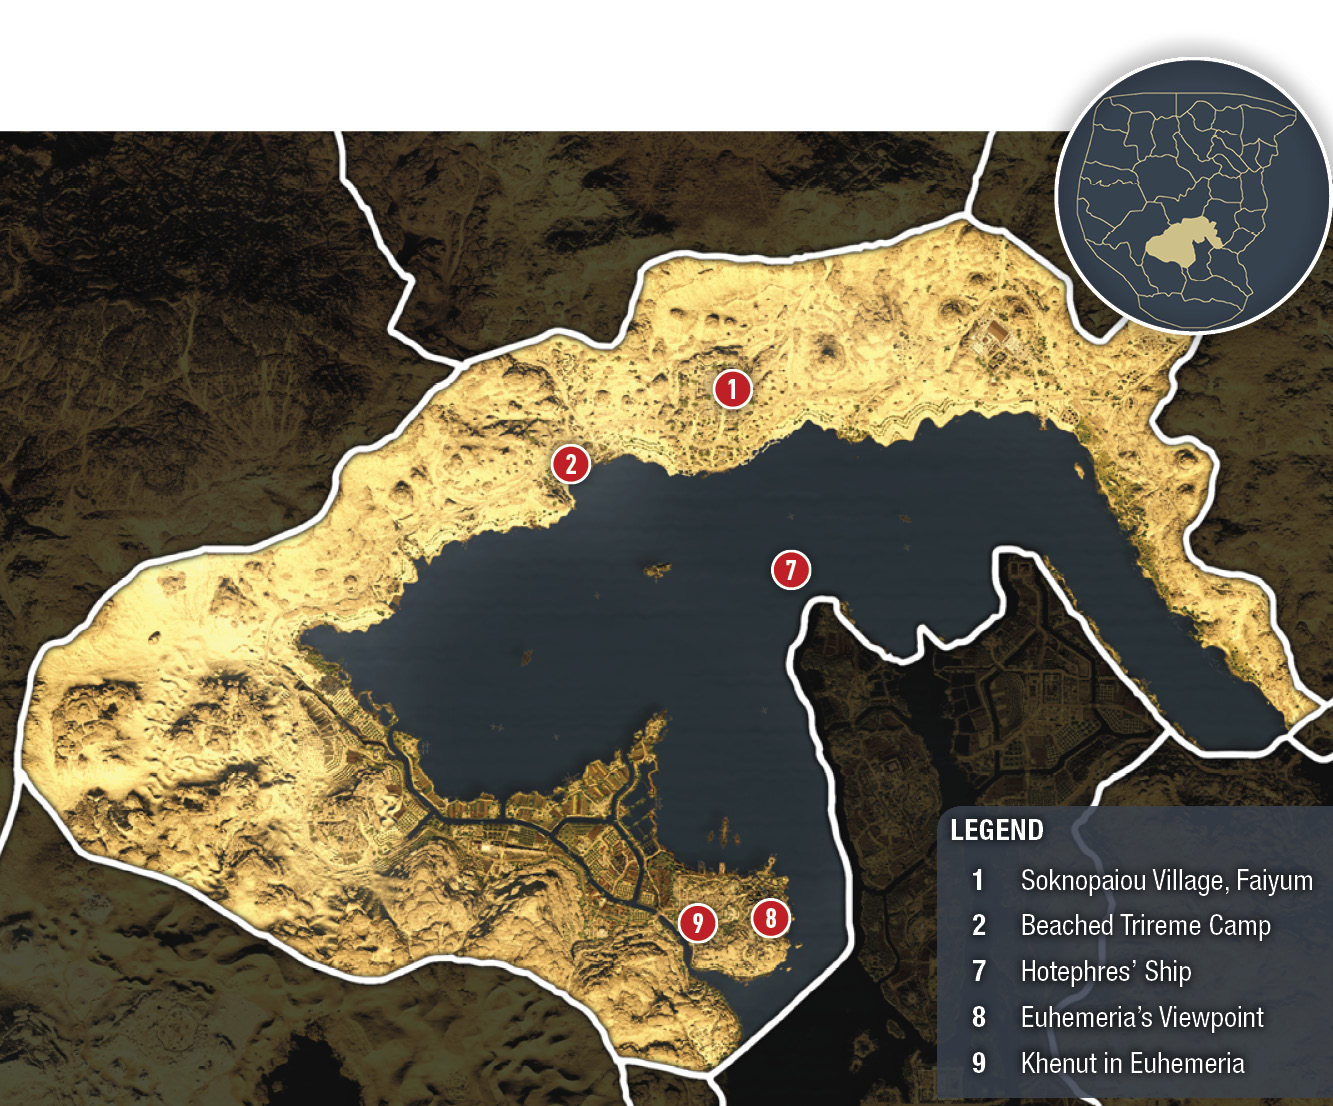
Travel to Soknopaiou Village in Faiyum and synchronize with the Viewpoint (1), if you have not done so during your side quest travels. Bayek must find Apollodorus’s informant in Faiyum in order to discover the identity of his next target, the Crocodile. Use Senu to locate the informant’s house. You can easily see it while atop the Viewpoint.
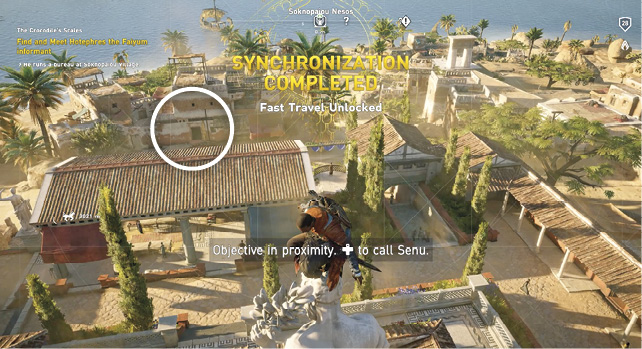
Find and Meet Hotephres, the Faiyum Informant
You enter the informant’s home that Senu identified, only to find no one is home.
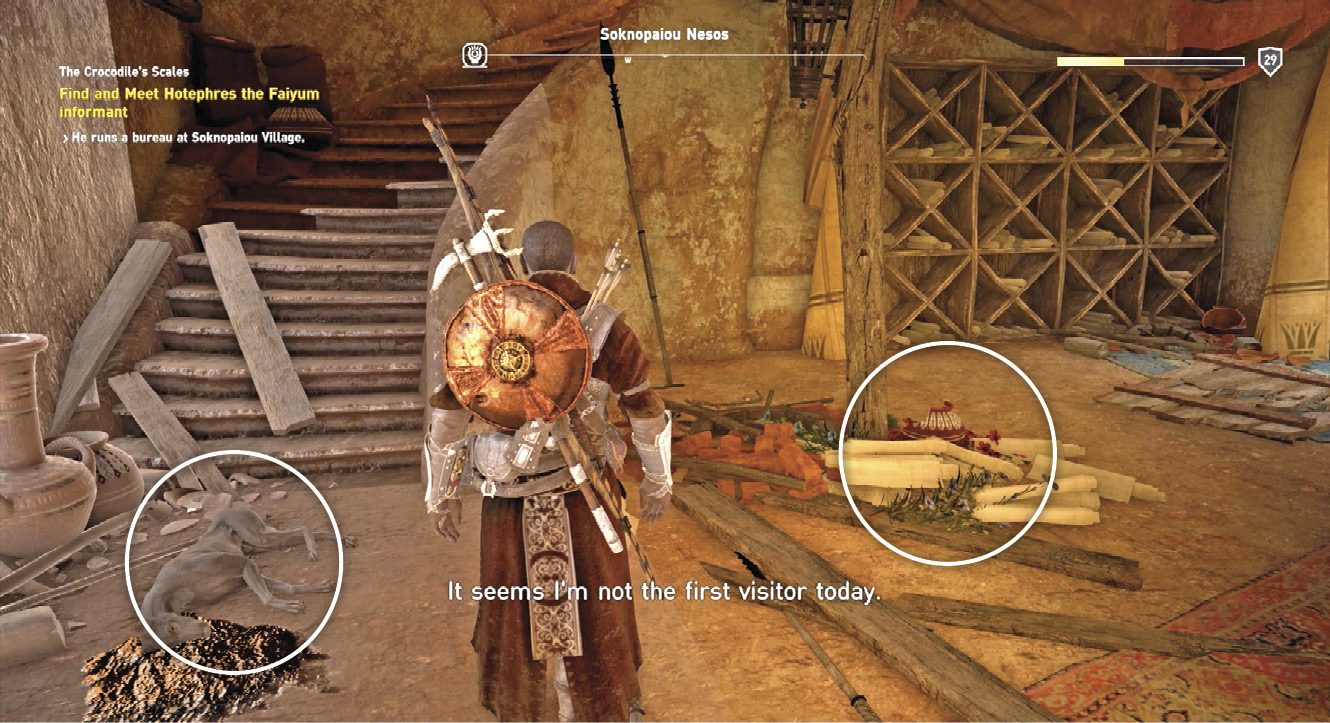
Investigate the Disappearance of Hotephres
Use Animus Pulse to locate the clues on the first floor. Inspect the broken vase, piles of scrolls, and the dead pet at the stairs. Head upstairs and examine the doll pierced with a spear, then enter the sunroom to inspect the scrolls on the table. You find a feather of a messenger pigeon beside the scrolls.

Climb the ladder in the room to the top of the carrier pigeon house to find the final clue: the Letter Left Behind by Hotephres. The letter says that the Crocodile knows his identity.
Find and Rescue Hotephres’s Servant
Access the map and spot the next location west of Soknopaiou. The servant is being held in the Beached Trireme Camp (2).
Beached Trireme Camp
Prerequisite: Approach the camp
SUGGESTED LEVEL: 26 or higher
LOCATION REWARD: 600 XP
LOCATION REWARD: Kill one captain, loot one treasure
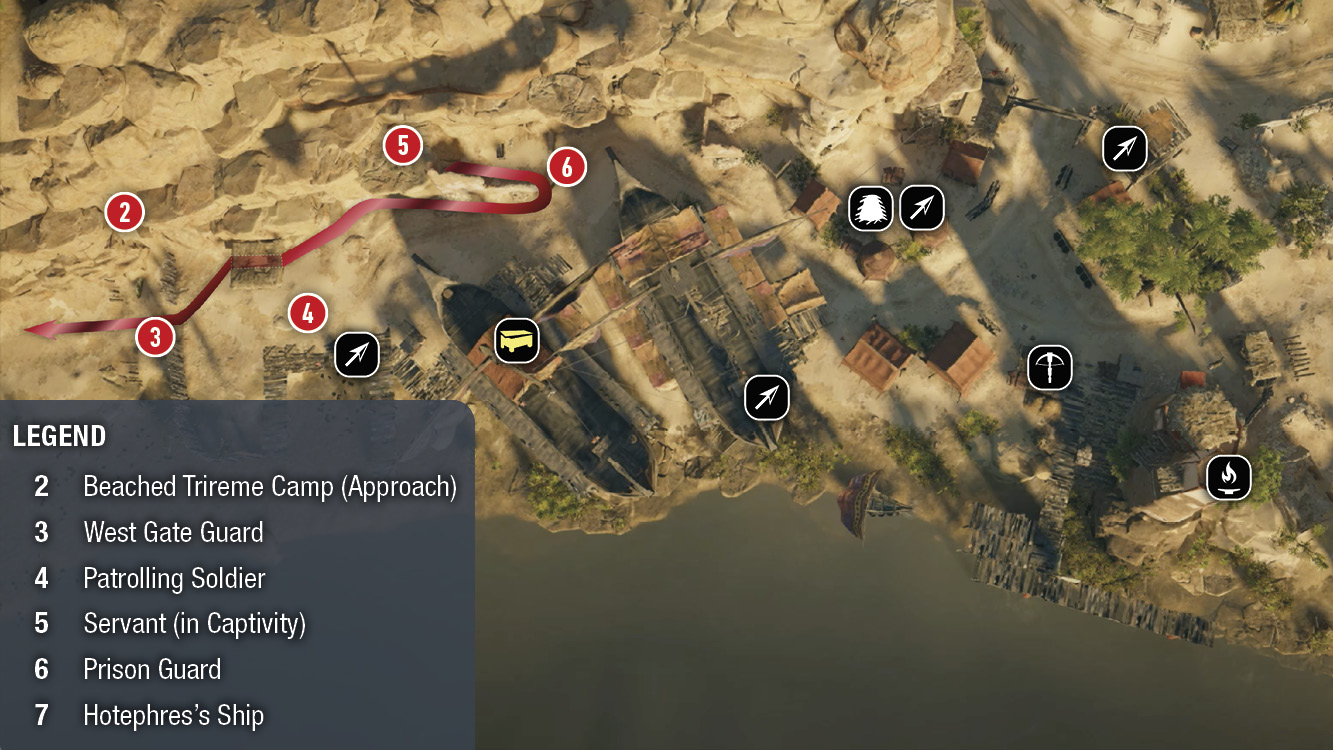
There are Level 25 to Level 27 (the captain) soldiers in the camp. We suggest getting in and out with the least amount of disturbance. The captain and treasure will be in the camp only if you have not already completed the location objective in Side Quest: Rebel Strike.
Approach the camp from the hilltop (2) above the west gate. Put an arrow through the gate guard’s head; then move east along the hillside to look for the next closest soldier (4). One patrols the area near the same gate. Take him out with an arrow.
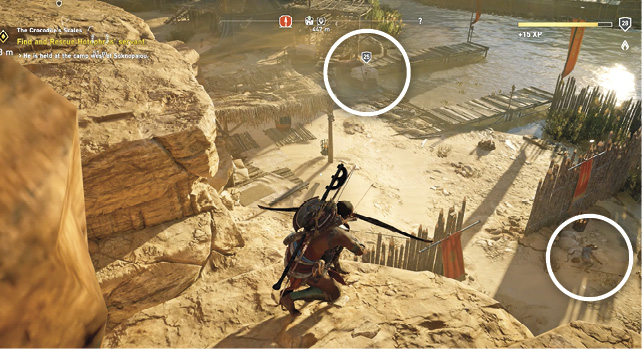
Continue east on the ledges and get into the grass on the low ledge west of the prisoner (5). Make sure no one on the ships is looking your way. Drop down and sneak up behind the prison guard (6) and execute him. Free the injured prisoner and pick him up.
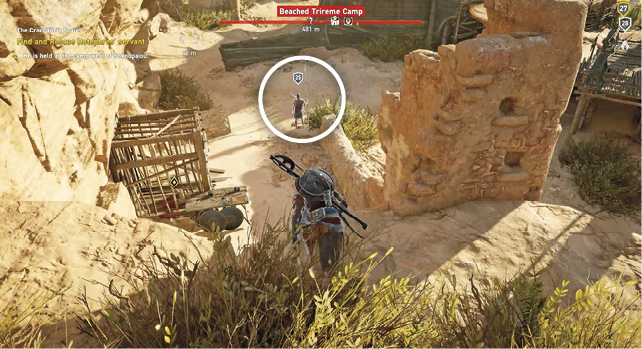
Now walk around the short wall in front of the prison with the servant on your shoulders. Crouch-walk through the tall grass, hugging the right walls. Head out the west gate. Continue until you get the prompt to set him down.
Speak to Hotephres’s Servant
Talk to the servant to learn that Hotephres took a trader’s ship to Lake Moeris and that the Crocodile has hired mercenaries to find him.
Find and Meet Hotephres the Informant
From the servant, head south to the water. Find a boat to sail southeast toward the marker, which is 850 meters away. When you get close to the large ships, send Senu up to pinpoint Hotephres’s ship (7). Board the ship and speak with Hotephres.
At first, Hotephres wants to kill you—that is, until you show him the Golden Medjay badge. Once he sees you share a common interest, he lowers his guard and explains what he knows about the Crocodile. But he does not know his true identity. However, he says he has a ledger that could have his name on it, but he gave it to his wife, Khenut, to hide. He gives you a doll to give to his daughter Shadya when you meet his family.
Meet Khenut, the Informant’s Wife
Euhemeria
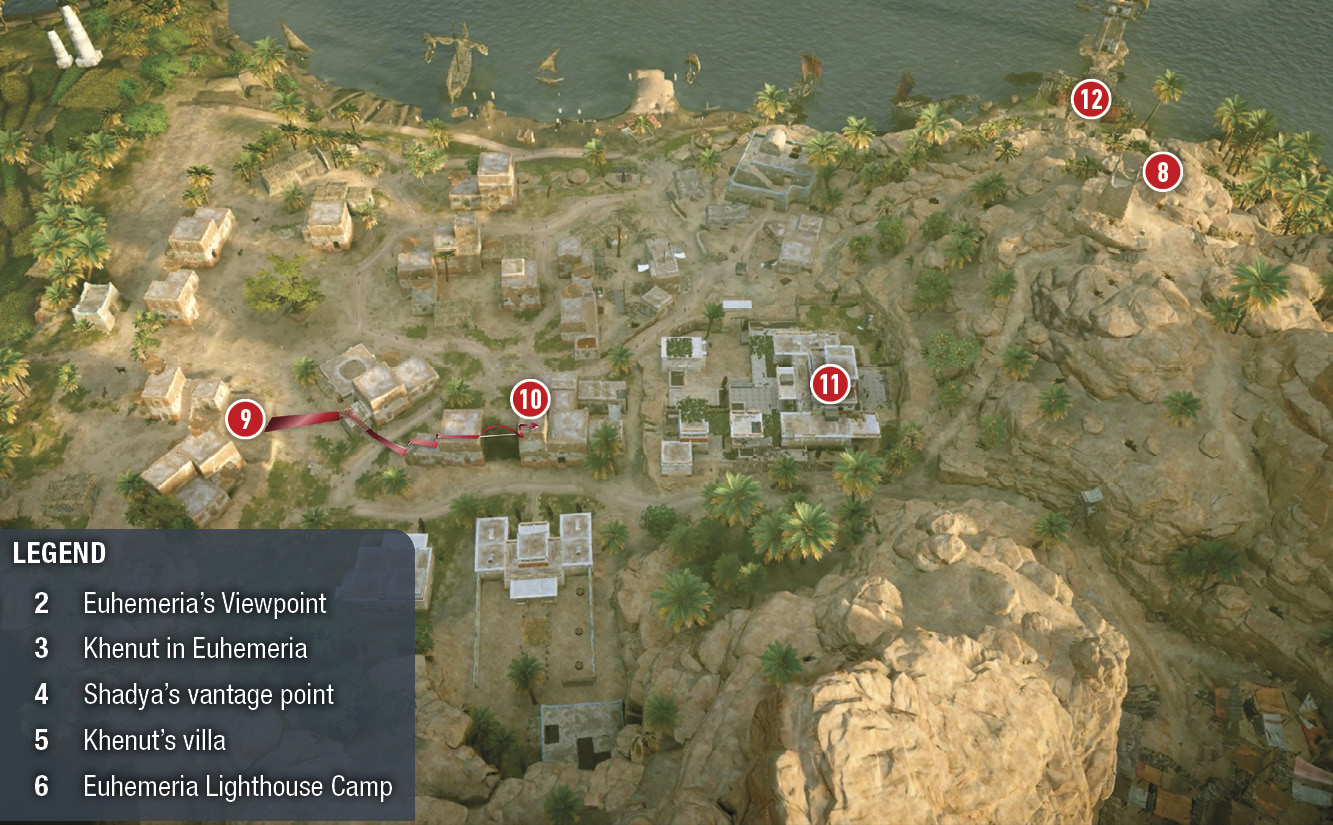
Get a boat and sail south to Euhemeria, avoiding the Okteres Blockade offshore. Synchronize the Viewpoint (8) east of the city; then head to the alms kitchen (9) to meet Khenut and Shadya.
She tells you ever since her husband got that ledger, the town has been on edge. Soldiers with torches patrol every night. She says she gave the ledger to their most trusted servant to hide it in their villa. She has Shadya show you the way.

Follow Shadya to Khenut’s Villa
Run east after Shadya as she takes off and starts climbing ladders almost as quickly as you can scale the wall beside her. She stops on a small rooftop (10) across the street from her villa.
Find and Get the Ledger from Khenut’s Villa
Khenut’s villa
Send Senu up to mark all the Level 25 soldiers around the villa. Locate the ledger (11) on the first floor of the main structure.
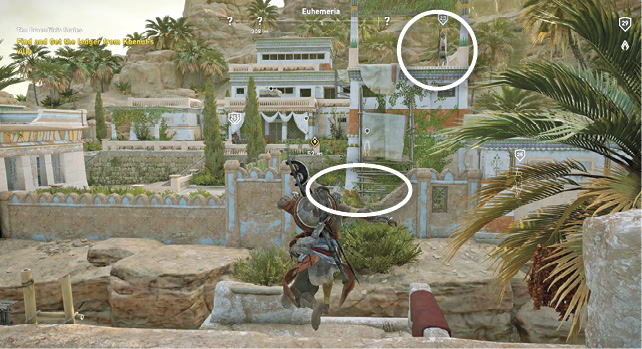
From the east end of the last rooftop connected to the building where Shadya stopped, shoot the soldier out of the nearest rooftop pergola. Enter the villa grounds through the broken wall below the pergola. Climb to the rooftop under the pergola.

Drop to the lower rooftop on the right and drop-assassinate the soldier standing near the gate entry.
Head up the nearby stairs, and climb the walls to reach the top balcony of the main building (11). Enter the building through the open doorway.
Jump from the railing to drop-assassinate the soldier with the large shield on the floor below. Head down to the ground level and come up behind the brute standing guard at the back door and assassinate him.
Reenter the house and use Animus Pulse to locate the ledger. Unfortunately, what you find is one of Shadya’s dolls near Shadya’s Diary. The diary reveals that her mother was hiding scrolls for Hotephres and that she’s going to keep the ledgers so her daddy doesn’t have to worry anymore. This means the soldiers just found out where the ledger is and you just left Shadya unattended.
Reach the Euhemeria Alms Kitchen
Exit the villa grounds using a route that you have cleared and rush back to the alms kitchen (9). The man at the kitchen tells you that soldiers just came and took Khenut and Shadya to the lighthouse.
Find and Rescue Khenut
Call your mount and ride to the Euhemeria Lighthouse, but stop short of entering the soldier camp (12) unless you are ready to battle five soldiers (including a brute) all at once.
Euhemeria Lighthouse Camp
Prerequisite: Approach the camp
SUGGESTED LEVEL: 26 or higher
LOCATION REWARD: 600 XP
LOCATION OBJECTIVES: Kill one captain, loot one treasure
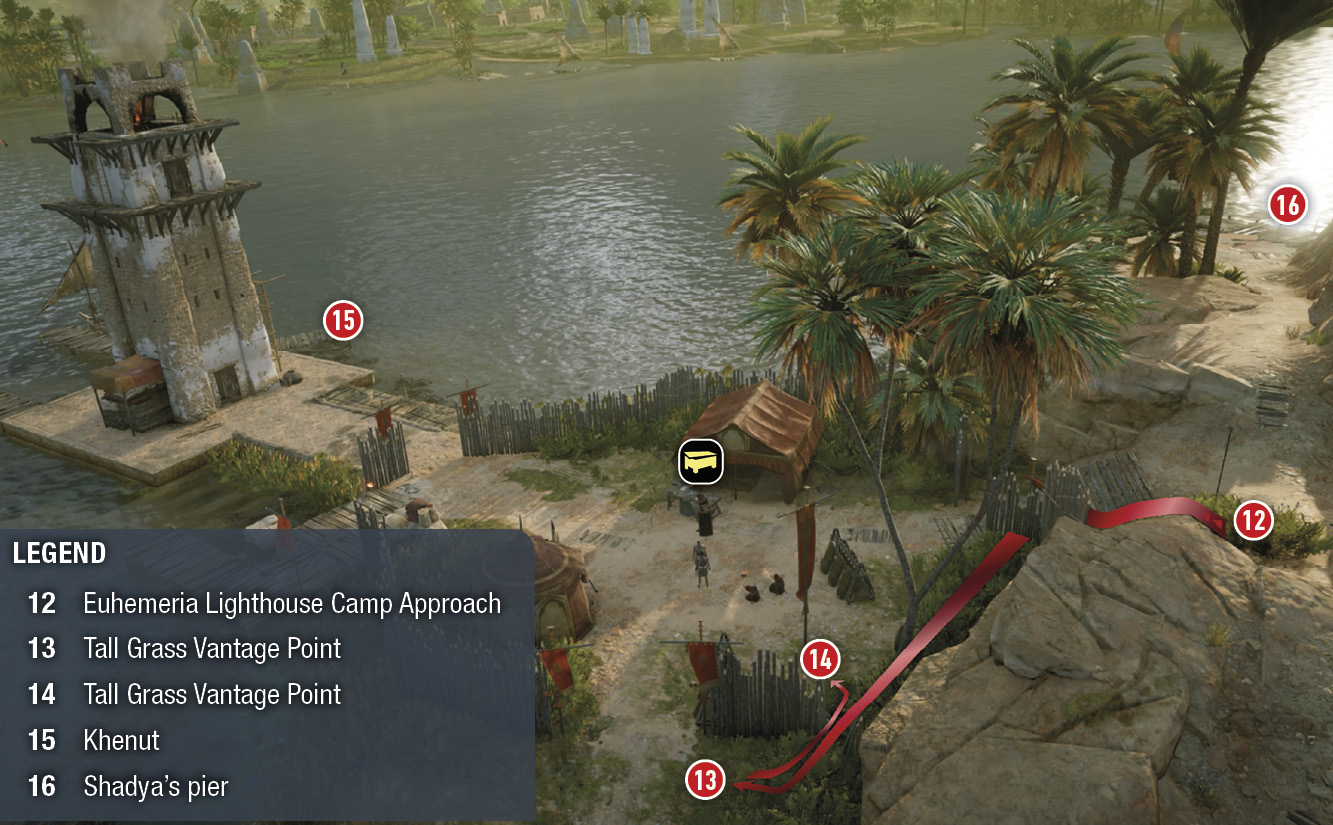
Creep in near the south entrance (12) through the tall grass. There’s a low hole in the wooden fence here that allows you to creep over to the west entrance (13). Whistle to separate the guards; then use the fence and grass to hide assassinations from nearby guards on the other side of the fence. Move from the west to the east side of the fence (14) to keep the hiding game going. Try to at least take out the Level 27 brute with the large shield; then you can eliminate the remaining, lesser enemies.


Grab the treasure from the tent to complete the location objective and then rush to the lighthouse pier to talk to Khenut (15).
Find Shadya
Shadya is not with her mother! Send Senu up to search to the south just off the coast near the next pier. She’s 120 meters away. Cut back through the camp. Use the south exit (12) and turn left to reach the next pier (16). Dive into the water and swim underwater. Prognosis is gloom. There are many dead people tied down to large rocks here. Sadly, Shadya is one of them. Interact with her to pull her out of the water and present her to her heartbroken mother.
Hotephres meets you on the pier. He is defeated. The ledger, lost. His daughter… the Crocodile has taken everything from him. He vows to do anything he can to help get revenge. He points you to the gladiator arena in Krokodilopolis. That’s where you can begin the hunt. He uses his gladiators to do his bidding.