
Assassin's Creed Origins Guide Main Quests Siwa
The Oasis
Prerequisite: Complete Main Quest: Homecoming
Suggested Level: 1
Reward: 1,000 XP
Unlocks: Senu; Side Quest: Gear Up; Main Quest: The False Oracle
Details: Bayek returns to Siwa. His close friend Hepzefa helps him prepare to battle the false Oracle, Medunamun.
Follow Hepzefa
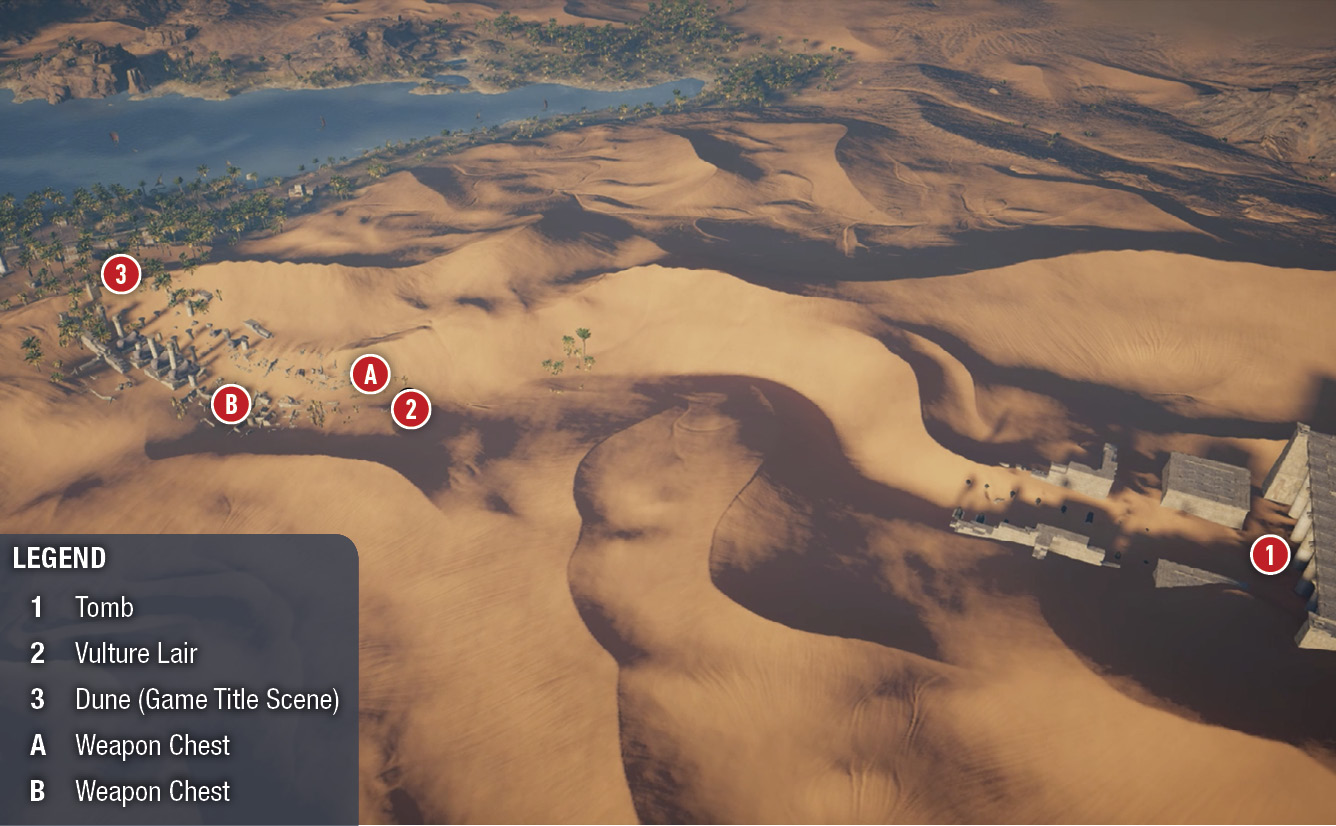
At the Temple buried in the sand (1), press and hold the Call Mount button to summon a camel. Mount it and follow Hepzefa back to Siwa. See Mount Controls in The Essentials chapter for riding help. During the ride, Hepzefa tells you about the conditions at Siwa since you left, focusing on the garrisons the soldiers set up to oppress the people.
Vulture Lair
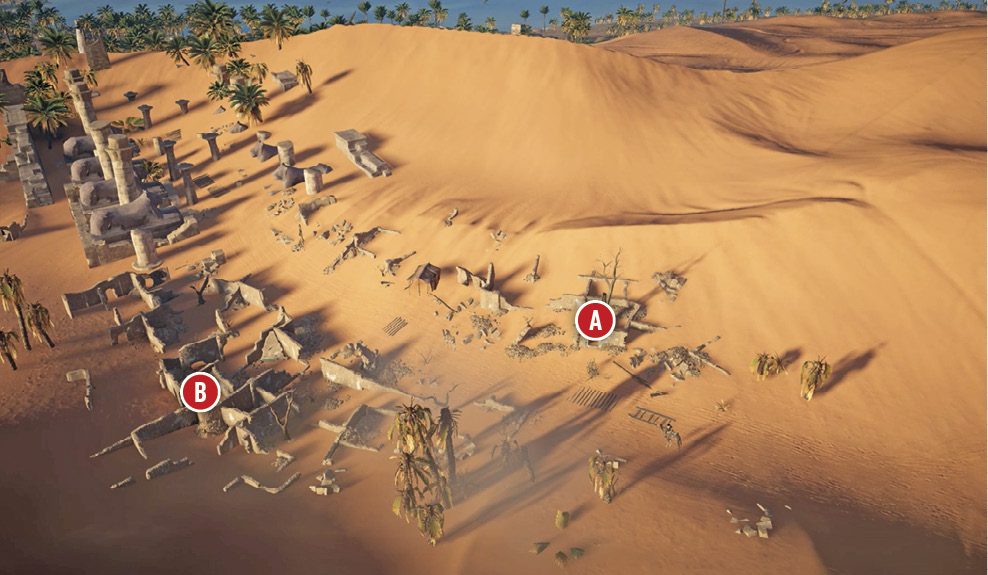
The first area you come to is a small village (2) in ruins. This later becomes a Vulture Lair challenge covered in the Activities section of the guide. Use the Animus Pulse throughout this village to find all the loot. You’ll be able to find weapon chests (A) and (B) inside the ruined structures..
Follow Hepzefa to the top of the dune (3) where Siwa’s name is presented. Notice that 25 XP is given each time you discover a new area. Continue to follow Hepzefa down the dune and into your hometown.
Siwa
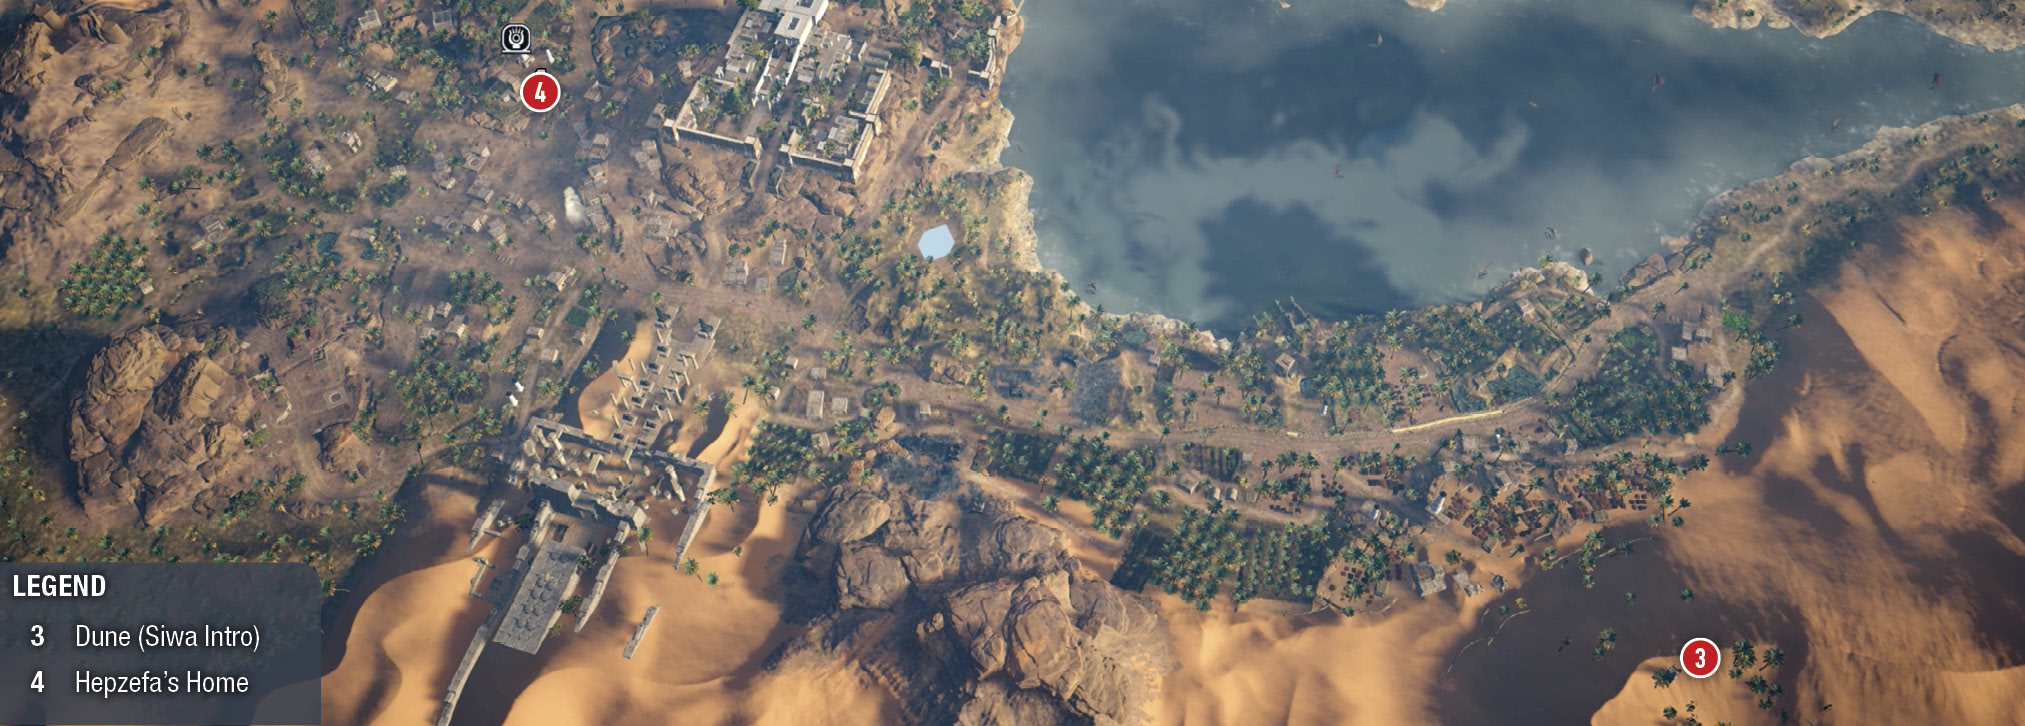
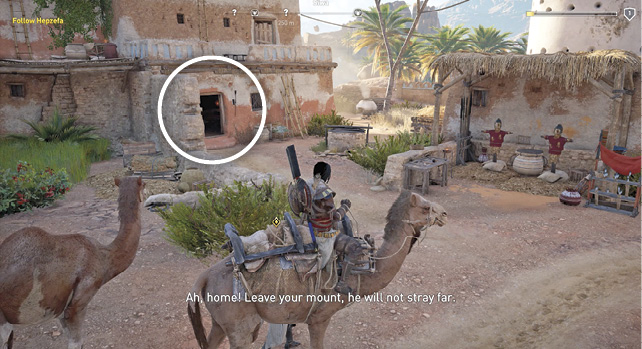
Travel through Siwa and follow Hepzefa to his home (4). Dismount and enter his home through the open doorway. It is a good idea to keep a low profile and avoid fights with Ptolemaic guards.
Hepzefa encourages you to rest, but you have no interest in that now. Rabiah enters the house in a panic about the local soldiers. While reuniting with Rabiah, she patches up your wounds as she has always done for you and your wife, Aya. She encourages you into a deep, much needed sleep.
Practice Using the Bow
Bow Lesson
After you wake up, Hepzefa hands you a bow outside and tells you to practice on the two target dummies in his backyard. Raise the bow, aim, and shoot the heads off the two dummies. The dummy on the right requires two shots to the head. This is because it is Level 3 and you are Level 1. If you need more arrows, take them from the supply next to you. When you finish with bow practice, a girl runs up and warns Hepzefa that soldiers are coming for him.
Kill the Soldiers
A Lesson in Stealth
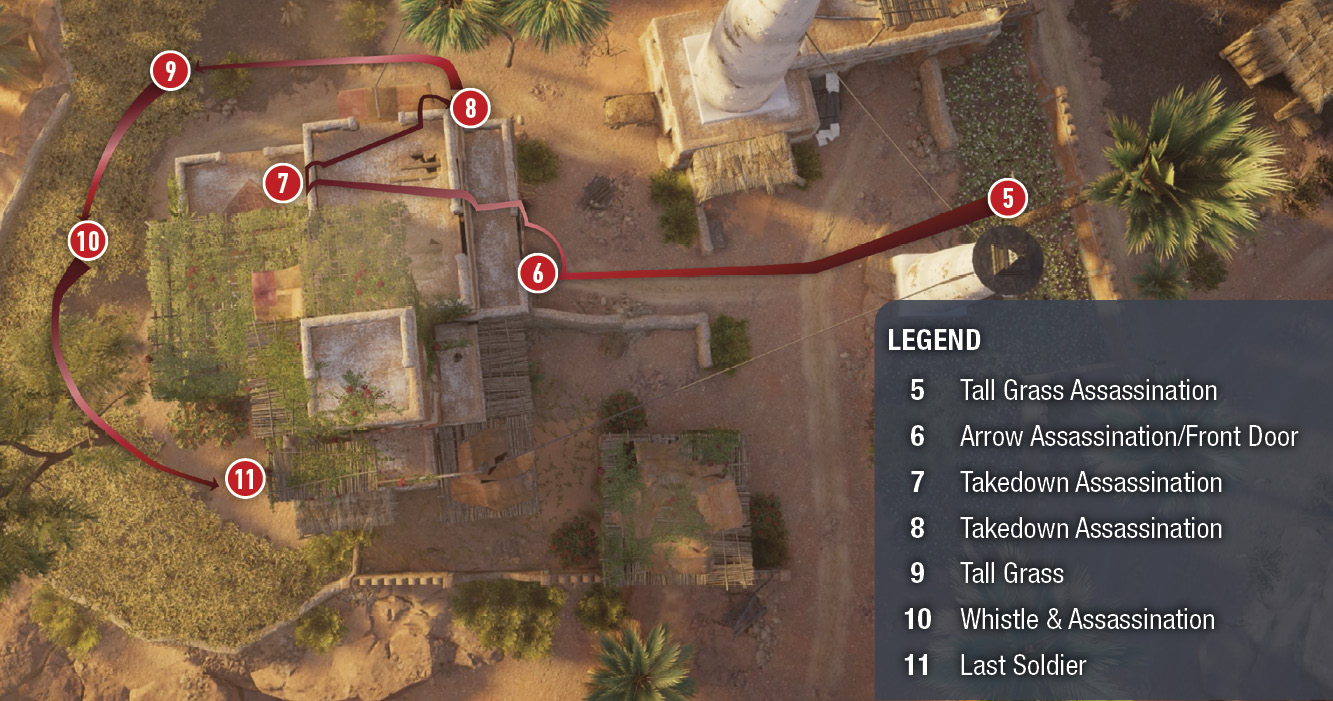
As the two of you hide in nearby bushes (5), you overhear the soldiers announcing that they are looking for the Medjay who killed Nomarch Rudjek.
Detection
The soldiers surround the house. Before control returns to you, the nearest soldier spots you in the tall grass. A white directional meter appears, pointing in his direction. This means you’ve been spotted. You are prompted to press the Crouch button to enter a stealth state by crouching in the tall grass around you. Your character will glow with a white light. This means you are hidden.
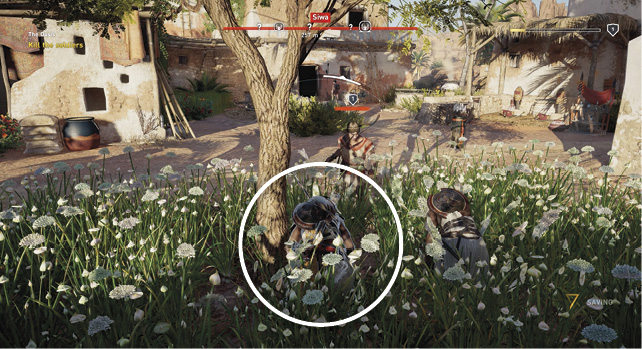
Assassination
As the soldier gets closer to you, the Awareness meter turns from a suspicious white to a cautious yellow and finally to an engaging battle red. You can perform a stealth attack when the meter displays any of these colors, including the last one (red) if you strike quickly enough. During this first trial kill, you always perform a successful stealth assassination, but be aware of those warning signs for all future attacks. Always try to strike before the Awareness meter turns red.
Bow Tagging
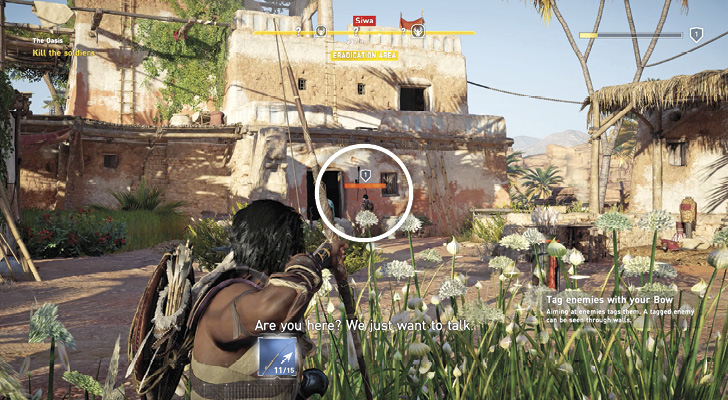
The next closest soldier (6) is standing with his back to you at Hepzefa’s front door. Pull out the bow and aim at the soldier. Notice that aiming the bow at the enemy tags them (the soldier’s level appears in a marker over his head). Tagged enemies are visible through walls. The full orange meter above the enemy’s head means that one shot will kill him. If you don’t see a full orange gauge, then aim at the head to kill him. Release the arrow and assassinate your target while remaining in stealth.
Note that with enemies at levels higher than yours, you may not be able to kill them with one shot to the head. Therefore, it is important to do everything you can to always be above the enemies’ levels. Achieve this by playing all the side quests and activities in a region before moving on to the next.
When you shoot the soldier near the door, Hepzefa picks up the body, moves it into the tall grass, and warns you to not leave bodies in the open. If another enemy sees the dead body, he leaves his patrol route and searches the area for you. Sometimes you may leave dead bodies where they lie as a strategy to lure enemies closer to your hiding place.
Takedown Assassination
Climb up the side of the house near the front door. Avoid passing in front of the open doorway on the second level (the patrolling soldier inside the house may spot you). Continue up the next wall to reach the second-floor balcony. Move directly to the west side, and perch on the short wall and look down. When the patrolling second-floor soldier (7) comes into view, you can perform a dropping takedown assassination. You can perform these from insane heights that would normally kill you if you weren’t landing on an enemy. You can successfully execute this move only if the assassination prompt appears when the enemy is directly below you.
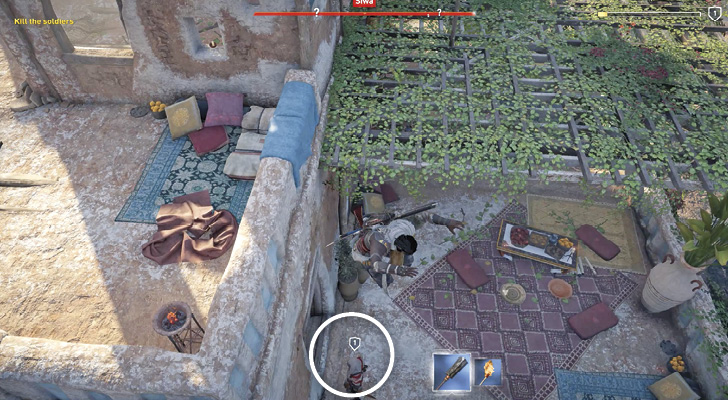
Climb back to the top balcony and move to the north side short wall. Wait for the soldier (8) patrolling below to walk into your dropping assassination range. Pounce on him.

Whistle to Attract Enemies
Crouch down and sneak into the tall weeds in the backyard (9). Here you can spot your next target. A soldier (10) searches through the tall weeds. Move closer to him and then whistle. Do not hold down the Whistle button or you’ll call your mount. Assassinate the soldier as he moves closer to inspect the sound.

Follow the tall weeds around to the house’s east side. Remain crouched as you slowly and silently exit the weeds to come up behind the last patrolling soldier (11) and assassinate him.
Return to Hepzefa
Return to Hepzefa, who is going into his house (6). He invites you upstairs and presents you a couple jobs that were given to him from the people of Siwa. He says that the real problem is with the next man on your hit list, Medunamun. Hepzefa suggests you become tougher and upgrade your armor before you take him on. This is a tip to level up, explore, and do some side quests before tackling an enemy with a higher level than yours.
He suggests you visit Benipe, the blacksmith, or use Senu’s help finding better weapons. You believed your old friend Senu was dead, but Rabiah nursed him back to health. Senu is Bayek’s falcon and sidekick. He is like an ancient drone that does reconnaissance for you. A cheerful reunion between you and your feathered friend occurs and the first quest ends successfully, earning you 1,000 XP and pushing you to Level 2.