
Assassin's Creed Origins Guide Activities Military Strongholds
Overview
Total: 10 Forts,
  16 Medium Military,
  78 Small Military
Possible Objectives: Kill captain, kill commander, find treasure
Related Quests: See list below
Fort Reward: 500, 1,000, or 1,500 XP
Medium Military Reward: 300, 600, or 900 XP
Small Military Reward: 200, 400, or 600 XP
Enemy strongholds are indicated by the three icons shown above on the in-game map as you approach the sites. They come in three basic sizes: full-size forts, medium military installations, and small bases. Enemy level at each base depends on the level range of the territory in which they are found.
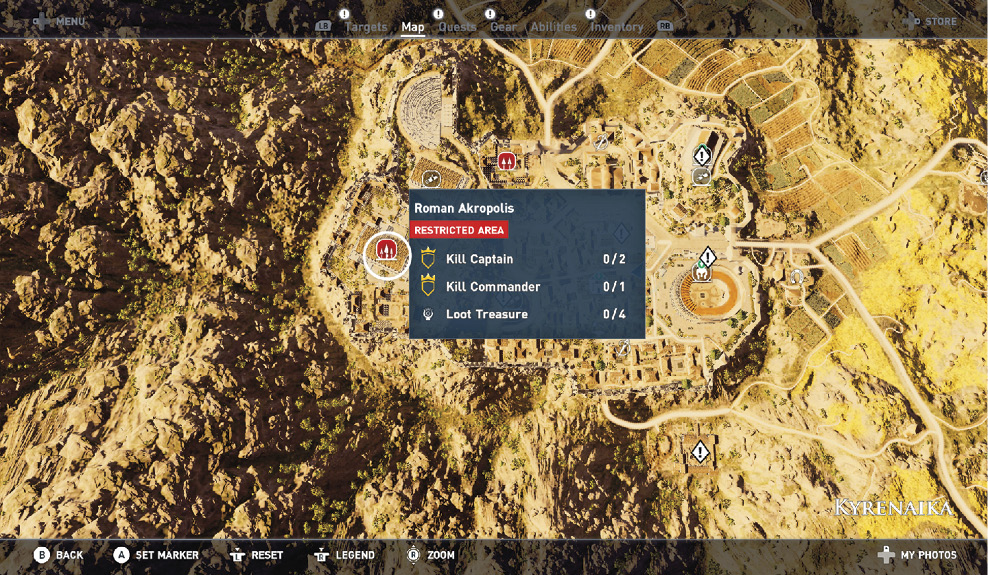
Your objectives are as follows:
| Type | Objective |
|---|---|
|
Kill the captain. Loot one treasure. Triremes do not have treasure. |
|
|
Kill the captain and commander. Loot two treasures. |
|
|
Fort |
Kill two captains and the commander. Loot four treasures. |
Scout the Location
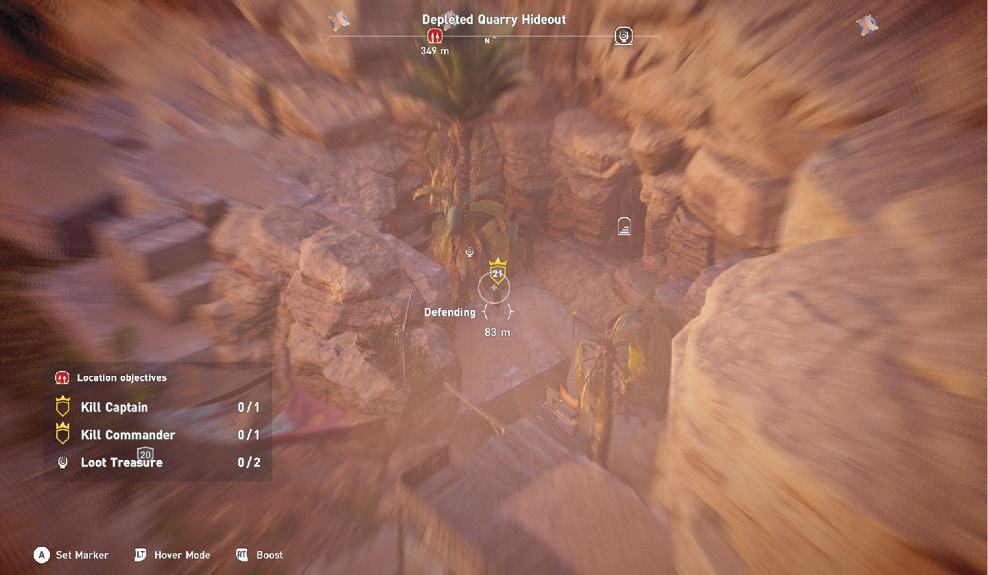
Use Senu to scout each stronghold, marking as many soldiers and as many treasures as you can. Captains and commanders are typically of a higher level and are indicated by the special icon. Items to look out for as you infiltrate strongholds are as follows:
- Ammo rack Enemy bases are typically well stocked, including plenty of ammo racks. Keep an eye out for their locations and use them when arrows and tools run low.
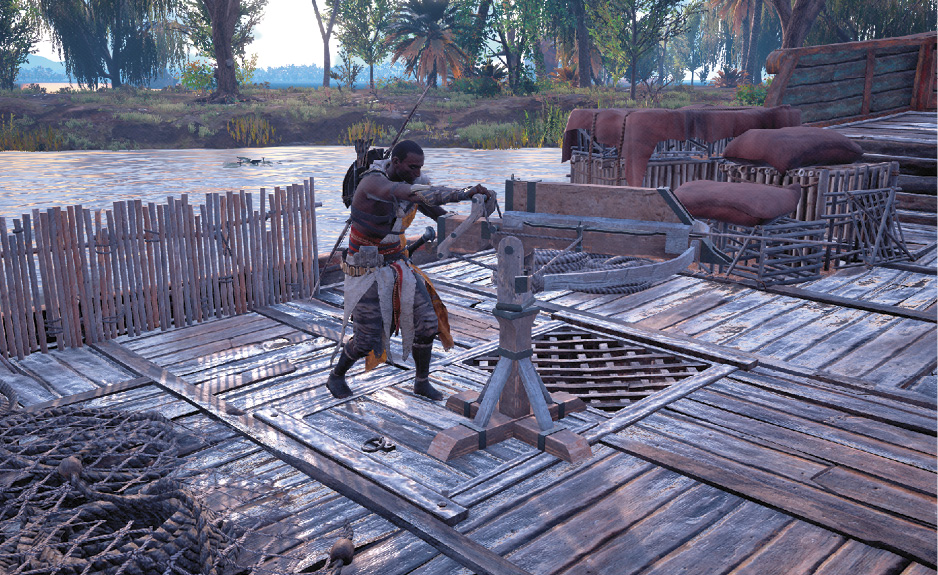
- Ballistae These small ballistae fire arrows at a high rate of speed, causing serious harm to anyone that approaches. Man the gun by approaching and interacting with it. These are very useful when the stealth approach is not an option. Nearby soldiers may use these powerful weapons when they detect you, so don’t hang out in their line of sight.
- Oil jars Not the stealthiest tactic, but these jars create an explosion when hit with fire. You can pick up and move them and even throw them.
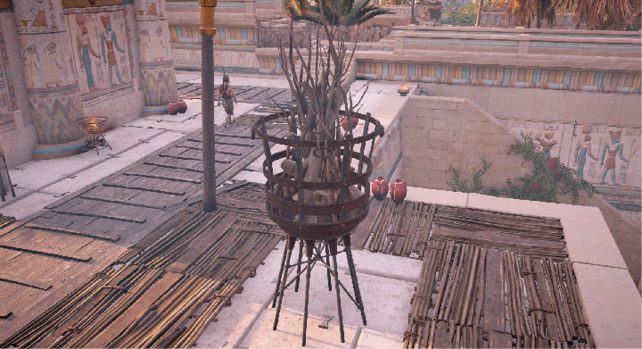
- Braziers Enemies can call in reinforcements by lighting a big brazier, typically found near the middle of bigger bases. When you are detected, a soldier may move to the nearest brazier and attempt to light it. If they light the flame, extra soldiers move into the area, making it tougher for you to complete your objective.
- Vantage points Use high vantage points, such as cliffs, towers, rooftops, and walkways, to get a good view of an enemy base. Watch out for snipers occupying these positions and assassinate them before they detect you. Clearing out the snipers before taking on a camp can go a long way to securing the location.
- Haystacks and hiding booths As you infiltrate a stronghold, it is often necessary to hide in order to stay undetected. Use haystacks, hiding booths, and tall grass when the enemy senses you are nearby. Also use these when you’re being pursued, but be sure they don’t see you enter them!
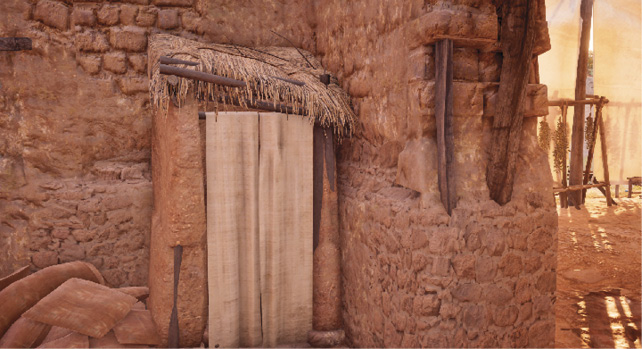
- Treasure There is typically at least one treasure chest or jewelry box at these strongholds that are required to complete the locations. Keep an eye out for them and collect the loot.
Tips
Here are a few handy tips when taking on an enemy base:
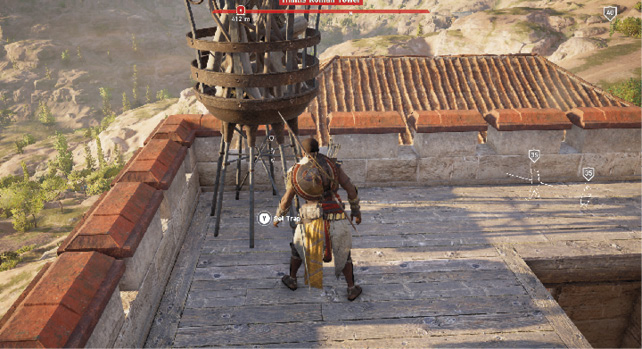
- A white brazier icon above an enemy indicates they are planning to light the alarm. Red indicates that it has been lit and reinforcements are on the way. You can stop him from lighting it in two ways: kill him before he can light the flame or interact with the brazier beforehand. By using the brazier first, you set a trap, causing the device to explode upon use—harming nearby enemies.
- Infiltrating an enemy base at nighttime typically results in less activity, with many guards sleeping inside buildings or on the rooftops. Look for stealthy entrances and assassinate the poor fools while they snooze.
- A cart full of hay can be used to infiltrate an enemy base. If a cart moves toward a stronghold, hide in the hay and ride it deep inside the fortification.
- A vehicle can be set on fire as it moves into a stronghold. This is a great way to spread chaos and cause a nice distraction.
All forts, medium military, and small military strongholds are listed in the following table, along with the territory they are located in and the objectives for each. We also mention if we’ve covered an enemy base in the quest chapters.
If no quest is listed or if you simply visit it in a quest, we provide an overhead view of the area and pinpoint arrow stands, ballistae, brazier alarms, and treasures. We also use arrows to indicate the hidden entrances. One arrow points to the outside entrance, while the other represents approximately where you enter inside the stronghold. These are typically underground paths into the base, allowing for a stealthier approach.
Enemy Strongholds
| Territory | Type | Name | Objectives | Quest |
|---|---|---|---|---|
|
Fort |
Akra Garrison |
4 Treasures, 2 Captains, 1 Commander |
Main Quest: Gennadios the Phylakitai |
|
|
Kibotos Arsenal |
2 Treasures, 1 Captain, 1 Commander |
Side Quest: Serapis Unites |
||
|
2 Treasures, 1 Captain, 1 Commander |
— |
|||
|
Kerke Wharf |
1 Treasure, 1 Captain |
Side Quest: The Matriarch |
||
|
South Nile Trireme |
1 Captain, Ship Patrols |
— |
||
|
2 Treasures, 1 Captain, 1 Commander |
— |
|||
|
Okteres Blockade |
2 Treasures, 1 Captain, 1 Commander |
Side Quest: Sobek’s Gold |
||
|
Beached Trireme Camp |
1 Treasure, 1 Captain |
Side Quest: Rebel Strike |
||
|
1 Treasure, 1 Captain |
— |
|||
|
1 Captain, Ship Patrols |
— |
|||
|
Euhemeria Lighthouse Camp |
1 Treasure, 1 Captain |
Main Quest: The Crocodile’s Scales |
||
|
1 Treasure, 1 Captain |
— |
|||
|
Pannouki Hideout |
1 Treasure, 1 Captain |
Side Quest: Curse of Wadjet |
||
|
1 Captain, Ship Patrols |
— |
|||
|
Fort |
4 Treasures, 2 Captains, 1 Commander |
Visited during Main Quest: The Crocodile’s Jaws, but not covered in full. |
||
|
Neorion Naval Arsenal |
2 Treasures, 1 Captain, 1 Commander |
Side Quest: Sobek’s Tears |
||
|
1 Treasure, 1 Captain |
— |
|||
|
1 Captain |
— |
|||
|
Depleted Quarry Hideout |
2 Treasures, 1 Captain, 1 Commander |
Main Quest: The Hyena |
||
|
Khentkawes Hideout |
2 Treasures, 1 Captain, 1 Commander |
Side Quest: Precious Bonds |
||
|
1 Treasure, 1 Captain |
— |
|||
|
Khufu Temple Hideout |
1 Treasure, 1 Captain |
Side Quest: Precious Bonds |
||
|
1 Treasure, 1 Captain |
— |
|||
|
1 Captain |
— |
|||
|
Fort |
Kyrenaike Roman Citadel |
4 Treasures, 2 Captains, 1 Commander |
Side Quest: Playing with Fire |
|
|
2 Treasures, 1 Captain, 1 Commander |
— |
|||
|
2 Treasures, 1 Captain, 1 Commander |
Side Quest: Carpe Diem |
|||
|
Balagrae Roman Barracks |
1 Treasure, 1 Captain |
Side Quest: Shadows of Apollo |
||
|
1 Treasure, 1 Captain |
— |
|||
|
1 Treasure, 1 Captain |
— |
|||
|
1 Treasure, 1 Captain |
— |
|||
|
1 Treasure, 1 Captain |
Side Quest: Halo of the Huntress |
|||
|
Desperate Gully Hideout |
1 Treasure, 1 Captain |
Side Quest: Pax Romana |
||
|
1 Treasure, 1 Captain |
— |
|||
|
1 Treasure, 1 Captain |
— |
|||
|
1 Treasure, 1 Captain |
— |
|||
|
1 Treasure, 1 Captain |
— |
|||
|
Fort |
Fort Boubastos |
4 Treasures, 2 Captains, 1 Commander |
Side Quest: Fighting for Faiyum |
|
|
Fort |
4 Treasures, 2 Captains, 1 Commander |
— |
||
|
Cleon’s Dam |
1 Treasure, 1 Captain |
Side Quest: Fighting for Faiyum |
||
|
1 Treasure, 1 Captain |
— |
|||
|
1 Treasure, 1 Captain |
— |
|||
|
1 Treasure, 1 Captain |
Side Quest: Reunion |
|||
|
1 Treasure, 1 Captain |
— |
|||
|
1 Treasure, 1 Captain |
— |
|||
|
1 Treasure, 1 Captain |
— |
|||
|
1 Treasure, 1 Captain |
— |
|||
|
Eremos Hideout |
1 Treasure, 1 Captain |
Side Quest: Ulterior Votive |
||
|
1 Treasure, 1 Captain |
— |
|||
|
Necropolis Bandit Hideout |
1 Treasure, 1 Captain |
Side Quest: The Book of the Dead |
||
|
2 Treasures, 1 Captain, 1 Commander |
— |
|||
|
2 Treasures, 1 Captain, 1 Commander |
— |
|||
|
1 Treasure, 1 Captain |
— |
|||
|
1 Treasure, 1 Captain |
— |
|||
|
Plesionhudor Hideout |
1 Treasure, 1 Captain |
Main Quest: The Scarab’s Lies |
||
|
1 Captain |
— |
|||
|
Fort |
Pissa Oros Citadel |
4 Treasures, 2 Captains, 1 Commander |
Side Quest: Plight of the Rebels |
|
|
1 Treasure, 1 Captain |
— |
|||
|
Camp Hetoimazo |
1 Treasure, 1 Captain |
Side Quest: Plight of the Rebels |
||
|
Camp Khoikos |
1 Treasure, 1 Captain |
— |
||
|
1 Treasure, 1 Captain |
— |
|||
|
1 Treasure, 1 Captain |
— |
|||
|
Dasos Hideout |
1 Treasure, 1 Captain |
Side Quest: The Old Library |
||
|
Als Hideout |
1 Treasure, 1 Captain |
Side Quest: Wild Ride |
||
|
1 Treasure, 1 Captain |
— |
|||
|
Fort |
4 Treasure, 2 Captains, 1 Commander |
Visited during Main Quest: The Final Weighing, but not covered in full. |
||
|
2 Treasure, Captain, Commander |
— |
|||
|
Apollonia Roman Barracks |
1 Treasure, 1 Captain |
Side Quest: Dead in the Water |
||
|
1 Treasure, 1 Captain |
Visited during Side Quest: Birthright, but not covered in full. |
|||
|
Lakeside Villa Outpost |
1 Treasure, 1 Captain |
Side Quest: Birthright |
||
|
1 Captain |
— |
|||
|
1 Captain |
— |
|||
|
2 Treasures, 1 Captain, 1 Commander |
— |
|||
|
Fort |
4 Treasures, 2 Captains, 1 Commander |
— |
||
|
Bemulos Roman Tower |
1 Treasure, 1 Captain |
Side Quest: His Secret Service |
||
|
1 Treasure, 1 Captain |
— |
|||
|
Hydrax Roman Camp |
1 Treasure, 1 Captain |
Side Quest: Shadows of Apollo |
||
|
1 Treasure, 1 Captain |
— |
|||
|
1 Treasure, 1 Captain |
— |
|||
|
1 Treasure, 1 Captain |
— |
|||
|
1 Treasure, 1 Captain |
— |
|||
|
Memphites Barracks |
2 Treasures, 1 Captain, 1 Commander |
Side Quest: The Baker’s Dilemma |
||
|
Apagogeas Hideout |
1 Treasure, 1 Captain |
Side Quest: Children of the Streets |
||
|
Temple of Hathor |
1 Treasure, 1 Captain |
Main Quest: The Lizard’s Mask |
||
|
Mesogeios Sea |
1 Captain |
— |
||
|
Fort |
Nikiou Fort |
4 Treasures, 2 Captains, 1 Commander |
Side Quest: The Tax Master |
|
|
Camp Achlys |
1 Treasure, 1 Captain |
Main Quest: The Scarab’s Lies |
||
|
1 Treasure, 1 Captain |
— |
|||
|
Camp Shemu |
1 Treasure, 1 Captain |
Side Quest: The Ostrich |
||
|
1 Treasure, 1 Captain |
— |
|||
|
Psenemphaia Hideout |
1 Treasure, 1 Captain |
Side Quest: Lost Happiness |
||
|
Anthylla Outpost |
2 Treasures, 1 Captain, 1 Commander |
Side Quest: In Protest |
||
|
Potamos Hideout |
1 Treasure, 1 Captain |
Side Quest: The Hungry River |
||
|
Hugros Hideout |
1 Treasure, 1 Captain |
Side Quest: Secrets of the First Pyramids |
||
|
1 Treasure, 1 Captain |
— |
|||
|
Camp Shetjeh |
1 Treasure, 1 Captain |
Side Quest: Striking the Anvil |
||
|
1 Treasure, 1 Captain |
— |
|||
|
2 Treasures, 1 Captain, 1 Commander |
— |
|||
|
1 Treasure, 1 Captain |
— |
|||
|
Trireme Stranding Camp |
1 Treasure, 1 Captain |
Side Quest: The Jaws of Sobek |
||
|
Desert Waterfalls Hideout |
2 Treasures, 1 Captain, 1 Commander |
Side Quest: Demons in the Desert |
||
|
1 Treasure, 1 Captain |
— |
|||
|
Larder Station Hideout |
1 Treasure, 1 Captain |
Side Quest: Demons in the Desert |