
Assassin's Creed Origins Guide Main Quests Siwa
Homecoming
Prerequisite: Start the game
Suggested Level: 0
Unlocks: The Oasis
Details: A weathered Bayek confronts the bodyguard of a man he killed.
Outskirts of Siwa
A Battle Tutorial
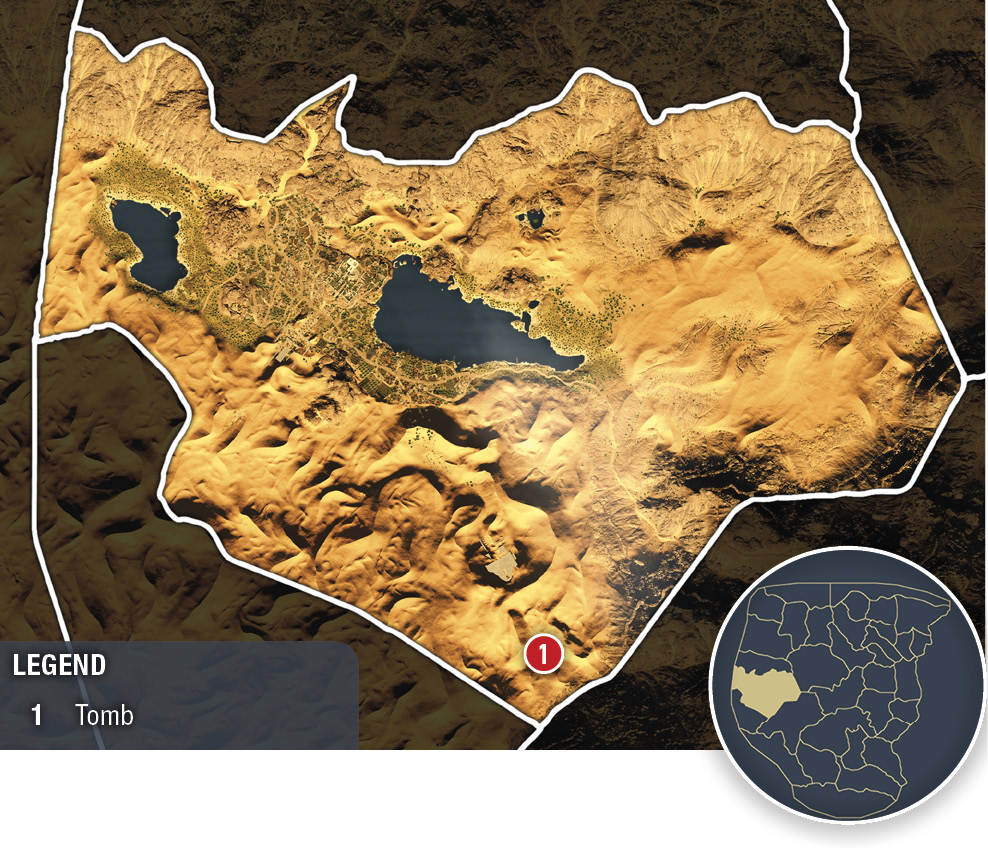
You begin in the outskirts of Siwa (1) one month after assassinating the Heron. You are engaged in battle with a very large adversary. You’re armed with a Level 1 Medjay shield and bronze sword. Hypatos is a Level 2 brute wielding a large heavy blunt mace seeking to avenge his fallen master. The battle begins with half his health depleted, as indicated by the gauge over his head.
During the battle with Rudjek’s bodyguard, you learn how to lock on to your enemy and how to perform a block and light attack, following the onscreen prompts. If he picks you up and throws you on the ground, then you also learn how to recover. You have total freedom of movement during battle, and your positioning is very important while fighting.
Wait for Hypatos to swing and miss before you quickly move in for an attack. Then quickly move away as he draws back for another swing. Run behind your opponent after dodging an attack and hit him from behind repeatedly. Hypatos smashes the ground with his mace, breaking the ground below you. Both of you fall through the crumbling foundation.

The battle continues after the fall. Once you regain your stance, you are instructed on how to use Shield Break (which is the strong yet slower weapon attack). Then you are instructed on how to dodge—press the Dodge button while moving in any direction. This is a great way to quickly move away from an attack as it’s happening.
A blue adrenaline gauge appears above your health meter. This gauge fills with each successful attack on your enemy.
Once the adrenaline gauge is full, release the special attack. The controls to initiate the attack always appear on the gauge when it is full and ready to release. To release the attack, simultaneously press and hold both the Light and Heavy Attack buttons. Always select your target just before releasing a special attack. The actual attack that you perform depends on the weapon you’re holding when the special attack is engaged.

Loot the body to acquire a mace and a few drachma. The mace is heavy and slow but does twice the damage of your sword. It has faster adrenaline regeneration and gives additional adrenaline on each kill. Consider using it for the next battle.
Leave the Battle Arena
Now it’s time to start your adventure. Use Animus Pulse to mark a wall block covered in scrambling scarabs. Approach this area and press the Pass Through Crack button to push the movable slab up, revealing a secret entrance that allows you inside the temple.

Temple Interior
Anteroom
Once inside, you learn how to use the torch for lighting. Press and hold the Torch button to raise and light a torch. You can throw your torch as a projectile using the Free Aim button in conjunction with the Throw Object button or just drop it by pressing the Drop Object button. The torch can also be used as an effective weapon—the fire that leaps onto an enemy continues to do damage even after the initial attack. Use Animus Pulse in the first room to locate some coins and other items on a high ledge above you.
After looting the first chamber, vault over the fallen columns in the pathway, run up the stairs, and enter the second chamber.

The Second Chamber
Fully explore the second chamber for loot. Use Animus Pulse to mark treasures located in almost every corner and then return to the fallen column (A) on the left. Use this column to climb to the high left ledge (B). Access a network of tunnels through an opening here. There is also an open hallway in the back-left corner on the lower level near a stash of loot that connects to the tunnels above.
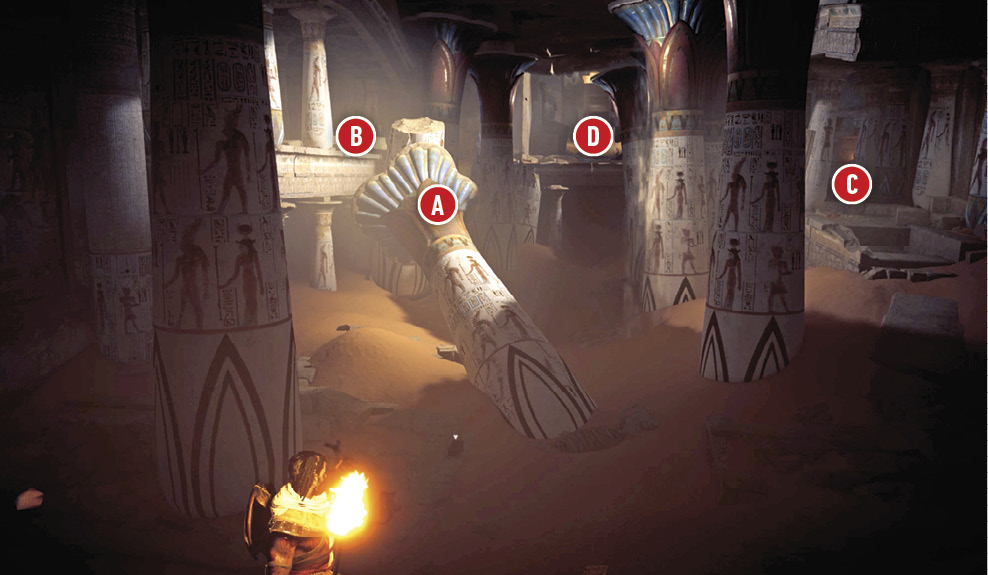
The left tunnel system has much more loot than you’ll find on the right-side chambers (C).
After you completely pillage the entire second chamber and connecting tunnels, return to the left upper ledge (B). Climb over the large slab to reach a fallen column that allows you to jump to the back ledge (D). From there, head to the final interior chamber.
Final Chamber
At the top, you are instructed on how to drop an item (the torch in this case). Climb either of the tall statues to the top of the head and then leap down to the ledge.
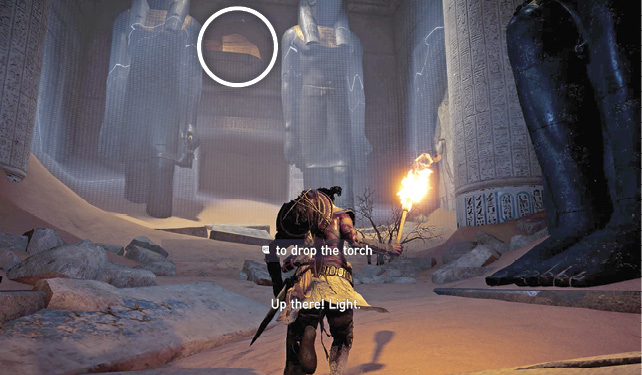
Approach the wall that’s covered in crawling scarabs and perform either a light or heavy attack on the cracked wall to break through, allowing you to exit the tomb.
Exterior Hall Battle
In the distance, you can see men fighting as you stand perched on a high ledge in a large exterior hall.

Rush into battle to help an old friend. Use the techniques learned in the introductory battle with Hypatos. There are four Level 1 soldiers that you can beat rather easily compared to your first competitor. You should be able to use your special adrenaline attack at least once during this fight.
Hepzefa Escorts You Home
After the battle, you reunite with your old friend Hepzefa. It’s been a year since you’ve seen him. Bayek tells him that he’s defeated one of the masked ones, the Heron. Hepzefa replies, “Four more!” It’s apparent that your good friend is privy to your quest to assassinate those who have wronged you. He mounts his camel and invites you to rest at home.