
Assassin's Creed Origins Guide Main Quests Memphis
The Lizard’s Mask
Prerequisite: Complete Main Quest: Aya
Suggested Level: 20
REWARDS: NA
Unlocks: Main Quest: The Lizard’s Face
Details: Bayek travels to Memphis to meet with the High Priest Pasherenptah to learn about one of his targets: the Lizard.
Speak to Pasherenptah in the Great Temple of Ptah
Memphis: Temple of Ptah
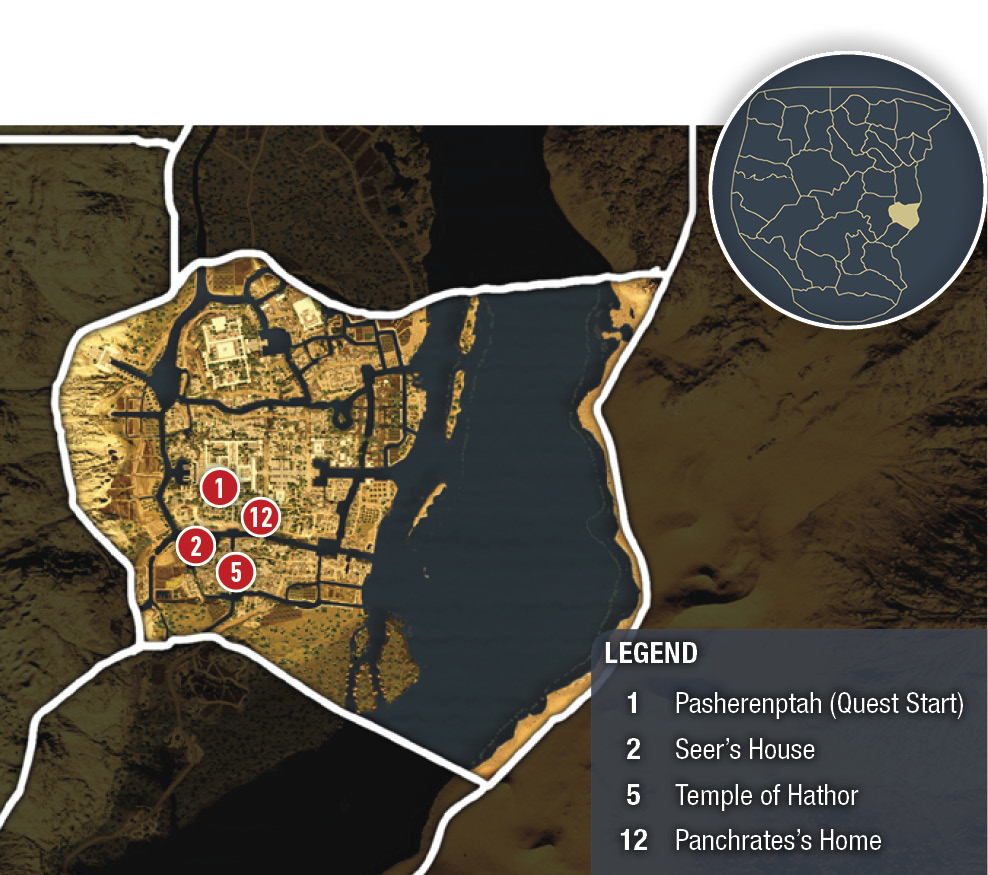
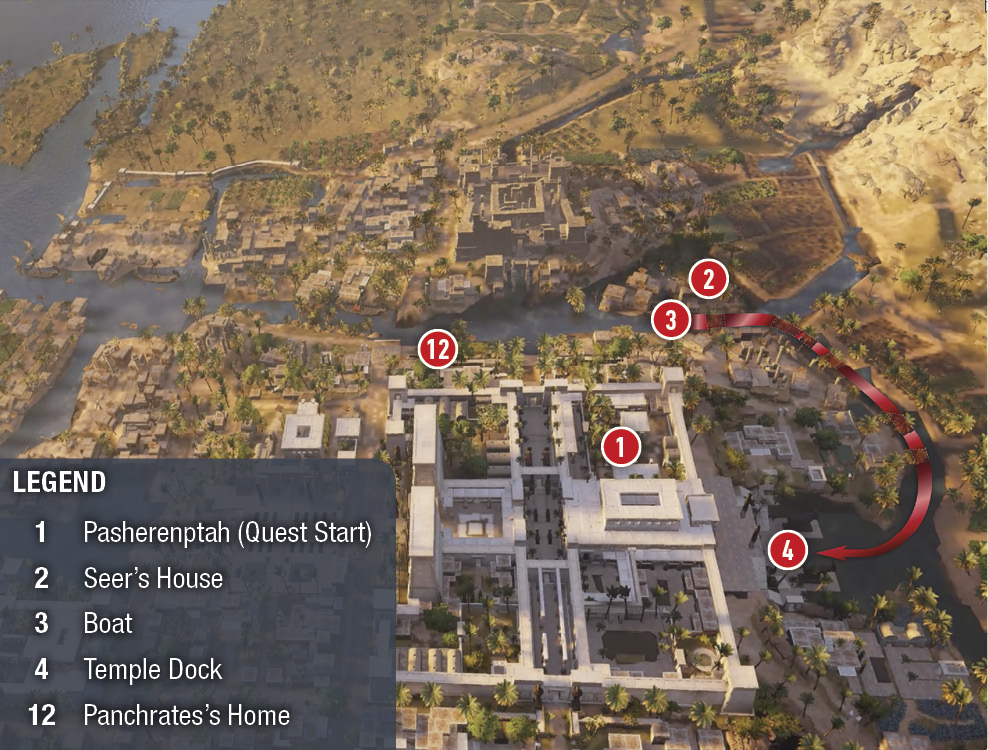
Bayek must work with Pasherenptah (1) to uncover the whereabouts of the Lizard, who is believed to be behind the curses that are plaguing the city of Memphis. Before you leave the Great Temple of Ptah after speaking with Pasherenptah, synchronize with the Viewpoint on the southeast tower.
Reach the Seer’s House and Speak to Taimhotep
Travel southwest to the marker to find the Seer (2) and Pasherenptah’s wife, Taimhotep. She is inside a small home performing a ritual to help prevent her child from being stillborn like her past pregnancies.
Bring the Cauldron into the Ritual Circle
Follow the marker 9 meters away to find the small cauldron on the floor. Pick it up and take it to the fire the participants are gathered around. During the excitement of the ritual, Taimhotep forces out some of the liquid from the cauldron meant for her. Bayek passes out from the drug.
You awaken in a drug-induced dream world. The Seer and Taimhotep are there with you. Walk through the raging sandstorm down the nearby dune slope. Continue along a pathway lined with ominous statues.
Continue into a large, dark tomb. Keep running straight through a brightly lit, narrow hallway. A cinematic shows Bayek’s doppelganger standing in front of the scale of justice just as a giant serpent (Apep, the Soul Eater) breaks through and eats your glowing heart, which the Bayek doppelganger throws into the air. A bow materializes in your hand. Magic, glowing arrows fall from above, forming a perfect circle around you.
Defeat the Soul Eater
The glowing bow has an unlimited number of arrows. The large snake rises out of the water and wraps itself around distant columns. Its health gauge appears at the top of the screen. The snake also spits damaging, poisonous, green acid that you should avoid. Dodge the projectile acid as well as the pool of acid that forms on the platform you fight from.
Hitting the snake anywhere on its body is damaging, but it is most damaging to shoot the snake in the weaks spots that are indicated with light. Aim for the body as it crawls up columns. As it slithers back down into the water below, keep hitting the exposed body with arrows.
The snake switches sides of the ship, so keep an eye on the ripples in the water to track its submerged position. Finally, dodge to avoid its lunging attack. It will come right at you and lunge across the platform where you are fighting. When the snake is down to half of its health, it destroys the ship. The fight continues in an arena where the snake is much more aggressive. At this point, the snake shoots even more poison and breaks the floor when it strikes. As the beast nears death, it shoots poison everywhere around the stage until it finally dies.

After the battle, you are knocked into a dark pool with floating lily pads. Swim to the stone crypt. A cinematic plays in which Bayek opens it and retrieves his heart. He grips it tightly in his hand and suddenly hears his son’s voice calling. He turns to look and he finds himself in a wheat field with Khemu. They approach each other, and Khemu whispers something in Bayek’s ear just before he wakes up.
The Seer translates what you’ve experienced and concludes that your enemy and Taimhotep’s enemy is the same and that someone is poisoning the temple food, which is killing Taimhotep’s unborn children.
Speak to Pasherenptah about Taimhotep
When leaving to head back to the temple, you run into Aya outside the Seer’s house. You tell her about the dreams of your son and how the Seer claims whoever is poisoning Taimhotep is your enemy.

Follow Aya
From the Seer’s (2), Aya heads to the stream and enters a boat (3). Get in and drive west. Turn right at the watery intersection to head north to the temple dock (4). Along the way, Bayek and Aya catch up and share what happened in each other’s lives while they were separated.
Follow Aya to the Apis Bull’s Quarters
Exit the boat and follow Aya as she runs north up the temple stairs and into the temple. She heads to the Apis Bull (1). When you reach the destination, Aya tells you to check on the bull while she talks to the priestesses.
Investigate the Sick Apis Bull’s Quarters
You need to find the cause of the bull’s (and Taimhotep’s) illness. Activate Animus Pulse to locate the clues around the bull pen. Pivot to your left and investigate the pile of bull dung. Bayek reaches deep into the large pile and pulls out a handful of peach pits.
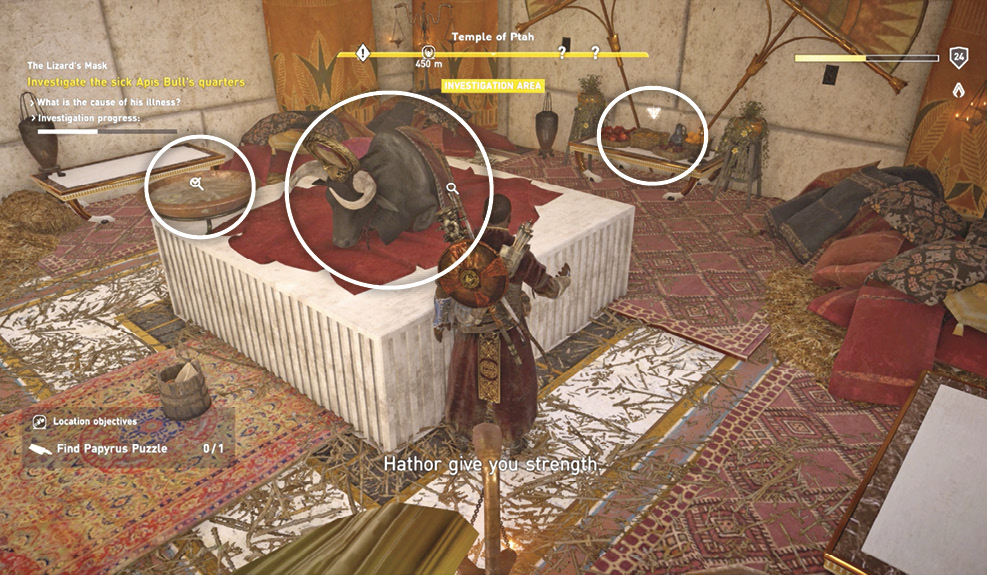
Speak to the man in the bull pen. He says the priestesses feed the bull and the fodder is in a shed that has been shut up since the bull got sick. Enter the bull’s chambers and investigate the water bowl, the Apis Bull, and the offerings on the table behind the bull.
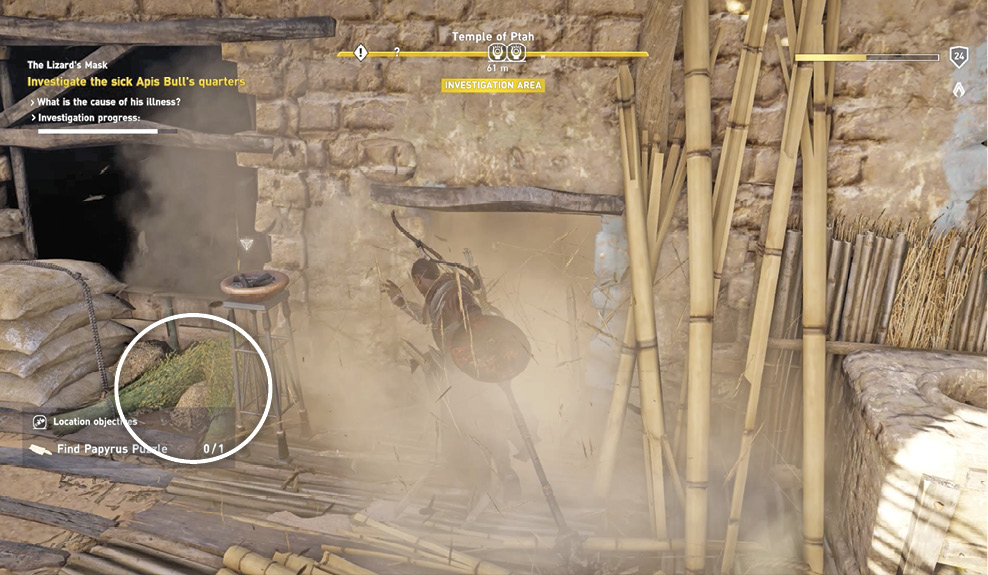
Exit the bull’s chambers. Head left and leave the bull pen. Interact with the food for the bull near the shed. Break through the sealed doorway to the right of the bull food to enter the shed. Investigate the peach pits inside to the left. These are the poison causing all the illness. Lying beside the peach pits is one of the priestesses’ necklace.
Speak to Aya and the Twins to Report Your Findings
Aya is talking to the priestess twins in front of the food shed. Approach them to present your condemning evidence. The twin with the missing neckless takes off running but is quickly captured. They admit to the poisoning but they did it because they were being pressured by bandits who have kidnapped their brother. They present his severed finger in a box.

Find and Rescue the Twins’ Brother, Panchrates
Temple of Hathor
Prerequisite: Approach the temple
SUGGESTED LEVEL: 22 or higher
LOCATION REWARD: 400 XP
LOCATION OBJECTIVE: Kill one captain, loot one treasure
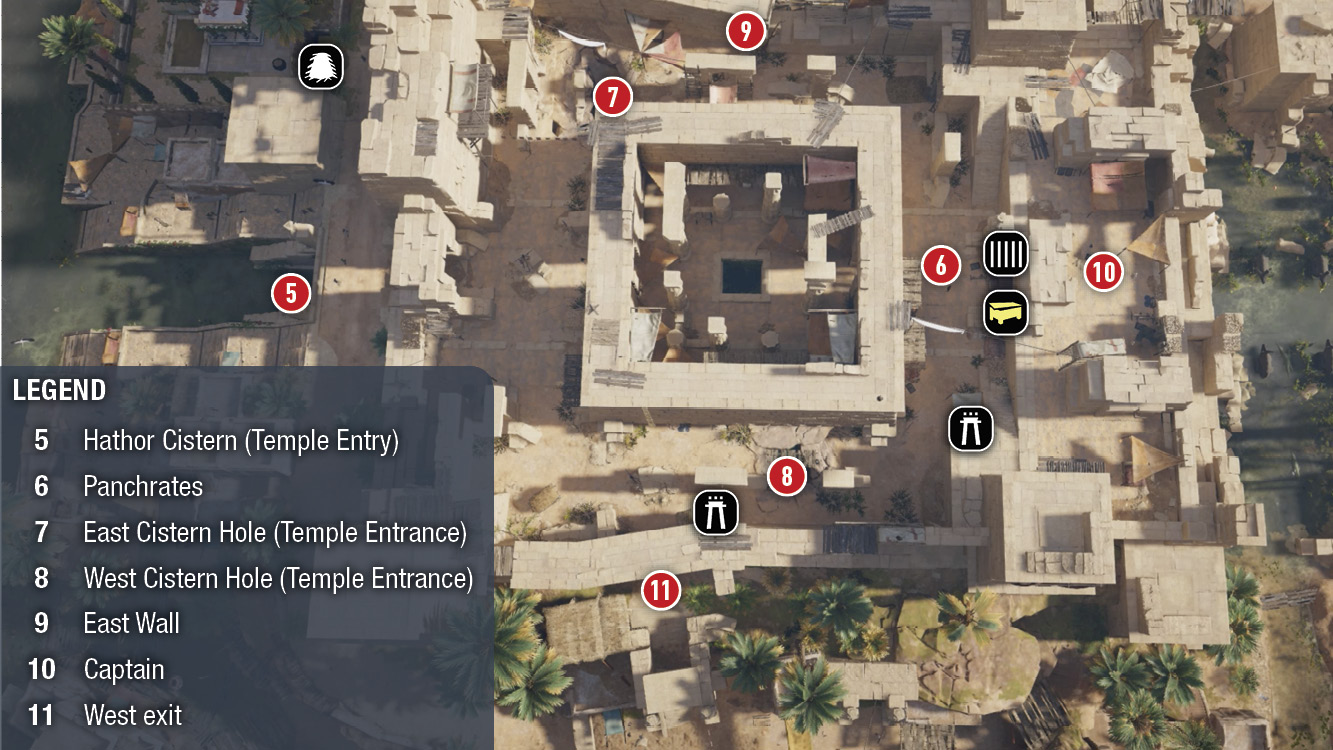
Aya watches over the twins while you go off to find the bandits at the temple of Hathor (5). Send Senu over the temple to locate Panchrates (6) and to mark all the bandits and treasure. Enter the temple via the north entrance (5) and the channel that runs underneath it.
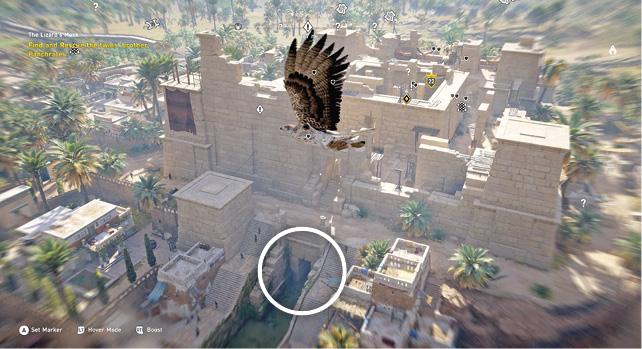
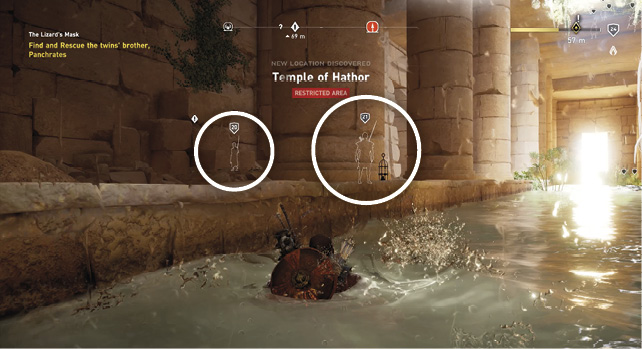
Swim into the underbelly of the temple and execute the two guards below. This is the Hathor Cistern. There are east and west passages that lead to exits up into the temple above. The east passage has you entering through the east hole (7) and the west cavern has you popping up through the west hole (8).
We suggest climbing up the east passage’s cavern wall to enter the temple through the east hole (7). Hang on to the edge of the hole. Pull the nearby patrolling bandit down into the hole to his death. Call any other nearby bandits to the same death trap. Once you are safely standing in the northeast corner, plan your next move. We suggest getting to higher ground.
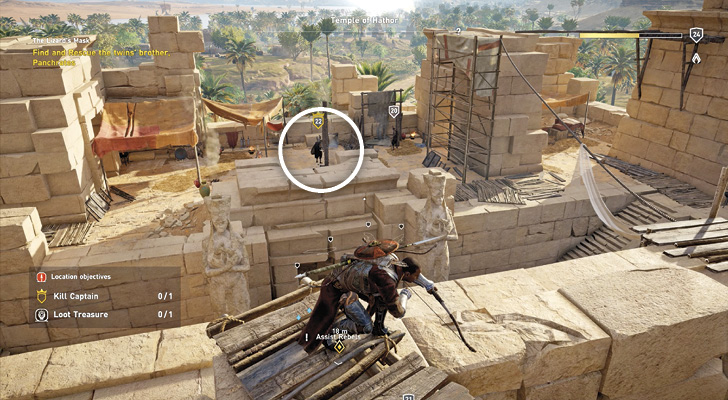
Climb the nearby east wall ladder (9) to reach the wall’s top. Begin moving around the temple’s top level, shooting arrows into the heads of any bandits who can spot you up here. This includes the captain (10) who patrols the upper platform above the south gate.
Carry Panchrates Back Home
Eliminate all the bandits in the camp and approach Panchrates (6). Free the captives near him for an extra 100 XP, and take the treasure near the captive cage to complete the location objective. Carry Panchrates west to a small exit (11) near a hiding booth. Call your mount, place him on it, and ride to his house (12) to the left across the bridge.
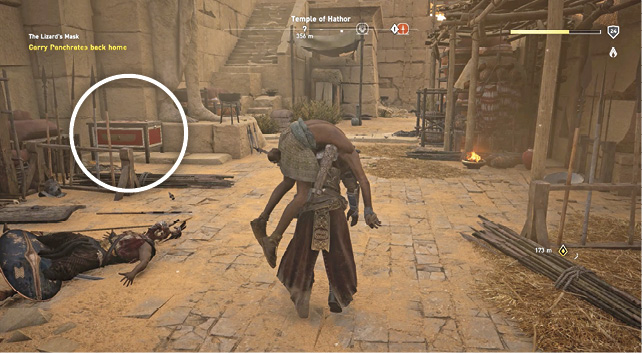

After you drop Panchrates off at home, he reveals that his abduction was ordered by a priest of Anubis at the Great Temple—a priest in Pasherenptah’s circle. He says he wears a blue scarf and has a terrible cough. You rejoin Aya outside his home. This quest ends here and continues in Main Quest: The Lizard’s Face.
