
BioShock: The Collection Guide Bioshock Evolve Today!
Gene Tonics
In addition to the described set of plasmids, the world of Rapture also contains 53 different gene tonics. Unlike plasmids, tonics work passively. Their effects are always at work and impact whatever you do without needing to select an individual one a to use it. Gene tonics come in three categories: Physical, Engineering, and Combat. Although you will only begin with two available tonic slots in each of these three tracks, you can purchase additional Tonic Slots for 80 Adam each at a Gatherer’s Garden vending machine.
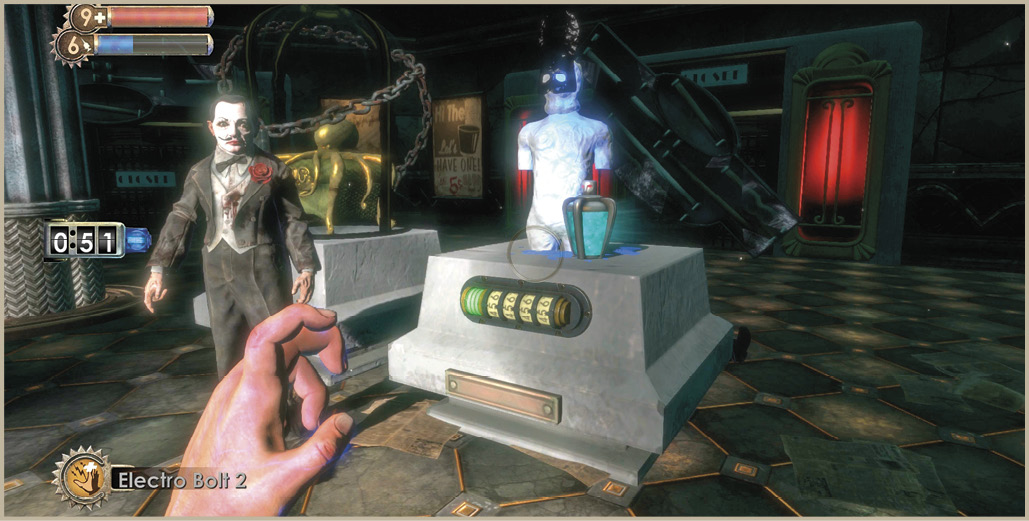
Another key difference between plasmids and tonics is that many of the advanced versions of tonics do not replace their inferior model. This allows you to splice two or more similar tonics to stack the effects. For example, the Photographer’s Eye and Photographer’s Eye 2 tonics yield research bonuses of 10% and 15%, respectively. Instead of simply choosing the latter tonic, you can assign them both a slot in your Combat Tonic track and gain a research bonus of 25%, the combined effects of the two tonics!
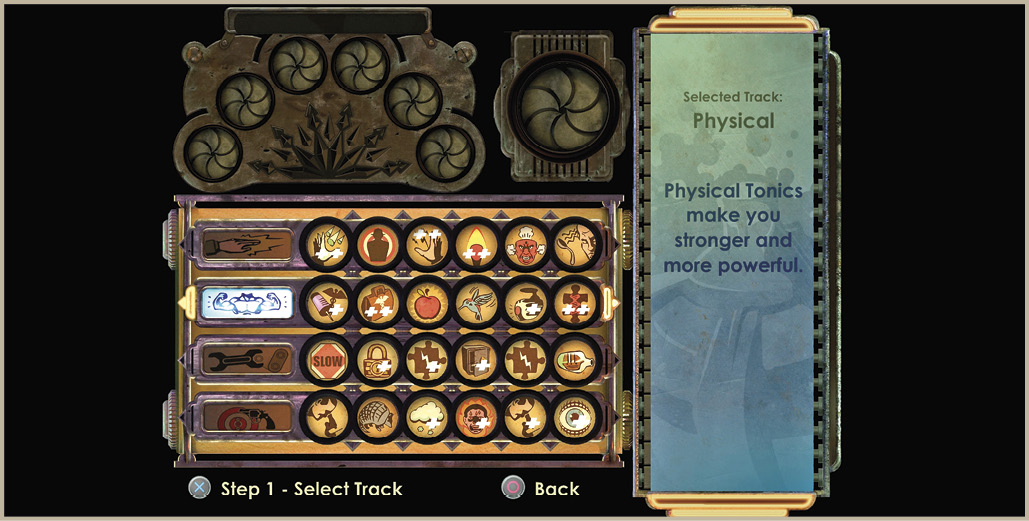
 Physical Tonics
Physical Tonics most commonly affect your ability to replenish Health and EVE. Additionally, some Physical Tonics will increase your ability to move through the environment without detection and aid in your ability to see items that would otherwise go undetected.
Our Five Favorite Physical TonicsEVE Link Extra Nutrition Medical Expert Natural Camouflage Scrounger |
 Bloodlust
Location: Available at U-Invent machines, starting in the Fort Frolic area.
Effect: You gain small amounts of Health and Eve when inflicting damage with the Wrench.
Bloodlust heals your body and your mind as you swing! Be red in tooth and claw—with Bloodlust!
 Booze Hound
Location: Available at U-Invent machines, starting in the Fort Frolic area.
Effect: Drinking alcohol restores a small amount of EVE, rather than draining it!
Take full advantage of Rapture’s distilleries and vintners. Drink to your health with Booze Hound!
 EVE Link
Location: Available in a Gatherer’s Garden vending machine, starting in the
Medical Pavilion area.
Effect: First Aid Kits also give you EVE.
Get more out of your First Aid Kits with EVE Link. This revolutionary new gene tonic causes your body to produce EVE whenever you use First Aid Kits.
 EVE Link 2
Location: On the ground in the Farmer’s Market.
Effect: First Aid Kits also give you a large amount of EVE.
Get more EVE with every First Aid Kit by using new EVE Link Two.
 EVE saver
Location: Available in a Gatherer’s Garden vending machine starting in the
Arcadia area.
Effect: Plasmids use less EVE.
In today’s genetic wonder land, you probably feel like there’s never enough EVE at hand. With EVE Saver, your EVE will go farther than ever before.
 Extra Nutrition
Location: Available in a Gatherer’s Garden vending machine, starting in the
Neptune’s Bounty area.
Effect: You gain a little extra Health from Snacks and Bandages.
Extra nutrition boosts you body’s natural ability to turn food into renewed vitality.
 Extra Nutrition 2
Location: Downstairs inside Sinclair Spirits, in the back corner of the
water-filled room.
Effect: You gain extra Health from Snacks and Bandages.
Make your food even healthier with new Extra Nutrition Two!
 Extra Nutrition 3
Location: Receive when reaching Research Level 4 with Spider Splicer.
Effect: You gain a great deal of Health from Snacks and Bandages.
The latest in the Extra Nutrition line makes food taste twice as good as it used to. Try it today!
 Hacker’s Delight
Location: In the Eternal Flame Crematorium. Activate the Furnace Control to cremate the
corpse on the tray.
Effect: Every time you hack something, you gain a little Health and EVE.
With Hacker’s Delight, your body converts the altered current from a hacked machine into a powerful healing agent. Hack and heal!
 Hacker’s Delight 2
Location: Available at U-Invent machines, starting in the Fort Frolic area.
Effect: Every time you hack something, you gain Health and EVE.
Hacker’s Delight 2 is even more efficient at converting the altered current from hacking into health for you!
 Hacker’s Delight 3
Location: On the desk next to the Rosie Helmets in the Failsafe Armored Escorts
wing.
Effect: Every time you hack something, you gain a large amount of Health and EVE.
The ultimate development of the Hacker’s Delight line, this will make every hacker a healthy hacker!
 Medical Expert
Location: On the ground in the Lower Wharf.
Effect: First Aid Kits give you 20% more Health.
With Medical Expert, your First Aid Kits will go farther, healing sickness and injury at a rate you’re sure to find astonishing. Don’t use a First Aid Kit without your best friend, Medical Expert!
 Medical Expert 2
Location: Inside Fort Frolic, but only accessible after completing Cohen’s
Masterpiece.
Effect: First Aid Kits give you 40% more Health.
With new Medical Expert Two, First Aid Kits heal you more than ever!
 Medical Expert 3
Location: Near the toilets in Dr. Suchong’s Clinic on the second floor of Artemis
Suites.
Effect: First Aid Kits give you 60% more Health.
Heal your injuries in the blink of an eye with new Medical Expert Three. Your best friend just got better!
 Natural Camouflage
Location: Receive when reaching Research Level 2 with Houdini Splicer.
Effect: When standing still, you become invisible.
Need some peace and quiet? Splice in Natural Camouflage, stop moving, and just fade away. Remember, not seeing is believing!
 Scrounger
Location: Receive when reaching Research Level 2 with Leadhead Splicer.
Effect: When searching containers or corpses, you can search again to get different loot.
Splicing Scrounger is like having a sixth sense. You’ll spot things you’d otherwise miss and discover things you’d otherwise leave behind. With Scrounger, you’ll swear you have X-Ray vision!
 Security Evasion
Location: On the ground in the Lower Concourse of Arcadia.
Effect: Security Cameras and Turrets take 2 seconds longer to see you.
Has a rival faction set up Security Cameras and Turrets where you need to go? Security Evasion adjusts the thermal signature of your epidermal layer, confusing cameras and turrets and delaying their response.
 Security Evasion 2
Location: On the desk in Lower Heat Loss Monitoring, right next to the
Audio Diary.
Effect: Security Cameras and Turrets take 4 seconds longer to see you.
Why let them know where you’ve been lately? The latest version of Security Evasion lets you bypass any Security Camera or Turret with ease.
 SportBoost
Location: Receive when reaching Research Level 2 with Thuggish Splicer.
Effect: You move and swing the Wrench faster. Movement speed is increased 10% and Wrench swing speed is increased by 25%
In today’s dangerous times, it never huts to be a little faster, a little quicker on the draw. Remember, you don’t have to outrun the crazed Splicer—just your neighbor!
 SportBoost 2
Location: Receive when reaching Research Level 4 with Thuggish Splicer.
Effect: You move and swing the Wrench much faster. Movement speed is increased 20% and Wrench swing speed is increased by 50%
Tired of being outrun by your neighbor with SportBoost installed? Get new SportBoost Two, and outrun HIM!
 Engineering Tonics
Many of the Engineering Tonics fall under the HackSmart label and, as the branding suggests, make it that much easier to hack everything from safes to Turrets. Many of these tonics reduce the number of alarm tiles and overload tiles present on the grid when hacking, and some even slow the speed of the current!
Our Five Favorite Engineering TonicsClever Inventor Hacking Expert Safecracker Security Expert Speedy Hacker |
 Alarm Expert
Location: On the balcony in the Fleet Hall Theatre. Jump from one balcony booth to
the other to get it.
Effect: Up to 2 fewer alarm tiles when hacking.
A staple in the HackSmart line of gene tonics, Alarm Expert uses your body’s electrochemical composition to defuse circuitry alarms in secure systems. Try it today!
 Alarm Expert 2
Location: In the Live Subject Testing area of Point Prometheus. It’s on a
filing cabinet.
Effect: Up to 4 fewer alarm tiles when hacking.
Are your hacks still being interrupted by Alarms? Then you need Alarm Expert Two, today! (A HackSmart gene tonic.)
 Clever Inventor
Location: On the desk in Suchong’s Apartment in Olympus Heights.
Effect: Inventing items requires 1 fewer of each component (minimum of 1).
U-Invent Stations truly are a marvel of modern engineering, and now you’ll need fewer raw materials to make what you want. It’s not witchcraft—it’s Clever Inventor!
 Focused Hacker
Location: In the entrance to Fontaine Fisheries, frozen in the ice near the pneumatic
tube.
Effect: Up to 2 fewer overload tiles when hacking.
Another favorite in the HackSmart line of gene tonics, Focused Hacker defuses overload traps in secure systems. Fewer fried circuits guaranteed or your money back!
 Focused Hacker 2
Location: Hestia Fourth Floor, on the desk in the corner of the room near the
safe.
Effect: Up to 4 fewer overload tiles when hacking.
When you have to hack the most delicate systems out there, only Focused Hacker Two, from HackSmart, can ensure your safety from overloads.
 Hacking Expert
Location: On the desk inside the entrance to the Research Laboratories.
Effect: All hacks have 1 fewer alarm tile and 1 fewer overlo ad tile.
The original HackSmart gene tonic, Hacking Expert defuses alarms and helps avoid overloads. It’s the must-have Plasmid of the HackSmart line.
 Hacking Expert 2
Location: Available in a Gatherer’s Garden vending machine starting in the Fort
Frolic area.
Effect: All hacks have 2 fewer alarm tiles and 2 fewer overl oad tiles.
When Hacking Expert alone isn’t enough, you need Hacking Expert Two! From HackSmart—only the best in hacking gene tonics.
 Prolific Inventor
Location: Rescue 18 Little Sisters to receive this tonic as a reward from
Tenenbaum.
Effect: Whenever you invent an item, you get twice as many as normal.
Inventing is already a valuable pastime in the resource-strapped halls of Rapture. Make yourself a Prolific Inventor and you’ll be the envy of your peers, as you turn worthless junk into valuable commodities.
 Safecracker
Location: Rescue 6 Little Sisters to receive this tonic as a reward from Tenenbaum.
Effect: When hacking safes and combination locks, there are up to 2 fewer alarm and overload tiles, 1 fewer accelerate tile, and 3 added deceleration tiles. The flow speed is reduced by 0.5 seconds per tile.
One of HackSmart’s most popular offerings, Safecracker lets you into places that they want to keep you out of. Splice it now, and get hacking!
 Safecracker 2
Location: In the Autopsy room in the downstairs of the Little Wonders Educational
Facility.
Effect: When hacking safes and combination locks, there are up to 4 fewer alarm and overload tiles, 2 fewer accelerate tiles, and 3 added deceleration tiles. The flow speed is reduced by 1.0 seconds per tile.
Are your enemies trying to lock away what’s rightfully yours? Don’t let them keep your hard-earned goods! Get them back with new Safecracker Two. HackSmart wants you to get what’s coming to you!
 Security Expert
Location: In the Twilight Fields funeral area. It is on a shelf in the
mortuary room.
Effect: When hacking Turrets, Security Bots, and Security Cameras, there are up to 2 fewer alarm and overload tiles, 1 fewer accelerate tile, and 1 added deceleration tile. The flow speed is reduced by 0.5 seconds per tile.
A new offering the HackSmart line, Security Expert was deigned for the Hacker specializing in disabling electronic security measures. You won’t be secure without Security Expert!
 Security Expert 2
Location: Obtained by reaching Research Level 2 with the
Security Bot.
Effect: When hacking Turrets, Security Bots, and Security Cameras, there are up to 4 fewer alarm and overload tiles, 2 fewer accelerate tiles, and 3 added deceleration tiles. The flow speed is reduced by 1.0 seconds per tile.
Your enemies have been upgrading their security—so you need to upgrade your hacking ability! Get Security Expert Two, the latest from HackSmart.
 Shorten Alarms
Location: Available in a Gatherer’s Garden vending machine starting in the
Arcadia area.
Effect: Length of security alarms is reduced by 20 seconds.
What sound is more ominous than a yammering security alarm? With Shorten Alarms spliced, your personal EM signature becomes altered to interact uniquely with alarm sensors, shortening the period until you’ll be free and clear.
 Shorten Alarms 2
Location: Available in a Gatherer’s Garden vending machine starting in the
Arcadia area.
Effect: Length of security alarms is reduced by 20 seconds.
Are frequent Security Alarms driving you deaf? Reduce the pain with new, improved Shorten Alarms Two.
 Speedy Hacker
Location: In the corner of the room in Painless Dental.
Effect: Flow speed is reduced by 1.5 seconds per tile when hacking.
The most popular of the HackSmart line, Speedy Hacker buys you the time you need to hack any electronic device. Time is on your side with Speedy Hacker!
 Speedy Hacker 2
Location: Available in a Gatherer’s Garden vending machine, starting in the
Olympus Heights area.
Effect: Flow speed is reduced by 3.0 seconds per tile when hacking.
In our ever-accelerating world of progress, it’s hard to find time to stop and think. But now you can buy yourself that time—with new Speedy Hacker Two! Only from HackSmart!
 Vending Expert
Location: Available in a Gatherer’s Garden vending machine starting in the
Arcadia area.
Effect: Reduces prices in vending machines.
With the Vending Expert tonic altering your EM signature, you can fool the pricing circuits at any vending machine. Known to our customers as “Circus Maximus,” Vending Expert will pay for itself in no time!
 Vending Expert 2
Location: Available in a Gatherer’s Garden vending machine starting in the
Hephaestus area.
Effect: Greatly reduces prices in vending machines.
Corporate conspiracies let the “important” people negotiate better prices for themselves at all of our vending machines. Is that fair? You know it isn’t! Get a taste of how the better half lives, with Vending Expert Two.
 Combat Tonics
As the name of this category infers, the tonics that fall in this category all enhance your ability to fight and withstand damage. Some increase your offensive ability while others increase your resistance to certain elemental attacks such as ice or fire. Several Combat Tonics even increase your skill in taking research photos and magnify the effects of the research bonuses you unlock.
Our Five Favorite Combat TonicsArmored Shell Damage Research Human Inferno Photographer’s Eye Static Discharge |
 Armored Shell
Location: Available in a Gatherer’s Garden vending machine starting with the
Medical Pavilion area.
Effect: Reduces piercing and bludgeoning damage by 15%
Useful in any hazardous situation, Armored Shell offers fantastic protection against life’s bumps and bruises. Don’t be a softie—use Armored Shell now!
 Armored Shell 2
Location: Rescue 15 Little Sisters to receive this tonic as a reward from
Tenenbaum.
Effect: Reduces piercing and bludgeoning damage by 25%.
When the bullets and blows are blasting away, you need all the protection you can get. Armored Shell Two provides more protection than our competitor.
 Damage Research
Location: On a desk in the secret crawlspace office in the Lower
Workshops.
Effect: Research damage bonuses are increased by 30%.
Get more bang for your research buck with Damage Research. Carry your analysis further than you ever thought possible.
 Damage Research 2
Location: In the Mendel Family Library, on a desk in the rear of the room.
Effect: Research damage bonuses are increased by 60%.
Hit ‘em where it hurts, and hit ‘em hard! New Damage Research Two lets you exploit your enemies’ weaknesses even more than before.
 Electric Flesh
Location: In the Projection Booth upstairs in the Fleet Hall Theatre. It’s only accessible after completing
Cohen’s Masterpiece.
Effect: Reduces electric damage by 75% and increases your outgoing electric damage by 30%.
Supercharge your body with Electric Flesh, the ultimate in electricity enhancements. Insulate yourself from harm with new EF!
 Electric Flesh 2
Location: In Fontaine’s Apartment, on the desk in his upstairs study.
Effect: Reduces electric damage by 100% and increases your outgoing electric damage by 60%.
When we said Electric flesh was the ultimate in electricity enhancements, we turned out to be premature. Now Electric Flesh Two is even better! Be the shock-er, not the shock-ee, with Electric Flesh Two!
 Frozen Field
Location: Search the corpse of Martin Finnegan inside the
Frozen Tunnel.
Effect: Reduces cold damage by 15%. Wrench does an extra 10 points of cold damage and has 10% chance of freezing enemy.
Leave your foes out in the cold with Frozen Field!
 Frozen Field 2
Location: On the desk in the Central Core, outside Andrew
Ryan’s Office.
Effect: Reduces cold damage by 30%. Wrench does an extra 20 points of cold damage and has 10% chance of freezing enemy.
Don’t let yourself be frozen out—get Frozen Field Two today!
 Human Inferno
Location: Available at a Gatherer’s Garden vending machine starting in the
Arcadia area.
Effect: Reduces heat damage by 20%. Increases heat damage you inflict by 30%, burning monsters take damage at a 30% higher rate.
Human Inferno—the hottest Plasmid in Rapture!
 Human Inferno 2
Location: Available at a Gatherer’s Garden vending machine starting in the Point Prometheus area.
Effect: Reduces heat damage by 40%. Increases heat damage you inflict by 50%, burning monsters take damage at a 50% higher rate.
Human Inferno—the hottest Plasmid in Rapture!
 Machine Buster
Location: Available in a Gatherer’s Garden vending machine starting in the
Neptune’s Bounty area.
Effect: Increases damage you deal to Cameras, Bots, and Turrets.
In today’s automated environment, you may find yourself up against hostiles not made of flesh and blood. Machine Buster gives you the edge you’ve been looking for against metal-plated antagonists.
 Machine Buster 2
Location: Available in a Gatherer’s Garden vending machine starting in the
Olympus Heights area.
Effect: Greatly increases damage you deal to Cameras, Bots, and Turrets.
Machines are getting redesigned every day. If you want to be able to beat them, you’ll need to redesign your own genes. Machine Buster Two lets you put those bots back in their place.
 Photographer’s Eye
Location: In the bunk room of the wine cellar in
Farmer’s Market.
Effect: All research photo scores are increased by 10%.
Every research photographer wants an edge, and Photographer’s Eye is yours. Once you’ve spliced this invaluable gene tonic, you’ll get the picture!
 Photographer’s Eye 2
Location: Receive for reaching Research Level 2
with Rosie.
Effect: All research photos scores are increased by 15%.
Everyone has a hidden weakness—but with Photographer’s Eye Two, they won’t stay hidden for long!
 Static Discharge
Location: In the Surgery Foyer, near the pool of water, near Dr. Steinman’s
lab.
Effect: When struck by a melee attack, the player emits an electrical burst that does 30 points of damage and includes a 15% chance of causing a shocked state.
Ryan Industries introduces the latest in wartime deterrent genetics. Static Discharge makes you a walking Tesla Coil, zapping anything and everything foolish enough to strike you. Feel safe, be safe with Static Discharge.
 Static Discharge 2
Location: Receive for reaching Research Level 4 with
Leadhead Splicers.
Effect: When struck by a melee attack, the player emits an electrical burst that does 50 points of damage and includes a 25% chance of causing a shocked state.
Is your old Static Discharge not slowing them down enough? Upgrade to new Static Discharge Two, today! (A Ryan Industries gene tonic.)
 Wrench Jockey
Location: In the Kure All area of Medical Pavilion. Crawl through the ventilation shaft near the floor to reach the small secret room.
Effect: Wrench damage increased by 350%.
Wrench Jockey bulks up your upper body, allowing you to wield club-like weapons with unprecedented skill and power!
 Wrench Jockey 2
Location: Receive for reaching Research Level 2
with Bouncer.
Effect: Wrench damage increased by 550%.
When your opponent has Wrench Jockey, how can you hope to beat him in a fight? By installing Wrench Jockey Two, of course! Don’t get caught wit last year’s model, upgrade today!
 Wrench Lurker
Location: In the Lower Wharf, on the edge of the walkway near the Gene Bank and Gatherer’s
Garden machines.
Effect: Wrench damage increased by 150% versus unaware or shocked opponents. Also quiets your footsteps.
When fighting those stronger or faster than yourself, you’ll need every advantage possible in a scrum. Wrench Lurker allows you to make the most of your opportunities when your antagonist is caught off guard.
 Wrench Lurker 2
Location: Available at a Gatherer’s Garden vending machine, starting at Olympus
Heights.
Effect: Wrench damage increased by 200% versus unaware or shocked opponents. Also quiets your footsteps.
Only a fool fights fair. When you want to take them down from behind, be smart, use Wrench Lurker Two!