
BioShock: The Collection Guide Bioshock Infinite Gear
Build Examples
You might notice that a lot of the Gear in Bioshock Infinite may have limited uses or may not seem that great on its own. However, when you combine certain pieces of Gear with others, you can create powerful and deadly combinations. Here are a few examples of set-ups that you can create by combining Gear pieces together.
Gunslinger
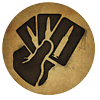
This build is specially built to emphasize firearm combat, especially using weapons that cause critical hits like the Pistol, Carbine or Repeater.
| Hat | Ammo Cap or Quick Handed |

|
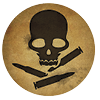
| Shirt | Scavenger’s Vest |
|
| Boots | Tunnel Vision |

|
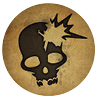
| Pants | Head Master |
|
With this build, you’ll find more ammo, reload faster, and your headshots will connect with extreme power! The buffs on Tunnel Vision and Head Master stack, causing enormous damage with a critical hit from a gun that is used with Iron Sights!
Depending on your preference, you can switch out Ammo Cap with Quick Handed—both increase your ability to reload in different ways, so this choice mostly comes down to personal preference.
Demolition Man
This example build is completely based around explosive weapons like the RPG and Volley Gun and causing extreme mayhem with them.
| Hat | Quick Handed |
|
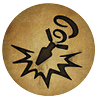
| Shirt | Nitro Vest |
|
| Boots | Tunnel Vision |
|
| Pants | Angry Stompers |

|
This build is mostly centered around the Nitro Vest, which increases any explosive damage you cause. When you combine that with Tunnel Vision, you’ll deal even more explosive damage per shot!
Quick Handed is better in this build than Ammo Cap, since the reload time on the RPG and other explosive weapons can be pretty lengthy and you’ll need to reload these weapons more often.
Berserker
In this build, Gear is chosen to maximize your efficiency as a melee powerhouse, bent on crushing enemies with the Sky-Hook!
| Hat | Ammo Cap or Quick Handed |
|
| Shirt | Scavenger’s Vest |
|
| Boots | Tunnel Vision |
|
| Pants | Head Master |
|
Every piece of Gear in this set is designed to maximize your Sky-Hook attacks, allowing you to attack from farther away, deal fire damage while striking, steal health after killing an enemy, and deal more damage in general!
If you’re fighting stronger enemies like the Siren or Handyman, you can equip Sheltered Life instead, which gives you invincibility after eating food or finding a Medical Kit. Be sure to search enemies while you’re fighting to maintain invincibility!
Wizard
The Wizard build is focused on efficiently and powerfully attacking with an array of Vigors. This Gear is meant to allow you to primarily attack using Shock Jockey, Devil’s Kiss, and other elemental attacks.
| Hat | Storm |
|
| Shirt | Blood to Salt |

|
| Boots | Overkill |
|
| Pants | Head Master |
|
To see the full effects of this build, zap an enemy with Shock Jockey, then blow them away with a Devil’s Kiss projectile. You’ll spread the effect to all enemies using Storm and stun them all using Overkill!
Once your foes are stunned, take out your enemies with headshots to fill your Salts Meter back up and do it again! If you want to limit your gun usage completely, consider Brittle-Skinned to turn your melee attacks into defense draining, debuff strikes!
Sky-Line Ninja
This build is focused on striking your enemy and quickly escaping, constantly moving and suffering as little damage as possible.
| Hat | Sheltered Life |
|
| Shirt | Winter Shield |

|
| Boots | Newton’s Law |

|
| Pants | Brittle-Skinned |
|
Since two of the Gear items in this build require Sky-Lines to be effective, you might not want to use these builds in areas with little-to-no Sky-Line combat, like Finkton and the first part of Emporia.
With this build, you should fly in, use a melee attack on an enemy once or twice then jump back onto a Sky-Line—you’ll be invincible after you jump off and again when you jump back on!
Defender
Defender is a build focused on keeping the Health and Shield Meters from draining. This build is better on harder difficulties or when you’re having trouble advancing through some of the more difficult points in the story.
| Hat | Hill Runner’s Hat |
|
| Shirt | Shock Jacket\Pyromaniac |

|
| Boots | Vampire’s Embrace |
|
| Pants | Urgent Care |
|
This build is mostly focused on Urgent Care and Hill Runner’s Hat. When combined, you can use the effect of Hill Runner’s Hat to get away from foes, making it easy to keep your Health Meter filled.
On the Torso slot, you can use either Shock Jacket or Pyromaniac interchangeably, since they both punish any enemy that tries to attack up close. Use the one that better suits your play style—Pyromaniac does more overall damage, but Shock Jacket keeps enemies in place, allowing you to escape or drain health with Sky-Hook strikes that are charged with Vampire’s Embrace.
Sky-Line Sniper
This is another build focused on being more efficient while fighting on and around Sky-Lines, but with guns instead of fists.
| Hat | Throttle Control |

|
| Shirt | Sky-Line Accuracy |

|
| Boots | Nor’easter |

|
| Pants | Fire Bird |

|
When using this build, slow down to shoot a few rounds at grounded enemies from a Sky-Line, then speed up to avoid their counter strike. After killing an enemy, shoot at another while you’re invincible!
If you’re being overwhelmed from the ground, try and jump towards multiple enemies if possible—Fire Bird will ignite them all! Instead of trying to finish off the flaming enemies, jump back on the Sky-Line to keep taking your enemies out from up high!