Prima Games eGuides
primagames.com Browse Redeem a code Help
BioShock: The Collection eGuide
Sign in My Guides

Sign in or create an account

We'll email you a link. No password needed, and if you don't have an account yet, the link makes one.

By creating an account or signing in, you agree to our Terms of Service and Privacy Policy.

Have a password?

Had an account on the old eGuides site, or a code from a printed guide? Help and troubleshooting

Sign in with a password

By signing in, you agree to our Terms of Service and Privacy Policy.

Check your email

A sign-in link is on its way. It works once and expires in 15 minutes. Open it and you're in, with an account if you didn't already have one.

Contents

  • Bioshock
    • One Man’s Vision…
    • About This Guide
    • Residents of Rapture
      • The Rapture Elite
      • Splicers
      • The Adam Gatherers
      • Rapture Security
    • Life Underwater
      • Gameplay Fundamentals
      • Beyond the Basics
    • Arm Yourself
      • Weapons Guide
    • Evolve Today!
      • Overview
      • Plasmids
      • Gene Tonics
    • U-Invent
      • Inventions and Components
    • Walkthrough
      • Introduction
      • Welcome to Rapture
        • Overview
        • Whereabouts Unknown
        • Bathysphere Station
        • Lounge
        • Elevators
        • Kashmir Restaurant
        • Footlight Theatre
      • Medical Pavilion
        • Overview
        • Foyer (First Visit)
        • Emergency Access
        • Foyer (Second Visit)
        • Surgery Foyer (First Visit)
        • Eternal Flame Crematorium
        • Twilight Fields
        • Kure All
        • Painless Dental
        • Dandy Dental
        • Surgery Foyer (Second Visit)
        • Surgery
        • Lounge
        • Foyer (Third Visit)
      • Neptune’s Bounty
        • Overview
        • Bathysphere Station
        • Lower Wharf
        • Fontaine Fisheries (First Visit)
        • Upper Wharf
        • Wharfmaster’s Office
        • Jet Postal
        • Fighting Mcdonagh
        • Fontaine Fisheries (Second Visit)
        • Relinquish Your Weapons
        • Freezer Top Floor
        • Freezer Bottom Floor
      • Smuggler’s Hideout
        • Overview
        • Flooded Cave
        • Control Room
        • Submarine Bay
      • Arcadia
        • Overview
        • Tea Garden
        • Arcadia Glens
        • Rolling Hills
        • Waterfall Grottos
        • Research Laboratories
        • Langford’s Office
        • Tree Farm
      • Farmer’s Market
        • Overview
        • Market
        • Silverwing Apiary
        • Worley Winery
      • Restoring Arcadia
        • Overview
        • Langford’s Office
        • Research Laboratories
      • Fort Frolic
        • Overview
        • Bathysphere Station
        • Go to Fleet Hall
        • Fleet Hall Theatre
        • Photograph the Dead Pianist
        • Atrium (First Visit)
        • Cohen’s Collection
        • Frozen Tunnel
        • Poseidon Plaza (First Visit)
        • Atrium (Second Visit)
        • Poseidon Plaza (Second Visit)
        • Eve’s Garden
        • Atrium (Third Visit)
      • Hephaestus
        • Overview
        • Bathysphere Station
        • Central Control
        • Hephaestus Core (First Visit)
        • Heat Loss Monitoring
        • Hephaestus Core (Second Visit)
        • Search The Workshops
        • Kyburz’s Office
        • Geothermal Control
      • Rapture Central Control
        • Overview
        • Control Room
        • Ryan’s Office
      • Olympus Heights
        • Overview
        • Tenenbaum’s Safehouse
        • Olympus Heights
        • Mercury Suites
        • Tenenbaum’s Apartment
        • Fontaine’s Apartment
      • Apollo Square
        • Overview
        • Apollo Square Streets
        • Artemis Suites
        • Dr. Suchong’s Clinic
        • Apollo Square
        • Hestia Chambers
        • Atlas’s Headquarters
      • Point Prometheus
        • Overview
        • Atrium
        • Little Wonders
        • Optimized Eugenics
        • Mendel Family Library
        • Failsafe Armored Escorts
      • Proving Grounds
        • Overview
        • Museum Lobby
        • South Wing
        • North Wing
      • Fontaine
        • Overview
        • Fontaine’s Lair
    • Achievement & Trophy Guide
      • Game Completion Series
      • Crafting Series
      • Plasmid Mastery Series
      • Weapon Upgrade Series
      • Research Series
      • Hacking Series
      • Special Series
    • Challenge Rooms
      • The "I" in Team
      • A Shocking Turn of Events
      • Worlds of Hurt
      • Achievements and Trophies
  • Bioshock 2
    • Introduction
    • Residents of Rapture
      • Subject Delta
      • The Rapture Elite
      • Splicers
      • The Protector/Gatherer Program
      • Rapture Security
    • Into the Dive Suit
      • Gameplay Fundamentals
      • Exploring Rapture
      • Protector in Combat
      • Beyond the Basics
      • Machines of Rapture
    • Big Daddy Weaponry
      • Bullet Supply
      • Weapons Guide
    • Evolve Today!
      • Gatherer’s Garden
      • Plasmids
      • Gene Tonics
    • Walkthrough
      • Adonis Luxury Resort
        • Overview
        • Lobby
        • Adonis Baths
        • Bridge Courtyard
        • Grand Foyer
        • Demeter’s Banquet Hall
      • Atlantic Express Depot
        • Overview
        • Airlock
        • Train Workshop 6A
        • Drafting Room
        • Train Workshop 6B
        • Switching Hub
        • Train Station
      • Ryan Amusements
        • Overview
        • Train Station
        • Museum Entrance
        • Rapture Museum
        • El Dorado
        • Back to the Museum
        • Journey to the Surface (Part 1)
        • Journey to the Surface (Part 2)
        • Hall of the Future
        • Melting The Ice
      • Pauper’s Drop
        • Overview
        • Train Station
        • Fishbowl Diner
        • Town Square
        • Market
        • Limbo Room
        • Sinclair Deluxe Tenements
        • Grace’s Apartment
      • Siren Alley
        • Overview
        • Little Eden Plaza
        • Maintenance Area
        • The Pink Pearl
        • Back to the Maintenance Area
        • Plaza Hedone
        • Pump Station Access (First Visit)
        • Pump Station No. 5
        • Pump Control Substation 5
        • Pump Station Access (Second Visit)
      • Dionysus Park
        • Overview
        • Basement Storage
        • The Promenade
        • Triton Cinema
        • Imago Fine Arts
        • J. Fischer Gallery
        • Lamb’s Garden
        • Train Station
      • Fontaine Futuristics
        • Overview
        • Train Station
        • Lobby
        • Security
        • Frank Fontaine’s Plasmid Spectacular Theater
        • Frank Fontaine’s Office
        • Lab Airlock
        • Fontaine’s Plasmid Research & Development
        • ADAM Research Laboratory
        • Live Test Facility
        • ADAM Research Lab
        • Hidden Elevator
      • Outer Persephone
        • Overview
        • Therapy Entrance
        • Main Atrium
        • Lamb’s Office
        • Cell Blocks
      • Inner Persephone
        • Overview
        • Docking Platform (First Visit)
        • Security Office
        • Holding Wing (First Visit)
        • Cell Blocks
        • Holding Wing (Second Visit)
        • Therapy Wing
        • Infirmary Wing
        • Pediatric Ward
        • Docking Platform (Second Visit)
        • Story Conclusions
    • Protector Trials
      • The Rules of Engagement
      • General Tips
      • The Adonis Baths
      • Atlantic Express Train Upkeep
      • Pauper’s Drop Market
      • Simon Wales’ Church
      • Folly of Dionysus
      • Persephone Cellblock F
      • Bonuses, Achievements, and Trophies
    • Minerva’s Den
      • New Discoveries
      • Find Charles Milton Porter
      • Restore Power to Minerva’s Den
      • Get to Porter’s Office
      • Take the Operations Punchcard
      • Head for Operations
      • Find the Gravity Well Plasmid
      • Find a Bathysphere Signal Beacon
      • Hack the Signal Beacon
      • Get to Computer Core Access
      • Reset the Climate Control Turbine
      • Print Out The Thinker’s Code
      • Defeat Reed Wahl
      • Achievements and Trophies
    • Achievement & Trophy Guide
      • Story Progression
      • Variable Endings
      • Hooked on ADAM
      • Power to the People!
      • Hackers Wanted
      • Smile for the Camera!
      • My Daddy Can Beat Up Your Daddy!
      • Something Special
  • Bioshock Infinite
    • Foreword
    • About This Guide
    • Detective Training
      • Gameplay Fundamentals
      • Catalogue for 1912
      • Elizabeth
      • Sights and Sounds of Columbia
    • Guns of Liberty
      • Overview
    • Vigors
      • Overview
      • Possession
      • Devil’s Kiss
      • Murder of Crows
      • Bucking Bronco
      • Shock Jockey
      • Charge
      • Undertow
      • Return to Sender
    • Gear
      • Columbia Chronicles
      • Randomized Gear
      • Guaranteed Gear
      • Build Examples
    • Walkthrough
      • In the Name of the Prophet
        • Introduction
        • Lighthouse
      • A Day at the Fair
        • Town Center
        • Comstock Center Rooftops
        • Monument Island Gateway
      • Bring Us the Girl
        • Monument Tower
        • Battleship Bay
        • Soldier’s Field
        • Hall of Heroes
      • Guns for the Lady
        • Finkton Docks
        • Finkton Proper
        • Shantytown
        • The Factory
      • Family Reunion
        • Emporia
        • Downtown Emporia
      • Flight of the Songbird
        • Comstock House
        • Hand of the Prophet
        • Hangar Bay
    • Enemies of the People
      • Soldiers (Founders and Vox)
      • Automatons (Turrets)
      • Mosquito
      • Zealot of the Lady
      • Fireman
      • Motorized Patriot
      • Beast
      • Handyman
      • Siren
      • Boys of Silence
    • Achievement & Trophy Guide
      • Introduction
      • Story Achievements
      • Combat Achievements
      • Upgrades and Collectibles
    • Clash in the Clouds
      • Battle Prep
      • The OPS Zeal
      • Duke and Dimwit Theater
      • Raven’s Dome
      • Emporia Arcade
      • Achievements and Trophies
    • Burial at Sea, Episode 1
      • Overview
      • Market Street
      • High Street
      • Cohen’s
      • Fontaine Station
      • Fontaine’s Department Store
      • Housewares
      • Achievements and Trophies
    • Burial at Sea, Episode 2
      • Introduction
      • Toy Department
      • Ryan the Lion Preparatory Academy
      • Bathyspheres DeLuxe
      • Columbia
      • Return to Rapture
      • Suchong’s Free Clinic
      • Achievements and Trophies
  • Credits
    • Legal

BioShock: The Collection Guide › Bioshock 2 › Minerva’s Den

New Discoveries

You, Subject Sigma, regain consciousness on the ocean floor sometime after 1968. You don’t remember much. There was a tunnel outside Rapture Central Computing, also known as Minerva’s Den. And you recall a voice, mention of something called The Thinker. The voice was frantic; it was terrified of you reaching The Thinker, whatever—or whoever—that is. And then, before you could react, a Security Bot detonated the tunnel and sent you swimming. Was it yesterday? Last year? A decade ago? There’s no telling. But you’re alive. At least you have that going for you. Might as well take a look around. There’s bound to be a way inside.

Minerva’s Den contains an exclusive weapon, Plasmid, two Gene Tonics, and several new enemies never before encountered. It also includes a new type of bot that can be destroyed to gain valuable equipment and items. But more about those later. Read on to discover what lies in store for you in this secluded corner of Rapture.

Weaponry
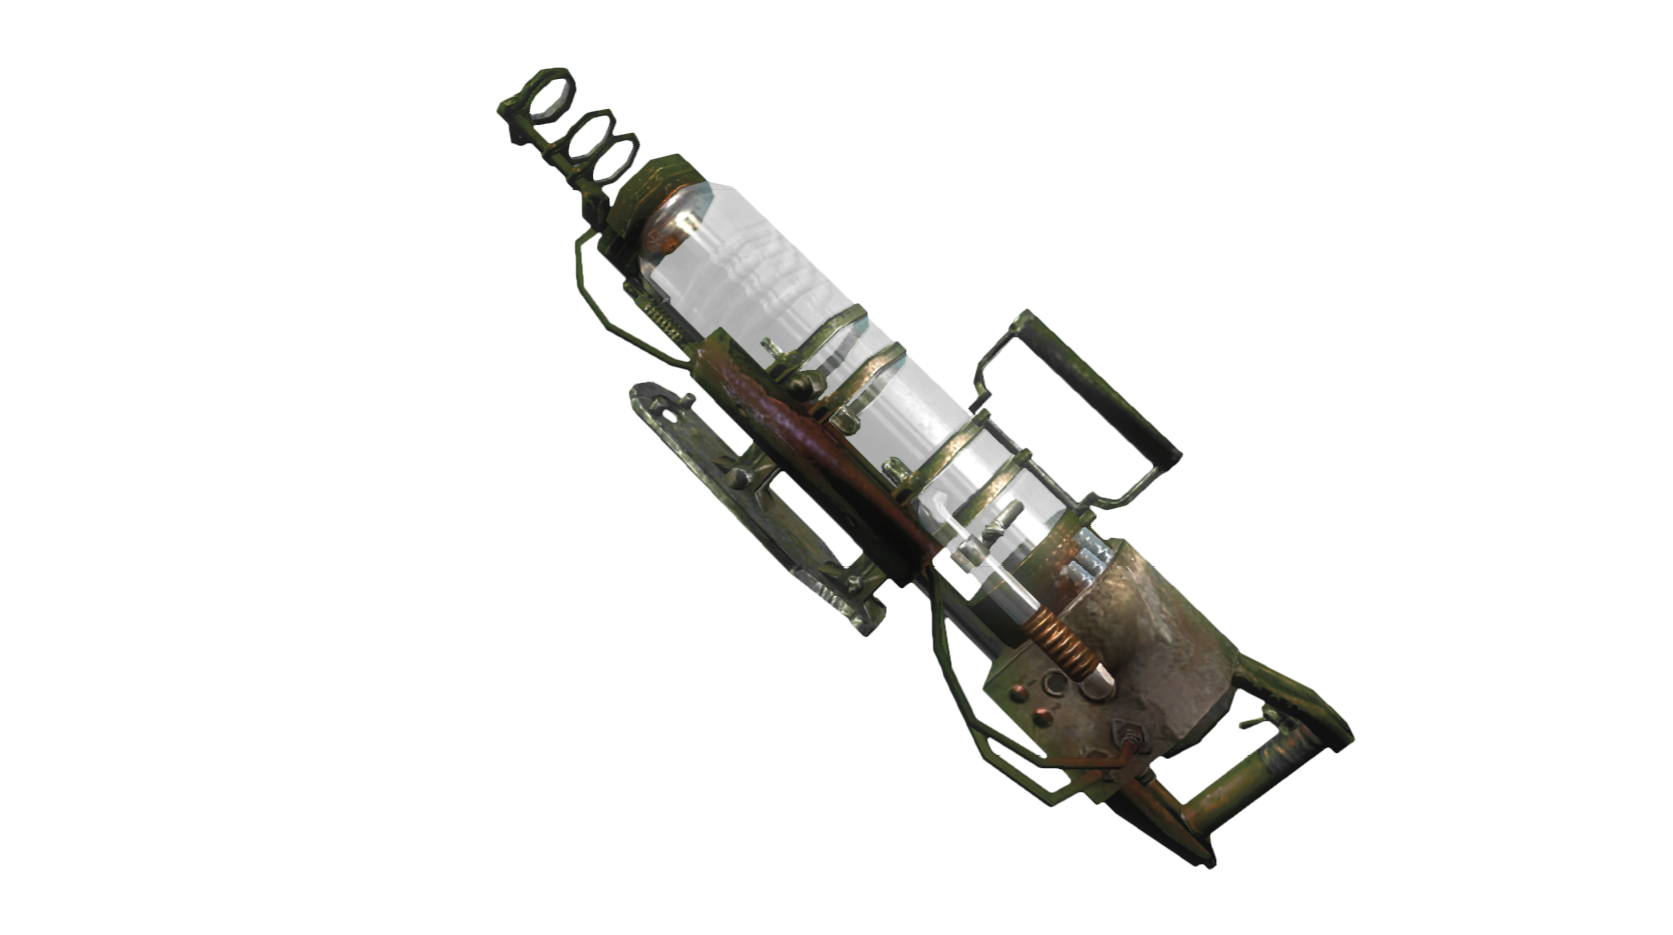
Ion Laser

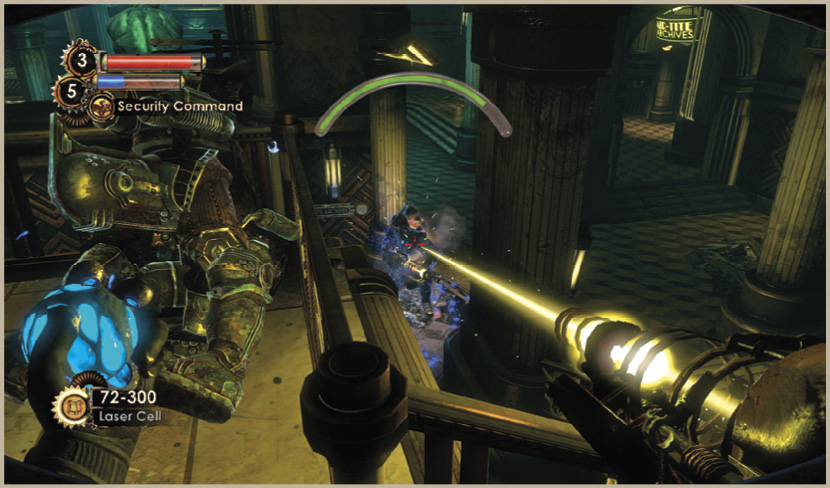
The Ion Laser is exclusive to the Minerva’s Den expansion. This ranged weapon fires a laser beam of energy that deals continuous damage while the trigger is held. Its pinpoint accuracy and ability to deal moderate to heavy damage makes it a worthy choice. One of the benefits to using the Ion Laser is that it can be used to snipe from afar or used against larger enemies from the hip, in close-range combat (the narrow beam makes it difficult to hit moving targets). The weapon has zero recoil, thus allowing you to maintain accuracy. The Ion Laser is best used against stationary, unsuspecting targets, or those you have stunned with Electro Bolt, Winter Blast, or Gravity Well.
Laser Gun Ammo Capacity
Ammo TypeMag Capacity (Base)Carry Capacity
Laser Cell 100 400
Thermal Cell 100 200
Burst Cell 100 200

Ammunition

Laser Cell: The basic ammunition for the Ion Laser fires a continuous, pinpoint laser beam that inflicts a small amount damage on the target. The Laser Cell delivers a continuous stream of damage from any distance.

Thermal Cell: The Thermal Cell ammunition deals a small quantity of fire damage and sets the target aflame. Use the Thermal Cell ammunition in small quantities because the fire inflicts damage over time. Switch to Laser Cell ammo or another weapon (or Plasmid) once the initial attack with Thermal Cell ammo sets the enemy on fire.

Burst Cell: This rare ammo type deals a small amount of piercing damage when not charged, but can deliver exceptional damage when fully charged. Stun an enemy or charge up the Burst Cell while in cover. A fully-charged Burst Cell attack consumes 50 cells. Partial charges do less damage but consume as little as 20.

Weapon upgrades

Ion Laser Intensity Upgrade: The intensity upgrade increases the damage output of the Ion Laser’s beam.

This weapon upgrade is obtained by looting the corpse of a Big Daddy in the Air-Tite Archives. The intensity upgrade increases the damage dealt by the Ion Laser and is a worthy acquisition that requires no extraneous exploration or cost.

Plasmids and Tonics

Gravity Well

This new Plasmid, exclusive to Minerva’s Den, allows Subject Sigma to deploy a superdense polyp that creates a vacuum, sucking in nearby enemies and objects before exploding. Enemies caught in the Gravity Well are held aloft, swirled in the Plasmid’s powerful vortex. The base level of the Plasmid merely stuns enemies and leaves them susceptible to Launcher attacks, Incinerate! blasts, and so on. But that’s not to say that it doesn’t cause damage. Enemies are injured due to the effects of colliding with one another and other objects caught in the blast. Beware that Gravity Well can also draw your friendly Security Bots into the swirling vortex, inflicting damage on your valuable allies. Consider deactivating your Security Bots before tossing Gravity Well at a group of enemies.

Gravity Well

Location: Located in the Air-Tite Archives.

Effect: Toss a superdense ball of fluid that causes a powerful vacuum when it explodes! Nearby matter is drawn to the center, then flung away with enormous force!

A flick of the wrist, a vortex of destruction!

Gravity Well 2

Location: At the Gatherer’s Garden machine in Operations (80 ADAM).

Effect: Charge up your Gravity Well polyp to create a proximity trap! Watch as careless foes are swept off their feet.

A deadly surprise lies in wait!

Gravity Well 3

Location: At the Gatherer’s Garden machine in Operations (100 ADAM).

Effect: When enemies are flung away from the center of the Gravity Well, a burst of powerful acid follows, eating away at their flesh!

A swirling vortex not enough? Splash your foes with searing acid!

Drill Dash

Location: Found inside McClendon Robotics, in the Security Bot display.

Effect: Allows the player to dash into an enemy with the Drill.

Bowl ’em over! Daddy’s home!

Master Protector

Location: Obtained at a Gatherer’s Garden (0 ADAM) if you completed the Protector Trials content and earned all 36 stars.

Effect: You’ll have to protect the Little Sister for an extended duration as she gathers ADAM, but you’ll receive 80 ADAM for each Gather instead of only 40.

Having proved your mettle in the Protector Trials, your Gathers take longer but give far greater rewards.

Enemies
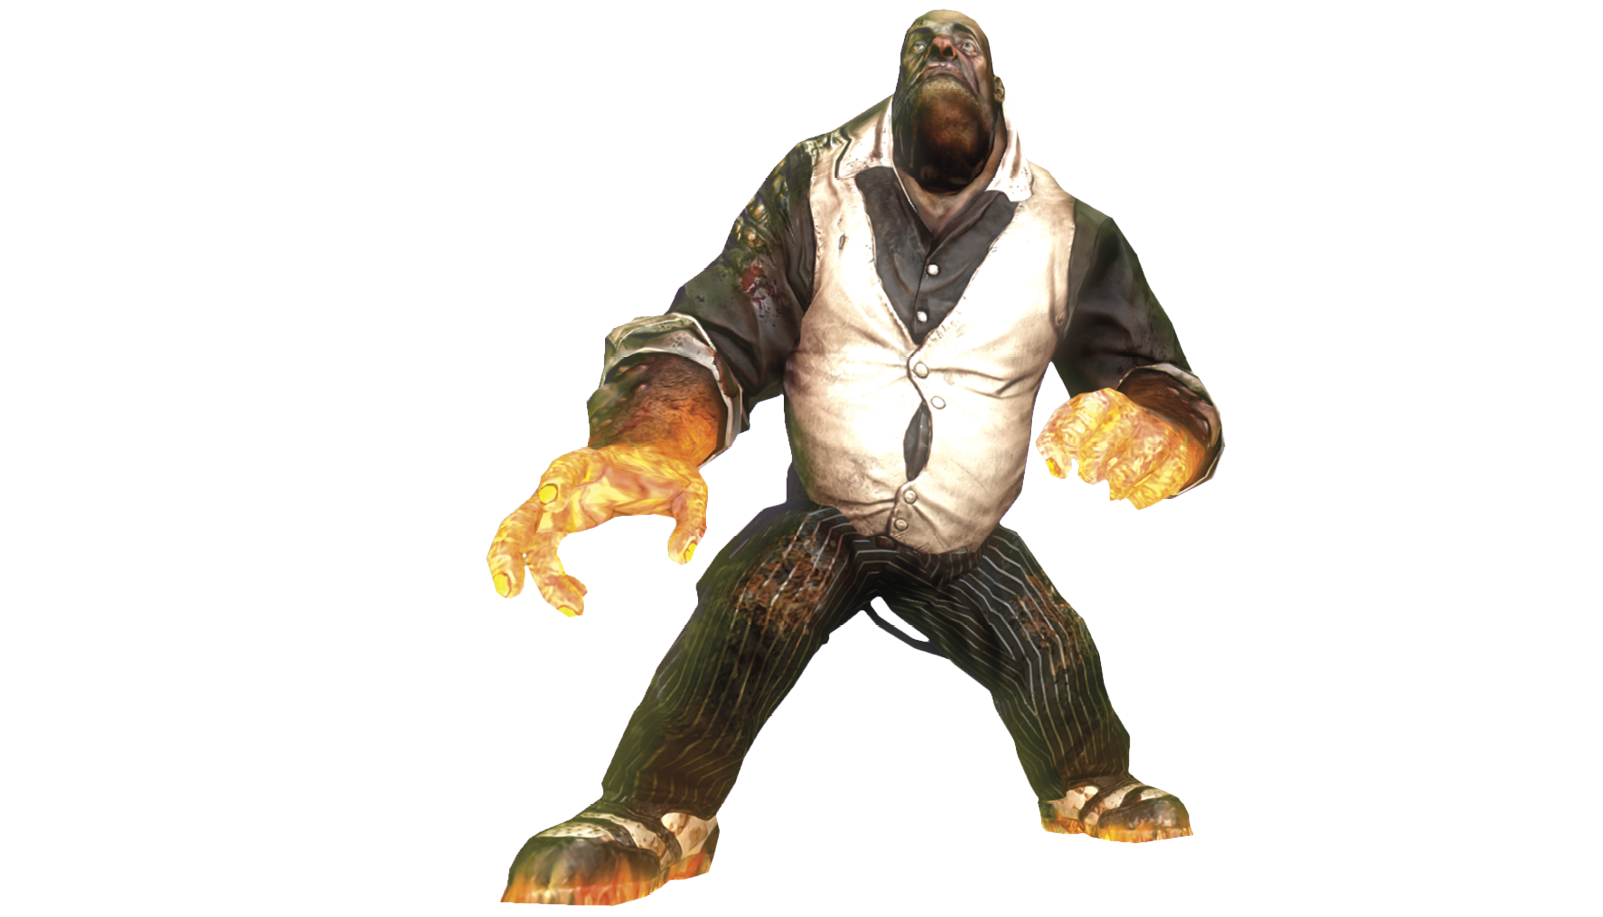
Fiery Brute Splicer

Fiery Brute Splicers, as their name suggests, are Brute Splicers who have undergone a genetic transformation, akin to having had Fire Storm Gene Tonic spliced into their system. Fiery Brute Splicers leave fiery footprints in their wake, giving you an indicator that one is around. Fiery Brute Splicers emit a burst of flame when struck, so refrain from using a Drill Dash attack on them. They are also immune to fire damage, so put away your Incinerate! Plasmid and Thermal Cells. Instead, hit them with Electro Bolt, Gravity Well, or Winter Blast to lock them in place and either open fire with the Launcher or use Anti-Personnel Rounds on these foes. Whatever you do, keep clear of their charge.
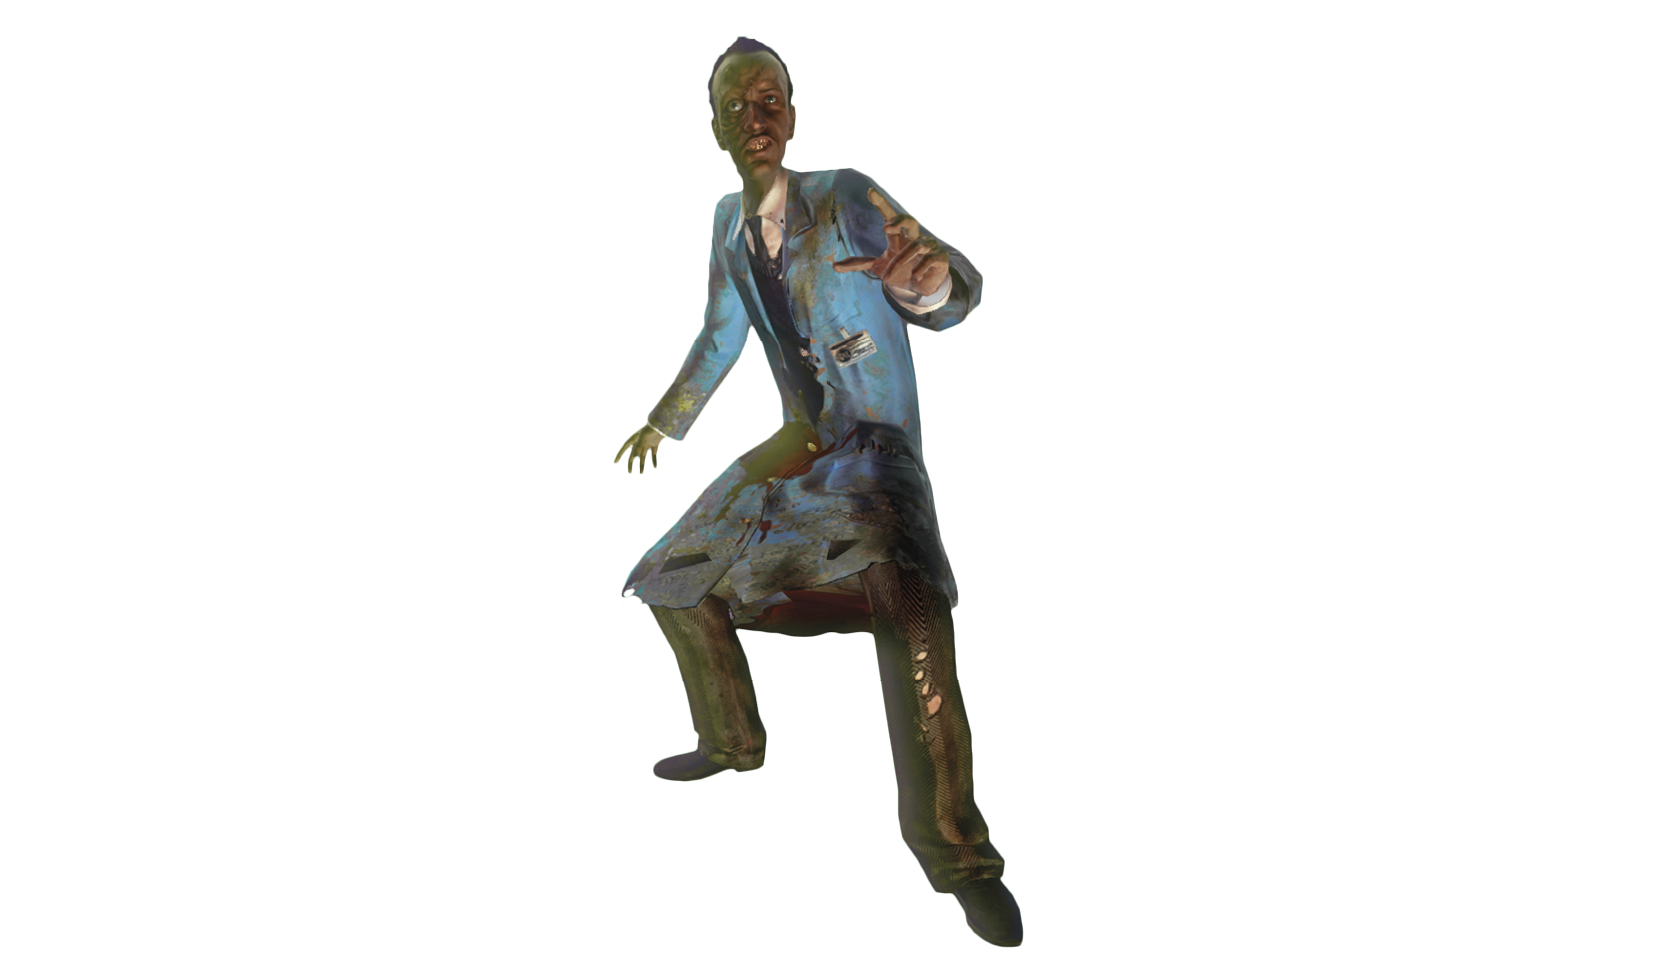
Wintry Houdini

Wintry Houdini Splicers are similar to the Houdini Splicers you’ve faced time and again, only these foes hurl balls of Winter Blast instead of Incinerate! Wintry Houdini Splicers are immune to cold-based attacks such as Winter Blast, but susceptible to Incinerate!, Electro Bolt, and other attacks. The hardest part in defeating Wintry Houdini is locking it in place. Consider using Gravity Well to stun the Wintry Houdini, then open fire with your Plasmids, the Ion Laser (Thermal Cells work well), or Anti-Personnel Rounds. Once the Wintery Houdini has been defeated, make a quick check of your Security Bots to ensure they haven’t been deactivated by the Splicer’s Winter Blast attack.
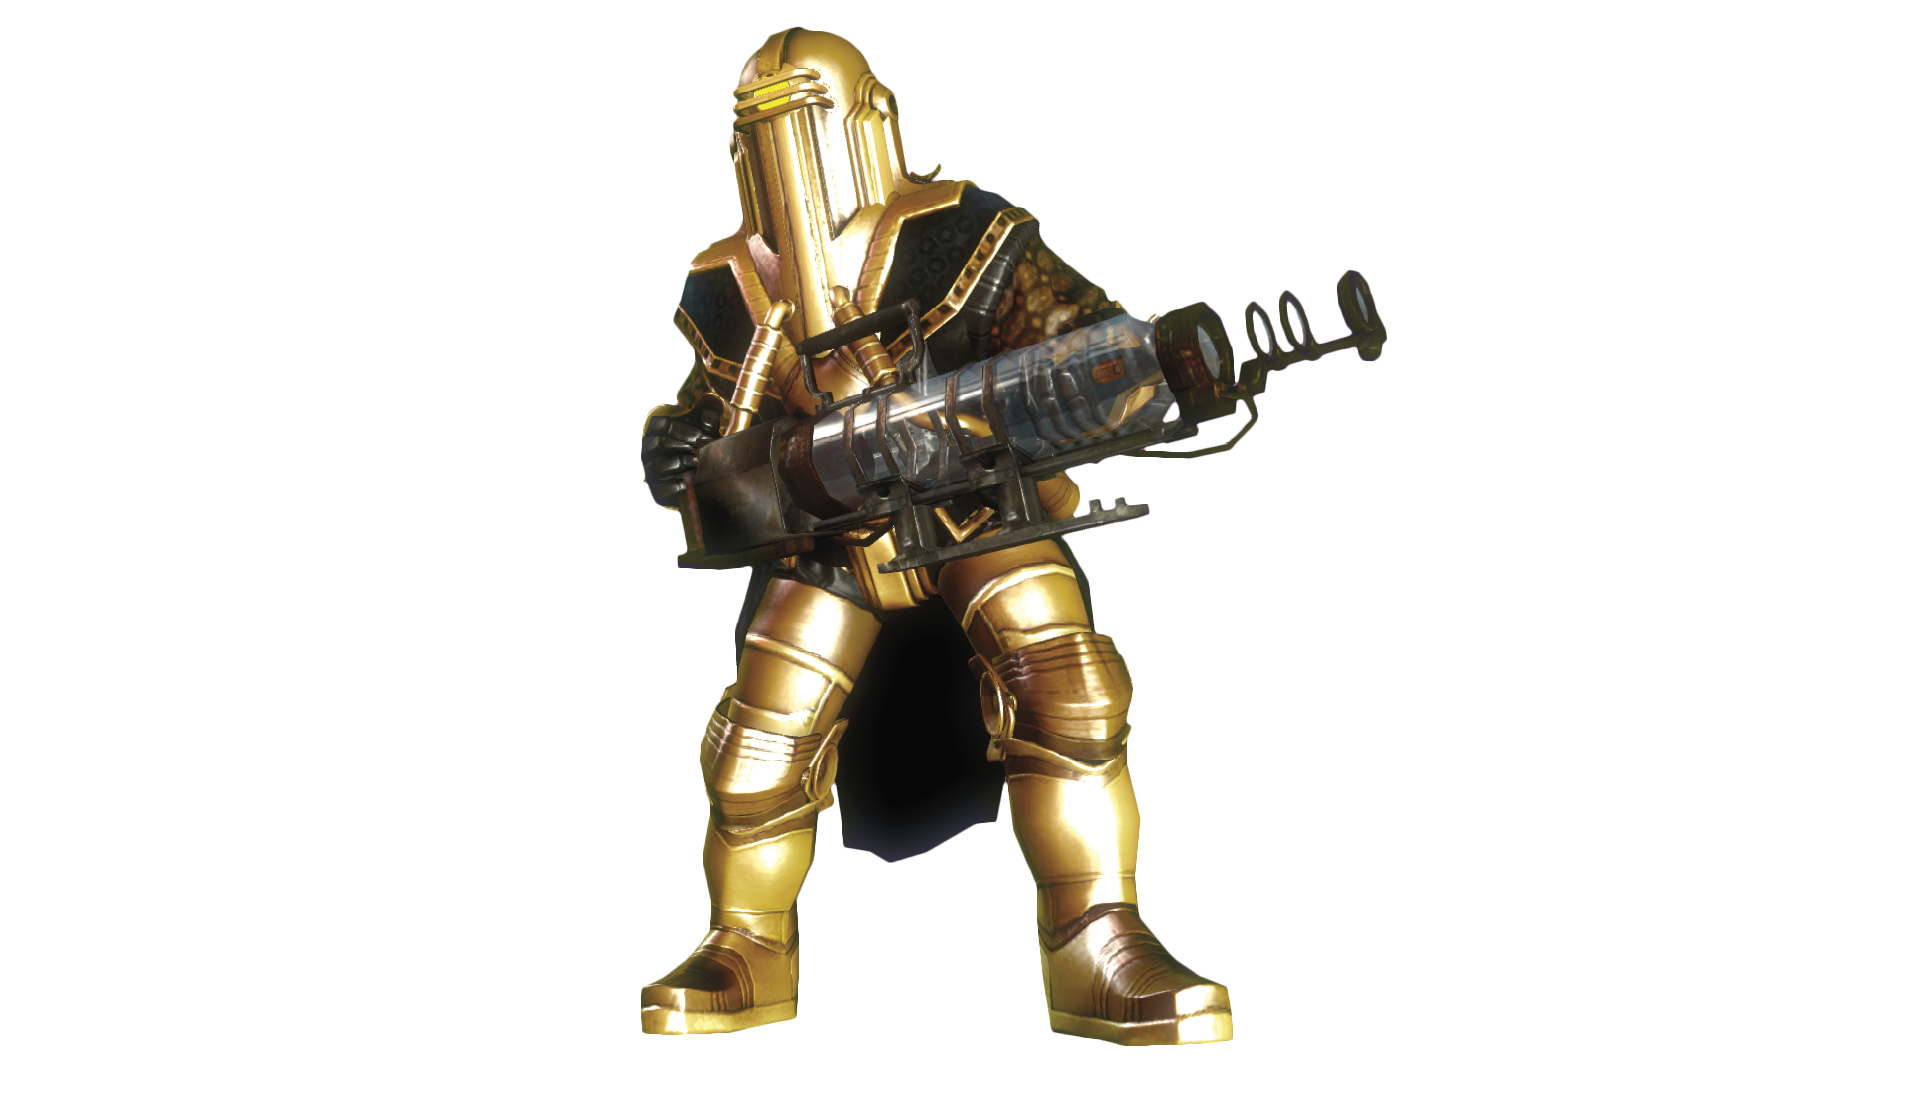
Lancer

The Lancer is a type of Big Daddy that is unique to the Minerva’s Den area. The Lancer, like other Big Daddies, can strike with a melee attack at close range, but it will also attempt to attack from range using its Ion Laser. The Lancer fires a standard Ion Laser attack. Duck into cover to avoid the Lancer’s uncanny accuracy. The Lancer is also capable of unleashing a blinding Ion Flash attack. Listen for a high-pitched scream, which precedes the Ion Flash attack, and quickly turn your back on the Lancer. The Ion Flash will not harm Subject Sigma, but it will temporarily blind you and make it that much harder to fight the Lancer. Lancers can be defeated much like other Big Daddies—employ the help of Security Bots whenever possible and use Thermal Cells, Rocket Spears, and Heat-Seeking Rockets to engulf the Lancer in flames. Hit the Lancer with Electro Bolt or Gravity Well to halt it in its tracks and finish it off with Armor-Piercing Rounds.

Keep reading with a free account

The first 3 sections of BioShock: The Collection are open to everyone. An account opens the rest of it, and every other guide in the archive. It's free, and there's nothing to buy.

Bought guides on the old Prima Games site? Your account and every guide you own moved here, so there's nothing to buy again. Sign in.

Create a free account Or browse our free guides

PreviousBonuses, Achievements, and Trophies NextFind Charles Milton Porter