Prima Games eGuides
primagames.com Browse Redeem a code Help
BioShock: The Collection eGuide
Sign in My Guides

Sign in or create an account

We'll email you a link. No password needed, and if you don't have an account yet, the link makes one.

By creating an account or signing in, you agree to our Terms of Service and Privacy Policy.

Have a password?

Had an account on the old eGuides site, or a code from a printed guide? Help and troubleshooting

Sign in with a password

By signing in, you agree to our Terms of Service and Privacy Policy.

Check your email

A sign-in link is on its way. It works once and expires in 15 minutes. Open it and you're in, with an account if you didn't already have one.

Contents

  • Bioshock
    • One Man’s Vision…
    • About This Guide
    • Residents of Rapture
      • The Rapture Elite
      • Splicers
      • The Adam Gatherers
      • Rapture Security
    • Life Underwater
      • Gameplay Fundamentals
      • Beyond the Basics
    • Arm Yourself
      • Weapons Guide
    • Evolve Today!
      • Overview
      • Plasmids
      • Gene Tonics
    • U-Invent
      • Inventions and Components
    • Walkthrough
      • Introduction
      • Welcome to Rapture
        • Overview
        • Whereabouts Unknown
        • Bathysphere Station
        • Lounge
        • Elevators
        • Kashmir Restaurant
        • Footlight Theatre
      • Medical Pavilion
        • Overview
        • Foyer (First Visit)
        • Emergency Access
        • Foyer (Second Visit)
        • Surgery Foyer (First Visit)
        • Eternal Flame Crematorium
        • Twilight Fields
        • Kure All
        • Painless Dental
        • Dandy Dental
        • Surgery Foyer (Second Visit)
        • Surgery
        • Lounge
        • Foyer (Third Visit)
      • Neptune’s Bounty
        • Overview
        • Bathysphere Station
        • Lower Wharf
        • Fontaine Fisheries (First Visit)
        • Upper Wharf
        • Wharfmaster’s Office
        • Jet Postal
        • Fighting Mcdonagh
        • Fontaine Fisheries (Second Visit)
        • Relinquish Your Weapons
        • Freezer Top Floor
        • Freezer Bottom Floor
      • Smuggler’s Hideout
        • Overview
        • Flooded Cave
        • Control Room
        • Submarine Bay
      • Arcadia
        • Overview
        • Tea Garden
        • Arcadia Glens
        • Rolling Hills
        • Waterfall Grottos
        • Research Laboratories
        • Langford’s Office
        • Tree Farm
      • Farmer’s Market
        • Overview
        • Market
        • Silverwing Apiary
        • Worley Winery
      • Restoring Arcadia
        • Overview
        • Langford’s Office
        • Research Laboratories
      • Fort Frolic
        • Overview
        • Bathysphere Station
        • Go to Fleet Hall
        • Fleet Hall Theatre
        • Photograph the Dead Pianist
        • Atrium (First Visit)
        • Cohen’s Collection
        • Frozen Tunnel
        • Poseidon Plaza (First Visit)
        • Atrium (Second Visit)
        • Poseidon Plaza (Second Visit)
        • Eve’s Garden
        • Atrium (Third Visit)
      • Hephaestus
        • Overview
        • Bathysphere Station
        • Central Control
        • Hephaestus Core (First Visit)
        • Heat Loss Monitoring
        • Hephaestus Core (Second Visit)
        • Search The Workshops
        • Kyburz’s Office
        • Geothermal Control
      • Rapture Central Control
        • Overview
        • Control Room
        • Ryan’s Office
      • Olympus Heights
        • Overview
        • Tenenbaum’s Safehouse
        • Olympus Heights
        • Mercury Suites
        • Tenenbaum’s Apartment
        • Fontaine’s Apartment
      • Apollo Square
        • Overview
        • Apollo Square Streets
        • Artemis Suites
        • Dr. Suchong’s Clinic
        • Apollo Square
        • Hestia Chambers
        • Atlas’s Headquarters
      • Point Prometheus
        • Overview
        • Atrium
        • Little Wonders
        • Optimized Eugenics
        • Mendel Family Library
        • Failsafe Armored Escorts
      • Proving Grounds
        • Overview
        • Museum Lobby
        • South Wing
        • North Wing
      • Fontaine
        • Overview
        • Fontaine’s Lair
    • Achievement & Trophy Guide
      • Game Completion Series
      • Crafting Series
      • Plasmid Mastery Series
      • Weapon Upgrade Series
      • Research Series
      • Hacking Series
      • Special Series
    • Challenge Rooms
      • The "I" in Team
      • A Shocking Turn of Events
      • Worlds of Hurt
      • Achievements and Trophies
  • Bioshock 2
    • Introduction
    • Residents of Rapture
      • Subject Delta
      • The Rapture Elite
      • Splicers
      • The Protector/Gatherer Program
      • Rapture Security
    • Into the Dive Suit
      • Gameplay Fundamentals
      • Exploring Rapture
      • Protector in Combat
      • Beyond the Basics
      • Machines of Rapture
    • Big Daddy Weaponry
      • Bullet Supply
      • Weapons Guide
    • Evolve Today!
      • Gatherer’s Garden
      • Plasmids
      • Gene Tonics
    • Walkthrough
      • Adonis Luxury Resort
        • Overview
        • Lobby
        • Adonis Baths
        • Bridge Courtyard
        • Grand Foyer
        • Demeter’s Banquet Hall
      • Atlantic Express Depot
        • Overview
        • Airlock
        • Train Workshop 6A
        • Drafting Room
        • Train Workshop 6B
        • Switching Hub
        • Train Station
      • Ryan Amusements
        • Overview
        • Train Station
        • Museum Entrance
        • Rapture Museum
        • El Dorado
        • Back to the Museum
        • Journey to the Surface (Part 1)
        • Journey to the Surface (Part 2)
        • Hall of the Future
        • Melting The Ice
      • Pauper’s Drop
        • Overview
        • Train Station
        • Fishbowl Diner
        • Town Square
        • Market
        • Limbo Room
        • Sinclair Deluxe Tenements
        • Grace’s Apartment
      • Siren Alley
        • Overview
        • Little Eden Plaza
        • Maintenance Area
        • The Pink Pearl
        • Back to the Maintenance Area
        • Plaza Hedone
        • Pump Station Access (First Visit)
        • Pump Station No. 5
        • Pump Control Substation 5
        • Pump Station Access (Second Visit)
      • Dionysus Park
        • Overview
        • Basement Storage
        • The Promenade
        • Triton Cinema
        • Imago Fine Arts
        • J. Fischer Gallery
        • Lamb’s Garden
        • Train Station
      • Fontaine Futuristics
        • Overview
        • Train Station
        • Lobby
        • Security
        • Frank Fontaine’s Plasmid Spectacular Theater
        • Frank Fontaine’s Office
        • Lab Airlock
        • Fontaine’s Plasmid Research & Development
        • ADAM Research Laboratory
        • Live Test Facility
        • ADAM Research Lab
        • Hidden Elevator
      • Outer Persephone
        • Overview
        • Therapy Entrance
        • Main Atrium
        • Lamb’s Office
        • Cell Blocks
      • Inner Persephone
        • Overview
        • Docking Platform (First Visit)
        • Security Office
        • Holding Wing (First Visit)
        • Cell Blocks
        • Holding Wing (Second Visit)
        • Therapy Wing
        • Infirmary Wing
        • Pediatric Ward
        • Docking Platform (Second Visit)
        • Story Conclusions
    • Protector Trials
      • The Rules of Engagement
      • General Tips
      • The Adonis Baths
      • Atlantic Express Train Upkeep
      • Pauper’s Drop Market
      • Simon Wales’ Church
      • Folly of Dionysus
      • Persephone Cellblock F
      • Bonuses, Achievements, and Trophies
    • Minerva’s Den
      • New Discoveries
      • Find Charles Milton Porter
      • Restore Power to Minerva’s Den
      • Get to Porter’s Office
      • Take the Operations Punchcard
      • Head for Operations
      • Find the Gravity Well Plasmid
      • Find a Bathysphere Signal Beacon
      • Hack the Signal Beacon
      • Get to Computer Core Access
      • Reset the Climate Control Turbine
      • Print Out The Thinker’s Code
      • Defeat Reed Wahl
      • Achievements and Trophies
    • Achievement & Trophy Guide
      • Story Progression
      • Variable Endings
      • Hooked on ADAM
      • Power to the People!
      • Hackers Wanted
      • Smile for the Camera!
      • My Daddy Can Beat Up Your Daddy!
      • Something Special
  • Bioshock Infinite
    • Foreword
    • About This Guide
    • Detective Training
      • Gameplay Fundamentals
      • Catalogue for 1912
      • Elizabeth
      • Sights and Sounds of Columbia
    • Guns of Liberty
      • Overview
    • Vigors
      • Overview
      • Possession
      • Devil’s Kiss
      • Murder of Crows
      • Bucking Bronco
      • Shock Jockey
      • Charge
      • Undertow
      • Return to Sender
    • Gear
      • Columbia Chronicles
      • Randomized Gear
      • Guaranteed Gear
      • Build Examples
    • Walkthrough
      • In the Name of the Prophet
        • Introduction
        • Lighthouse
      • A Day at the Fair
        • Town Center
        • Comstock Center Rooftops
        • Monument Island Gateway
      • Bring Us the Girl
        • Monument Tower
        • Battleship Bay
        • Soldier’s Field
        • Hall of Heroes
      • Guns for the Lady
        • Finkton Docks
        • Finkton Proper
        • Shantytown
        • The Factory
      • Family Reunion
        • Emporia
        • Downtown Emporia
      • Flight of the Songbird
        • Comstock House
        • Hand of the Prophet
        • Hangar Bay
    • Enemies of the People
      • Soldiers (Founders and Vox)
      • Automatons (Turrets)
      • Mosquito
      • Zealot of the Lady
      • Fireman
      • Motorized Patriot
      • Beast
      • Handyman
      • Siren
      • Boys of Silence
    • Achievement & Trophy Guide
      • Introduction
      • Story Achievements
      • Combat Achievements
      • Upgrades and Collectibles
    • Clash in the Clouds
      • Battle Prep
      • The OPS Zeal
      • Duke and Dimwit Theater
      • Raven’s Dome
      • Emporia Arcade
      • Achievements and Trophies
    • Burial at Sea, Episode 1
      • Overview
      • Market Street
      • High Street
      • Cohen’s
      • Fontaine Station
      • Fontaine’s Department Store
      • Housewares
      • Achievements and Trophies
    • Burial at Sea, Episode 2
      • Introduction
      • Toy Department
      • Ryan the Lion Preparatory Academy
      • Bathyspheres DeLuxe
      • Columbia
      • Return to Rapture
      • Suchong’s Free Clinic
      • Achievements and Trophies
  • Credits
    • Legal

BioShock: The Collection Guide › Bioshock › Arm Yourself

Weapons Guide

El Ammo Bandito Vending Machine Prices
Item Price Hacked Price
Pistol Rounds x6 25 19
00 Buck x6 54 41
Machine Gun Rounds x40 60 45
Armor-Piercing Pistol Rounds x6 60 30
Antipersonnel Auto Rounds x40 100 50
Electric Buck x6 72 36
Frag Grenade x3 60 45
Napalm x100 75 57
Proximity Mine x3 75 38
Steel-Tip Bolt x6 30 23
Incendiary Bolt x6 80 40

The world of Bioshock contains eight different weapons, six of which can be used to fire projectiles at enemies, one is a melee weapon, and the other is a camera used to research enemies. Each of these weapons is obtained during your progress through the environment, and the locations of each have been mapped in the “City Directory” portion of this book.

The city of Rapture is filled with enemies that drop weapons and can be collected to replenish your ammo supplies. Additionally, there are many containers that can be looted to gather up an army’s worth of ammunition. Lastly, ammunition can be obtained through the many vending machines located in Rapture. Some ammunition can be acquired at the Circus of Values vending machine, but be on the lookout for the El Ammo Bandito vending machines that specialize strictly in ammunition. Additionally, each weapon has a special inventible ammunition type that is very rarely seen outside of U-Invent machines, so be sure to collect the many invention components described in the “U-Invent, We Show You How” chapter to be able to craft these special types of ammunition.

The following weapons are listed in the order in which you find them. Each of the weapons (with the exception of the Wrench and Research Camera) can be upgraded at the 12 Power to the People machines located throughout Rapture. These machines are hard to find and can only be used once, so choose your upgrades wisely.

Wrench
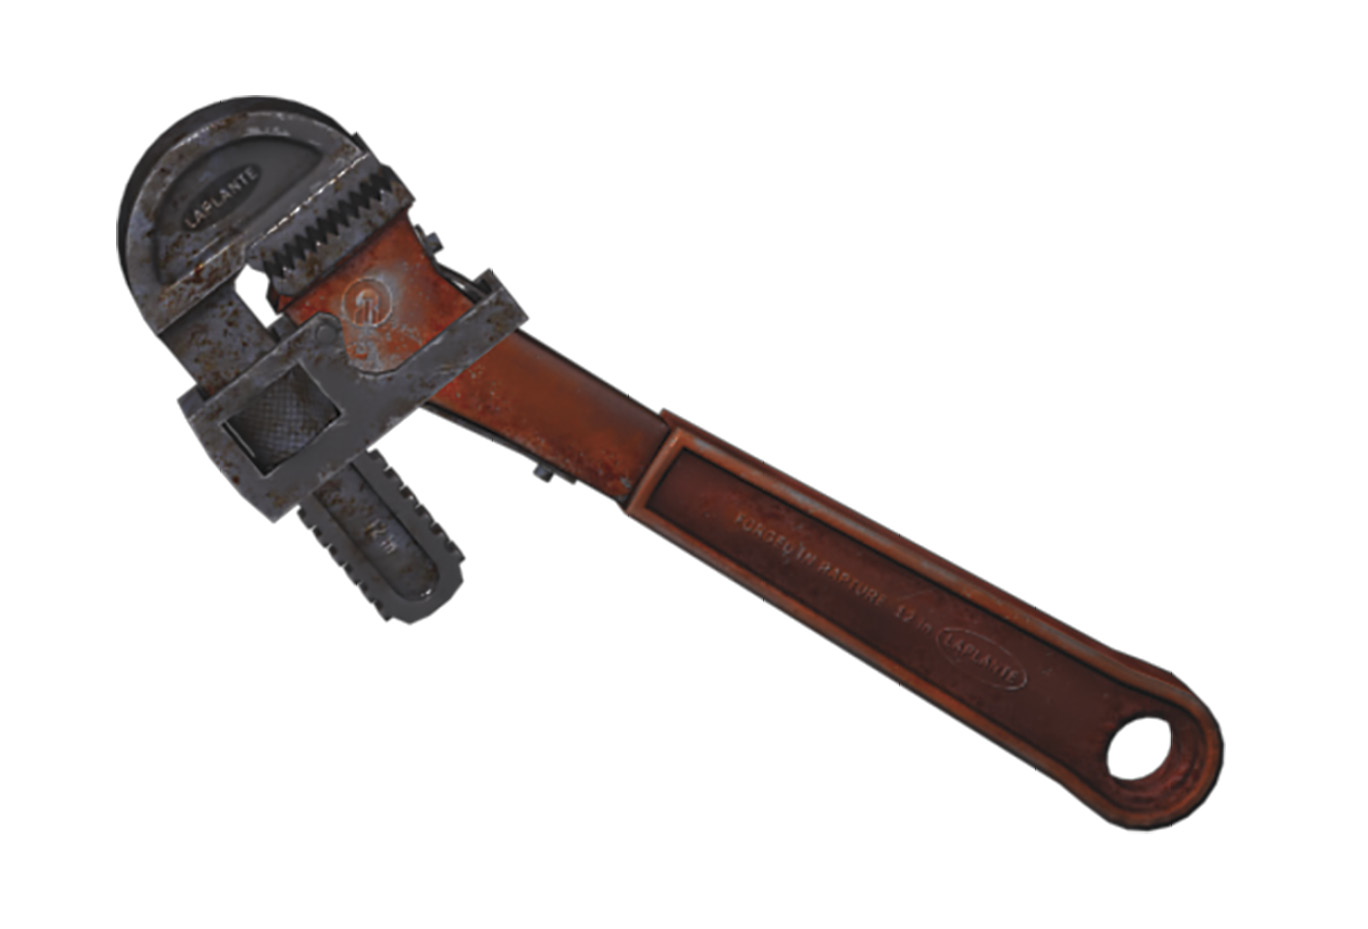
The Wrench is the first weapon you acquire in Rapture and can be used to deal small amounts of bludgeoning damage (bonus damage if the target is stunned with electricity), break through some barriers, and also smash the occasional lock. Although there are tonics that can be spliced into your system to improve the effectiveness with the Wrench, it is likely to become a weapon of last resort as you make your way through Rapture. Skilled players who try to employ a more stealth-based approach are likely to get more use out of the Wrench.

Pistol

Pistol Ammo Capacity
Ammo Type Carry Capacity Load Capacity
Pistol Rounds 48 6 (24 with upgrade)
Armor-Piercing 24 6 (24 with upgrade)
Antipersonnel 24 6 (24 with upgrade)

The Pistol is the lone handgun in Bioshock and relies on .38 caliber rounds which, although adequate for lesser enemies, may not inflict enough damage against tougher foes. Headshots are indeed an effective means of dispatching enemies, especially stunned ones, and the three ammo types give the Pistol added usability later on in the game. That said, the Pistol’s initial carrying capacity of just 6 rounds requires frequent reloading, which does pose a problem in heated firefights.

Ammunition

Base Ammo: .38 caliber rounds that inflict moderate piercing damage. Best used against Thuggish and Leadhead Splicers.

Advanced Ammo: .38 caliber armor-piercing that inflict moderate armor-piercing damage. Best used against Security Bots, Security Turrets, and Big Daddies.

Inventible Ammo: .38 caliber antipersonnel rounds that inflict moderate amount of antipersonnel damage. Best used against Nitro Splicers, Houdini Splicers, and Spider Splicers.

Weapon upgrades

Pistol Clip Size: An auto-loading clip effectively quadruples the clip size of the Pistol. This upgrade makes it possible to load 24 rounds of ammunition at once instead of just 6.

Pistol Damage Increase: An ammunition accelerator increases the damage done by the Pistol. More damage per round means you go through bullets slower and have to reload less frequently.

Machine Gun

Machine Gun Ammo Capacity
Ammo Type Carry Capacity Load Capacity
Auto Rounds 360 40
Antipersonnel 180 40
Armor-Piercing 180 40

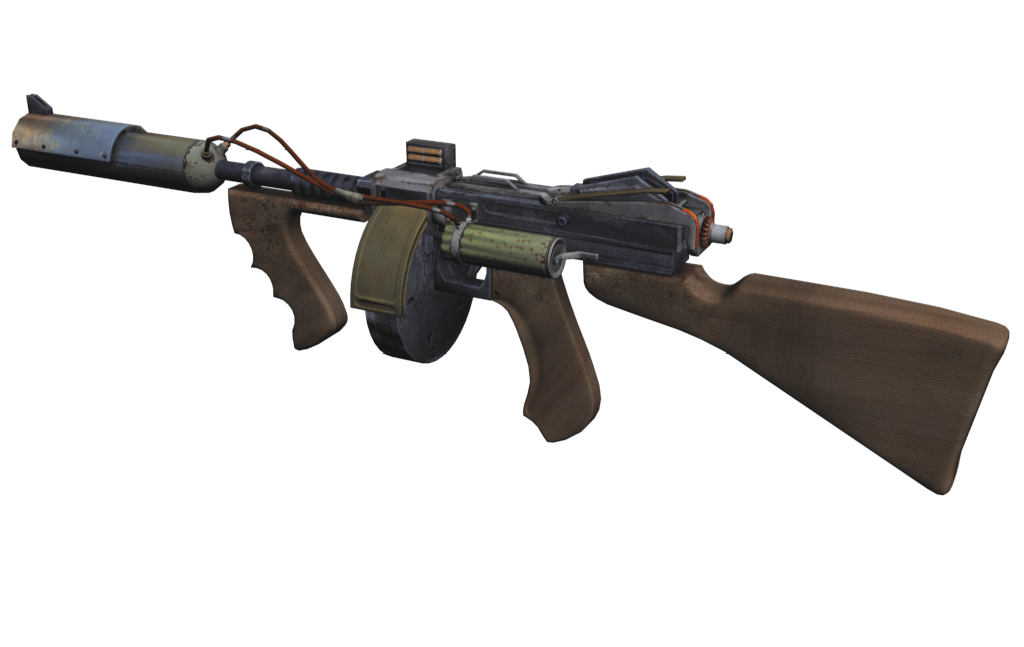
The Machine Gun fires a rapid spray of bullets that are very useful for situations involving lots of enemies at close to medium range. The Machine Gun does suffer from extensive recoil, so you may want to fire it in short bursts to keep the recoil under control and to avoid wasting large sums of ammunition. The Machine Gun, as you might expect, features the fastest rate of fire and can cut through opponents very quickly in the hands of a skilled gunner. You can load a magazine of 40 Auto Rounds into the Machine Gun at once.

Ammunition

Base Ammo: Auto Rounds that do a small amount of piercing damage. The base ammo is useful against Thuggish Splicers, Leadhead Splicers, and Nitro Splicers.

Advanced Ammo: Antipersonnel Auto Rounds that do a small amount of antipersonnel damage. This ammo type is best saved for use against Houdini Splicers and Spider Splicers.

Inventible Ammo: Armor-Piercing Auto Rounds that do a small amount of armor-piercing damage. This ammunition type is extremely effective against Big Daddies.

Weapon upgrades

Machine Gun Damage Increase: An acceleration framework increases the damage of the Machine Gun. Increasing the damage each bullet does makes it possible to conserve ammunition and have to reload less often.

Machine Gun Kickback Reduction: A stabilization cylinder reduces the kickback of the Machine Gun. Once this upgrade has been installed, you’ll be able to control the weapon better, which means you can hold the trigger for longer periods without firing astray.

ShotGun

Shotgun Ammo Capacity
Ammo Type Carry Capacity Load Capacity
00 Buck 48 4
Electric Buck 24 4
Exploding Buck 24 4

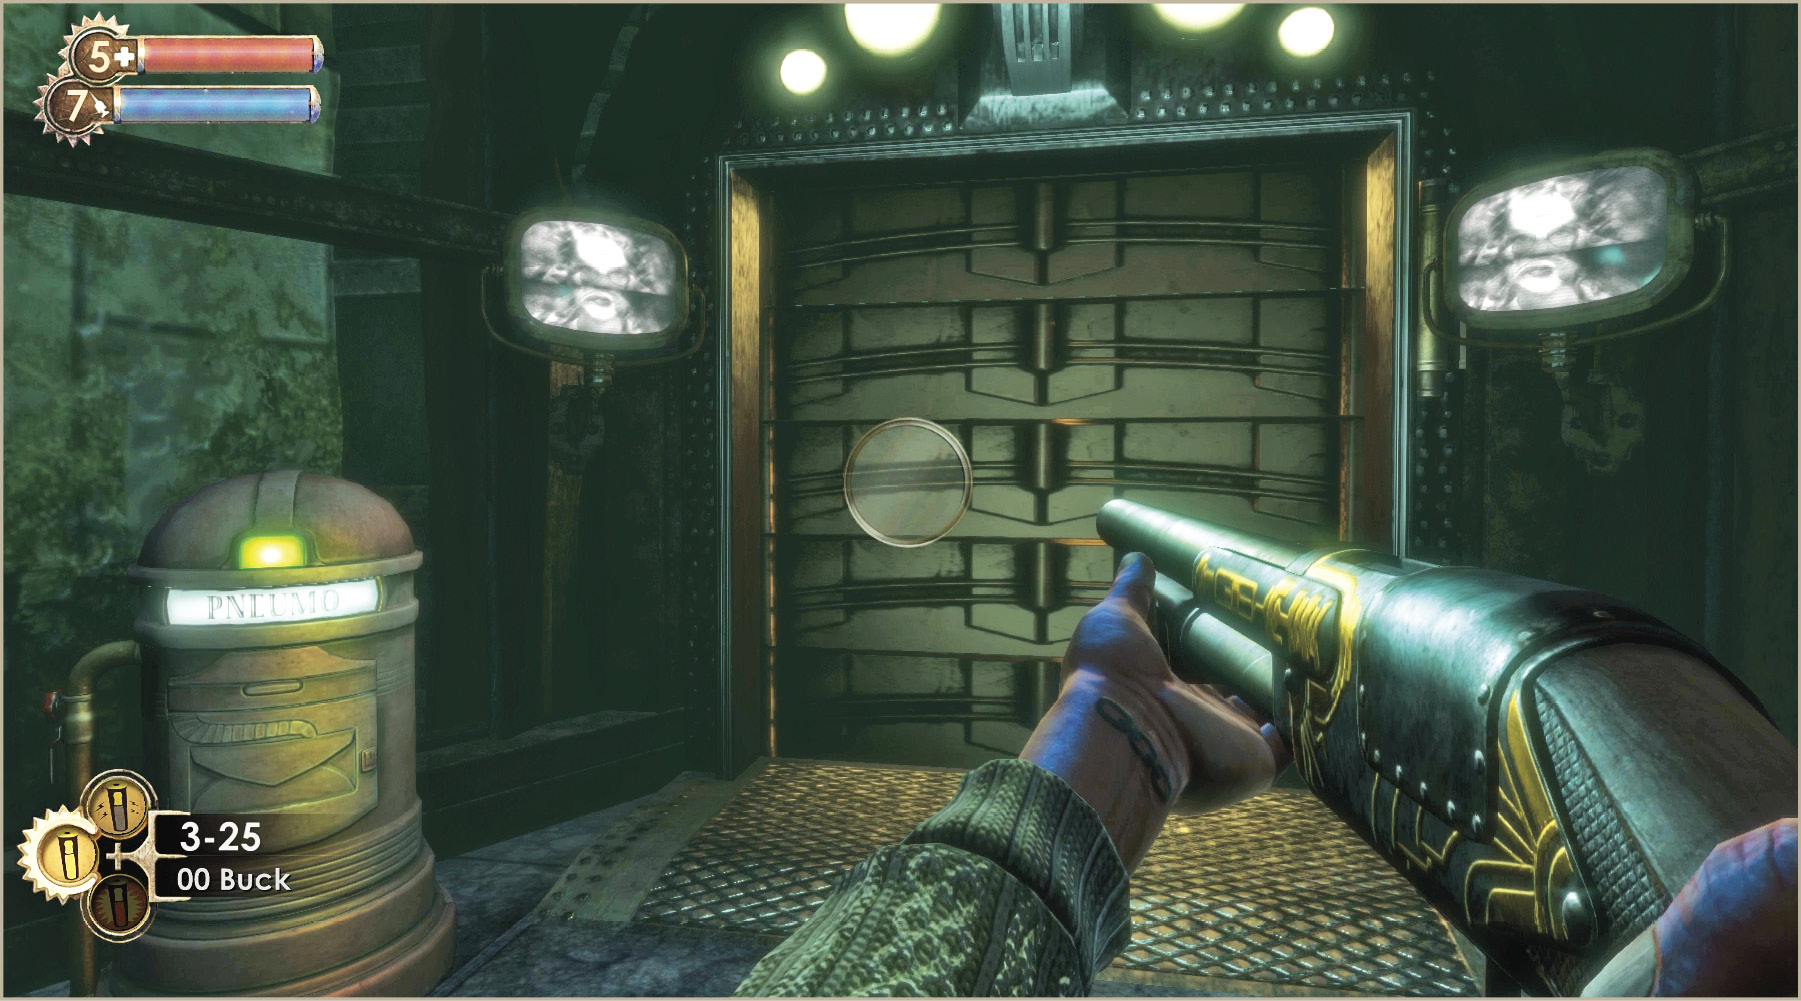
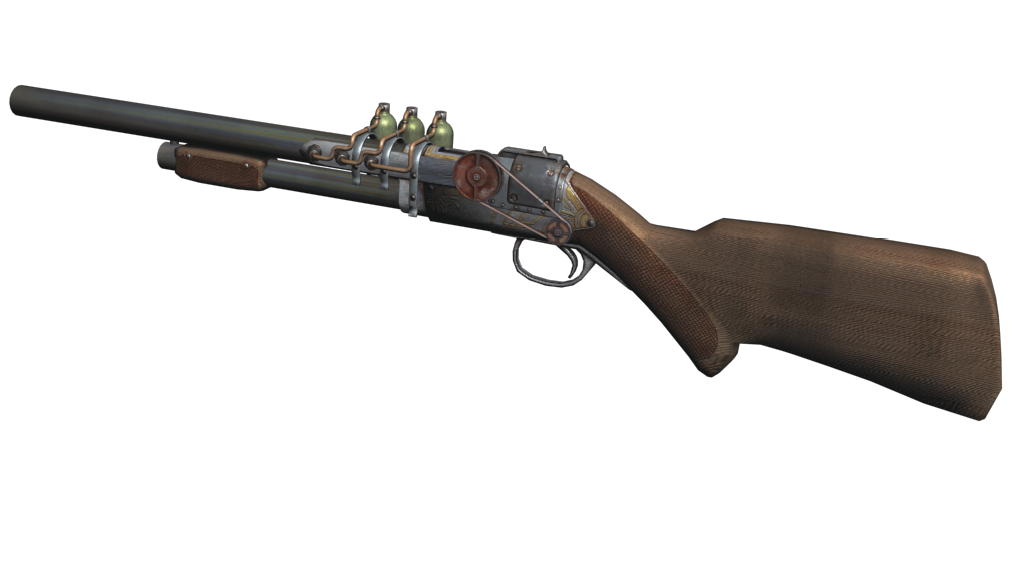
The Shotgun is a very powerful weapon and most effective at short range. It fires a wide burst of pellets (Buck), which means the user need not aim with as much precision in order to score a hit. The Shotgun is not without its limitations, however. For starters, the Shotgun can only be loaded with 4 shells at once and has a slow firing rate. It also takes quite a bit of time to reload the Shotgun, since each shell must be inserted individually. That said, the Shotgun is the undisputed weapon for close-quarters combat, especially for times when you suspect enemies to leap out from around corners at any second. Pair it with Winter Blast to freeze a Splicer, then shoot it into a thousand pieces with one squeeze of the trigger!

Ammunition

Base Ammo: 00 Buck that does a moderate amount of piercing damage. This ammunition can deliver significant damage to all types of Splicers.

Advanced Ammo: Electric Buck that does a moderate amount of electrical damage. In addition to causing damage, the Electric Buck also shocks the enemy temporarily. This is excellent for use against mechanical devices such as Security Bots and Turrets. Can also be used with some success against Big Daddies.

Inventible Ammo: Exploding Buck that does a large amount of combined piercing and heat damage. This is arguably the most lethal ammunition in all of Rapture and should be reserved for boss battles and Big Daddy encounters.

Weapon upgrades

Shotgun Rate of Fire: A steel gear accelerator increases the Shotgun’s rate of fire. This is one of the most beneficial weapon upgrades in the game and really helps make the Shotgun a more viable option in many situations.

Shotgun Damage Increase: A gas-assisted firing mechanism increases the Shotgun’s damage. This upgrade makes the base 00 Buck ammunition more effective against all enemies, but you’ll notice the biggest difference against Nitro Splicers and Spider Splicers.

Grenade Launcher

Grenade Launcher Ammo Capacity
Ammo Type Carry Capacity Load Capacity
Frag Grenade 12 6
Proximity Mine 6 6
Heat-Seeking RPG 6 6

What the Grenade Launcher lacks in carrying capacity, firing rate, reload times, and range, it more than makes up for in ammunition variety and sheer firepower! The Grenade Launcher can be used to clear a room of Splicers, lay traps for Big Daddies, or even fire homing rockets at distant bosses or other tough foes. Since ammunition is relatively scarce, this is a specialty weapon that should only be used sparingly.

Ammunition

Base Ammo: Fragmentation Grenades that deliver large amounts of piercing damage in a radius. Fire a Frag Grenade into a cluster of enemies to score numerous kills or in the vicinity of a much larger foe to deliver significant splash damage.

Advanced Ammo: Proximity Mine that does a large amount of piercing damage in a radius when triggered. The Proximity Mine detonates when an enemy (not triggered by you) enters the red ring surrounding the charge. Extremely useful against Big Daddies!

Inventible Ammo: Heat-Seeking Rocket-Propelled Grenade is a guided rocket that does a large amount of heat damage in a small radius. This is an extremely potent ammunition type for battles against Big Daddies. Don’t waste this ammo on lesser enemies.

Weapon upgrades

Grenade Launcher Damage Increase: Incendiary injectors increase the damage of the Grenade Launcher. This upgrade increases the damage inflicted by all three types of grenade ammunition.

Grenade Launcher Damage Immunity: Autogenerated shaped charges make you immune to the damage from your own grenades. This is an excellent upgrade to acquire as it makes it possible to detonate grenades at close range without injuring yourself.

Research Camera

Camera Ammo Capacity
Ammo Type Carry Capacity Load Capacity
Film 100 100

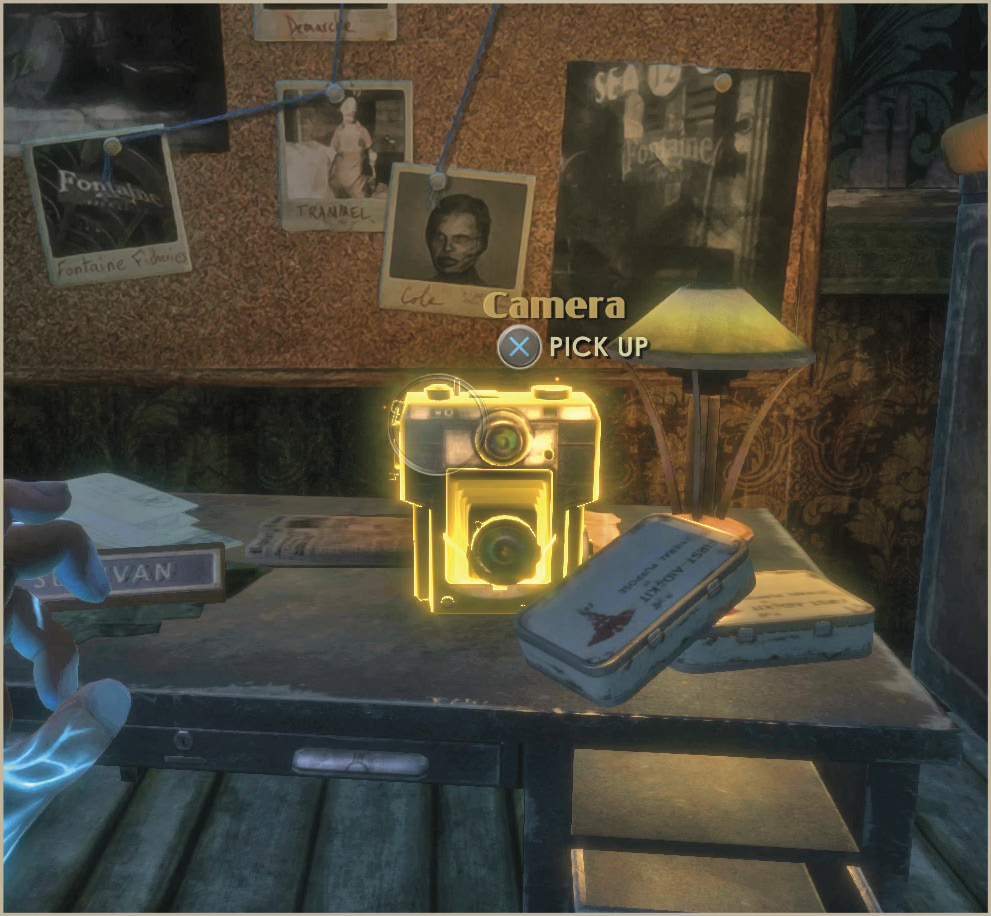
The Research Camera may not inflict direct damage to an enemy, but it is a very important weapon nonetheless. Use the Research Camera to capture photos of all types of enemies and security devices to reach each of their five different research bonus levels. Many of these bonuses include free tonics and increased damage susceptibility. Each photo you take is scored based on how centered the subject is in the picture, whether it is an action shot, and also whether or not there are multiple enemies in the photo. Scores are penalized for taking photos of dead subjects and for repeat photos of the same enemy. Note that you can only take research photos of hostile beings. This means that you cannot take photos of Turrets, Security Bots, or Security Cameras that you have hacked.

Ammunition

Film: The Research Camera can store a wealth of Film for use in capturing research photos. Film works much the same way as ammunition for other weapons, only it doesn’t inflict damage.

Chemical Thrower

Chemical Thrower Ammo Capacity
Ammo Type Carry Capacity Load Capacity
Napalm 400 100
Liquid Nitrogen 200 100
Electric Gel 200 100

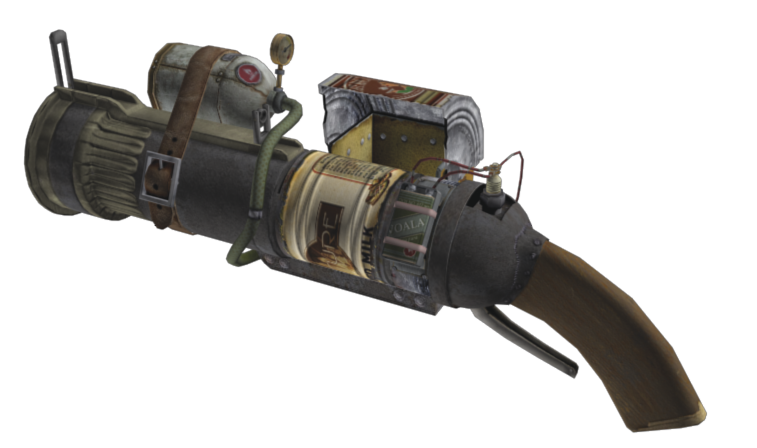
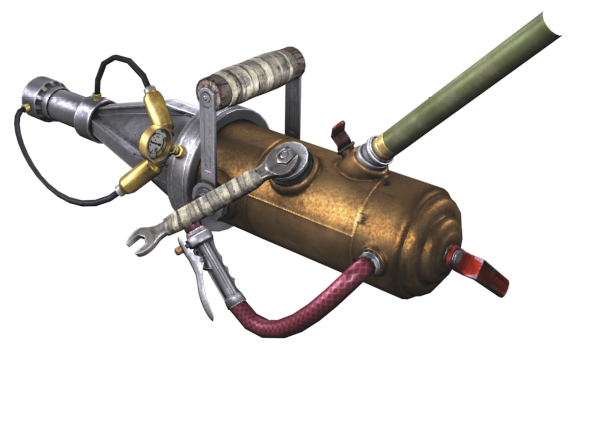
The Chemical Thrower is the most unique of the weapons encountered in Rapture. This large tank-like weapon can be used with a variety of chemical agents that can burn, freeze, or electrocute enemies. The Chemical Thrower fires a nonstop stream of chemicals at short range and is therefore perfect for those times when you find yourself complete out-numbered. It can also function as a pseudo-replacement of plasmids if you run out of EVE. While very powerful, the Chemical Thrower is not without its drawbacks. This weapon only fires at a short range and features a very slow reload time, so you had better come equipped.

Ammunition

Base Ammo: Napalm deals a moderate amount of heat damage and includes a chance of setting an opponent on fire. This is a tremendously useful ammunition type for dealing with large groups of enemies, especially when combined with the Human Inferno tonic.

Advanced Ammo: Liquid Nitrogen delivers a moderate amount of cold damage and carries a chance of freezing an opponent. This is useful for situations when you need to make a quick getaway and need to buy yourself some time. It is even more potent when combined with the Frozen Field tonic.

Inventible Ammo: Electric Gel inflicts a moderate amount of electrical damage and may also shock the opponent. This ammunition is effective against Big Daddies and other metallic or armor-plated enemies. It is best used in conjunction with the Electric Flesh tonic.

Weapon upgrades

Chemical Thrower Consumption Rate: A tapered nozzle reduces the ammunition consumption rate of the Chemical Thrower. Given the slow reload speed of the Chemical Thrower and relative scarcity of ammunition compared to other weapons, this is a very good upgrade to acquire.

Chemical Thrower Range: A pressure-calibration hose increases the range of the Chemical Thrower. This upgrade makes the Chemical Thrower all the more useful, since you don’t have to get too close to your victims!

Crossbow

Crossbow Ammo Capacity
Ammo Type Carry Capacity Load Capacity
Steel-Tip Bolt 48 5
Incendiary Bolt 24 5
Trap Bolt 24 5

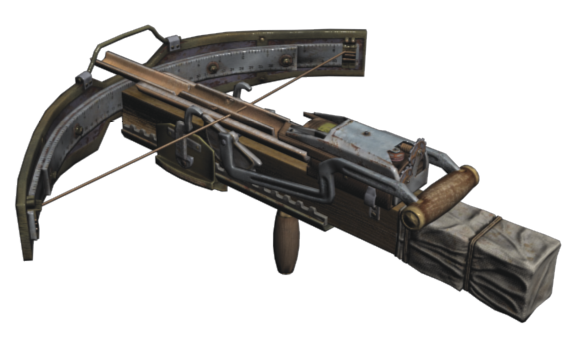
Those looking to employ a bit of stealth and deception in the way they handle the Splicers should enjoy the Crossbow. This weapon may only fire one bolt at a time, but it is extremely lethal when aimed properly. A headshot will all but kill even the toughest of Splicers! The ability to zoom in and aim with pinpoint precision makes it entirely possible to eliminate far off enemies before they know what hit them. The Crossbow is a bit of a specialty weapon, however, and features a very slow rate of fire and equally long reload time. That said, it’s very fun to use and, once upgraded, can even be used successfully when shot from the hip.

Ammunition

Base Ammo: The standard ammo is a Steel-Tip Bolt that delivers large amount of piercing damage. These bolts can often be reclaimed from corpses which means you can make a small quantity last much longer than you would otherwise.

Advanced Ammo: Incendiary Bolts deliver large amounts of heat damage and often ignite the target on fire. This ammunition type makes it possible to ignite distant enemies too far to be reached by Incinerate or the Chemical Thrower.

Inventible Ammo: Trap Bolts create an electric wire that delivers a large dose of electric damage to anyone who trips the wire. Fire the Trap Bolt at a wall then move away as the Trap Bolt fires another anchoring point back at the Crossbow.

Weapon upgrades

Crossbow Breakage Chance: An automatic tension adjuster greatly reduces the chance of bolts breaking on impact. This upgrade makes it much more likely that the Steel-Tip Bolts you fire will be retrievable.

Crossbow Damage Increase: A high-tensile bow increases the damage done by crossbow bolts. With this upgrade installed, the Crossbow becomes so powerful that you can take down most any Splicer with a single shot to the torso!

Keep reading with a free account

The first 3 sections of BioShock: The Collection are open to everyone. An account opens the rest of it, and every other guide in the archive. It's free, and there's nothing to buy.

Bought guides on the old Prima Games site? Your account and every guide you own moved here, so there's nothing to buy again. Sign in.

Create a free account Or browse our free guides

PreviousBeyond the Basics NextOverview